









The only Python IDE you need.
Build a Live Object Detection App for the Reachy Mini With TensorFlow and PyCharm
This is a guest post from Iulia Feroli, founder of the Back To Engineering YouTube community.
In this tutorial, we build a live object detection app using TensorFlow and PyCharm, then deploy it onto the Reachy Mini open-source robot for real-time object tracking.
Reachy Mini is a compact open-source robot built in collaboration by Pollen Robotics, Hugging Face, and Seeed Studio. It has been going viral lately, getting mentioned in NVIDIA videos and even in the keynotes at some of their conferences. What makes it particularly interesting is that not only is all the code open-source, the body is too, which means you can print your own parts and develop your own apps to run on it.
There is an app store of community-built projects you can explore and try, and easily contribute to. Anything conversational or camera-based is especially fun to build because of the hardware it ships with: a speaker, a microphone, and a camera, plus expressive antennas for emotions.
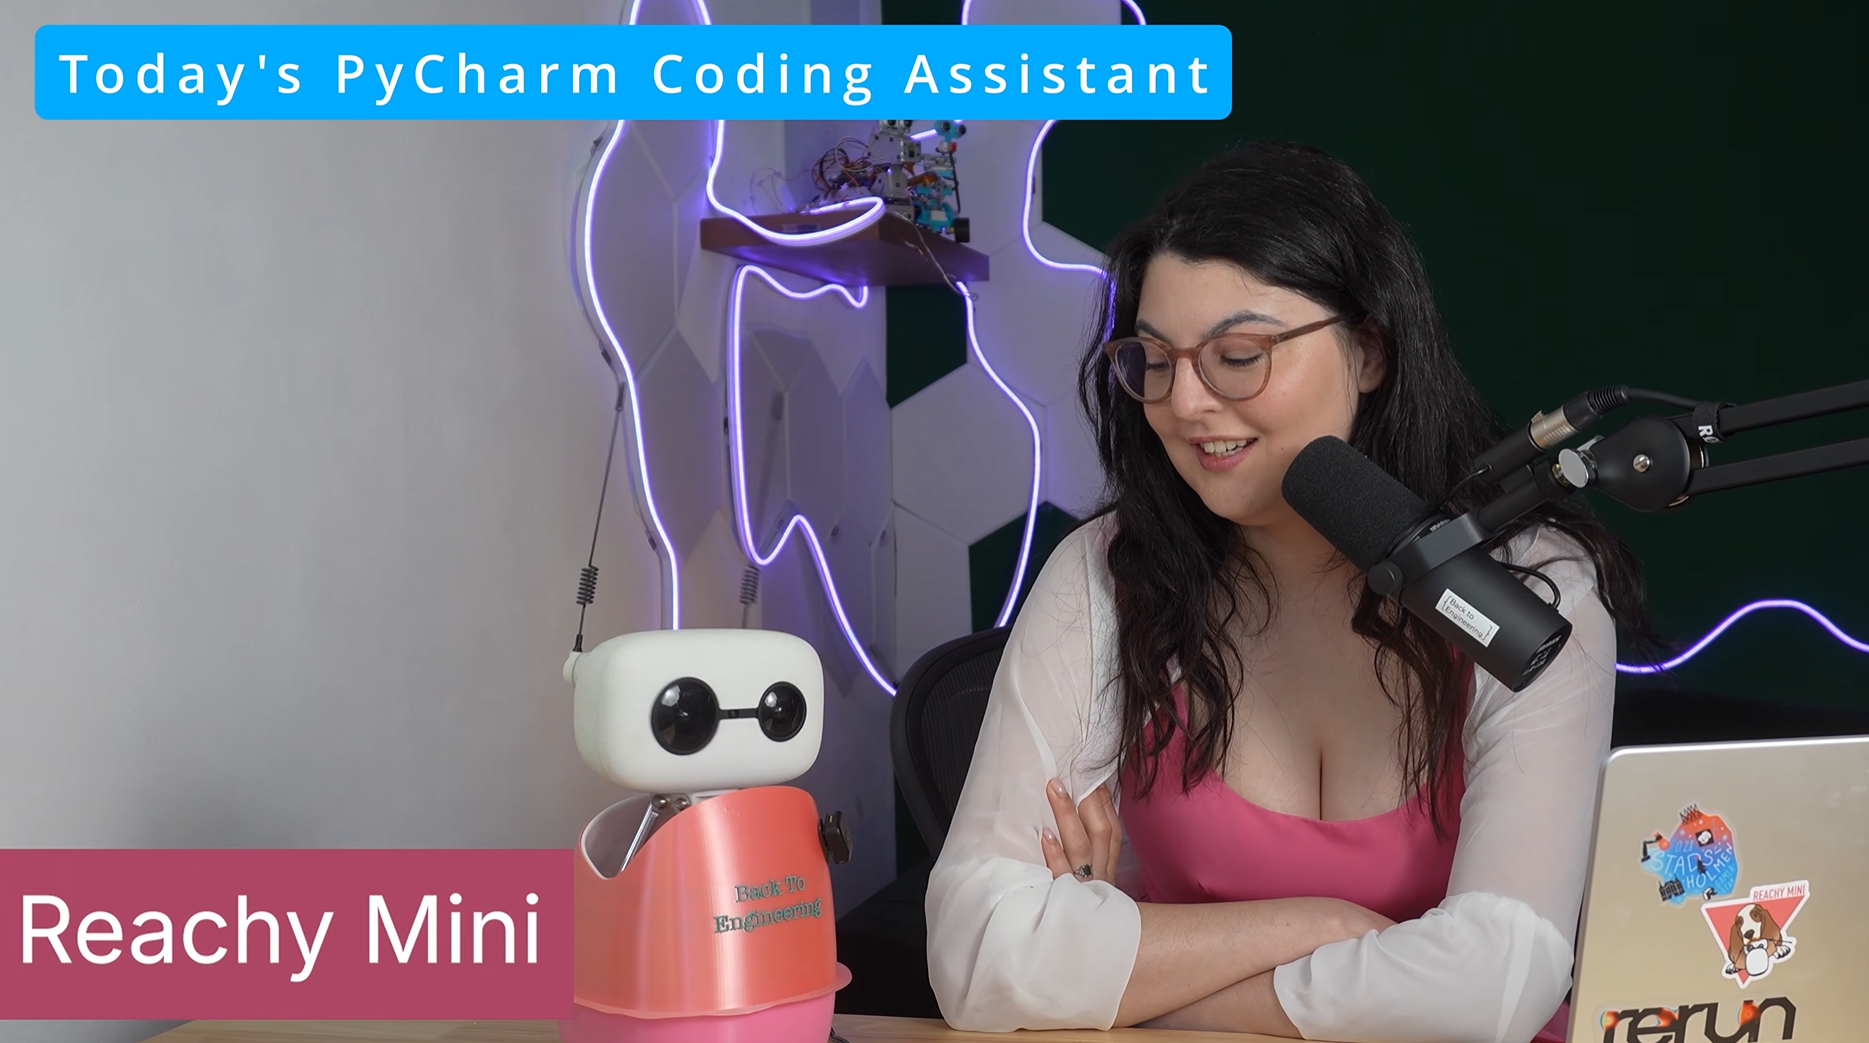
This really highlights the unique new type of robot that the Reachy Mini embodies: It almost feels like it is a physical representation of an LLM or an AI agent, rather than a robot that has AI added to it. It does not have a body that moves around or hands to grab things, so its main selling point is really its brain. That design choice shapes what is most interesting to build with it.
Let’s learn how to build a TensorFlow object detection app and deploy it on the Reachy Mini, which will then allow us to do live object tracking. You can head over to the PyCharm channel for the full code breakdown and try it at home. All the code is in the Reachy-mini-object-detection GitHub repository.
For an introduction to the robot, you can first watch Iulia’s video here:
What you’ll learn
- How to build a real-time TensorFlow object detection pipeline.
- How to use SSD MobileNet V2 from TensorFlow Hub.
- How to create a TensorFlow object detection example with OpenCV.
- How to run live webcam inference in PyCharm notebooks.
- How to deploy object detection on the Reachy Mini robot.
- How to track detected objects using head movement logic.
- How to stream annotated detections to a live dashboard.
What we are building
The project is split into two stages.
Stage 1 is a standalone notebook that runs entirely on your laptop using your webcam. No robot needed. This is where we make sure the detection pipeline works correctly before touching any hardware.
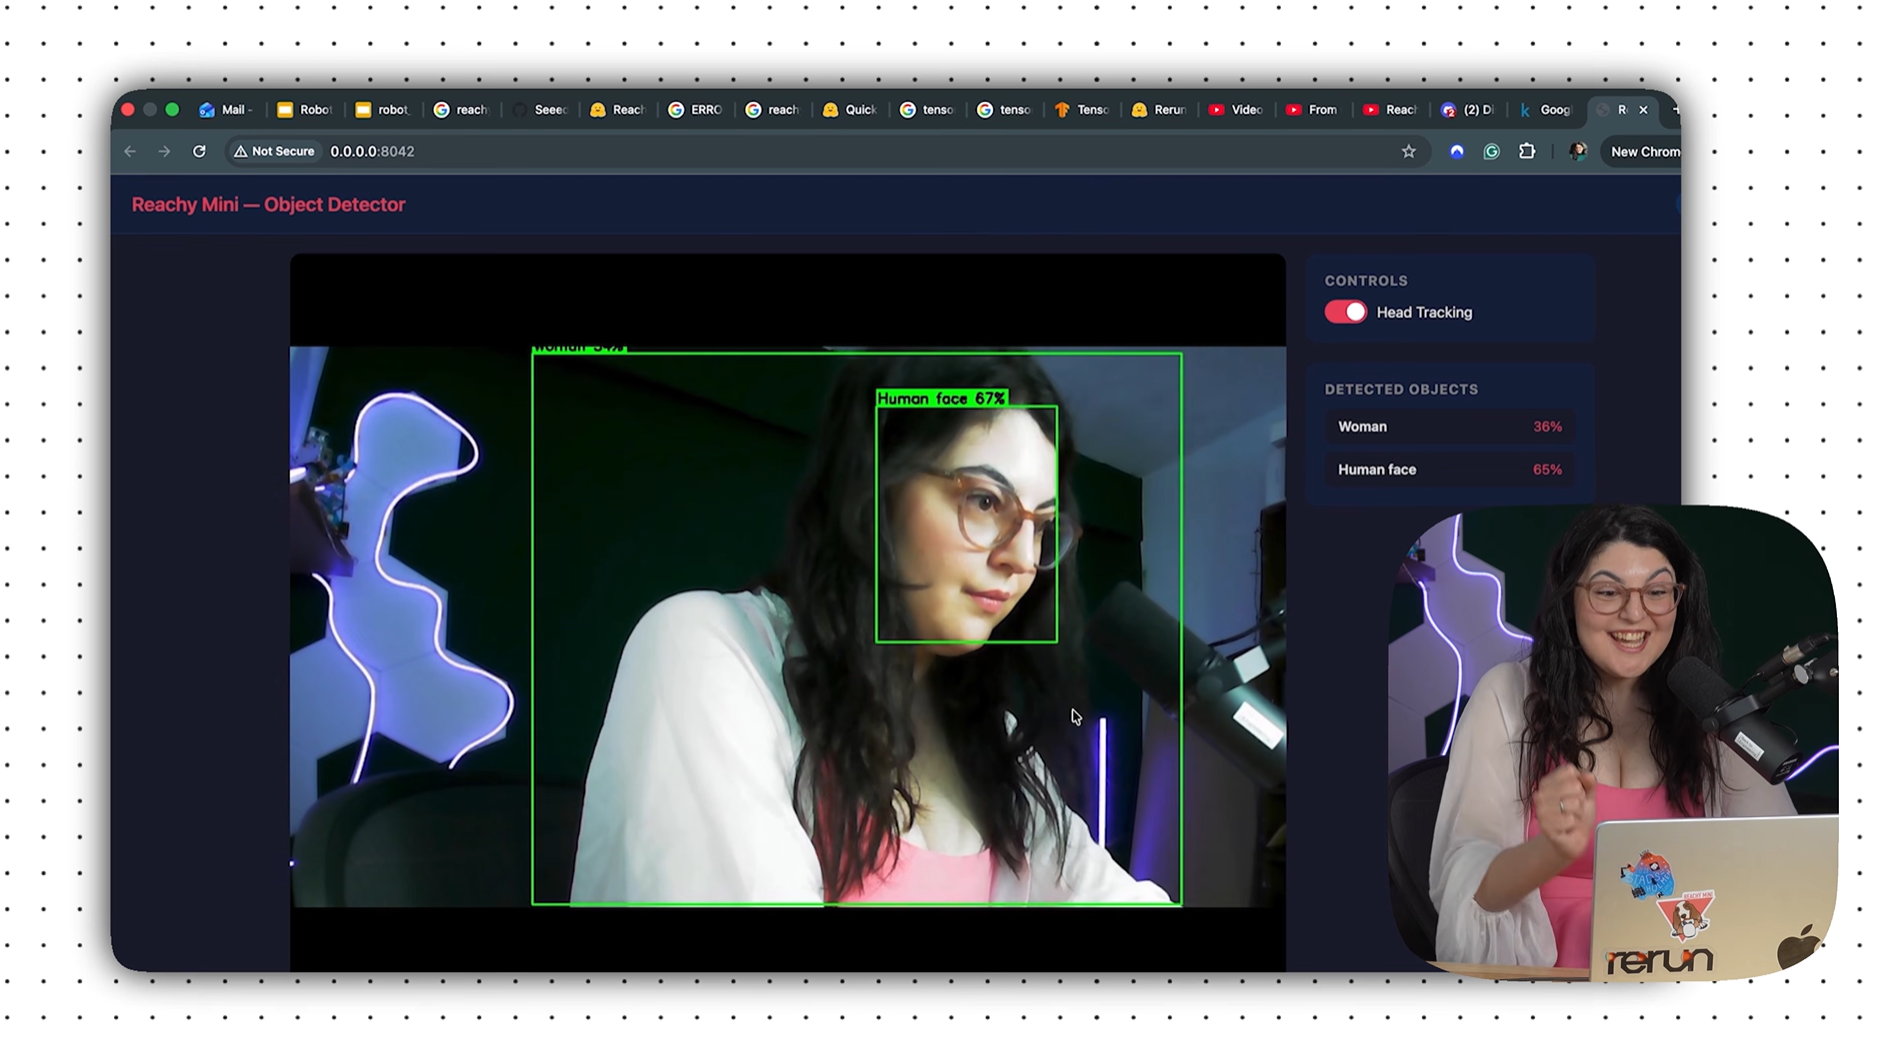
Stage 2 is a Reachy Mini app that integrates the same model with the robot: Her head moves to follow detected objects, her antennas wiggle when she spots something new, and a live web dashboard at http://0.0.0.0:8042 shows the annotated camera feed and detections.
You can follow along with the step-by-step video tutorial:
How TensorFlow object detection works: Step by step
1. Capture an image frame from the webcam.
2. Convert the frame into a TensorFlow tensor.
3. Run inference through the pretrained model.
4. Receive bounding boxes, labels, and confidence scores.
5. Filter low-confidence detections.
6. Draw annotated results onto the frame.
7. Display the processed image in real time.
Prerequisites
- Python 3.12+.
- PyCharm with its Jupyter Notebook integration.
- A Reachy Mini for Stage 2 (Stage 1 runs entirely on your laptop).
- Some familiarity with TensorFlow basics – if you are brand new to it, the previous post in this series is a good starting point.
Stage 1: Building a Tensorflow object detection pipeline in PyCharm
Before connecting the robot, we want to make sure the TensorFlow part works independently. We are going to make a notebook that only executes through our object detection model and makes it run smoothly. PyCharm’s native notebook integration is a great fit here: You can inspect each step of the pipeline and visualize results inline.
The object detection model
We are using SSD MobileNet V2 from TensorFlow Hub, trained on Open Images V4. This popular model from Google provides SSD-based object detection and has been trained on a lot of open images. With a little bit of fine-tuning you can deploy it with your own use case, though for this tutorial, the general model works well without any fine-tuning at all.
It runs at around 10 FPS on CPU, which is fast enough for responsive real-time behavior on the robot.
Install dependencies
!pip install tensorflow tensorflow-hub opencv-python numpy Pillow
Load the model
import tensorflow as tf
import tensorflow_hub as hub
import numpy as np
import cv2
import time
from IPython.display import display, clear_output
from PIL import Image

MODEL_HANDLE = "https://tfhub.dev/google/openimages_v4/ssd/mobilenet_v2/1"

print(f"TensorFlow version: {tf.__version__}")
print("Loading model (first time downloads ~30MB)...")

detector = hub.load(MODEL_HANDLE)
print("Model loaded!")
The model is about 30 megabytes and gets cached locally after the first download. Because it is very generalized, it can work across a lot of different scenarios without needing additional training data, which makes it a lot easier to get started.
Detection and drawing helpers
We need two helper functions: one to run inference and return a list of detections, and one to draw the bounding boxes on the frame. These are the same functions we use later in the Reachy app.
def detect_objects(frame_bgr, min_score=0.5, max_detections=10):
    rgb = frame_bgr[:, :, ::-1]
    img_tensor = tf.image.convert_image_dtype(rgb, tf.float32)[tf.newaxis, ...]

    results = detector.signatures['default'](img_tensor)

    boxes = np.array(results["detection_boxes"])
    scores = np.array(results["detection_scores"])
    class_labels = np.array(results["detection_class_entities"])

    if boxes.ndim > 2:
        boxes = boxes[0]
    if scores.ndim > 1:
        scores = scores[0]
    if class_labels.ndim > 1:
        class_labels = class_labels[0]

    scores = np.atleast_1d(scores)
    indices = [i for i, score in enumerate(scores) if score >= min_score][:max_detections]

    detections = []
    for idx in indices:
        ymin, xmin, ymax, xmax = boxes[idx]
        label = class_labels[idx].decode('utf-8') if isinstance(class_labels[idx], bytes) else str(class_labels[idx])
        detections.append({
            "box": [ymin, xmin, ymax, xmax],
            "score": float(scores[idx]),
            "label": label
        })

    return detections


def draw_detections(frame_bgr, detections):
    h, w = frame_bgr.shape[:2]
    annotated = frame_bgr.copy()

    for det in detections:
        ymin, xmin, ymax, xmax = det["box"]
        x1, y1 = int(xmin * w), int(ymin * h)
        x2, y2 = int(xmax * w), int(ymax * h)

        color = (0, 255, 0)
        cv2.rectangle(annotated, (x1, y1), (x2, y2), color, 2)

        label = f"{det['label']} {det['score']:.0%}"
        font_scale, thickness = 0.6, 2
        (tw, th), _ = cv2.getTextSize(label, cv2.FONT_HERSHEY_SIMPLEX, font_scale, thickness)
        cv2.rectangle(annotated, (x1, y1 - th - 8), (x1 + tw + 4, y1), color, -1)
        cv2.putText(annotated, label, (x1 + 2, y1 - 4),
                    cv2.FONT_HERSHEY_SIMPLEX, font_scale, (0, 0, 0), thickness)

    return annotated
The detect_objects function runs inference using the model’s detect_objects entry point and handles flattening the batch dimension from the output tensors. Labels come back as bytes from the model, so we decode them to strings before returning.
Test on a single frame
cap = cv2.VideoCapture(0)
ret, frame = cap.read()
cap.release()

if not ret:
    print("ERROR: Could not access webcam. Make sure no other app is using it.")
else:
    print(f"Frame captured: {frame.shape}")

    t0 = time.time()
    detections = detect_objects(frame)
    elapsed = time.time() - t0

    print(f"Inference time: {elapsed:.2f}s ({1/elapsed:.1f} FPS)")
    print(f"Found {len(detections)} objects:")
    for d in detections:
        print(f"  - {d['label']}: {d['score']:.0%}")

    annotated = draw_detections(frame, detections)
    display(Image.fromarray(annotated[:, :, ::-1]))
This is the stage where you check that the model is detecting correctly and the bounding boxes are drawn in the right places. The inline image display in PyCharm’s notebook view makes it easy to see the result right there in the cell.
Running real-time TensorFlow object detection with OpenCV
Once the single-frame test looks good, you can run it continuously:
cap = cv2.VideoCapture(0)

if not cap.isOpened():
    print("ERROR: Could not open webcam.")
else:
    print("Running live detection... (interrupt kernel to stop)")
    try:
        while True:
            ret, frame = cap.read()
            if not ret:
                break

            t0 = time.time()
            detections = detect_objects(frame)
            fps = 1.0 / max(time.time() - t0, 0.001)

            annotated = draw_detections(frame, detections)
            cv2.putText(annotated, f"{fps:.1f} FPS", (10, 30),
                        cv2.FONT_HERSHEY_SIMPLEX, 1.0, (0, 0, 255), 2)

            clear_output(wait=True)
            display(Image.fromarray(annotated[:, :, ::-1]))

            labels = ", ".join(f"{d['label']} ({d['score']:.0%})" for d in detections)
            print(f"{fps:.1f} FPS | {len(detections)} objects: {labels or 'none'}")

    except KeyboardInterrupt:
        print("Stopped.")
    finally:
        cap.release()
        print("Camera released.")
At this point we have built a notebook that works with just having object detection and we can use this with a simple camera of whatever type you have around. Now, we can wrap it up and make it into an app that we can deploy on the Reachy.
Stage 2: Deploying the TensorFlow object detection app on the Reachy Mini
The Reachy Mini app lives in the reachy_mini_object_detector/ folder and extends the detection logic with head tracking, antenna reactions, and a web dashboard. We’ve followed the guidelines for building Reachy Apps laid out in this blog post. Particularly, we can leverage a helper LLM system like Claude by giving it the predefined Agent Helper documentation.
Project structure
reachy_mini_object_detector/
├── pyproject.toml
└── reachy_mini_object_detector/
    ├── detector.py       # TF Hub model wrapper
    ├── main.py           # App: head tracking + web dashboard
    └── static/           # Web UI assets (served at :8042)
The detector.py file wraps the model and the detect_objects logic. main.py imports from it and adds everything specific to the robot.
Installing the app
From the Reachy Mini dashboard, under Apps, or by manually adding:
pip install git+https://huggingface.co/spaces/backtoengineering/reachy_mini_object_detector
How head tracking works
The app runs two loops in parallel: an inference thread that grabs frames from the robot’s camera and runs detection, and a main control loop at around 50Hz that handles head movement and antenna control.
The head tracking feature maps the detected object’s position in the frame to a yaw and pitch offset for the head. The camera has a horizontal field of view of 60 degrees and a vertical field of view of 45 degrees. When an object is at the center of the frame its center_x is 0.5, so subtracting 0.5 and multiplying by the field of view gives the angle offset to track it:
target_yaw = -(largest.center_x - 0.5) * CAMERA_FOV_H_DEG
target_pitch = (largest.center_y - 0.5) * CAMERA_FOV_V_DEG
Rather than snapping the head instantly to that target, the app uses a smoothing factor (TRACKING_ALPHA = 0.15) so the movement looks natural:
self._current_yaw += TRACKING_ALPHA * (target_yaw - self._current_yaw)
self._current_pitch += TRACKING_ALPHA * (target_pitch - self._current_pitch)
When nothing is detected, the head slowly drifts back toward center rather than freezing in place.
Antenna wiggle
The antennas wiggle when a new object class is first detected, not on every frame. The app keeps track of which classes have already been seen in _seen_classes, and when something new appears it sets a wiggle timer for 1.5 seconds. During that window, the control loop drives a sinusoidal antenna movement as follows:
phase = (t - t0) * 8.0  # fast wiggle
antenna_val = np.deg2rad(20.0 * np.sin(phase))
antennas = np.array([antenna_val, -antenna_val]
This makes the interaction feel intentional: Reachy reacts when she sees something new, rather than wiggling constantly while tracking.
The web dashboard
The app serves a live dashboard (available at http://0.0.0.0:8042) with the annotated camera feed (as an MJPEG stream), the current detection list, an FPS counter, and a toggle to enable or disable head tracking. This is useful during development because you can see exactly what the model is detecting from the robot’s perspective in real time.
Where to go next
This is a great starting point and there are a lot of directions you can take it:
- Run the app with a specific use case in mind. The model is general, but if you want Reachy to recognize specific objects you can fine-tune on your own dataset using TensorFlow’s Object Detection API.
- Add more apps. There are many apps that users have already created in the Reachy Mini store, and building one that uses both the camera and the conversational capabilities together opens up a lot of possibilities.
- Connect to physical arms. Something I would really like to explore next is connecting Reachy to the SO-101 arms, so she can actually reach out and do things in the physical world as well as see them.
You can find all the code in the Reachy-mini-object-detection repository. Everything is open-source, so feel free to build on it, adapt it, or deploy your own version.
FAQs
What is TensorFlow object detection?
TensorFlow object detection is a computer vision technique that uses machine learning models to identify and locate objects within images or video streams.
What is the best TensorFlow object detection model for real-time applications?
SSD MobileNet V2 is commonly used for real-time TensorFlow object detection because it balances inference speed and accuracy efficiently.
Can TensorFlow object detection run on CPU?
Yes. Models like SSD MobileNet V2 can run entirely on CPU, making them suitable for laptops, edge devices, and robotics projects.
What is the difference between the TensorFlow Object Detection API and TensorFlow Hub?
TensorFlow Hub provides pretrained reusable models, while the TensorFlow Object Detection API offers a larger framework for training, evaluation, and deployment workflows.
Can I train TensorFlow object detection on custom data?
Yes. You can fine-tune pretrained models using your own labelled datasets to detect custom objects.
About the author

Iulia Feroli
Iulia Feroli is the founder of the Back To Engineering community on YouTube, where she builds robots, explores physical AI, and makes complex engineering topics accessible and fun. She has a background in data science, AI, cloud architecture, and open source.
Subscribe to PyCharm Blog updates