It seems that every time I document how to do Xilinx JTAG programming from a Raspberry Pi, they change something to break it. So, it is time to update the instructions again.
The method in this blog post uses libgpiod. It appears that this library has been updated to v2 in the Trixie version of Pi OS, which is not API compatible. I do not have a solution at this time, it will require more rewrites. Please use Bookworm for now.
The main problem is when using xc3sprog. The original method used wiringpi in the Buster version of Pi OS to talk to the GPIO. Then the Bullseye version came around and wiringpi was removed in favour of sysfsgpio. I believe in-part due to the way the Pi 5 GPIO works, this was no longer viable, so with Bookworm, there is another method libgpio. In addition, wiringpi is back and also should work!
I should probably note here that if you are confused about the Pi OS naming, it is based on Debian. Debian names each release after Toy Story characters.
The original xc3sprog repository appears to be no longer developed or taking contributions. I was going to fork it and add support for libgpio, but someone beat me to it. You can find their repository here.
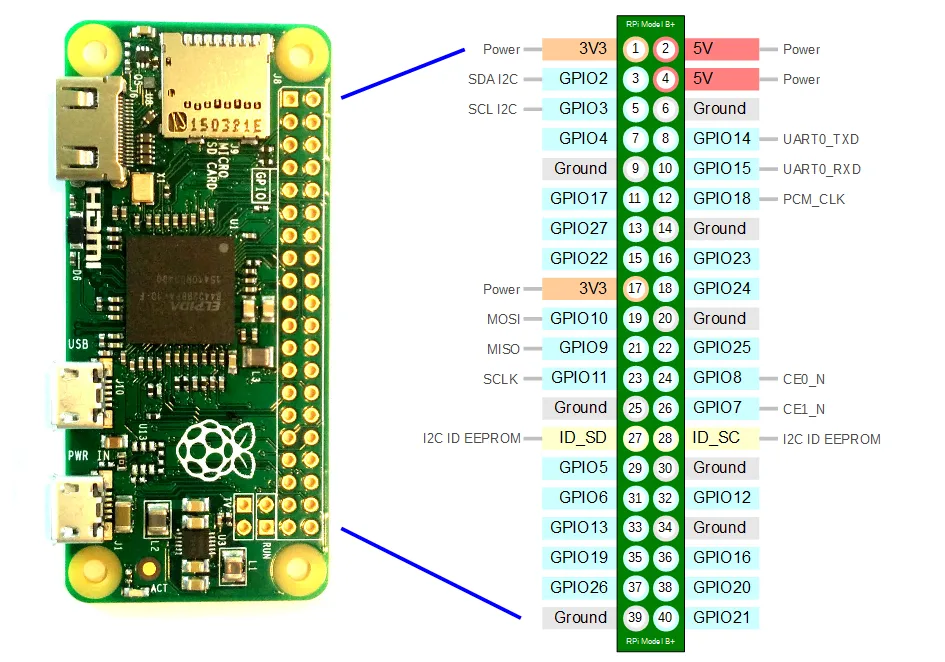
As a refresher, this is the pinout of the Pi GPIO, this is the same for most generations of Raspberry Pi, apart from the first original one:
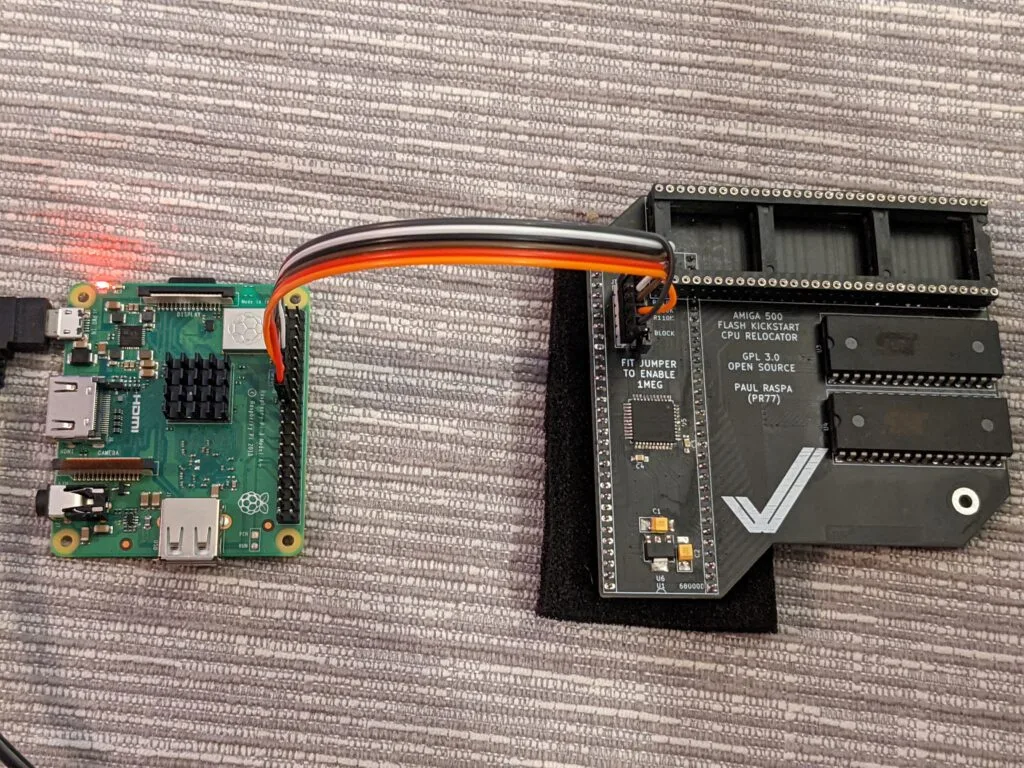
You should wire it up as follows:
| Pin Number | GPIO Number | Function |
|---|---|---|
| 7 | 4 | TMS |
| 9 | – | GND |
| 11 | 17 | TCK |
| 13 | 27 | TDO |
| 15 | 22 | TDI |
| 17 | – | 3.3v |
Now, to install the software, open a shell or SSH into the Pi and do the following:
sudo apt update
sudo apt install build-essential libusb-dev libftdi-dev libgpiod-dev git cmake
git clone https://github.com/arkadiuszmakarenko/xc3sprog.git
mkdir xc3sprog/build
cd xc3sprog/build
cmake ..
make
sudo make install
This should get you the software installed. From here you can check if the JTAG chain works by using:
sudo xc3sprog -c gpiod_creator -j
This should give you a list of JTAG devices connected. JTAG works in a chain from ID 0, so multiple chips can be programmed from a single connector.
From here you can program your chips using:
sudo xc3sprog -c gpiod_creator -v -p {chain position starting from 0} {filename}.jed
That is it! You should get a successful flash!
此内容由惯性聚合(RSS阅读器)自动聚合整理,仅供阅读参考。 原文来自 — 版权归原作者所有。