I recently purchased an external floppy drive the for the Amiga which was sold as “untested”. Unfortunately “untested” in this case meant “doesn’t work and someone did a bad attempt at repairing it”. There were parts of the drive physically broken and it was beyond repair. I lucked out because unlike the Rotec drive I repaired in the past, this one uses a standard floppy connector inside. So, instead I decided to convert a PC floppy drive to work in the case.
Amiga floppy drives are wired a little differently to PC ones, they use a modified version of the Shugart standard. In particular the following things are different to the IBM/PC standard:
I happened to have a working Samsung SFD-321J floppy drive. So I decided to modify this drive. There are guides all over the internet on how to modify drives. Some are as easy as selecting jumpers, many (like mine) require soldering. Unfortunately I could not find a guide for my specific model, but luckily it was very easy to figure out.
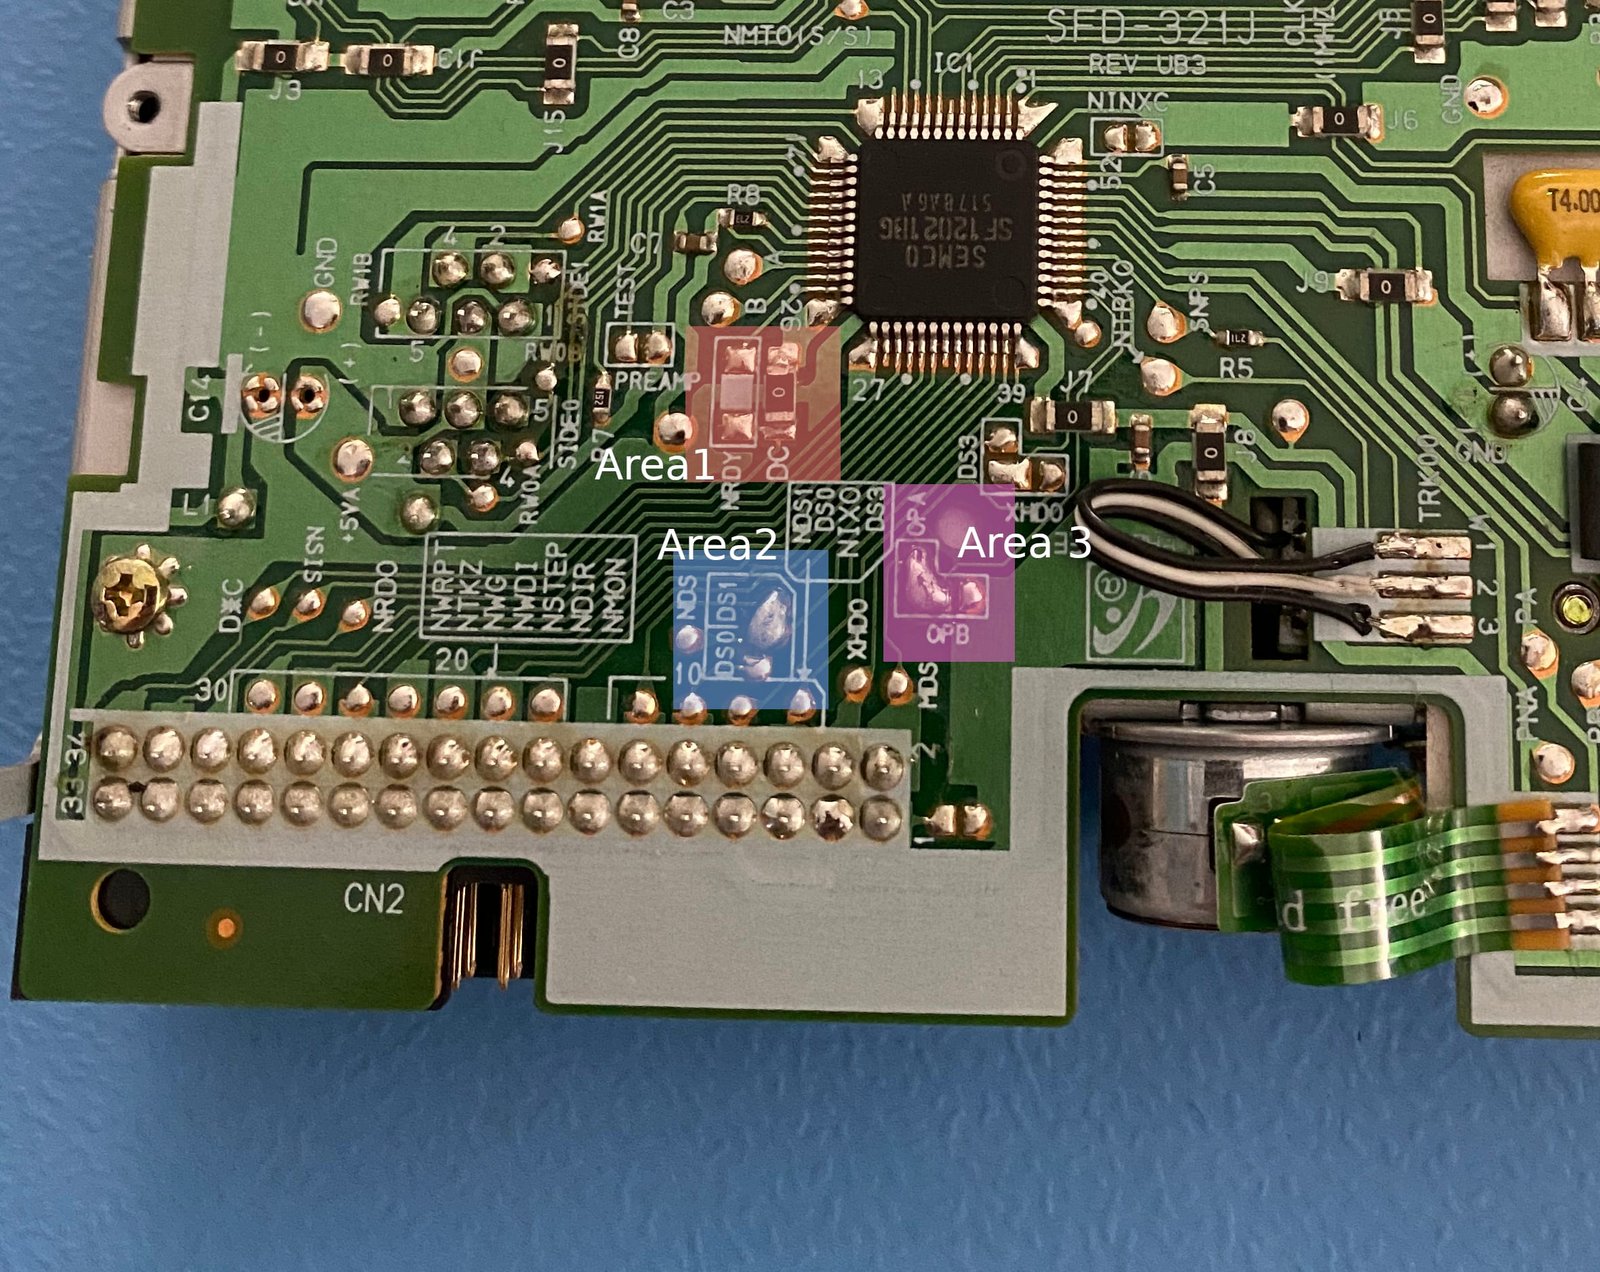
Using the labelled areas below, this is what I did:
This area is essentially a jumper select for pin 34. It uses a 0 ohm resistor to select DC as the pin’s output. Using flux and a hot-air gun I desoldered the 0 ohm resistor from DC, then carefully resoldered it in RDY.
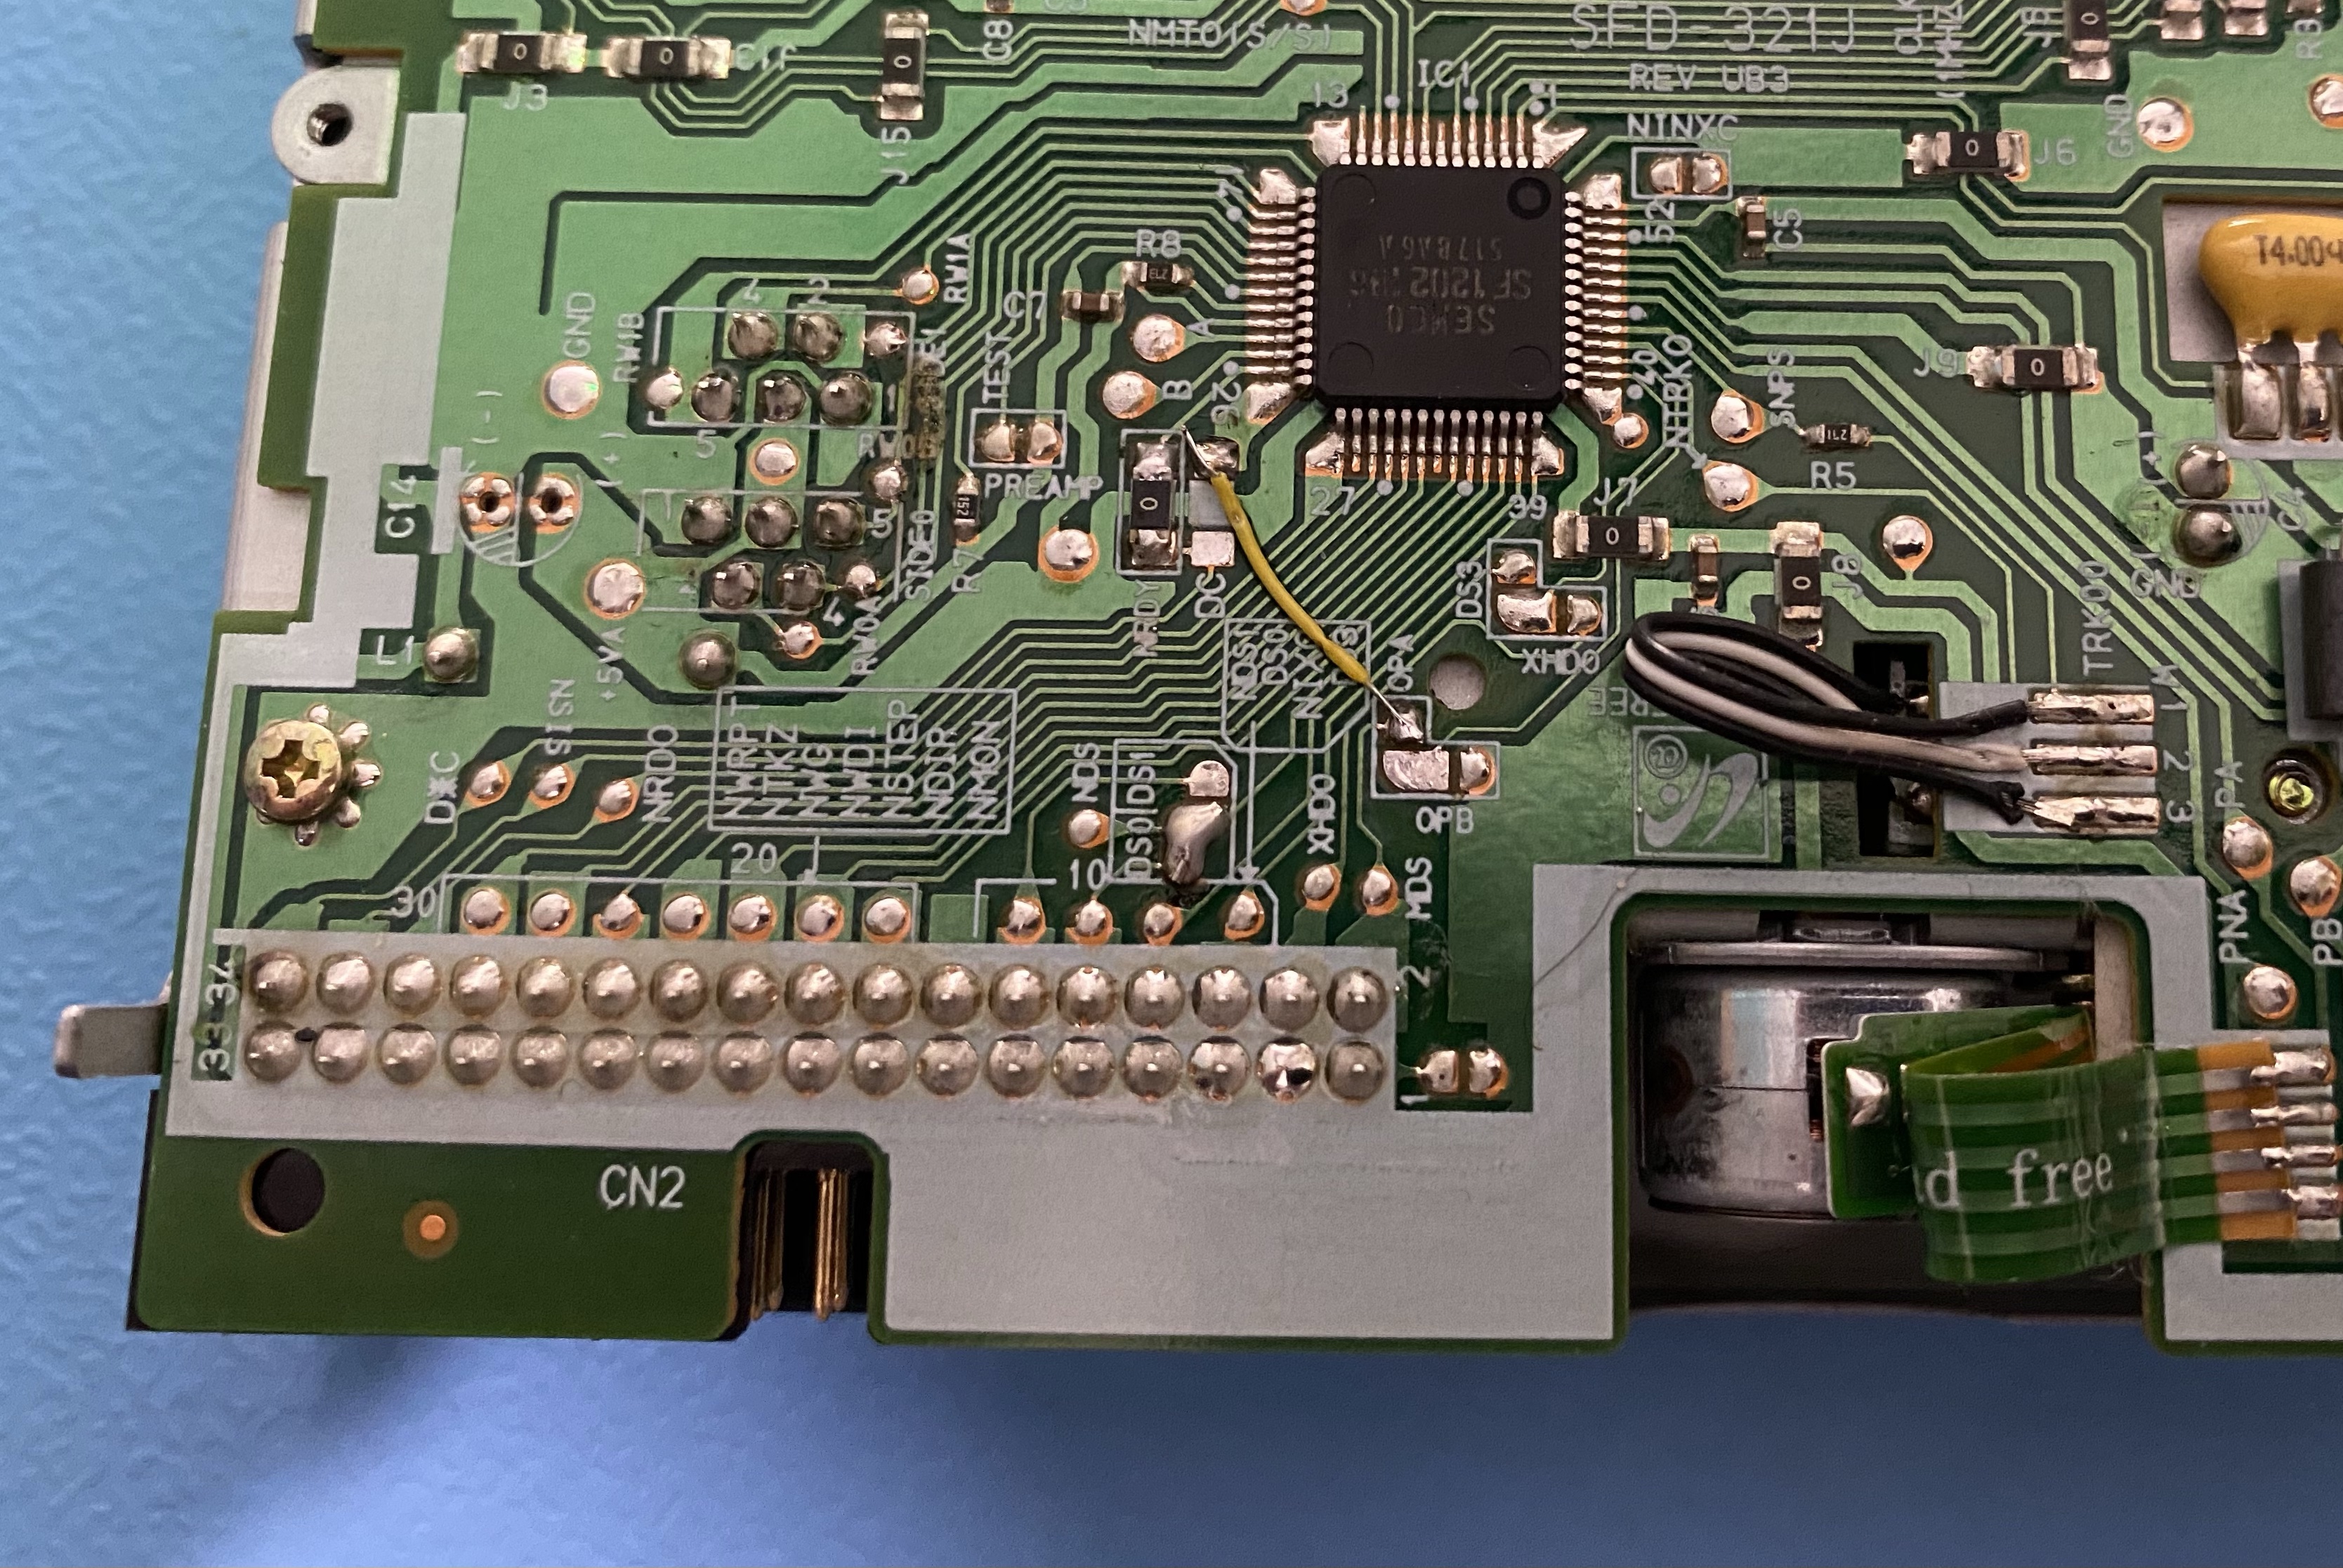
We do need the DC signal for pin 2 so I soldered a wire there for Area 3.
This was a giant solder blob between the middle pin and DS1 at the top, using some solder wick this was removed very easily. Since the gap was large I decided to use a tiny wire between the pins for DS0 and solder that in place.
This area is the option select for pin 2. It was set to OP A which is the disk density selection, OP B I believe force DD. Again this was just a giant solder blob which was wicked-up easily. We want this pin to be the DC so the wire from Area 1 was soldered to the middle of this area which is directly connected to pin 2.
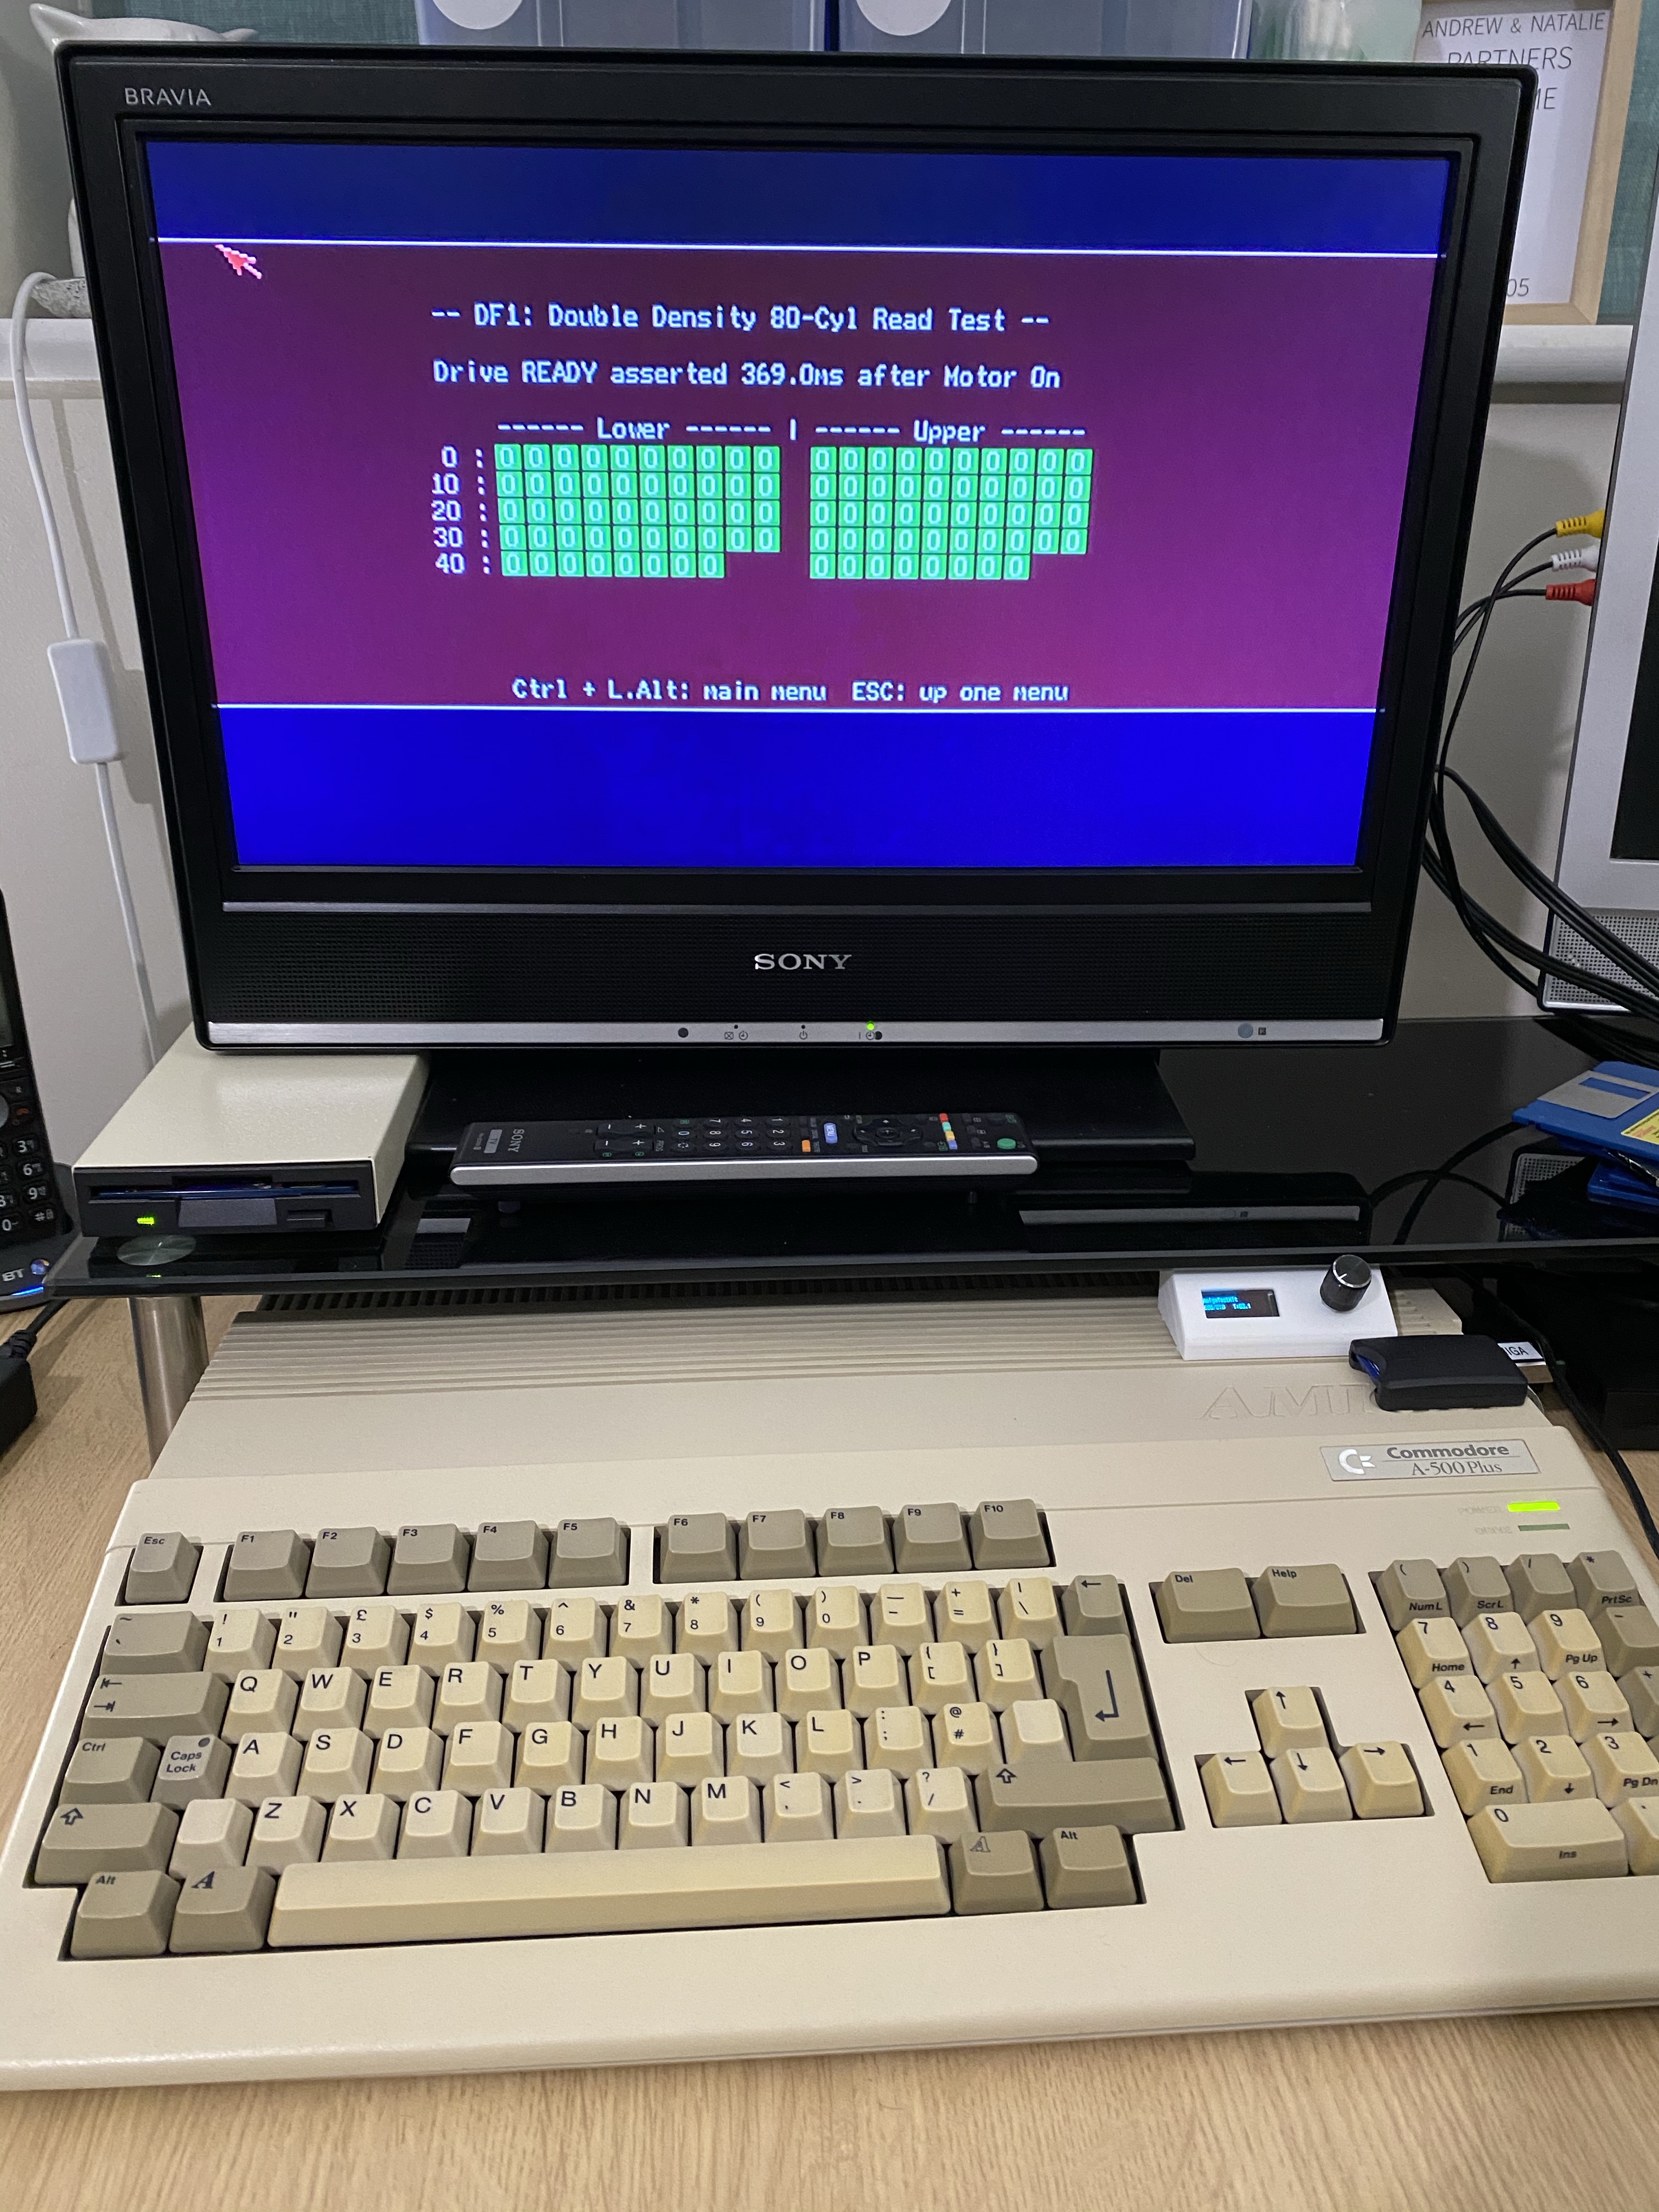
The image above is the final result. I also made sure the drive heads were clean and re-greased the worm gear for the heads. After reassembling I ran a few tests and it appears to work. I now have a real floppy drive to use alongside my Gotek!
此内容由惯性聚合(RSS阅读器)自动聚合整理,仅供阅读参考。 原文来自 — 版权归原作者所有。