












Most modern web applications are frequently updated to implement new features, execute marketing campaigns, or enhance their UX with new libraries or APIs. While this helps you better engage your users, constant UI updates make designing flexible, long-lasting tests challenging.
To help keep track of shifting UI elements through different design iterations, many synthetic tests include locators. Locators are unique identifiers that you can use to label each element in your app, enabling you to track them even as your overall layout changes. While there are many ways you can create locators, two of the most common methods are to use CSS or xPath selectors, which enable you to query the Document Object Model (DOM) to retrieve specific elements.
Figuring out which type of selector to use can present its own set of difficulties, and many teams may even implement features of each to create their own locators. For example, Datadog Synthetic Monitoring uses a custom locator system that draws on several different reference points—including xPath, text, and classes—to reliably identify elements. Understanding the advantages and disadvantages of each approach can help you design more effective synthetic tests tailored to the unique needs of your text stack.
In this post, we’ll show you:
How locators work in synthetic testing, including the differences between CSS and xPath selectors
How to customize your locators using Datadog Synthetic Monitoring
Locators can take a number of different formats, enabling you to target elements based on their attributes or location. Some of the strategies for using locators are more straightforward, such as directly querying element IDs via methods like getElementById(). However, factors such as missing IDs can complicate these approaches, making it difficult to get complete, resilient coverage for your tests. To accomodate more advanced use cases, many testers turn to using CSS and xPath selectors instead. These selectors provide you with more options for targeting elements, helping you integrate locators into your tests with minimal additional work.
When deciding which selector type to use in your tests, one of the biggest advantages to CSS selectors is that they are typically easier to learn and read than xPath. CSS selectors use much of the same syntax as HTML, defining elements based on features such as their class and attributes—this makes it relatively easy to determine which elements each locator applies to just by looking at your code. For example, you can easily select a link element in your text like so:
`const gum_link = document.querySelector(“[href=’https://candy.example/product/bubblegum’]”)`
Additionally, CSS selectors are able to access elements within the shadow DOM via functions like :host(). By navigating into the shadow DOM, you can granularly test elements that normally would be hidden within a larger web component, such as the individual video control buttons within a web player.
By contrast, xPath selectors tend to have a higher learning curve but can provide more advanced querying options. You can use xPath selectors to target an element based on content, including text, which can come in handy for elements like individual <div> containers that may not have any unique attributes. You can also define an element based on its location by traversing both up and down the DOM tree—for example, to select a list based on its parent, you could use something like the query below:
`const gum_list = //h1/parent::ul`
In addition to being useful for elements without distinctive attributes, this feature can come in handy when you have multiple nested elements, such as in a menu.
You can easily copy the xPath of an element using your browser’s developer tools functionality:
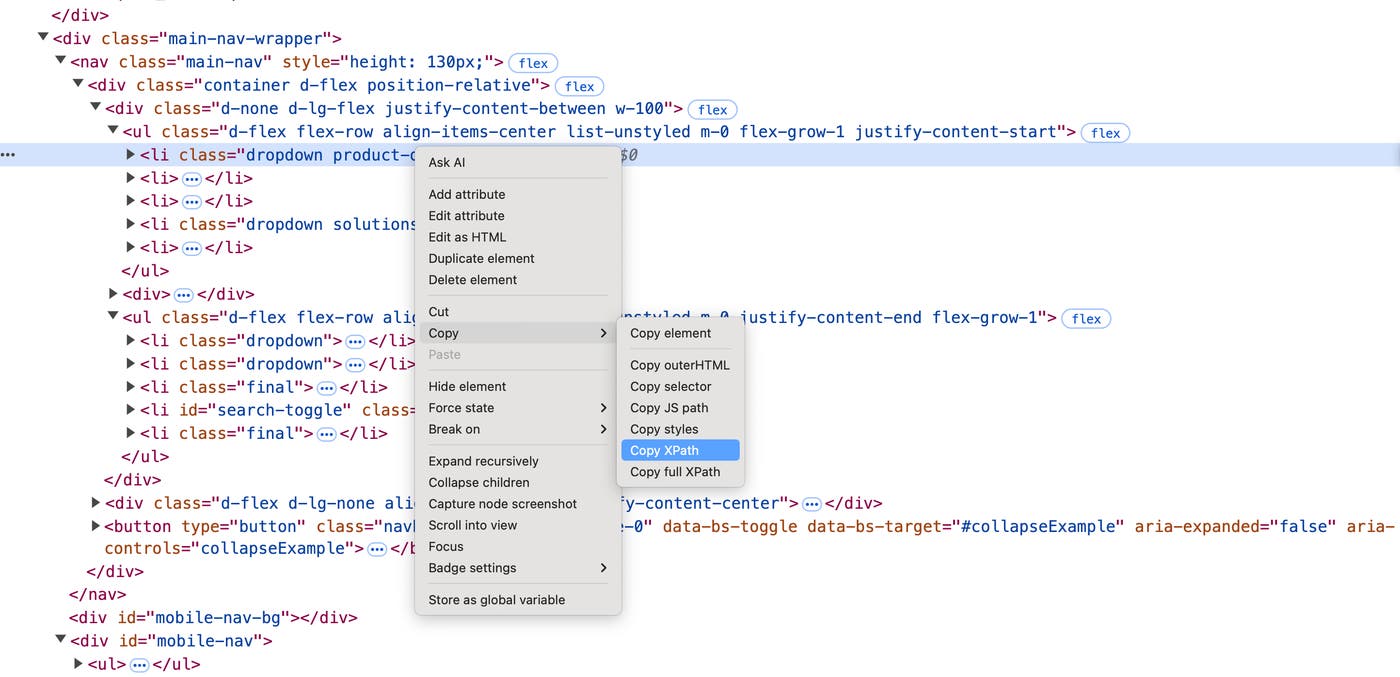
Note that you can often use these tools to get the CSS selector for an element as well—in the example above, you would use the Copy selector option.
If you choose to define an element based on its location using xPath, you will have to be careful that any UI updates don’t change the position of the element in the DOM. This could result in a locator that either points to a different element than intended or is broken completely. If you anticipate frequent changes to your app’s DOM structure, you may want to choose CSS selectors instead.
Datadog Synthetic Monitoring’s self-healing locators automatically cover most use cases, with no scripting knowledge necessary. However, there are a few select situations where you might need to customize your own locators. To account for this, Synthetic Monitoring also provides out-of-the-box testing templates that help you easily create your own xPath or CSS locators. You can use basic naming conventions with these locators to select elements based on their page section, for example. Note that the xPath selectors are enhanced with JavaScript functions that help determine their location dynamically.
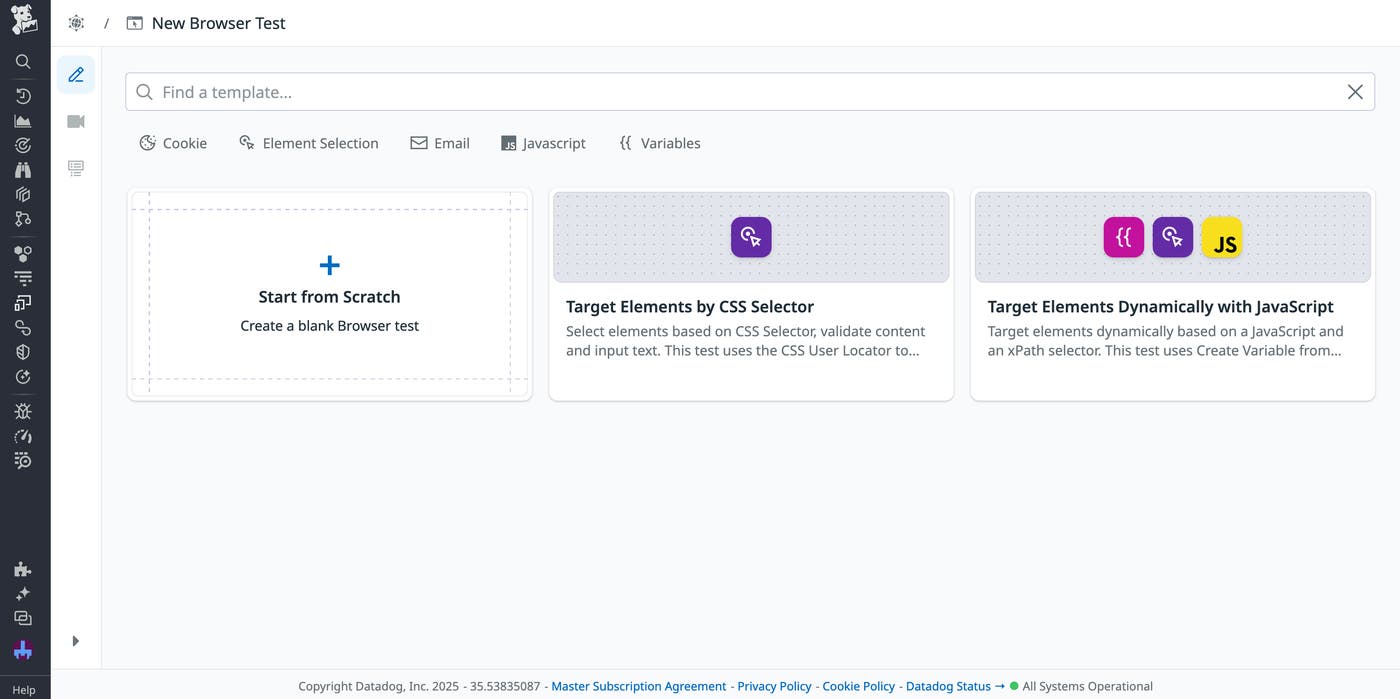
Let’s say that you want to select an element based on a certain dynamic condition—perhaps you want to select the first Out of Stock element in your inventory. The exact element that this applies to might change from session to session, with only this text acting as a reliable identifier. In this situation, you can use the Datadog testing templates to create a synthetic browser test that automatically creates an xPath locator for this element.
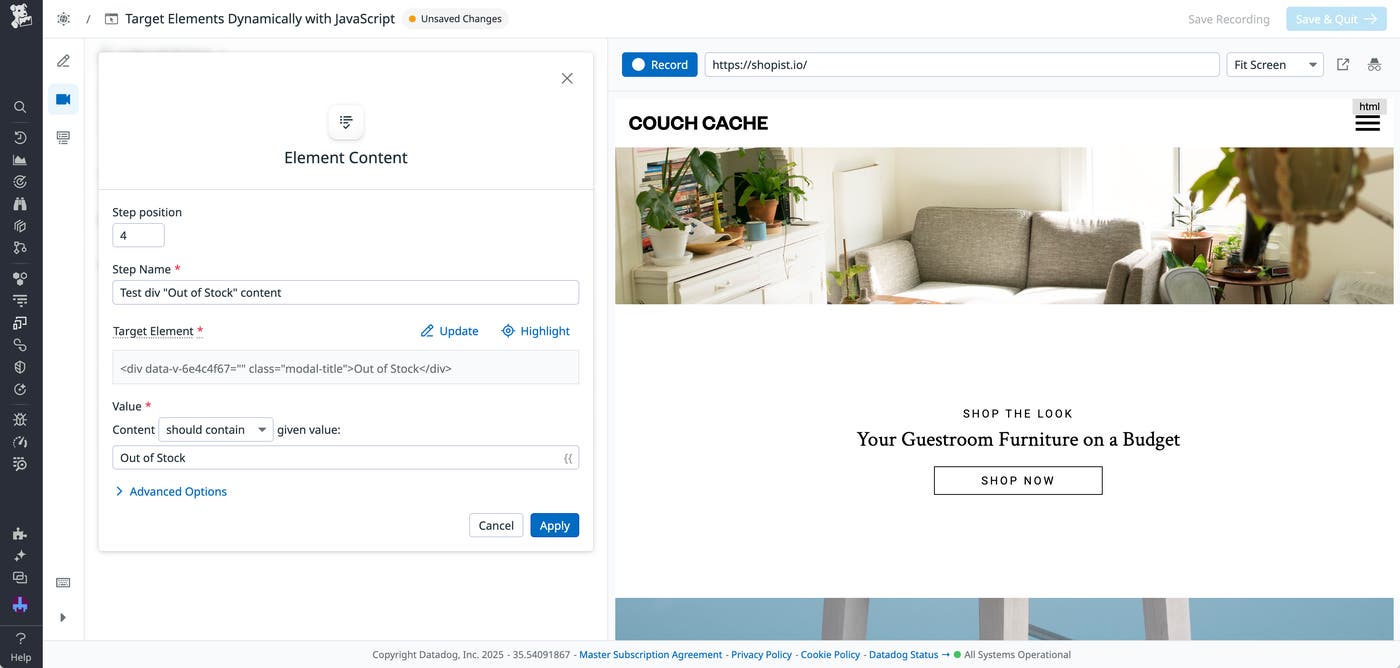
Alternatively, let’s say you’re testing an element that could go missing or otherwise break under certain conditions. Because Datadog’s default locators are self-healing, they will automatically try to find elements that have moved, changed, or disappeared. Therefore, to create tests that you intentionally want to fail, you may want to define your own locators instead. For example, maybe you want to determine whether your styling remains consistent even in the face of certain edge cases, such as a widget that breaks due to issues with a third-party API. You can explicitly target this widget with a user-created locator to ensure that any errors within it result in a failing test. You can then review these failed tests to make sure that your app was able to handle the issue correctly.
Datadog Synthetic Monitoring helps you quickly create tests that can withstand any UI changes, from planned updates to unexpected layout shifts or rendering issues. Using our synthetic testing templates, you can easily design tests for your specific use cases, with the ability to customize granular features like locators.
You can check out our documentation to get started with Datadog Synthetic Monitoring. Or, if you’re not yet a Datadog user, you can sign up for a 14-day free trial.
此内容由惯性聚合(RSS阅读器)自动聚合整理,仅供阅读参考。 原文来自 — 版权归原作者所有。