


为了搭建一个家庭智能科学上网的环境,想找个支持Openwrt的路由刷一刷, 观望了一段时间,入手了款矿渣newifi3 d2,虽说有人吐槽信号不好,然而房间小的我并不担心==。
2022/08/13 更新
目前我已经刷入了 OpenWrt, 并且设置了全局代理,用起来真香。 详见 Openwrt + Clash 全局科学上网 和 Newifi3 刷入 OpenWrt 固件 v21.02。
2021/12/18 更新
文中的 ShadowSocks 已经能被GFW准确识别了,不能用来科学上网了。但目前还有VMess, Trojan协议等。 我目前用的 Trojan 协议,结合 https://github.com/p4gefau1t/trojan-go 项目,完美使用。 而且最新的老毛子固件也支持 Trojan 了。
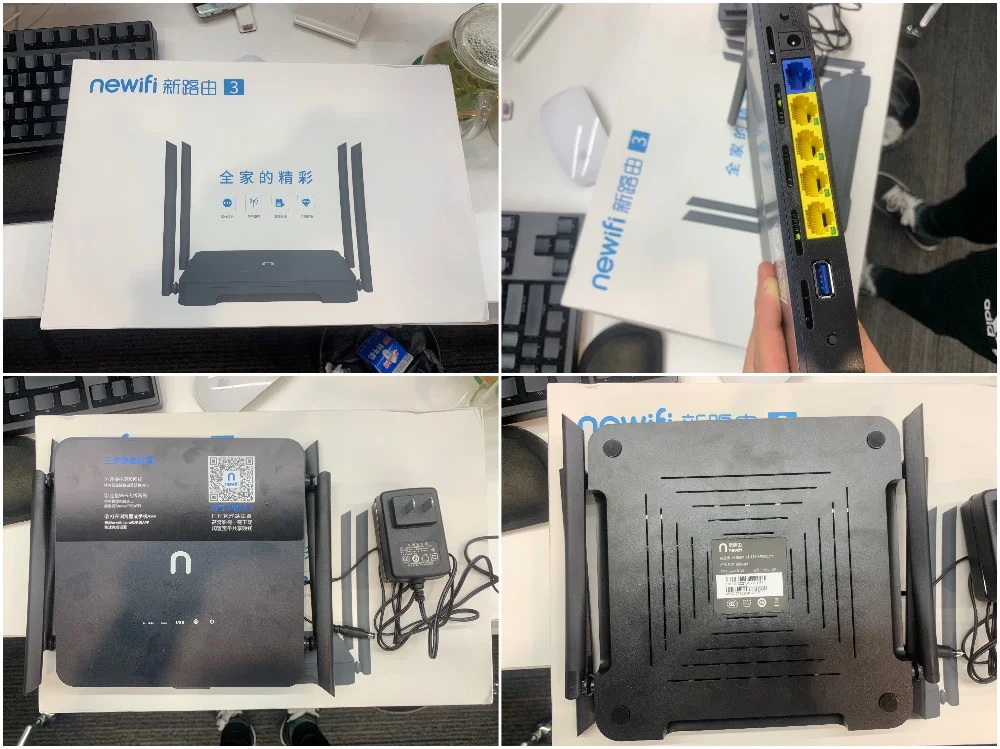
CPU: MT7621A 闪存: 32MB 内存: 512MB 传输频段: 2.4G;5G 网口: 全千兆 4xLAN + 1xWAN USB: 3.0x1 价格: 某宝¥85
我买的是刷了Openwrt的,后来觉得Openwrt折腾起来还是需要点时间的,自己又刷了老毛子。
我们SSH上去看看。
$ cat /proc/cpuinfo
system type             : MediaTek MT7621 SoC
processor               : 0
cpu model               : MIPS 1004Kc V2.15
BogoMIPS                : 583.68
wait instruction        : yes
microsecond timers      : yes
tlb_entries             : 32
extra interrupt vector  : yes
hardware watchpoint     : yes, count: 4, address/irw mask: [0x0000, 0x0ff8, 0x0000, 0x0003]
ASEs implemented        : mips16 dsp mt
shadow register sets    : 1
kscratch registers      : 0
core                    : 0
VPE                     : 0
VCED exceptions         : not available
VCEI exceptions         : not available

processor               : 1
cpu model               : MIPS 1004Kc V2.15
BogoMIPS                : 583.68
wait instruction        : yes
microsecond timers      : yes
tlb_entries             : 32
extra interrupt vector  : yes
hardware watchpoint     : yes, count: 4, address/irw mask: [0x0000, 0x0004, 0x0000, 0x0000]
ASEs implemented        : mips16 dsp mt
shadow register sets    : 1
kscratch registers      : 0
core                    : 0
VPE                     : 1
VCED exceptions         : not available
VCEI exceptions         : not available

processor               : 2
cpu model               : MIPS 1004Kc V2.15
BogoMIPS                : 583.68
wait instruction        : yes
microsecond timers      : yes
tlb_entries             : 32
extra interrupt vector  : yes
hardware watchpoint     : yes, count: 4, address/irw mask: [0x0000, 0x0000, 0x0000, 0x0000]
ASEs implemented        : mips16 dsp mt
shadow register sets    : 1
kscratch registers      : 0
core                    : 1
VPE                     : 0
VCED exceptions         : not available
VCEI exceptions         : not available

processor               : 3
cpu model               : MIPS 1004Kc V2.15
BogoMIPS                : 583.68
wait instruction        : yes
microsecond timers      : yes
tlb_entries             : 32
extra interrupt vector  : yes
hardware watchpoint     : yes, count: 4, address/irw mask: [0x0000, 0x0004, 0x0003, 0x0000]
ASEs implemented        : mips16 dsp mt
shadow register sets    : 1
kscratch registers      : 0
core                    : 1
VPE                     : 1
VCED exceptions         : not available
VCEI exceptions         : not available
CPU架构mips, 可以支持跑Go程序哦,一会试试。
$ df -h
Filesystem                Size      Used Available Use% Mounted on
rootfs                   13.0M     13.0M         0 100% /
/dev/root                13.0M     13.0M         0 100% /
tmpfs                     8.0K         0      8.0K   0% /dev
tmpfs                    20.0M      1.7M     18.3M   8% /etc
tmpfs                     1.0M         0      1.0M   0% /home
tmpfs                     8.0K         0      8.0K   0% /media
tmpfs                     8.0K         0      8.0K   0% /mnt
tmpfs                    40.0M     17.9M     22.1M  45% /tmp
tmpfs                     4.0M    348.0K      3.7M   8% /var
tmpfs                    40.0M     17.9M     22.1M  45% /opt
/dev/sda2               795.0M    438.8M    356.2M  55% /media/AiDisk_a2
/dev/sda1               118.5G     56.1G     62.4G  47% /media/home
这是磁盘情况(/dev/sda1-2 是我的外接硬盘)。
由于我的路由器是已经刷了Openwrt了,我就不用再刷了,看了一下网友步骤,不外乎:
初始化,设密码;
连LAN口,登陆后台 “http://192.168.99.1” ,访问“http://192.168.99.1/newifi/ifiwen_hss.html”激活SSH;
下载Breed文件newifi-d2-jail-break.ko,scp newifi-d2-jail-break.ko root@192.168.99.1:/tmp;
ssh 登陆, cd /tmp && insmod newifi-d2-jail-break.ko;
系统重启,成功刷入;
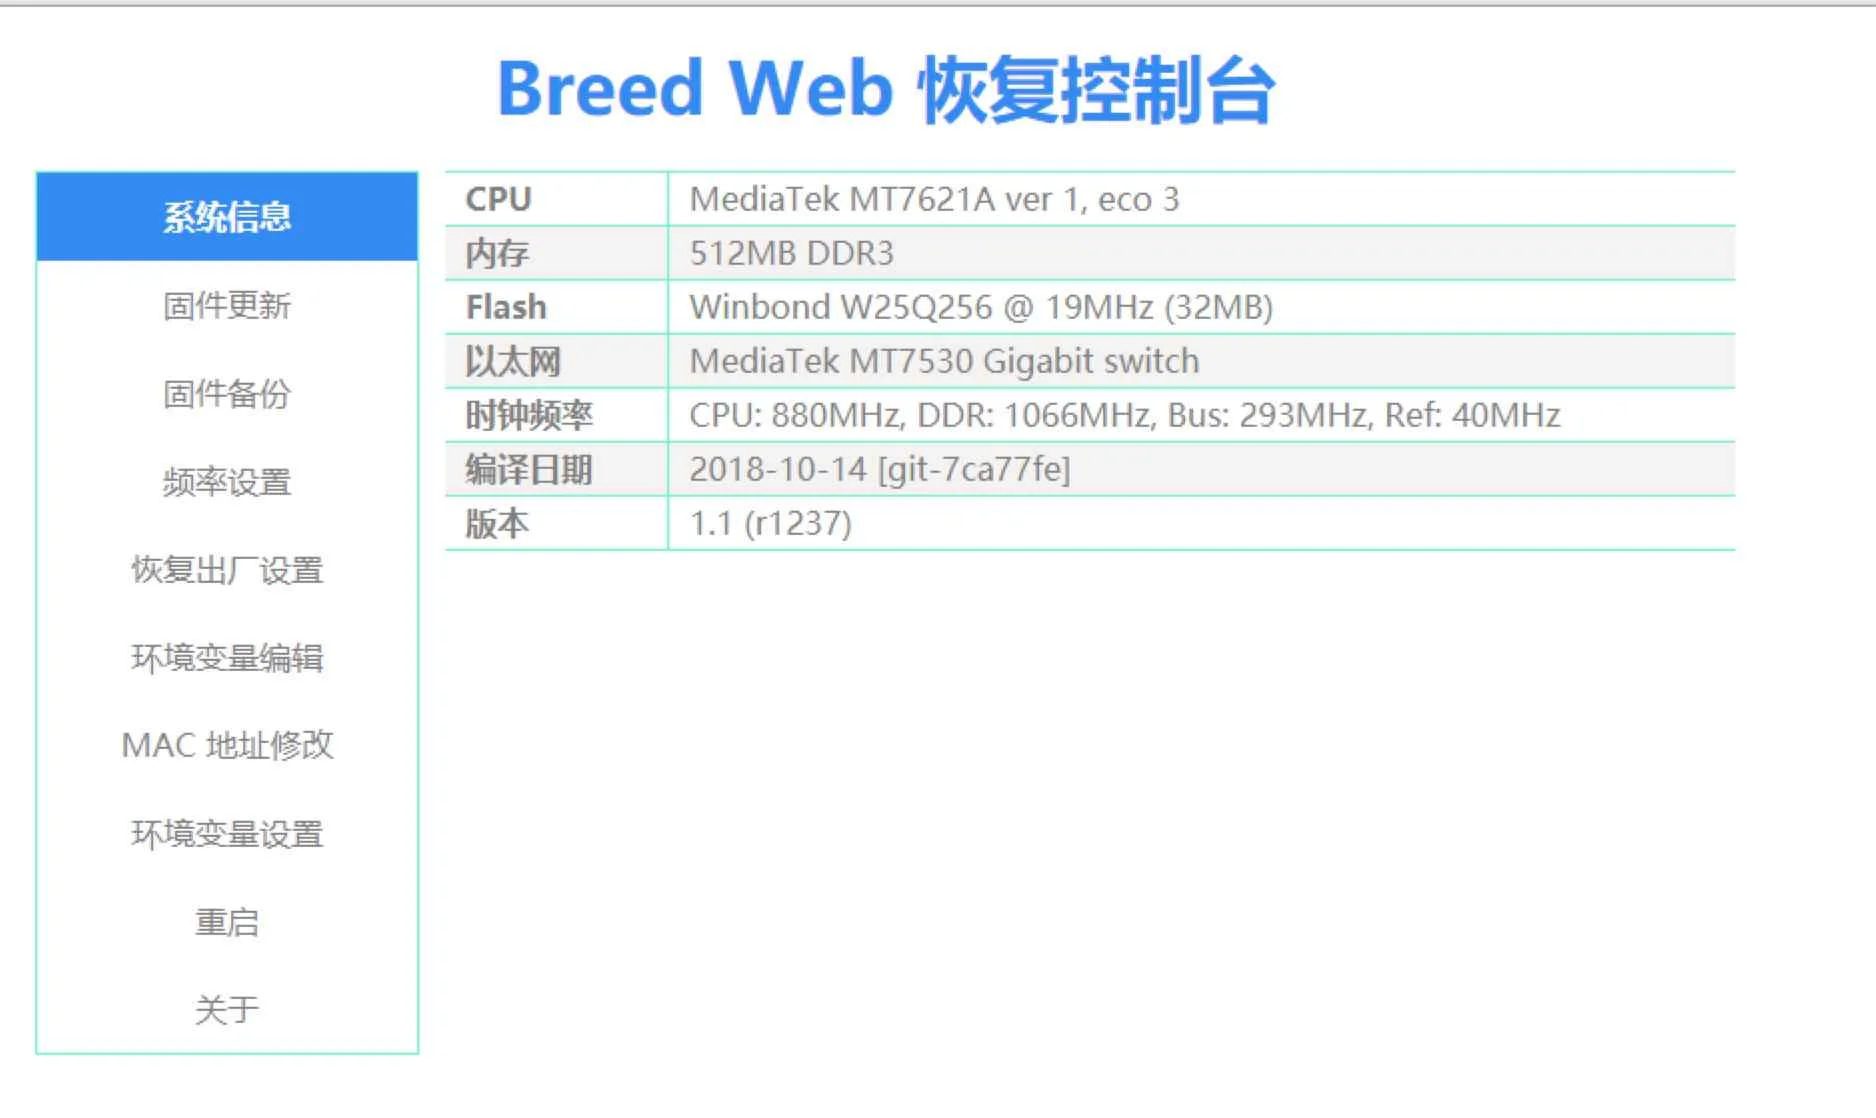
拔掉电源,按住reset后, 插入电源,等几秒,电源灯闪缩,浏览器输入192.168.1.1进入Breed,如下。
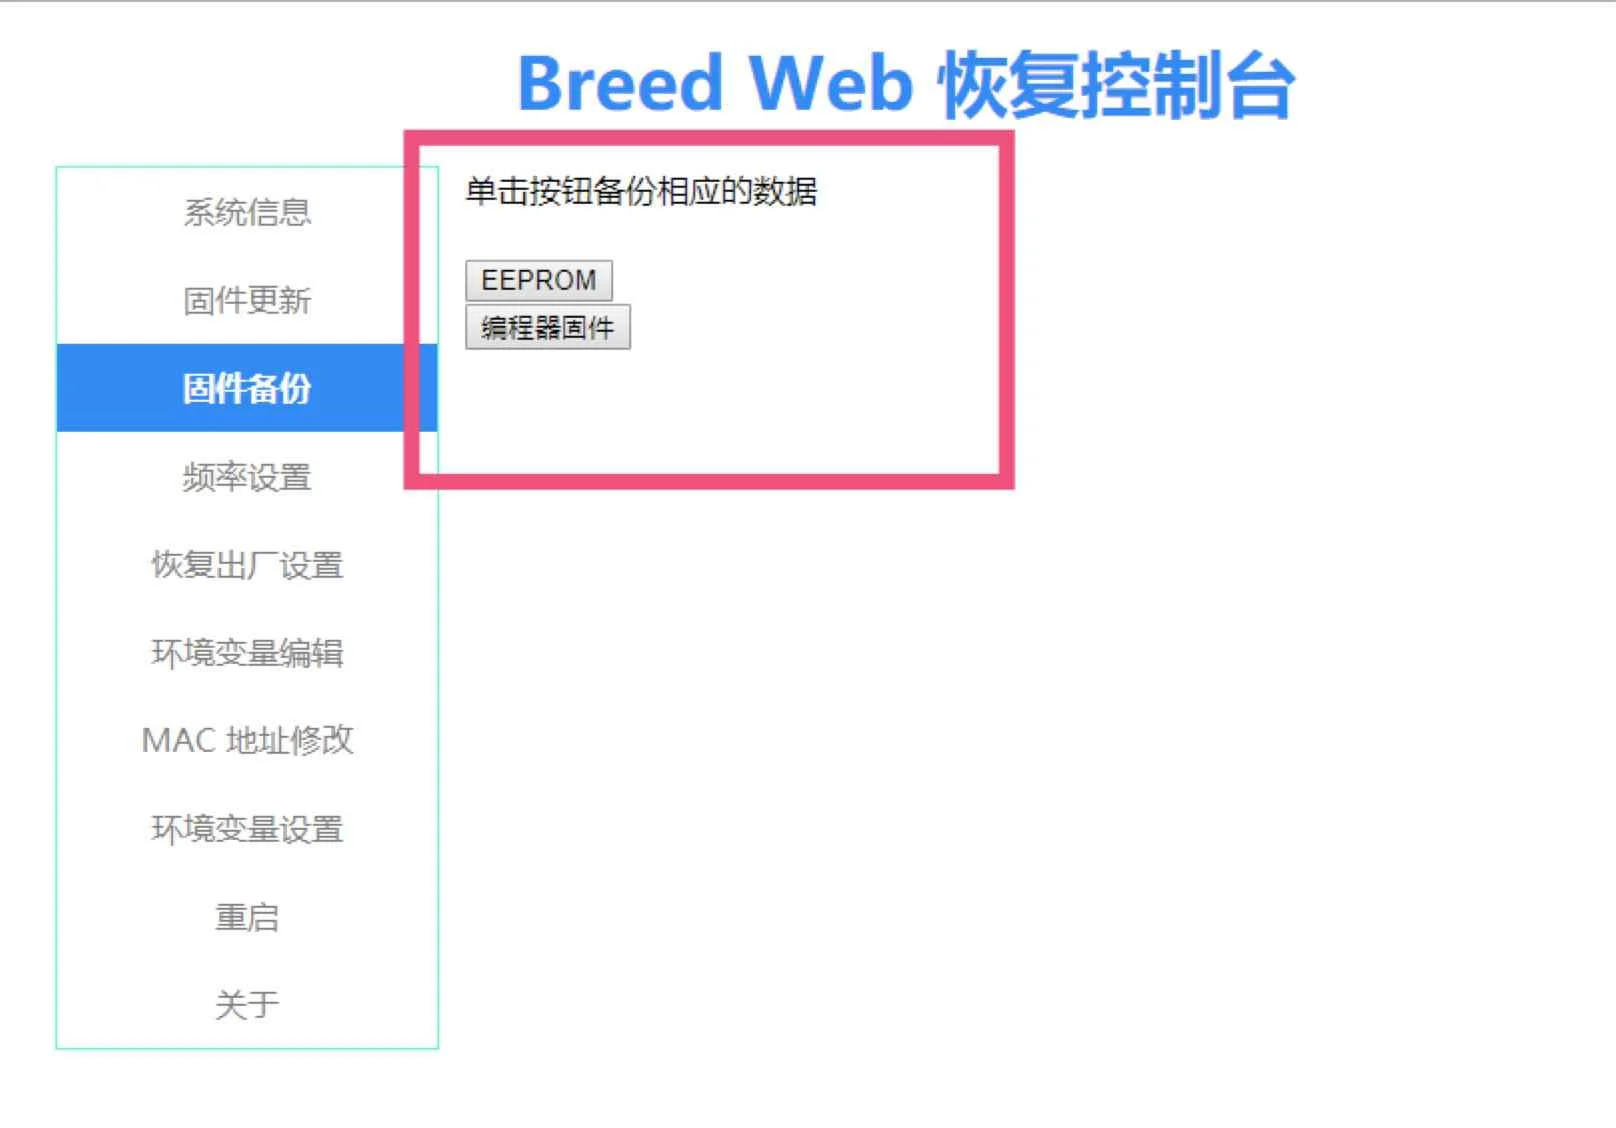
在刷之前,我们备份一下。两个都选一下。
然后我们在固件更新这里就可以 刷机/恢复 我们的固件了。
我原来的Openwrt固件在这里-> 【链接:https://share.weiyun.com/5hDGrBl 密码:9u73g3】
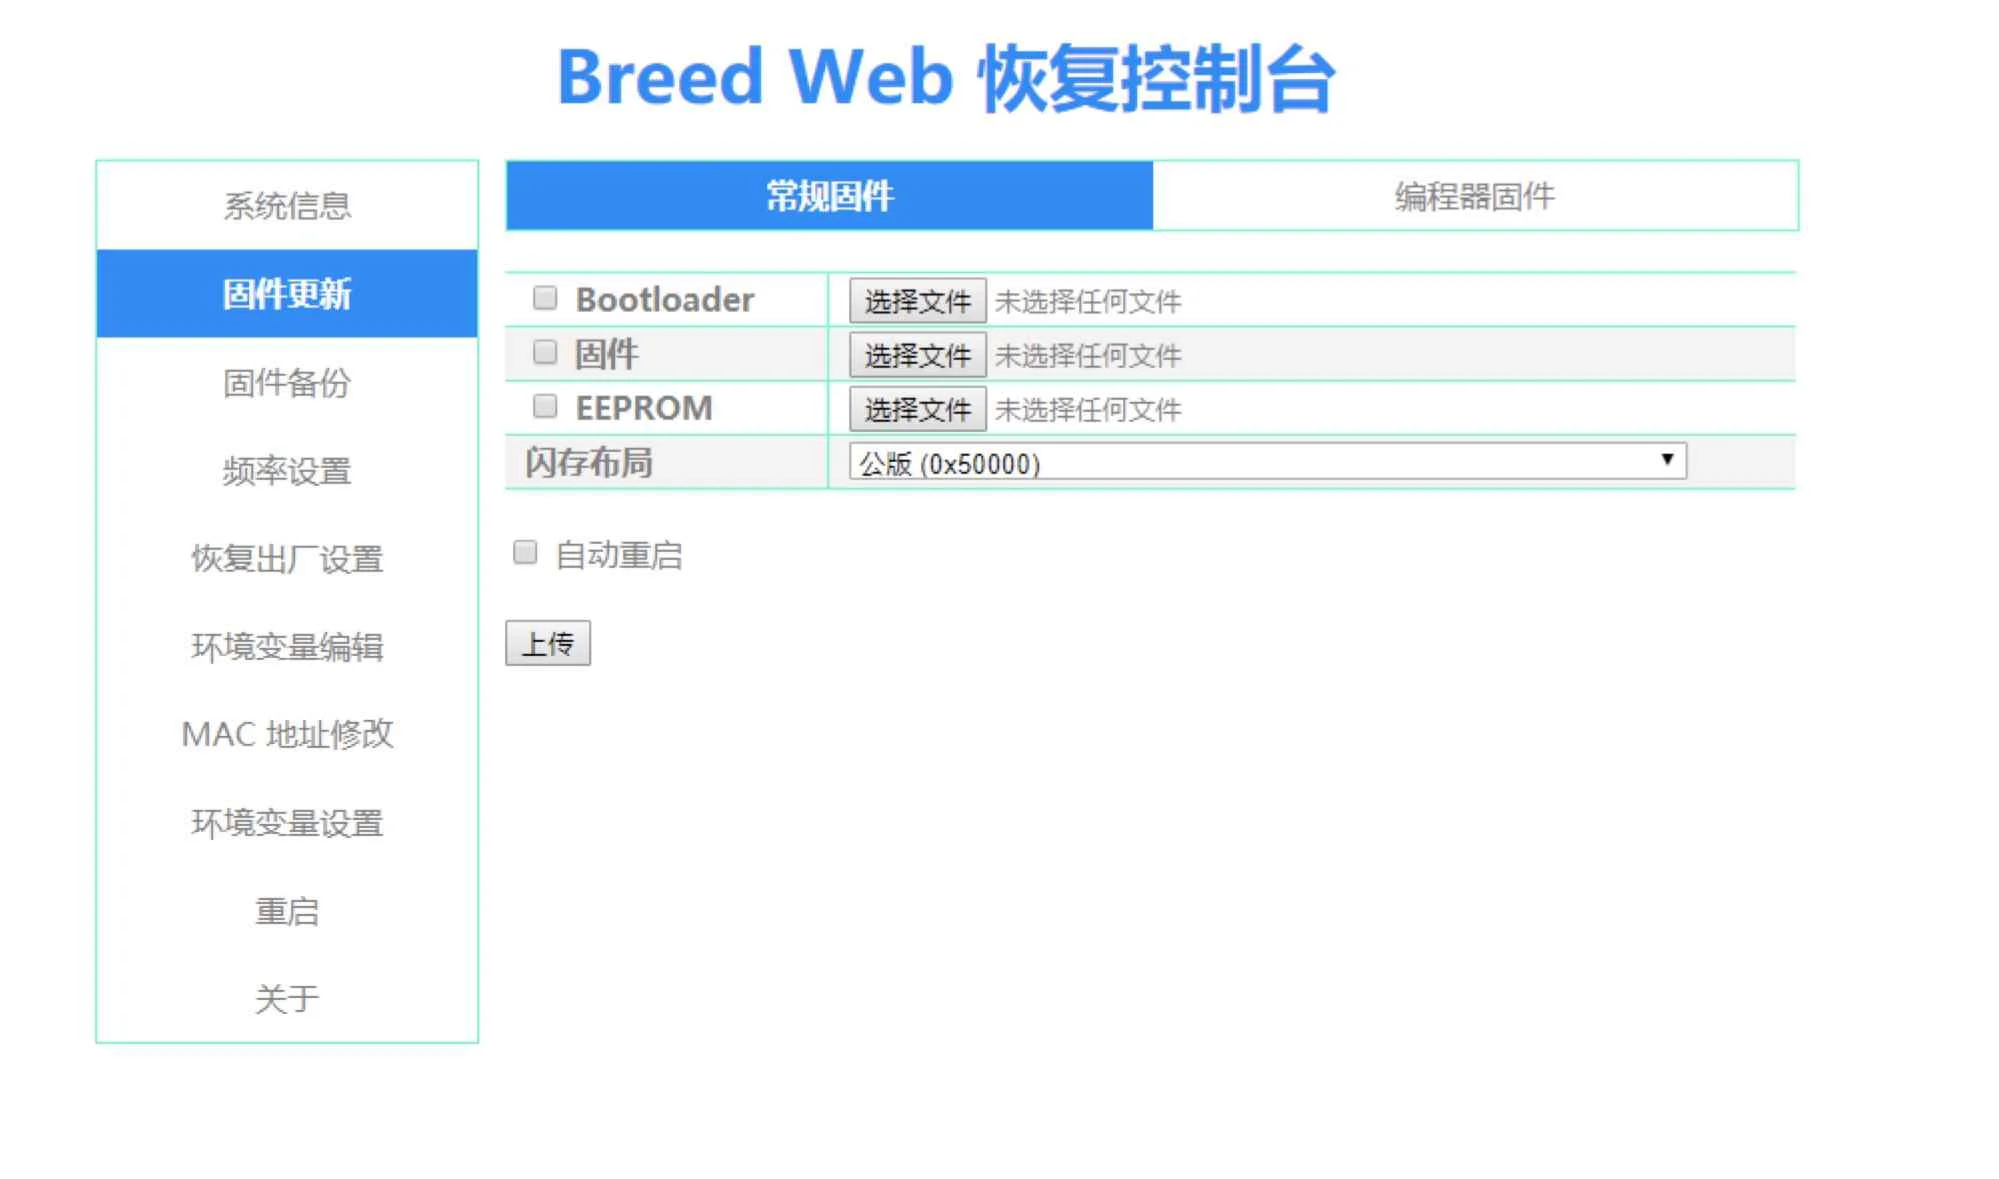
这里有newifi3 d2支持的固件帖子新路由三 NEWifi D2 固件集合贴。
下载h大的Padavan固件 原下载地址“http://opt.cn2qq.com/padavan/” ,下载RT-N56UB1-newif3D2-512M_3.4.3.9-099.trx。 我在微云备份了一个【链接:https://share.weiyun.com/5YyHFA2 密码:iiuf29】
进入上面图片中的固件更新,固件选择刚刚下载的估计,上传,进度完成再等几分钟,重启即可。

启动后默认开启了无线网 PDCN_5G和PDCN, 密码为1234567890。
默认网关地址192.168.123.1, 用户名密码都是admin。
登陆后,大概是这样子。

要配置ShadowSocks,你先要有ShadowSocks服务,可以自己搭建或购买。
我个人是购买的SS服务,毕竟用自己的服务器有被封的概率。我在这里买的,约97RMB一年,基本能满足日常工作生活的需求。
点击ShadowSocks, 就可以配置了,如图是我的配置。
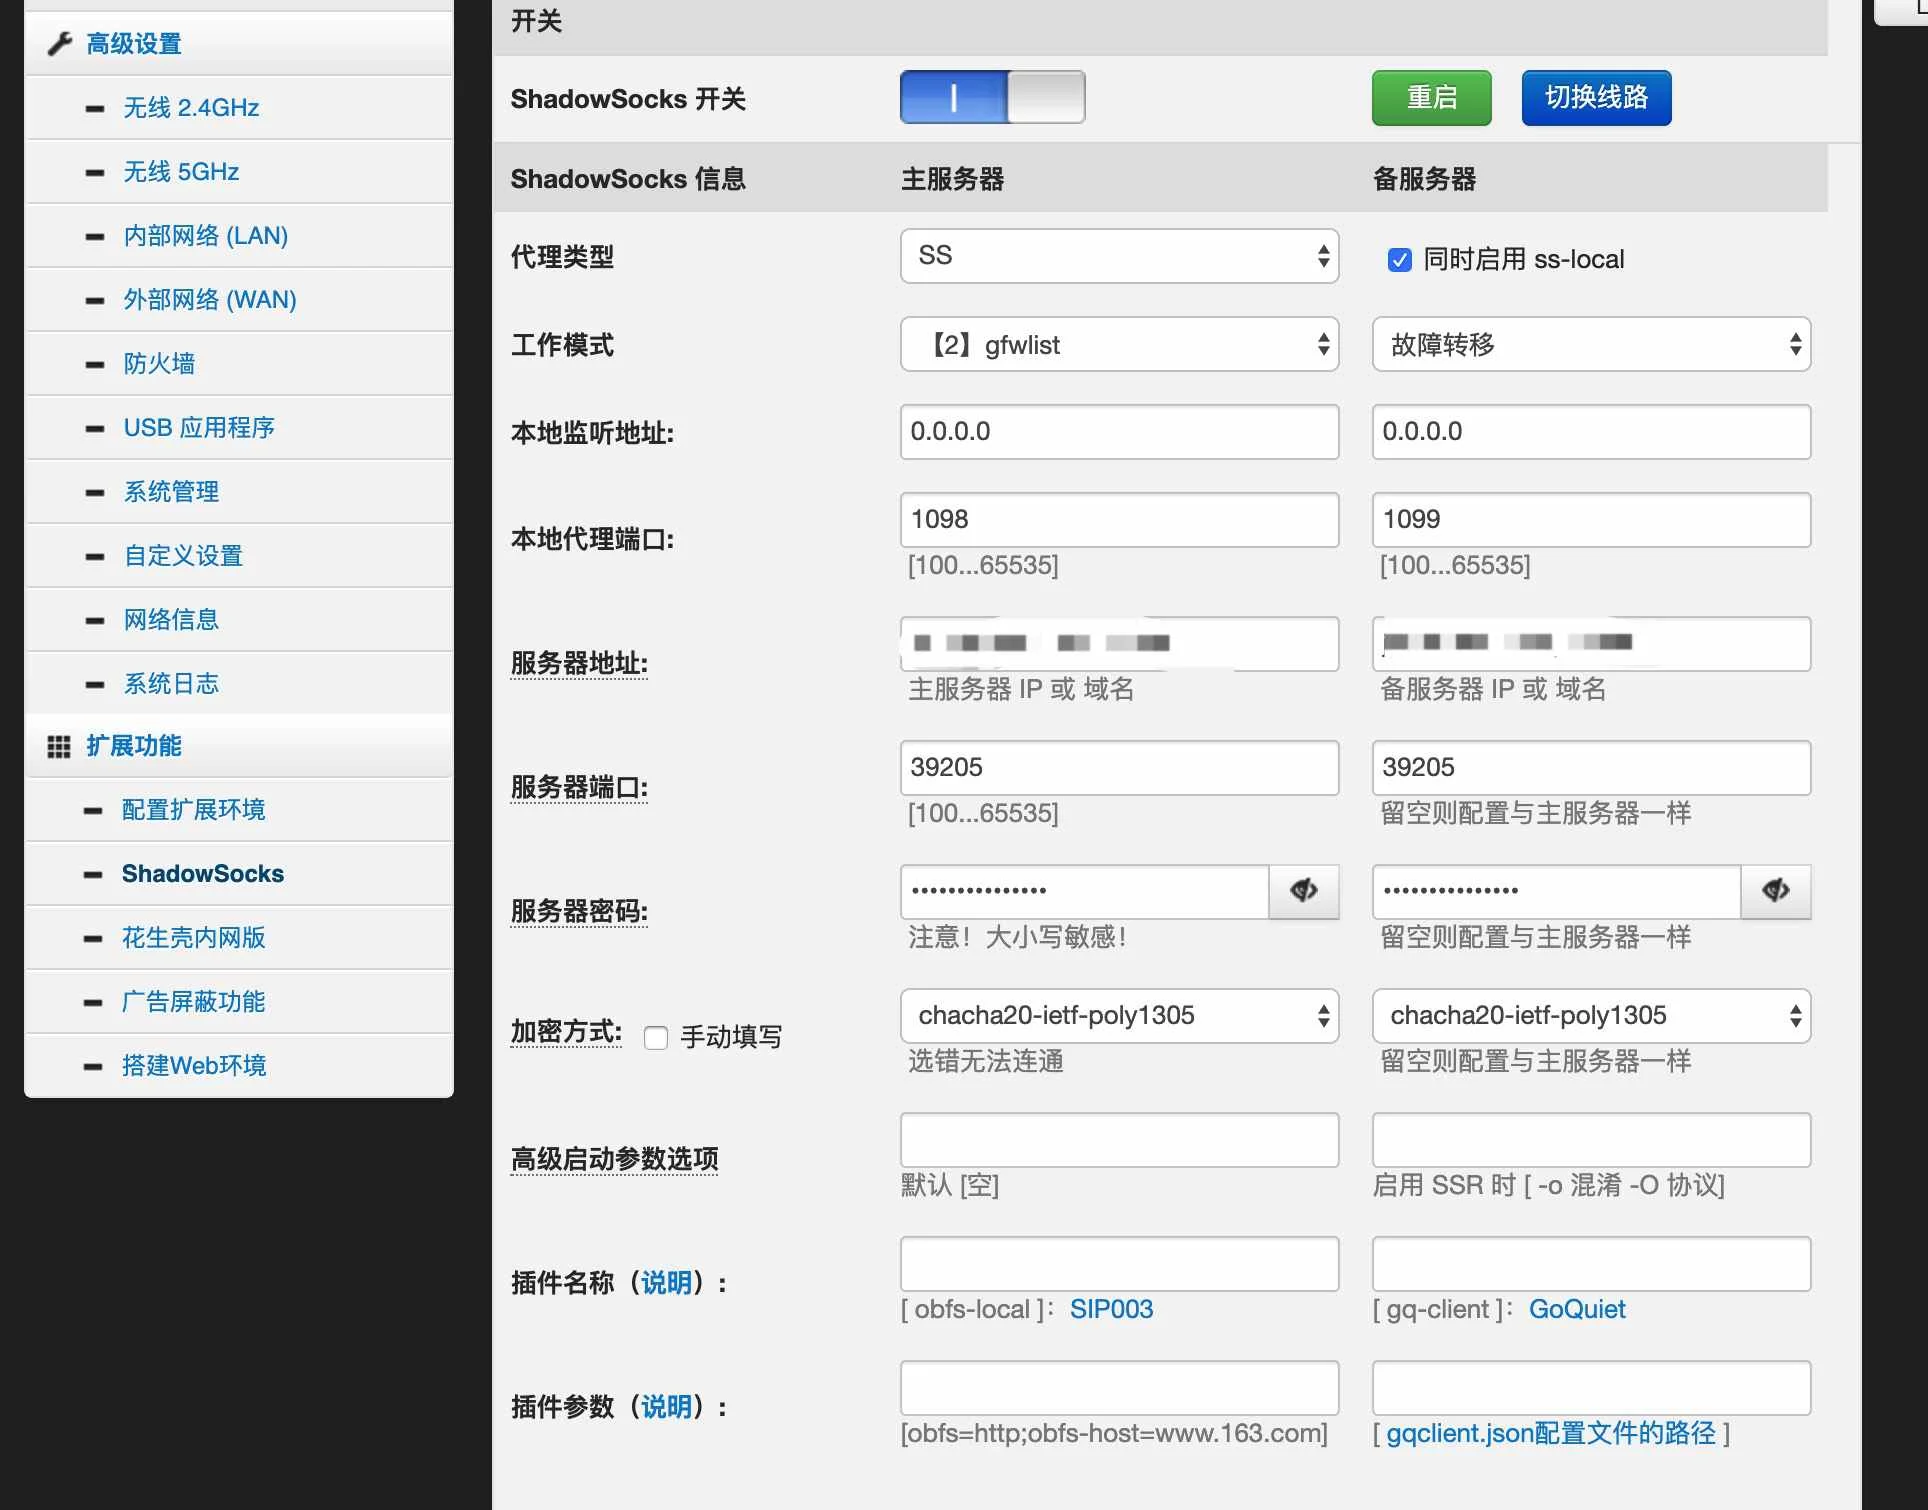
为了达到全局自动代理的效果,我开启了重定向DNS,也就是我所有的DNS都会走dnsmasq, dnsmsq配合chinaDNS自动将国外的站点走翻墙。
GFW -> https://raw.githubusercontent.com/gfwlist/gfwlist/master/gfwlist.txt

配置好后,点击应用本页配置,稍等片刻(可以点击右上角log,查看配置进度),就可以轻松科学上网啦。
这个漏油器有512MB的内存,不跑点什么感觉浪费了。查了一下,go居然可以在上面跑起来。
通过uname -m我们可以看出来,cpu架构为mpis。 我们查到golang支持的如下:
我们写个hello world试一下。
# file openwrt.go

import (
	"fmt"
	"net/http"
)

func main() {
	http.HandleFunc("/hello", func(w http.ResponseWriter, r *http.Request) {
		w.Write([]byte("hello world"))
		return
	})

	fmt.Println("start listen")
	http.ListenAndServe(":12345", nil)
}
编译:
$ GOOS=linux GOARCH=mipsle go build openwrt.go
上传:
$ scp openwrt razeen@192.168.123.1:/tmp
# 输入路由登陆密码,上传成功
# 注意目录。 其他目录可能没有空间
运行:
访问:
$ curl -v http://192.168.123.1:12345/hello
*   Trying 192.168.123.1...
* TCP_NODELAY set
* Connected to 192.168.123.1 (192.168.123.1) port 12345 (#0)
> GET /hello HTTP/1.1
> Host: 192.168.123.1:12345
> User-Agent: curl/7.54.0
> Accept: */*
>
< HTTP/1.1 200 OK
< date: Tue, 01 Oct 2019 16:23:43 GMT
updated: Tue, 01 Oct 2019 16:23:43 GMT
< Content-Length: 11
< Content-Type: text/plain; charset=utf-8
<
* Connection #0 to host 192.168.123.1 left intact
hello world%
完美~
此内容由惯性聚合(RSS阅读器)自动聚合整理,仅供阅读参考。 原文来自 — 版权归原作者所有。