惯性聚合 高效追踪和阅读你感兴趣的博客、新闻、科技资讯
阅读原文 在惯性聚合中打开

推荐订阅源

T
Threat Research - Cisco Blogs
H
Hacker News: Front Page
IT之家
IT之家
I
Intezer
GbyAI
GbyAI
MongoDB | Blog
MongoDB | Blog
博客园_首页
cs.CL updates on arXiv.org
S
SegmentFault 最新的问题
D
Darknet – Hacking Tools, Hacker News & Cyber Security
T
Threatpost
Cisco Talos Blog
Cisco Talos Blog
C
Check Point Blog
P
Proofpoint News Feed
P
Privacy International News Feed
有赞技术团队
有赞技术团队
T
Tailwind CSS Blog
Scott Helme
Scott Helme
U
Unit 42
J
Java Code Geeks
W
WeLiveSecurity
H
Hackread – Cybersecurity News, Data Breaches, AI and More
C
CERT Recently Published Vulnerability Notes
小众软件
小众软件
The Hacker News
The Hacker News
L
LINUX DO - 热门话题
博客园 - 【当耐特】
G
Google Developers Blog
Latest news
Latest news
AWS News Blog
AWS News Blog
NISL@THU
NISL@THU
S
Secure Thoughts
P
Proofpoint News Feed
L
Lohrmann on Cybersecurity
F
Full Disclosure
S
Securelist
K
KPMG report finds enterprise disconnect between AI and its ROI | CIO
Engineering at Meta
Engineering at Meta
Security Archives - TechRepublic
人人都是产品经理
人人都是产品经理
T
Tor Project blog
Recent Announcements
Security Latest
Security Latest
N
News | PayPal Newsroom
A
About on SuperTechFans
Hugging Face - Blog
Hugging Face - Blog
Y
Y Combinator Blog
大猫的无限游戏
大猫的无限游戏
博客园 - Franky
T
The Blog of Author Tim Ferriss

ABB00717

medusa 找不到 ssh module 中文文案排版指北 BugBounty Playbook 小知識 清除 git history 中的機敏資料 編譯器筆記 部落格聚集地 HTB - Busqueda 788. Rotated Digits 396. Rotate Function 幫耳機補血! 紀錄/週刊/ 做過的夢(旅行) 做過的夢 週刊 Vol.18 週刊 Vol.17 週刊 Vol.16 做過的夢(火箭推進器和追蹤導彈) 在 Ubuntu 24.04 中安裝 python2 和 pip2 動態牆 紀錄/音樂/ 用 miniflux 和 Cloudflare Tunnel 自架 RSS Reader 週記 Vol.15 關於用了 GCC 擴充功能,而被批評不夠 Clean Code 這檔事 GDB Makefile HTB - TwoMillion 週記 Vol.14 紀錄/Hack-The-Box/ 週記 Vol.13 ABB00717's Blog 1980. Find Unique Binary String 週記 Vol.12 紀錄/Leetcode/ 在互聯網上,什麼該說,什麼又不該說? 週記 Vol.8 週記 Vol.7 週記 Vol.6 天才之於一種義務 就算 LLM 能解答所有問題,你也不該放棄學習 Stack-Based Buffer Overflow 筆記/書籍/ 《絕佳時間》 週記 Vol.5 偽深刻的自我解構 筆記/Linux-雜項筆記/ 解決 Ubuntu 待機後喚醒異常的問題 將應用程式新增到 GNOME 的 Activities Overview 週記 Vol.4 Assembly Language 週記 Vol.3 筆記/ 文章/ 紀錄/ 資源/ 挑戰 週記 Vol.2 部落格該有的東西 週記 Vol.1 數學符號表 Advent of Code Day 8 Advent of Code Day 7 Obsidian 無痛轉成 Blog Advent of Code Day 6
透過 Ubuntu 26 設定 Windows 11 雙系統並使用 Image Recovery 之踩坑全紀錄
2026-07-01 · via ABB00717

已經一年多完全不碰 Windows 了,但最近突然多了條 512GB 的 SSD,就想把 Windows 裝在上面,做個 Ubuntu + Windows 的 Dual Boot 機器。踩了超多坑,紀錄一下整個過程。

我的硬體設備:

  • Disk E:完全空的硬碟
  • Disk U:存著完整的 Ubuntu 系統(在安裝前先拔掉了)
  • USB E:完全空的隨身碟
  • USB D:能夠存資料的隨身碟

強烈建議在操作以前先用 rescuezilla 備份。

  • 先去官網下載 Windows.iso 檔案
  • Intel 官網 下載 SetupRST.exe,執行 SetupRST.exe -extractdrivers SetupRST_extracted。如果要用 wine 跑會有很多 bug 要修,我是直接在本來的 Windows 虛擬機執行完以後再把結果存到 USB D
  • 安裝 Ventoy,把他它寫進 USB E,再來把 Windows.iso 拖進去。也可以用 dd 直接寫入。
  • 重開電腦,在 BIOS 把 Secure Boot 關掉,接著狂按 F9 選擇使用 Ventoy
  • 進入 Ventoy 介面,選 Windows Normal Mode

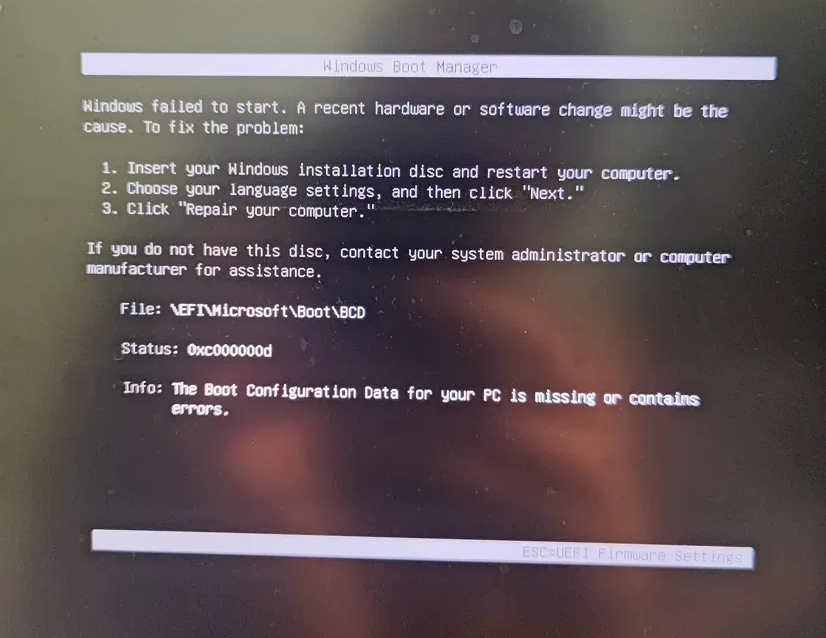
那時遇到這個畫面,後來發現是 Windows.iso 沒有存好,重新存一次就解決了。接著進入 Windows 安裝引導畫面,選 Install Windows 11。

如果你有備份的鏡像檔,可以選 Repair my PC,然後 跳到這裡

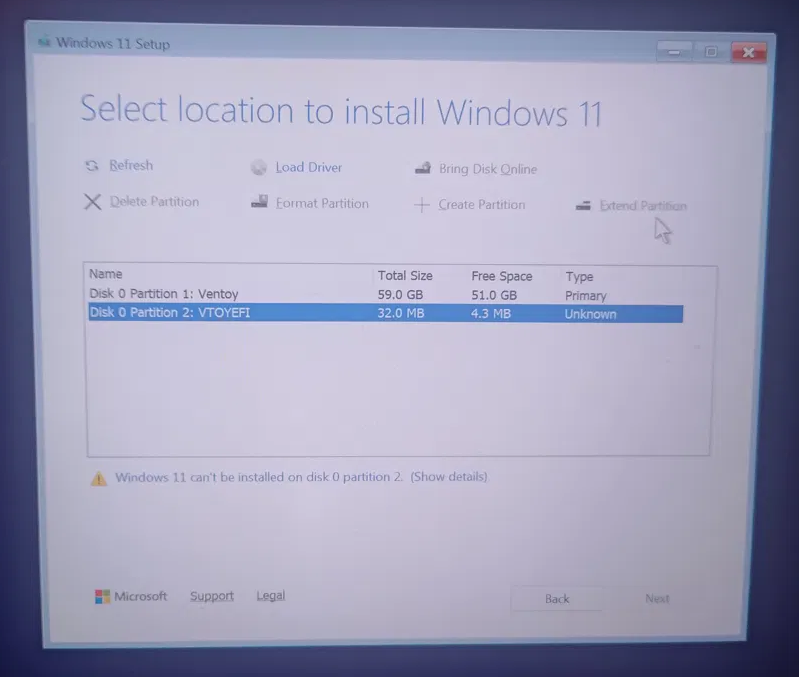
沒意外的話,Windows 完全找不到你要安裝的 Disk E:

這時要從 USB D 裡頭找剛剛下載的 Driver,把每個資料夾都翻一遍,你最後大概會找到一個叫做 Intel RST VMD Controller 的 Driver,點下去後就可以看到 Disk E 了!如果沒用那就裝 Intel RST VMD Managed Controller 看看。最後一直點點點就可以安裝完 Windows 11 了。

Image Recovery

假設現在你還沒安裝 Windows,Disk E 還是空的。可能沒影響,但在這裡我 USB E 改成了Windows 11 Installation Media。

在 Windows 安裝引導程式的最開始選擇「Repair your computer」。如果你可以成功進入藍色引導畫面,選 Troubleshoot > Advanced Options > See more recovery options > System Image Recovery,選你的鏡像檔,接著應該就可以了。

但我這邊點下去會一直重新開機,使用舊版的引導程式一直沒有反應,會一直跳轉回去。在 System Image Recovery 點下去會出現:
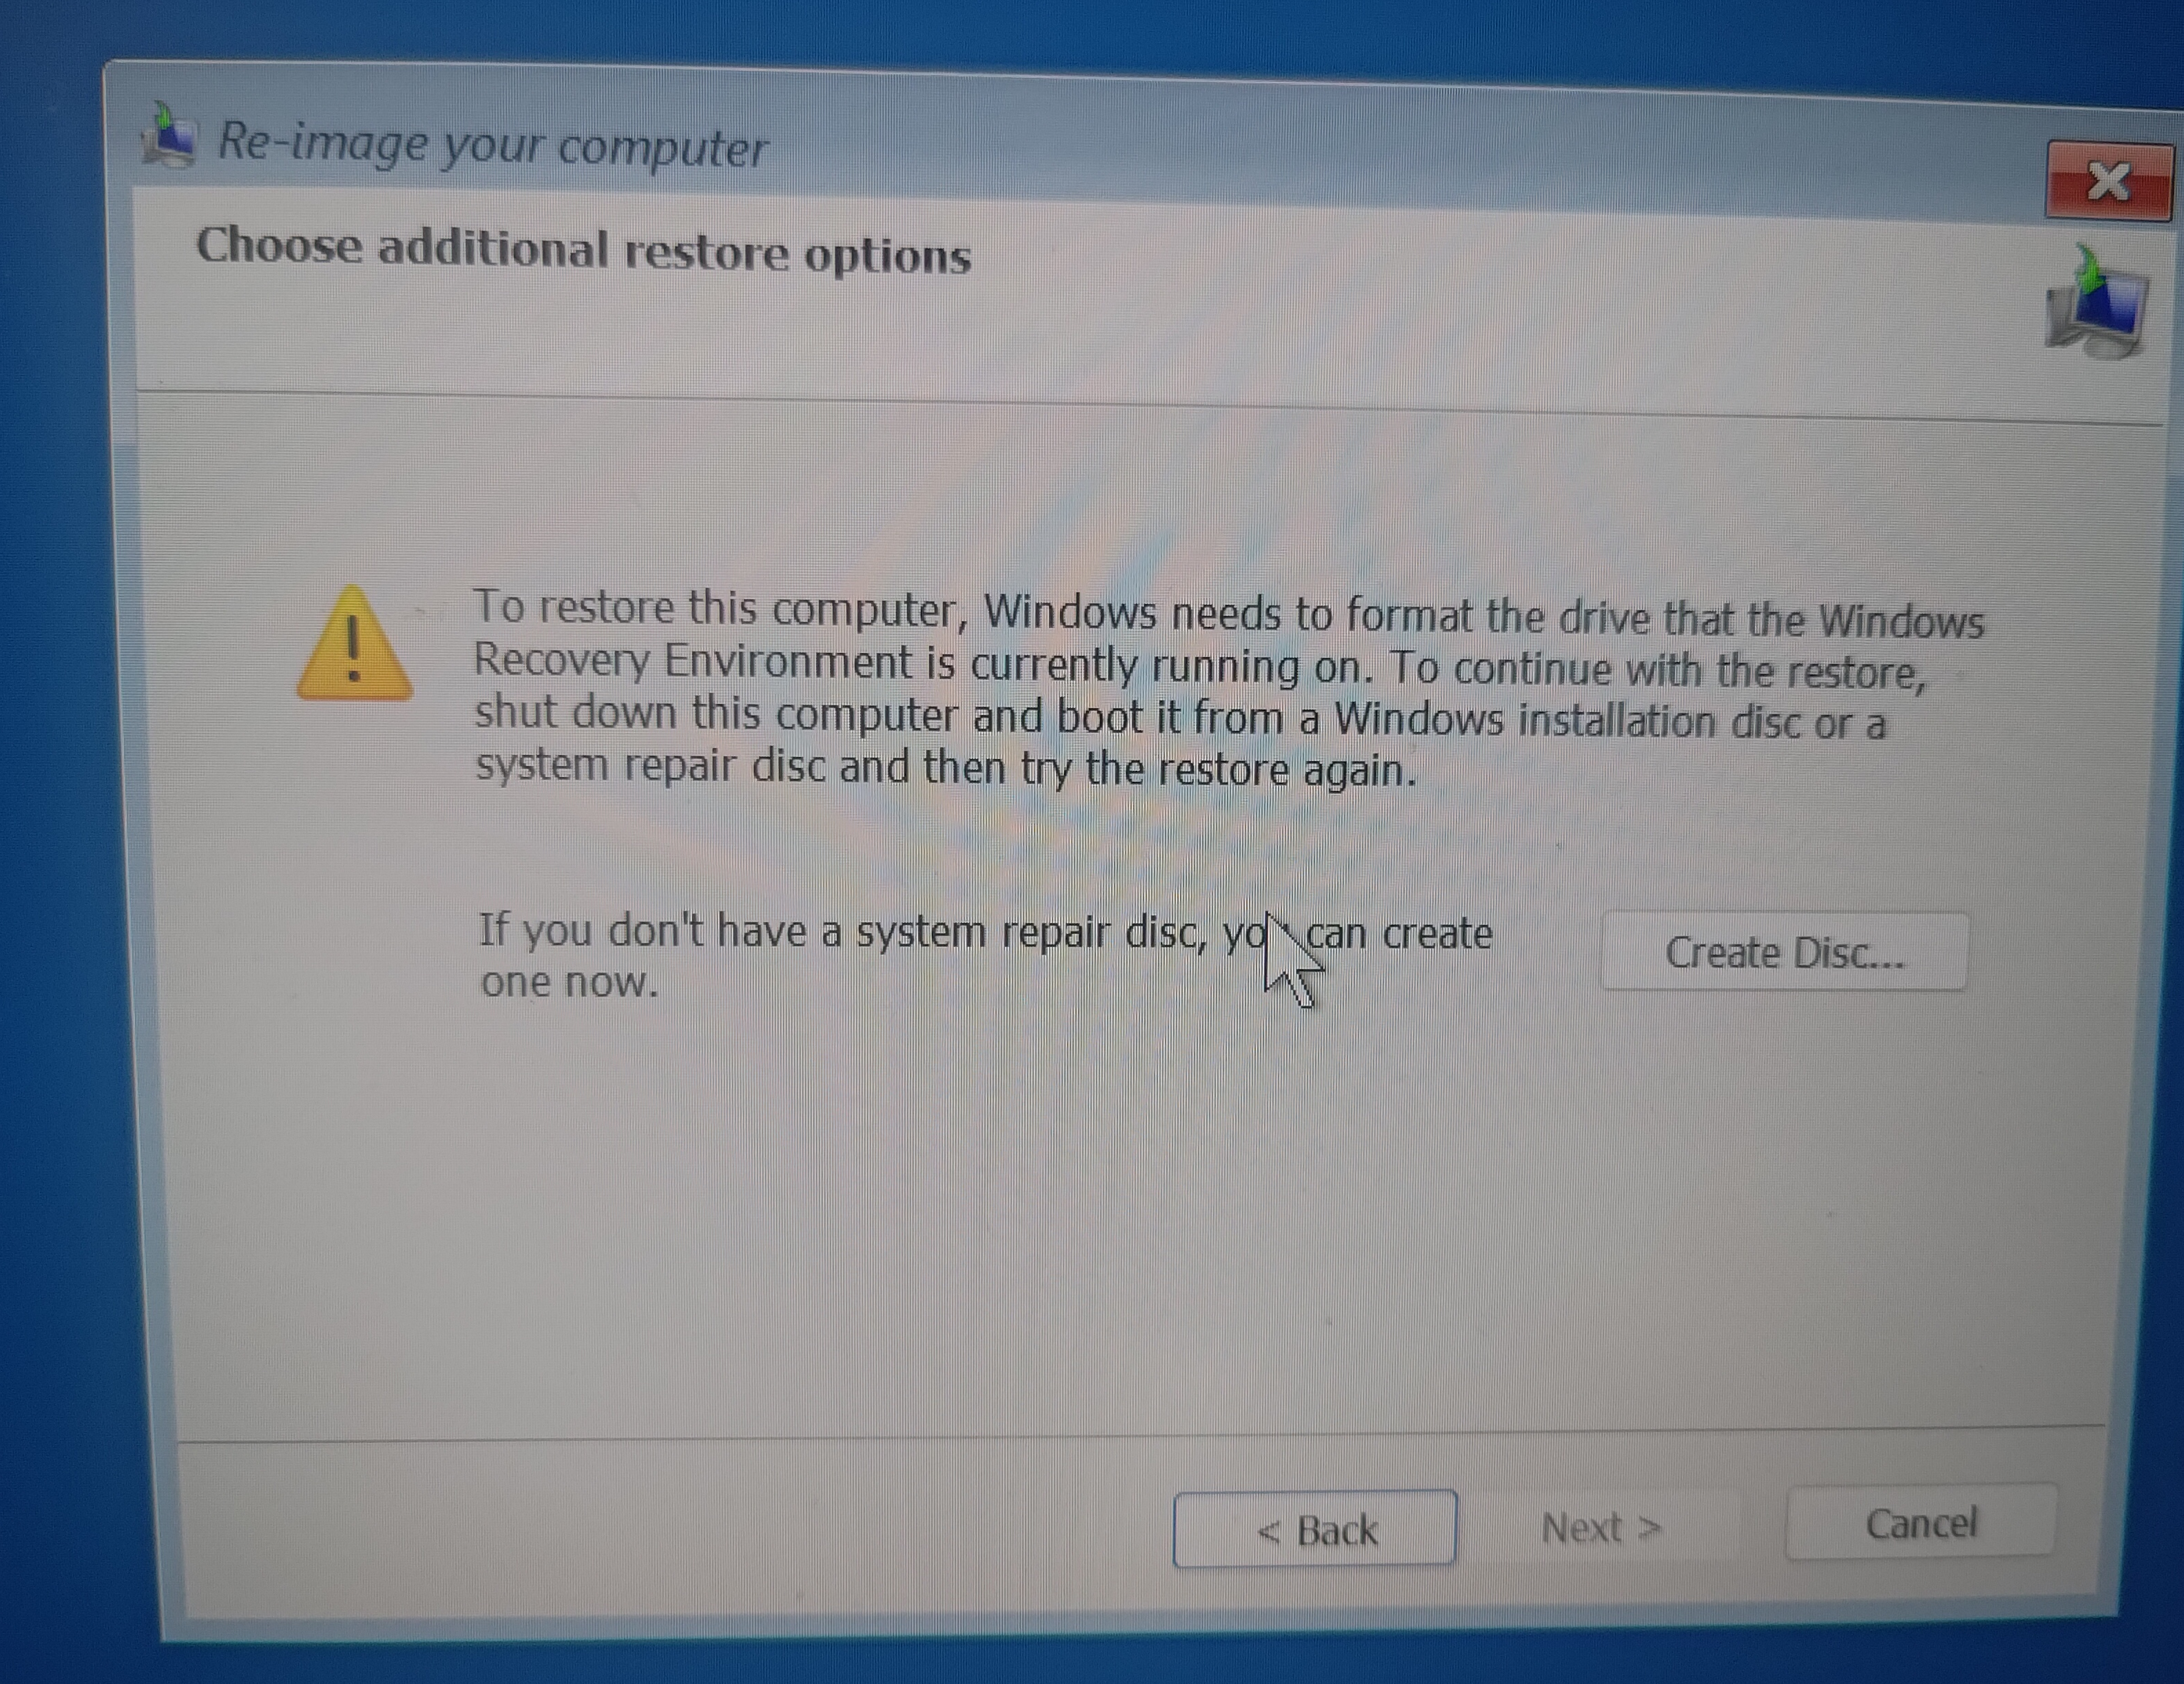
我後來在 Windows 安裝引導程式的最開始(點 Repair your computer 介面那裡)按 shift + f10 打開 CMD。先透過 drvload <Intel RST VMD Controller 的路徑> 載入 Driver,wbadmin get disks 就會顯示你的 Disk E。再來輸入 diskpart & list volume,並記住 Disk E 的 Disk Ltr。

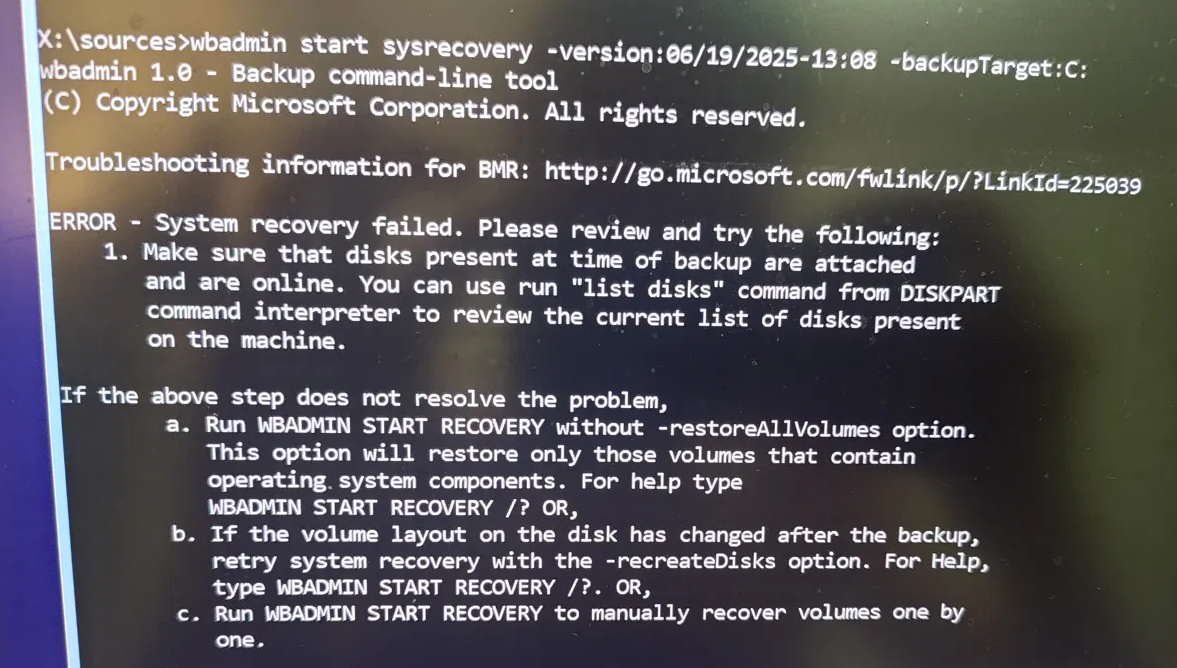
回到 CMD 輸入 wbadmin start sysrecovery -version:MM/DD/YYYY-HR:MN -backupTarget:<Disk Ltr>:(假設備份 Image 存在 C,那就是 wbadmin start sysrecovery -version:06/19/2025-13:08 -backupTarget:C:

預計回報下列錯誤訊息:

這是因為現在磁碟佈局和備份時不一樣,在末尾加上 -recreateDisks 就可以了。如果出現:
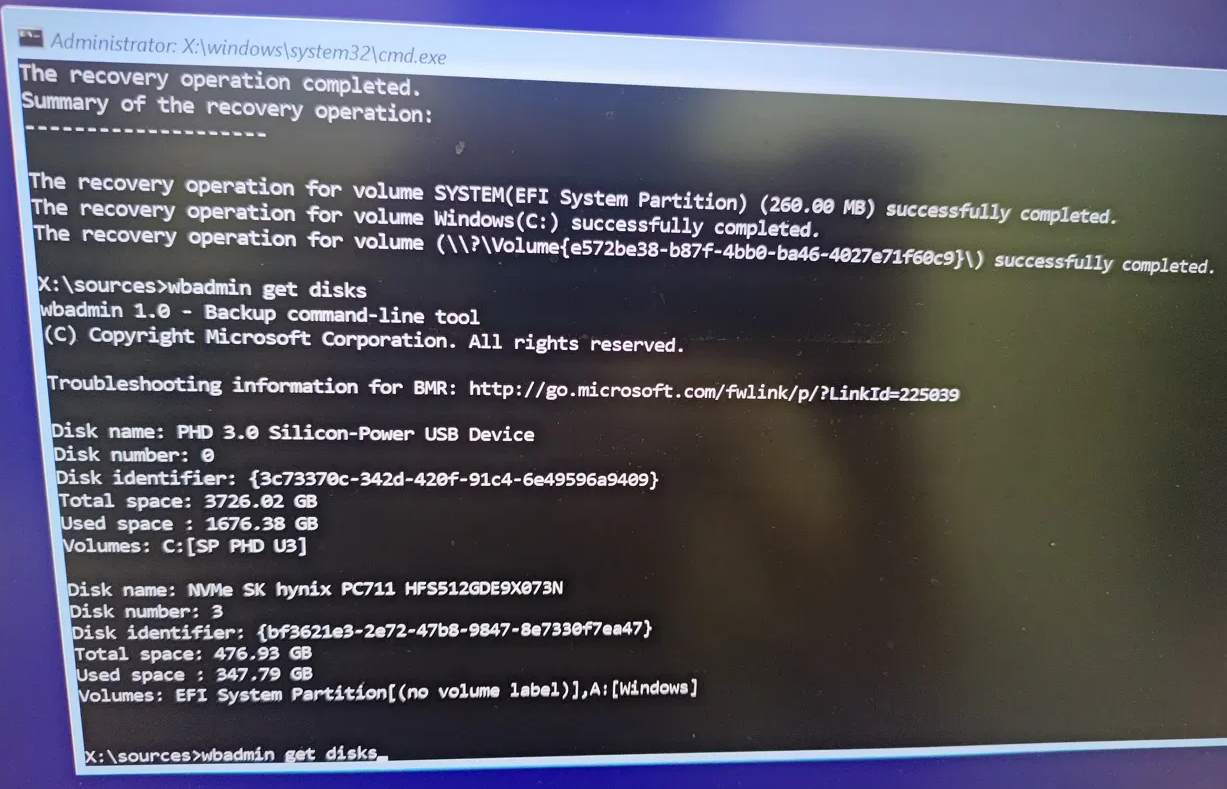
就表示成功了!接下來直接開機就可以看到你之前備份的 Windows 了。

設定 UEFI

在這之後,開機都會優先選擇 Windows。而且如果你按 F9,大概會發現 UEFI 只剩下 Windows Boot Manager,但在 Windows 輸入 bcdedit /enum firmware 大概會發現 Ubuntu 的 firmware displayorder 順序還在最前面。這是因為剛剛在重建 EFI 系統分割區的時候,把 UEFI 韌體裡記錄的開機項目清單也一併覆蓋了,只剩下 Windows Boot Manager。

解決方法很簡單,加回去就好了。在 F9 開機選單手動選進 Ubuntu,然後在 Terminal 輸入:

$ sudo update-grub
$ sudo grub-install --target=x86_64-efi --efi-directory=/boot/efi --bootloader-id=ubuntu --recheck

這樣就完成了!

馬的裝個 Windows 而已,搞了我四個小時 = = 希望這篇文章可以讓後來者省下不少時間 Orz。