








分三個部份:
- 在樹梅派上成功安裝和設定 miniflux
- 用 Nginx 設定 miniflux 的 Proxy(可選)
- 用 Cloudflare Tunnel 穿透內網
本篇文章的安裝環境
$ fastfetch —logo none
- OS: Ubuntu 25.10 aarch64
- Host: Raspberry Pi 4 Model B Rev 1.5
- Kernel: Linux 6.17.0-1003-raspi
- Uptime: 19 hours, 33 mins
- Packages: 698 (dpkg)
- Shell: bash 5.2.37
- Terminal: /dev/pts/1
- CPU: BCM2711 (4) @ 1.80 GHz
- GPU: Broadcom bcm2711-vc5 [Integrated]
- Memory: 607.06 MiB / 3.69 GiB (16%)
- Disk (/): 3.12 GiB / 57.45 GiB (5%) - ext4
- Locale: C.UTF-8
請自行根據不同的安裝環境參考對應的文檔。
在 Ubuntu 設定安裝源:
$ echo "deb [trusted=yes] https://repo.miniflux.app/apt/ * *" | sudo tee /etc/apt/sources.list.d/miniflux.list > /dev/null
$ sudo apt update && sudo apt install miniflux
設定 Postgres 當作資料庫:
$ sudo -u postgres -i
$ createuser -P miniflux
Enter password for new role: ******
Enter it again: ******

$ createdb -O miniflux miniflux
$ psql
=# ALTER USER miniflux WITH SUPERUSER;
組態 /etc/miniflux.conf:
# See https://miniflux.app/docs/configuration.html

RUN_MIGRATIONS=1
WEBAUTHN=1
DATABASE_URL = user=miniflux password=miniflux dbname=miniflux sslmode=disable
套用組態:
$ miniflux -migrate -config-file /etc/miniflux.conf
level=INFO msg="Running database migrations" current_version=125 latest_version=125

$ miniflux -create-admin -config-file /etc/miniflux.conf
Enter Username: miniflux
Enter Password:
level=INFO msg="Created new admin user" username=miniflux user_id=1
將 miniflux 切換回普通使用者:
$ sudo su - postgres
$ psql
=# ALTER USER miniflux WITH NOSUPERUSER;
重新啟動 systemctl:
$ systemctl restart miniflux
$ systemctl status miniflux
記得以後如果要用 miniflux,都請指定自訂的 -config-file。 比方說,如果要重新設定密碼:
$ miniflux -config-file /etc/miniflux.conf -reset-password
其他設定選項
筆者在使用時,發現常常遇到 Miniflux is not able to reach this website due to a network error 的問題:
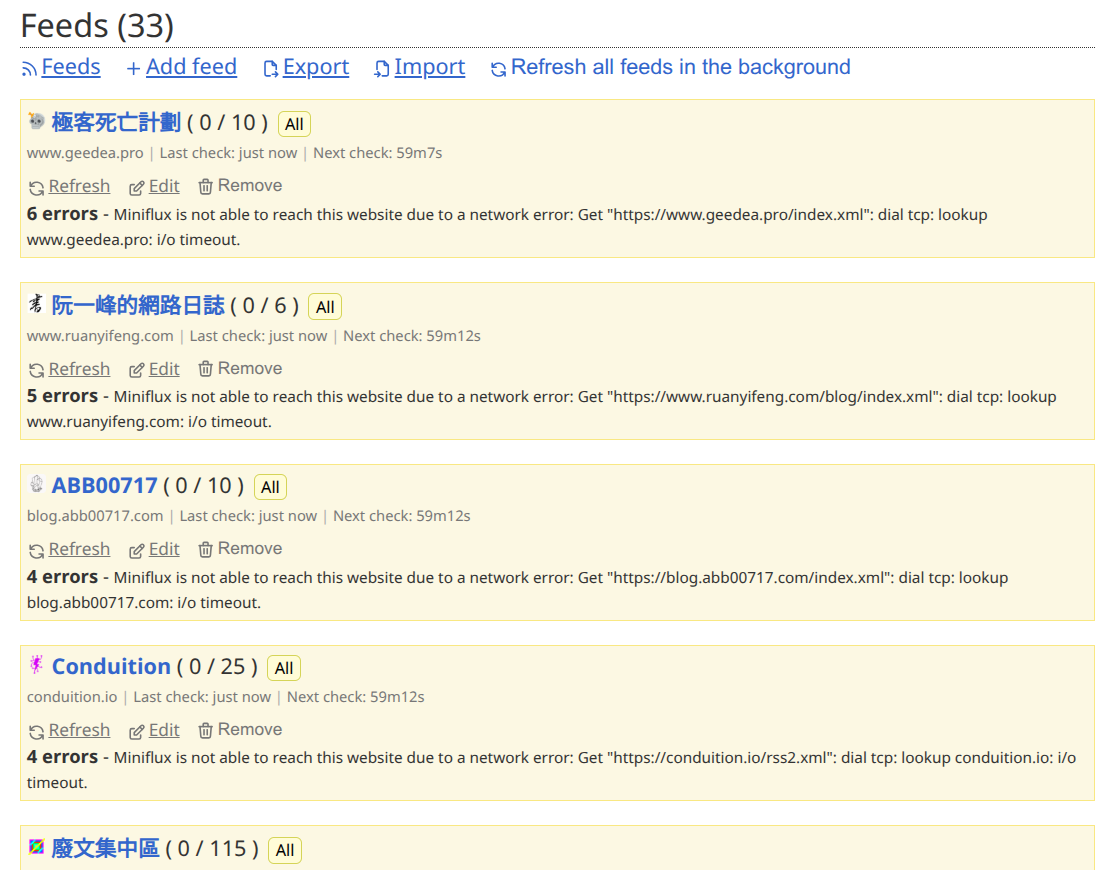
根據作者自述,這只是因為暫時的網路問題,miniflux 本身沒辦法做什麼。所以我改了幾個設定:
- 把
POLLING_PARSING_ERROR_LIMIT設定成0 - 把
FORCE_REFRESH_INTERVAL設定成1,讓 Refresh all feeds in the background 的最短間隔縮短到一分鐘 - 降低瞬間併發量和放寬等待時間
所以還是會有 network error 的問題,這些設定只是降低問題的影響。以下是我的組態,你可以在這裡看所有可用的選項:
# See https://miniflux.app/docs/configuration.html

RUN_MIGRATIONS=1
HTTPS=true
DATABASE_URL = user=miniflux password=<secret> dbname=miniflux sslmode=disable

FORCE_REFRESH_INTERVAL=1
HTTP_CLIENT_TIMEOUT=60
BATCH_SIZE=20
HTTP_CLIENT_MAX_BODY_SIZE=15728640
WORKER_POOL_SIZE=2
POLLING_FREQUENCY=5
POLLING_LIMIT_PER_HOST=2
POLLING_PARSING_ERROR_LIMIT=0
設定 Nginx(可選)
其實不一定要 Nginx,如果沒有下一步 Cloudflare 指定通訊埠(Port)應該也可以直接用。我用只是我習慣了。
設定 /etc/nginx/nginx.conf:
events {
    worker_connections 1024;
}

http {
    server {
        listen 80;
        server_name _;

        location / {
            proxy_pass http://127.0.0.1:8080;
            proxy_set_header Host $host;
            proxy_set_header X-Real-IP $remote_addr;
            proxy_set_header X-Forwarded-For $proxy_add_x_forwarded_for;
            proxy_set_header X-Forwarded-Proto $scheme;
        }
    }
}
server_name:可以輸入自訂的網域名稱,Nginx 就可以透過分辨輸入的網域來區分流量- 正確設定
proxy_set_header才能正確顯示流量來源,若沒有設定,則全部都會顯示「來自本地端」 - 因為 Cloudflare Tunnel 就已經保證外部流量都是加密的,所以就省略了 SSL 的設定。
設定 Cloudflare Tunnel
網頁的頁面容易變動,最好是照著官方最新的教學按。總之,Zero Trusts → Networks → Connectors → Create a Tunnel → Cloudflared → 接著就一通亂點,然後跟著安裝提示安裝,應該就完成了!
如果你有多個 Cloudflare Tunnel 的話,你可以透過 cloudflared 的組態檔管理,也可以透過 systemd。因為前者已經有教學了,所以我這裡選擇後者。更改 /etc/systemd/system/cloudflared@.service 的 EnvironmentFile 和 ExecStart:
[Unit]
Description=cloudflared tunnel %I
After=network-online.target
Wants=network-online.target

[Service]
TimeoutStartSec=15
Type=notify
EnvironmentFile=/etc/default/cloudflared-%i
ExecStart=/usr/bin/cloudflared --no-autoupdate tunnel run --token ${TUNNEL_TOKEN}
Restart=on-failure
RestartSec=5s

[Install]
WantedBy=multi-user.target
原本應該會是 /etc/default/cloudflared.service,將裡面的 <secret> 萃取出來,接著新增 /etc/default/cloudflared-miniflux:
TUNNEL_TOKEN=<your_dirty_little_secret>
依樣畫葫蘆以後:
$ ls cloudflared*
cloudflared-miniflux  cloudflared-ssh
都用好就重新載入和設定 systemd:
sudo systemctl daemon-reload

sudo systemctl start cloudflared@miniflux
sudo systemctl start cloudflared@ssh

sudo systemctl enable cloudflared@miniflux
sudo systemctl enable cloudflared@ssh
接著就可以了!好好享受吧!

參考資料
Postgres:
Miniflux:
- https://miniflux.app/docs/database.html
- https://miniflux.app/docs/debian.html
- https://blog.starry-s.moe/posts/2022/miniflux-build/
Nginx:
Cloudflare: