第一次接触Canokey还是在2021年,当时跟风买了CanoKey Pigeon首发,到手以后把GPG密钥塞进去再加到几个网站做认证器以后就一直是半吃灰状态,毕竟网站的登录不会天天掉,而GPG更是一万年没人给我发加密的信息,连用来git签名的次数都少(我懒)。
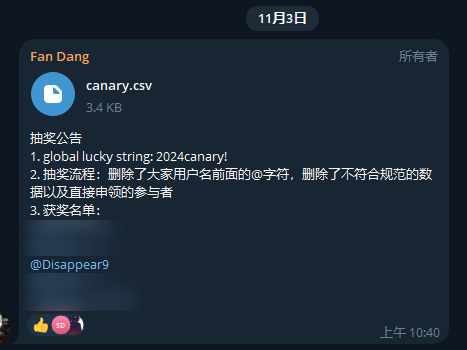
前段Canokey群抽奖送Canary测试版,本人有幸中得一个:
那这不再折腾一下似乎就有点不合适了。
硬件信息:
Canokey的功能主要有这几大块:
1
2
3
4
WebAuthn (Passkey) OTP OpenPGP PIV
我们分别来介绍怎么玩(也是给自己留个备忘)。
然后就可以开始用作网站登录的认证了,这里不再赘述。
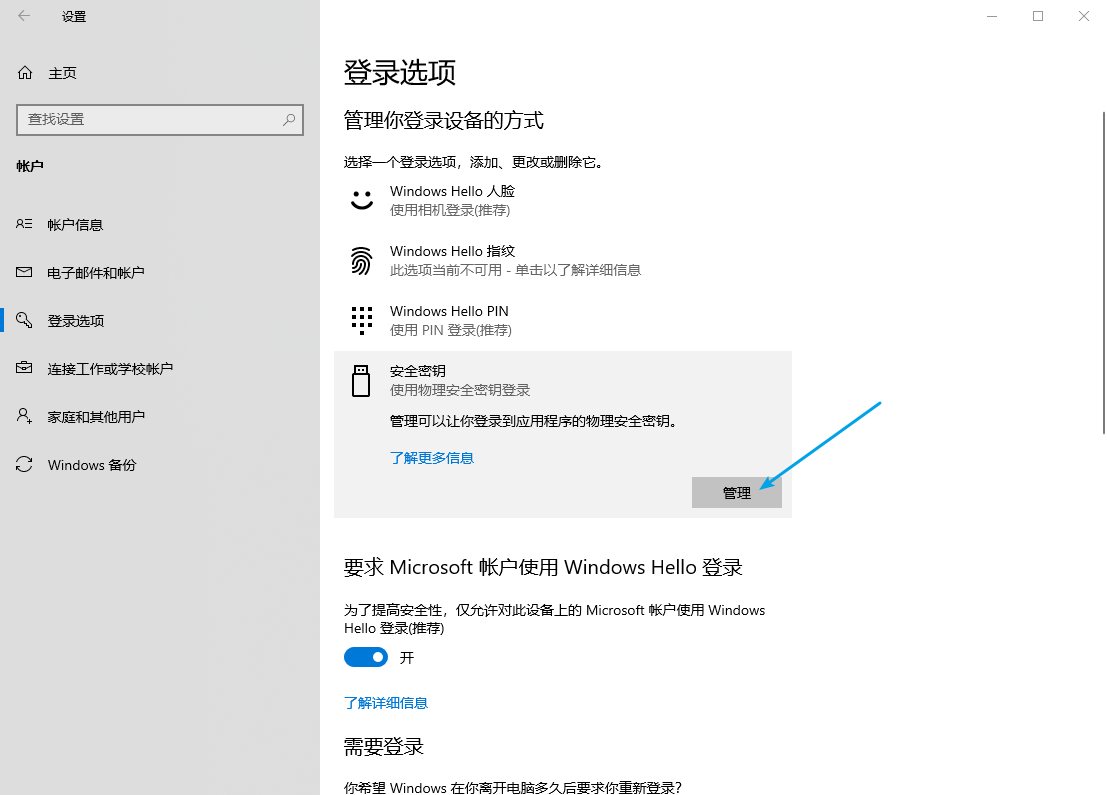
参考WebAuthn (Passkey)
本人测试过在当前环境下只有 Discoverable Credential(Resident Key)是可用的,non-discoverable credentials无论是使用 Windows 自带的 SSH 还是用 SK SSH Agent 转发均无法使用,原因未知,请不吝赐教。putty-cac 本人没有测试过。
1 ssh-keygen -t ed25519-sk -O resident
将生成的公钥文件 ~/.ssh/id_ed25519_sk.pub 中的内容添加到目标服务器的 authorized_keys 文件中。~/.ssh/id_ed25519_sk 后就可以使用了。
建议是别用 Stratum - Authenticator App (https://github.com/stratumauth/app )
参考Canokey 指南:OTP,FIDO2,PGP 与 PIV
1 2 3 4 5 6 7 8 9 10 11 12 13 14 15 16 17 18 19 20 21 22 23 24 25 26 27 28 29 30 31 32 33 34 35 36 37 38 39 40 41 42 43 44 45 46 47 48 49 50 51 52 53 54 55 56 57 58 59 60 61 62 63 64 65 66 67 68 69 70 71 72 $ gpg --expert --full-gen-key gpg (GnuPG) 2.3.4; Copyright (C) 2021 g10 Code GmbH This is free software: you are free to change and redistribute it. There is NO WARRANTY, to the extent permitted by law. Please select what kind of key you want: (11) ECC (set your own capabilities) Your selection? 11 # 推荐使用 ECC 算法 Possible actions for this ECC key: Sign Certify Authenticate Current allowed actions: Sign Certify (S) Toggle the sign capability Your selection? s # 主密钥只保留 Certify 功能,其他功能使用子密钥 Possible actions for this ECC key: Sign Certify Authenticate Current allowed actions: Certify (Q) Finished Your selection? q Please select which elliptic curve you want: (1) Curve 25519 *default* Your selection? 1 Please specify how long the key should be valid. <n>y = key expires in n years Key is valid for? (0) 10y Key does not expire at all Is this correct? (y/N) y # 主密钥建议设置5-10年有效期,防止由于个人原因遗失后不可控。 Real name: Editst Email address: [email protected] Comment: You selected this USER-ID: "Editst <[email protected] >" # 这里建议直接设置成GitHub上的对应的邮箱 Change (N)ame, (C)omment, (E)mail or (O)kay/(Q)uit? o We need to generate a lot of random bytes. It is a good idea to perform some other action (type on the keyboard, move the mouse, utilize the disks) during the prime generation; this gives the random number generator a better chance to gain enough entropy. # Windnows 下会弹出窗口输入密码,注意一定要保管好!!! gpg: revocation certificate stored as 'C:\\Users\\XXX\\AppData\\Roaming\\gnupg\\openpgp-revocs.d\\68697537A54B1F0BFC05E1D9787E848E1A98D086.rev' public and secret key created and signed. # 会自动生成吊销证书,注意保存到安全的地方 pub ed25519/787E848E1A98D086 2022-01-01 [C] Key fingerprint = 6869 7537 A54B 1F0B FC05 E1D9 787E 848E 1A98 D086 uid Editst <[email protected] >
1 2 3 4 5 6 7 8 9 10 11 12 $ gpg --fingerprint --keyid-format long -K C:\Users\XXX\AppData\Roaming\gnupg\pubring.kbx ------------------------------------------------ sec ed25519/787E848E1A98D086 2022-01-01 [C] Key fingerprint = 6869 7537 A54B 1F0B FC05 E1D9 787E 848E 1A98 D086 uid [ultimate] Editst <[email protected] > $ gpg --quick-add-key 68697537A54B1F0BFC05E1D9787E848E1A98D086 cv25519 encr 5y $ gpg --quick-add-key 68697537A54B1F0BFC05E1D9787E848E1A98D086 ed25519 auth 5y $ gpg --quick-add-key 68697537A54B1F0BFC05E1D9787E848E1A98D086 ed25519 sign 5y # 子密钥建议设置最多5年有效期
再次查看目前的私钥,可以看到已经包含了这三个子密钥。
1 2 3 4 5 6 7 8 9 10 11 12 13 gpg --fingerprint --keyid-format long -K C:\Users\XXX\AppData\Roaming\gnupg\pubring.kbx ------------------------------------------------ sec ed25519/787E848E1A98D086 2022-01-01 [C] Key fingerprint = 6869 7537 A54B 1F0B FC05 E1D9 787E 848E 1A98 D086 uid [ultimate] Editst <[email protected] > ssb ed25519/055917609C9C0D7B 2022-01-01 [S] [expires: 2024-01-01] Key fingerprint = E99F 3D15 7ACF 7E24 3DC8 FFE7 0559 1760 9C9C 0D7B ssb ed25519/05F4A6C335157258 2022-01-01 [A] [expires: 2024-01-01] Key fingerprint = C4B9 7EEC 4060 F856 7A4D 2956 05F4 A6C3 3515 7258 ssb cv25519/C5B8214C3AD21C6C 2022-01-01 [E] [expires: 2024-01-01] Key fingerprint = E39E E067 3233 BD73 7ED1 15F1 C5B8 214C 3AD2 1C6C
1 2 3 4 5 6 7 8 9 10 11 # 公钥 $ gpg -ao public-key.pub --export 787E848E1A98D086 # 吊销证书 路径: %APPDATA%\gnupg\openpgp-revocs.d\68697537A54B1F0BFC05E1D9787E848E1A98D086.rev # 主密钥和三个子密钥 gpg -ao sec-key.asc --export-secret-key 787E848E1A98D086! gpg -ao sign-key.asc --export-secret-key 055917609C9C0D7B! gpg -ao auth-key.asc --export-secret-key 05F4A6C335157258! gpg -ao encr-key.asc --export-secret-key C5B8214C3AD21C6C!
把这些文件拿7z打个加密压缩包,密码用KeePass生成一个够长的保存,然后找个你喜欢的网盘存好或者刻张光盘放衣柜里。
1 2 3 4 5 6 7 8 9 10 11 12 13 14 15 16 17 18 19 20 21 22 23 24 25 26 27 28 29 30 31 32 33 34 35 36 37 38 39 40 41 42 43 44 45 46 47 48 49 50 51 52 53 54 55 56 57 58 59 60 61 62 63 64 65 66 67 68 69 70 71 72 73 74 75 $ gpg --edit-card Reader ...........: canokeys.org OpenPGP PIV OATH 0 Manufacturer .....: CanoKeys ...... # 进入 Admin 模式 gpg/card> admin Admin commands are allowed gpg/card> passwd gpg: OpenPGP card no. xxxxxxxxxxxxxxxxxxxxxxxxxxx detected 1 - change PIN 2 - unblock PIN 3 - change Admin PIN 4 - set the Reset Code Q - quit # PIN 和 Admin PIN 最好都要改掉 ...... # 改完后退出 gpg/card>quit $ gpg --edit-key 787E848E1A98D086 sec ed25519/787E848E1A98D086 created: 2022-01-01 expires: never usage: C trust: ultimate validity: ultimate ssb ed25519/055917609C9C0D7B created: 2022-01-01 expires: 2024-01-01 usage: S ssb ed25519/05F4A6C335157258 created: 2022-01-01 expires: 2024-01-01 usage: A ssb cv25519/C5B8214C3AD21C6C created: 2022-01-01 expires: 2024-01-01 usage: E [ultimate] (1). Editst <[email protected] > gpg> key 1 # 首先选中第一个子密钥 gpg> keytocard Please select where to store the key: (1) Signature key Your selection? 1 # 选择对应插槽 # 首先输入 OpenPGP 的密码,再输入 OpenPGP Applet 对应的 Admin PIN # 之后先反选 key 1,再依次选择 key 2,key 3,重复操作即可 gpg> key 1 gpg> key 2 gpg> keytocard Please select where to store the key: (3) Authentication key Your selection? 3 gpg> key 2 gpg> key 3 gpg> keytocard Please select where to store the key: (2) Encryption key Your selection? 2 gpg> save # 保存修改 # 查看 Canokey 状态,确认导入成功 $ gpg --card-status Reader ...........: canokeys.org OpenPGP PIV OATH 0 ...... General key info..: sub ed25519/055917609C9C0D7B 2022-01-01 Editst <[email protected] > sec ed25519/787E848E1A98D086 created: 2022-01-01 expires: never ssb> cv25519/055917609C9C0D7B created: 2022-01-01 expires: 2024-01-01 card-no: F1D0 xxxxxxxx ssb> ed25519/05F4A6C335157258 created: 2022-01-01 expires: 2024-01-01 card-no: F1D0 xxxxxxxx ssb> ed25519/C5B8214C3AD21C6C created: 2022-01-01 expires: 2024-01-01 card-no: F1D0 xxxxxxxx
看到ssb>就可以删掉主密钥了:
1 gpg --delete-secret-keys 787E848E1A98D086
1 2 3 4 5 6 7 8 9 10 11 12 13 14 15 16 17 18 19 20 21 # 导入公钥 $ gpg --import public-key.pub $ gpg --edit-card $ gpg/card> fetch # 查看本地的私钥,确定已经指向了Canokey $ gpg --fingerprint --keyid-format long -K C:\Users\XXX\AppData\Roaming\gnupg\pubring.kbx ------------------------------------------------ sec# ed25519/787E848E1A98D086 2022-01-01 [C] Key fingerprint = 6869 7537 A54B 1F0B FC05 E1D9 787E 848E 1A98 D086 uid [ultimate] Editst <[email protected] > ssb> ed25519/055917609C9C0D7B 2022-01-01 [S] [expires: 2024-01-01] Key fingerprint = E99F 3D15 7ACF 7E24 3DC8 FFE7 0559 1760 9C9C 0D7B Card serial no. = F1D0 xxxxxxxx ssb> ed25519/05F4A6C335157258 2022-01-01 [A] [expires: 2024-01-01] Key fingerprint = C4B9 7EEC 4060 F856 7A4D 2956 05F4 A6C3 3515 7258 Card serial no. = F1D0 xxxxxxxx ssb> cv25519/C5B8214C3AD21C6C 2022-01-01 [E] [expires: 2024-01-01] Key fingerprint = E39E E067 3233 BD73 7ED1 15F1 C5B8 214C 3AD2 1C6C Card serial no. = F1D0 xxxxxxxx
1 2 3 4 $ git config --global user.signingkey 055917609C9C0D7B # 子密钥中的签名(S)密钥 # 之后在 git commit 时增加 -S 参数即可使用 gpg 进行签名,或者直接全局开启: $ git config commit.gpgsign true
首先在%AppData%\gnupg\gpg-agent.conf中写入(没有就新建一个):
1 2 3 enable-win32-openssh-support enable-ssh-support enable-putty-support
然后运行gpg -k --with-keygrip获取 [A] Subkey 的 Keygrip(40位,虽然看着很像上面的fingerprint但是不一样),写入%AppData%\gnupg\sshcontrol(没有就新建一个),然后开任务管理器,找到gpg-agent.exe,右键结束进程树。gpg --card-status再把gpg-agent拉起来。
查看 openSSH 读取到的公钥信息,把输出的公钥信息添加到服务器的~/.ssh/authorized_keys
1 2 3 $ ssh-add -L ssh-ed25519 AAAAC3NzaC1lZDI1NTE5AAAAIAzFAR5puWAj0OflZJVzAJqejVEZCap2NhFJbzedYwX2 cardno:F1D0 xxxxxxxx
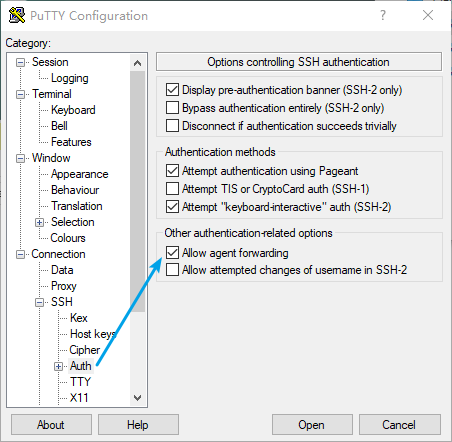
Putty设置:
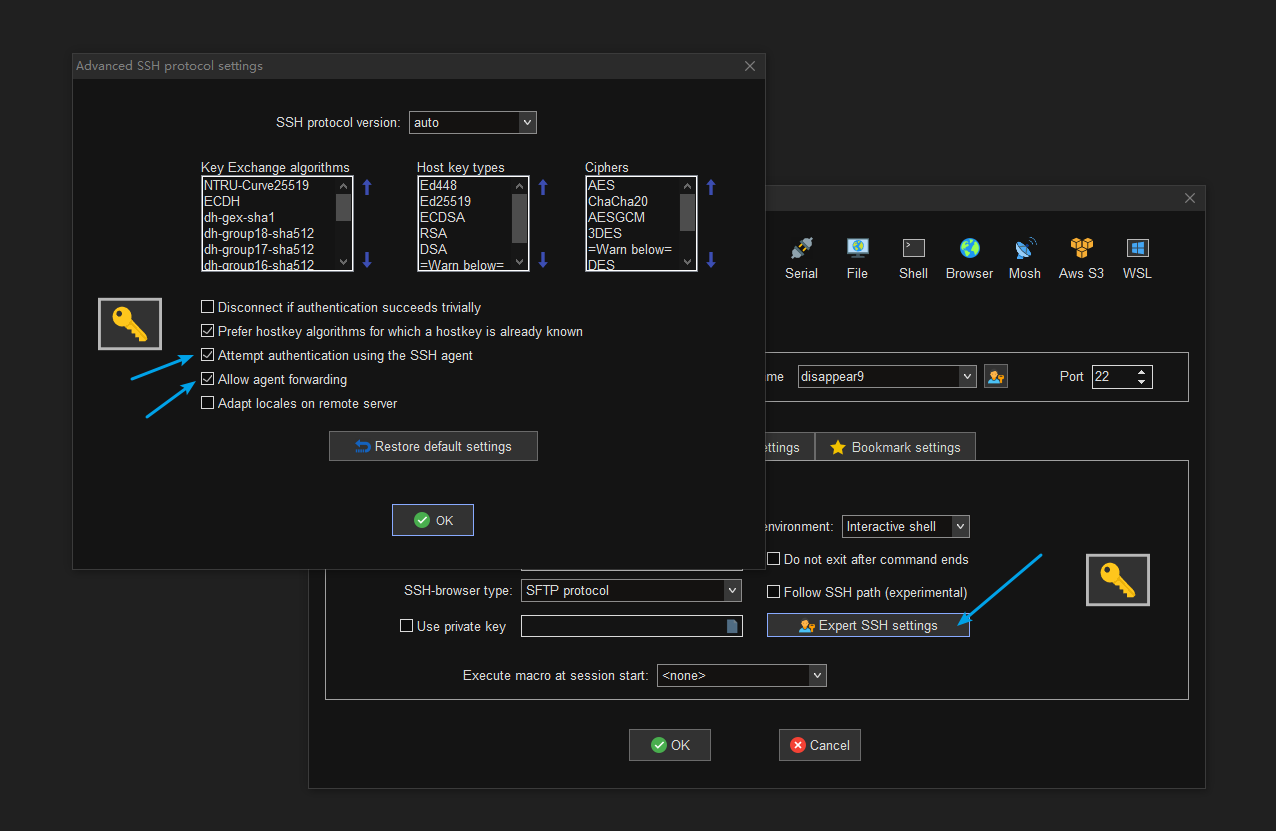
MobaXterm设置:
CanoKey Canary 3.0.0版本的固件是有bug的,参见:https://docs.canokeys.org/ 但是问题不大,因为PIV一般根本用不到255199a->9c->9d->9e的顺序读,也就是说假如你在9c槽存了一个CN=Disappear9 's CanoKey的证书,那么不管后面槽位的证书CN内容是什么,读卡时信息都会一直显示为9c的CN,直到9a存了证书。
1 2 3 4 5 6 7 8 9 10 11 12 13 14 15 yubico-piv-tool -r canokey -a status Version: 5.7.0 Slot 9a: Algorithm: RSA2048 Subject DN: CN=Disappear9 's CanoKey, O=D9Lab, C=CN Issuer DN: CN=Disappear9 's CanoKey, O=D9Lab, C=CN Slot 9c: Algorithm: RSA2048 Subject DN: [email protected] Issuer DN: C=IT, ST=Bergamo, L=Ponte San Pietro, O=Actalis S.p.A., CN=Actalis Client Authentication CA G3 Slot 9d: Algorithm: RSA2048 Subject DN: CN=TEST Issuer DN: CN=TEST PIN tries left: 3
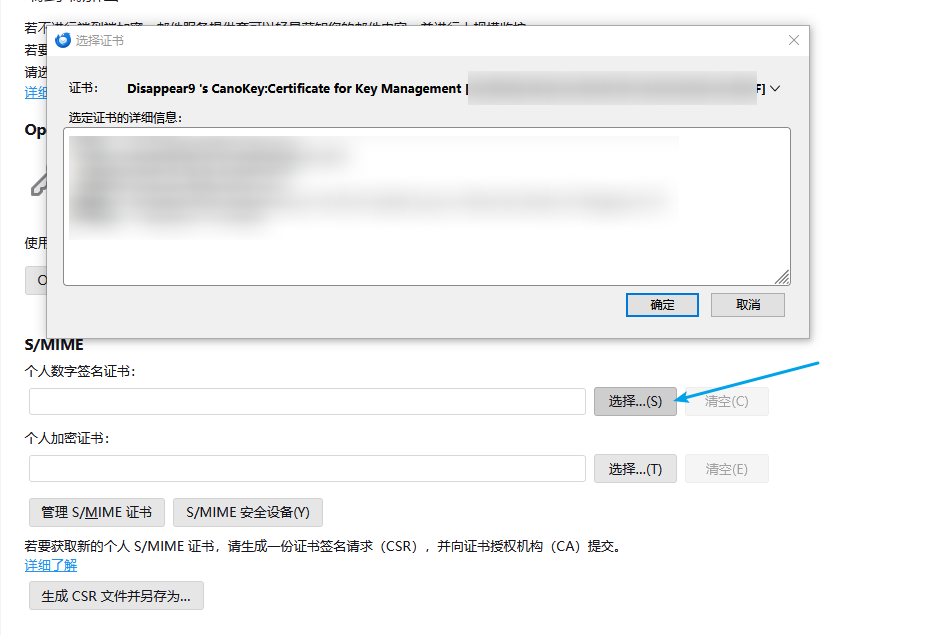
在Thunderbird中查看时:
所以如果你和我一样容易突然犯强迫症,那么可以自己生成一个给Bitlocker用的证书放9a。
新建一个certreqcfg.ini文件Subject,NotBefore,NotAfter,这几项是可以随意更改的,剩下的不要动,尤其是有些人(比如我)看到2048位RSA会感觉啊好不安全然后改成4096,证书能生成能导入Bitlocker也能正常读到加锁,然后解密的时候就会突发恶疾智能卡无效导致你只能用恢复密钥解密(至少我在win10 LTSC 21H2 和 win11 LTSC上实验过全是这样)。
certreqcfg.ini 1 2 3 4 5 6 7 8 9 10 11 12 13 14 15 16 17 18 19 20 21 [NewRequest] Subject = "C=CN,O=D9Lab,CN=Disappear9 's CanoKey" NotBefore = 2025 /01 /01 00 :00 AMNotAfter = 2035 /01 /01 00 :00 AMExportable = TRUE KeyLength = 2048 HashAlgorithm = "SHA512" EncryptionAlgorithm = "AES" EncryptionLength = 256 KeySpec = "AT_KEYEXCHANGE" KeyUsage = "CERT_KEY_ENCIPHERMENT_KEY_USAGE" KeyUsageProperty = "NCRYPT_ALLOW_DECRYPT_FLAG" RequestType = CertSMIME = FALSE [EnhancedKeyUsageExtension] OID =1.3 .6.1 .5.5 .7.3 .1 OID =1.3 .6.1 .5.5 .7.3 .2 OID =1.3 .6.1 .4.1 .311.67 .1.1 OID =1.3 .6.1 .4.1 .311.10 .3.4 OID =1.3 .6.1 .4.1 .311.10 .3.12
运行命令certreq –new certreqcfg.ini certrequest.req
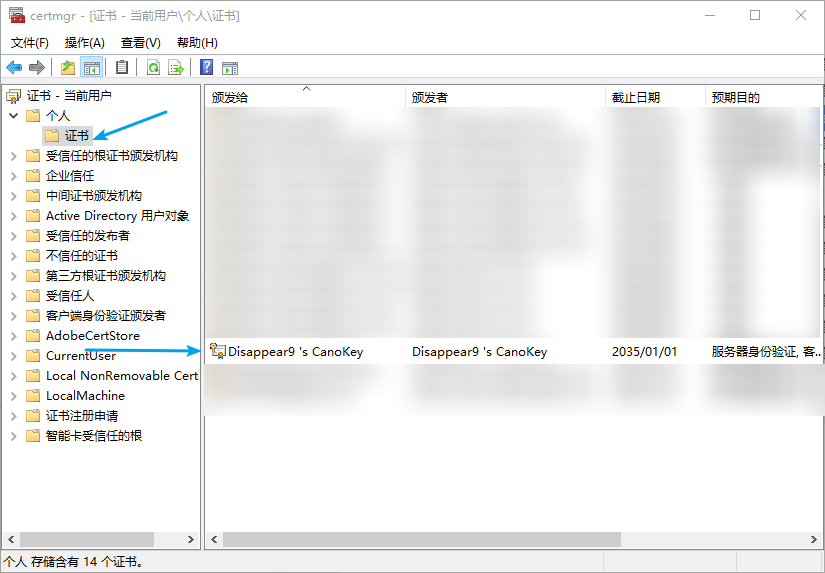
运行命令certmgr.msc打开证书管理器
右键所有任务->导出,选择是,导出私钥,导出pfx文件命名为9a.pfx。
由于是自签名证书,需要添加注册表允许自签名
1 reg add HKEY_LOCAL_MACHINE\SOFTWARE\Policies\Microsoft\FVE /v SelfSignedCertificates /t REG_DWORD /d "1"
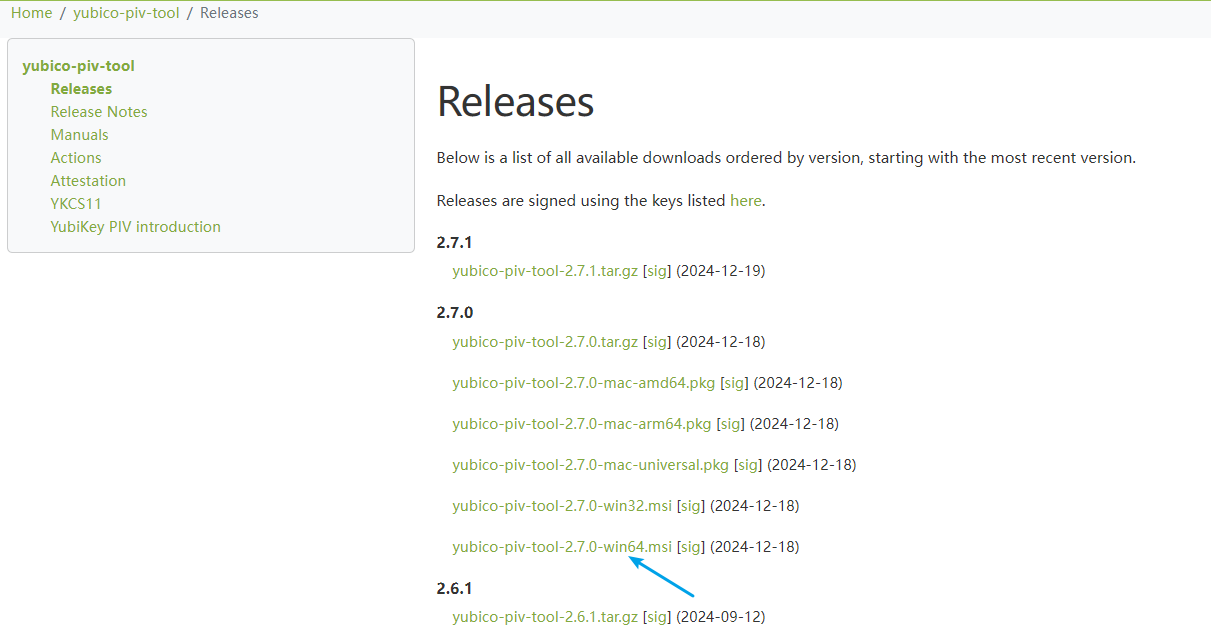
下载安装 yubico-piv-tool
1 2 3 4 5 6 7 8 9 10 11 12 13 14 15 16 # 确认是否能检测到Canokey $ yubico-piv-tool -r canokeys -a status # 修改 PIN、PUK $ yubico-piv-tool -r canokeys -a change-pin $ yubico-piv-tool -r canokeys -a change-puk # 导入密钥 $ yubico-piv-tool -r canokeys -s 9a -i 9a.pfx -KPKCS12 -a import-key -a import-cert # 初始化 Card Holder Unique Identifier 和 CCC $ yubico-piv-tool -r canokeys -a set-chuid $ yubico-piv-tool -r canokeys -a set-ccc # 确认是否导入成功 $ yubico-piv-tool -r canokeys -a status
至此,Canokey 就可以用于进行 Bitlocker 加密了。在使用 Bitlocker 时,选择“使用智能卡”即可。
清理与善后 9a.pfx。个人 和 中间证书颁发机构下,要同时删掉。
准备工作 从 Actalis 申请一个免费的S/MIME证书 参考免费申请S/MIME邮箱证书 Certum 的吧,15欧元两年,教程参考:使用 S/MIME 证书签名并加密电子邮件 Thunderbird OpenSC yubico-piv-tool
导入证书:
1 $ yubico-piv-tool -r canokeys -s 9c -i certificate.p12 -KPKCS12 -a import-key -a import-cert --pin-policy=once
如果你有不止一个邮箱的证书可以继续导入9d, 9e槽位,我们可以在导入命令的后面附加--pin-policy或--touch-policy选项覆盖掉默认规则,防止默认规则下9e槽位可以不经验证被直接使用。详细使用方法参考: https://developers.yubico.com/yubico-piv-tool/Manuals/yubico-piv-tool.1.html
冲突预防 GnuPG and PC/SC conflicts, episode 3 %AppData%\gnupg\scdaemon.conf中写入(没有就新建一个):
1
2
disable-ccid pcsc-shared
然后开任务管理器,找到gpg-agent.exe(如有),右键结束进程树。
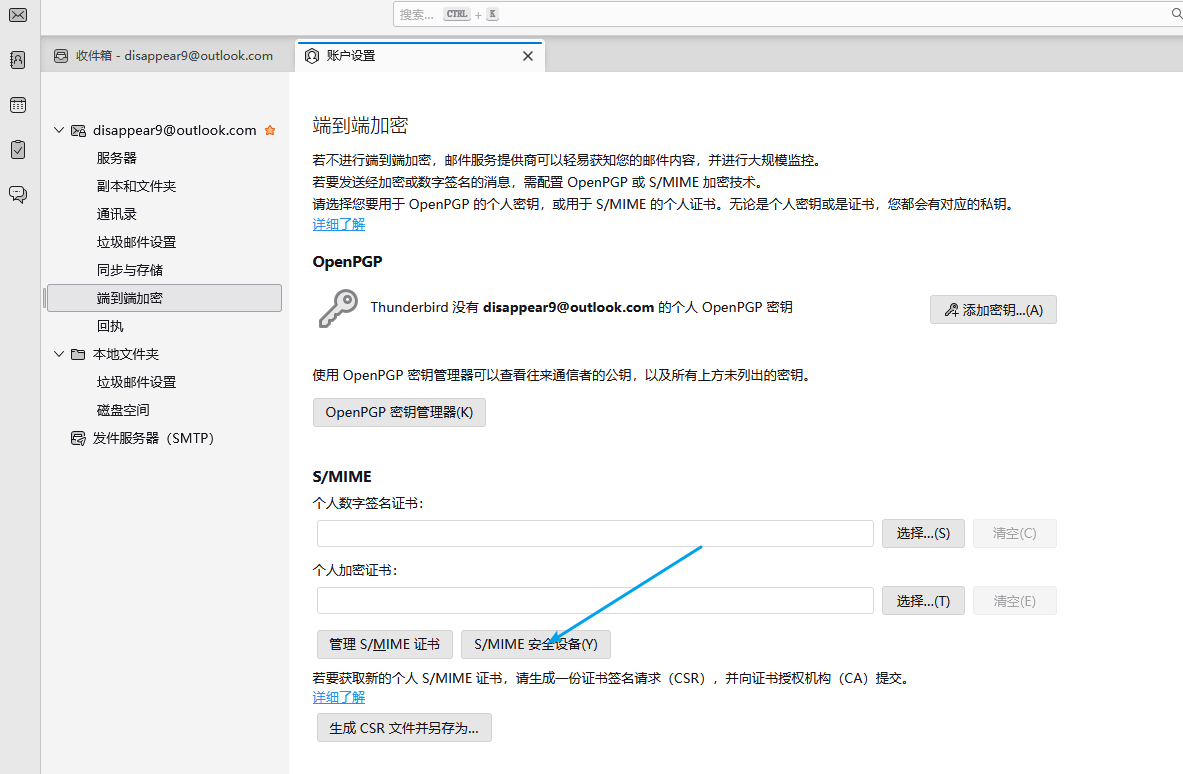
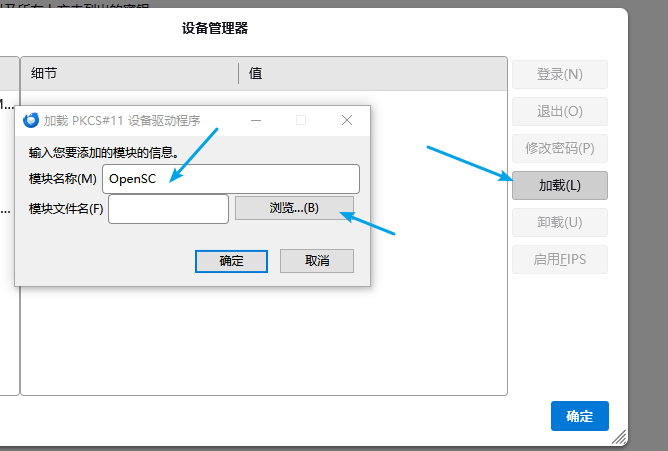
配置Thunderbird C:\Program Files\OpenSC Project\OpenSC\pkcs11\opensc-pkcs11.dll
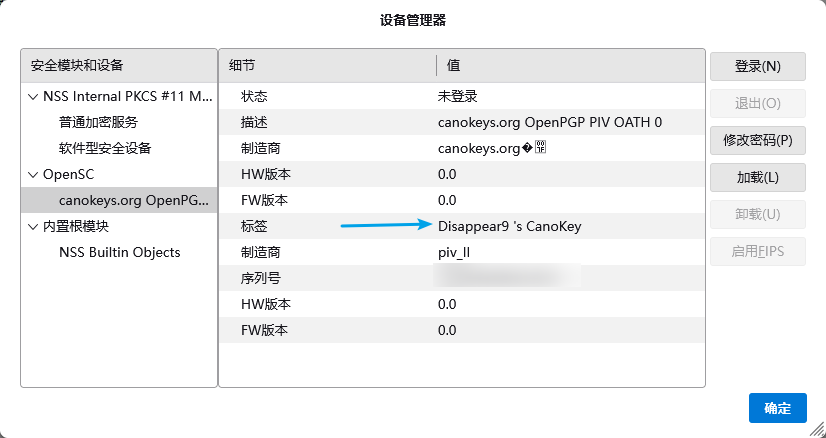
加载后就可以看到Canokey了(重用一下上面的图)
选择与邮箱对应的证书
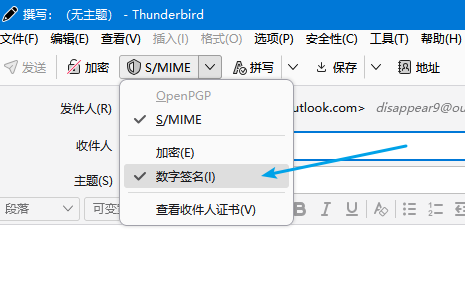
然后在写信时就可以选择签名/加密了
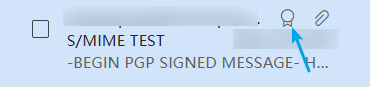
别人收到以后是这么一个效果: