In this tutorial, we’ll cover the basics of iSCSI, configuring iSCSI on FreeNAS (soon to be TrueNAS CORE), and setting up access from a Windows machine. A ZVOL, which is another type of dataset, is required to connect with iSCSI for block storage. One benefit of using iSCSI on TrueNAS is that Windows systems backed up with iSCSI get the ZFS rollback feature to quickly recover from CryptoLocker, ransomware, and data loss. This tutorial assumes that you have configured a ZFS Pool.
What is iSCSI?
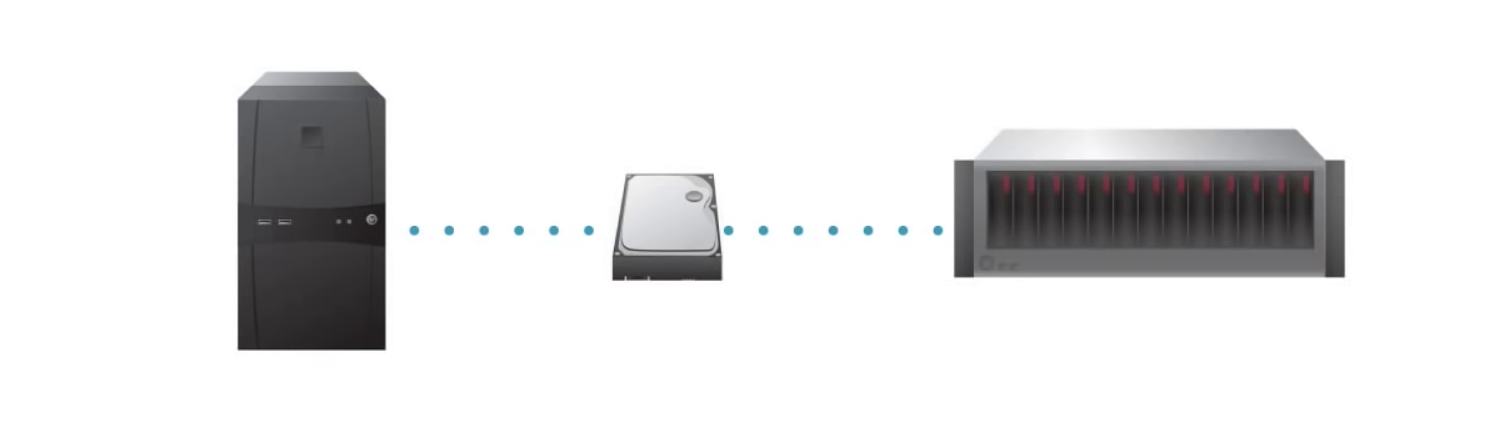
iSCSI is a protocol standard that allows the consolidation of storage data. iSCSI is implemented in TrueNAS to act like a Storage Area Network (SAN) over an existing Ethernet network.
- Specifically, iSCSI exports disk devices or “targets” over an Ethernet network that iSCSI clients or “initiators” can attach to and mount.
- iSCSI can be used over an existing Ethernet network, although dedicated networks can be built for iSCSI traffic for higher performance.
- Interestingly, SAN environments built on Fibre Channel can be expanded using iSCSI. iSCSI was designed with Ethernet in mind, but it works just as well with fiber. So it can be a cost-effective alternative add-on for existing fiber setups.
- iSCSI also provides an advantage in an environment that uses Windows shell programs; these programs tend to filter “Network Location” but iSCSI mounts are not filtered.
Basic Information
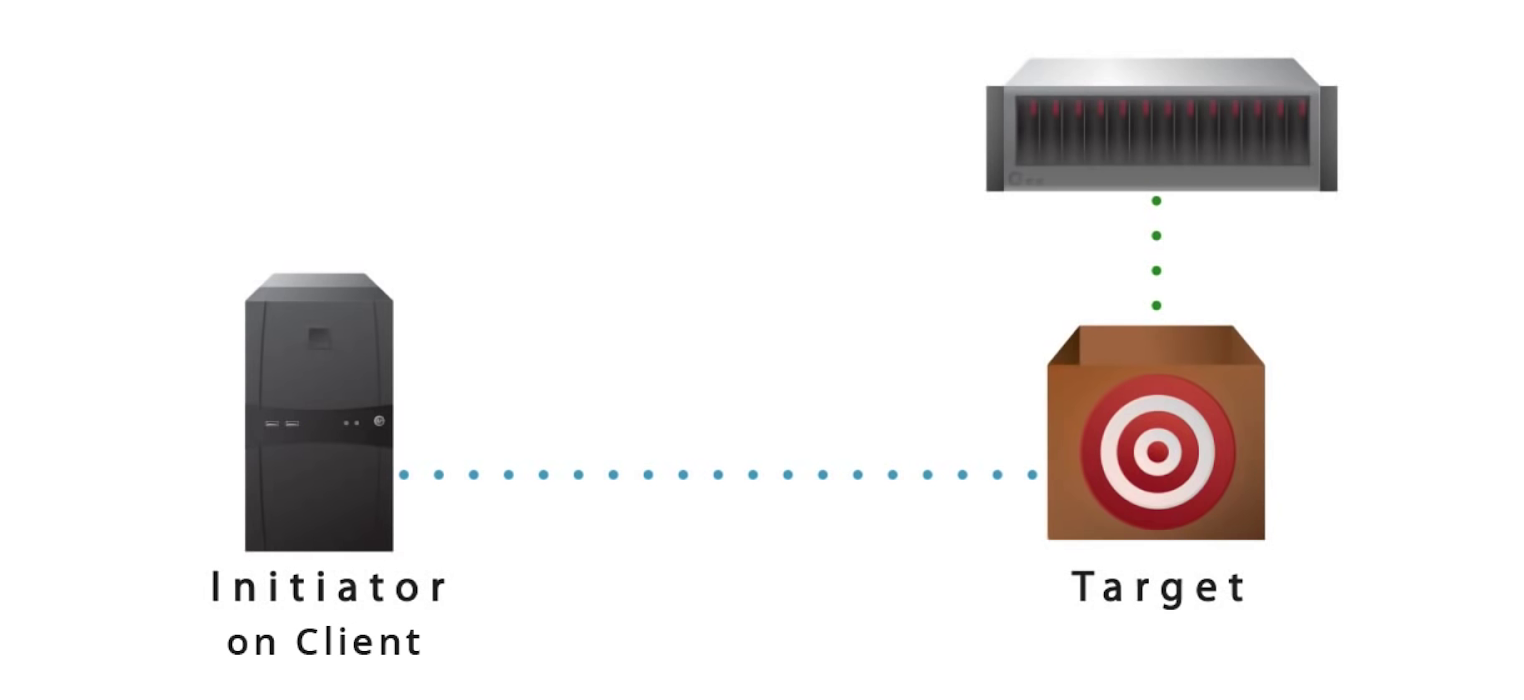
Before configuring iSCSI on your TrueNAS system, you should be familiar with the following iSCSI terminology:
- Initiator is a client that has authorized access to the storage data on the TrueNAS system. The client requires initiator software in order to initiate the connection to the iSCSI share–TARGET. ** Note that not all connections are authorized.
- Target is a storage resource on the TrueNAS system that is shared with an initiator. Every target has a unique name known as an iSCSI Qualified Name (IQN).
- Extent is the storage unit to be shared. It can be in the form of a file or a device EXTENT, that is provided as an iSCSI target.
- CHAP, or Challenge-Handshake Authentication Protocol, is an authentication method that uses a shared secret and three-way authentication to determine if a system is authorized to access the storage device and to periodically confirm that the session has not been hijacked by another system. In iSCSI, the initiator (client) performs the CHAP authentication.
- Mutual CHAP is a superset of CHAP in that both ends of the communication authenticate to each other.
Creating a ZVOL
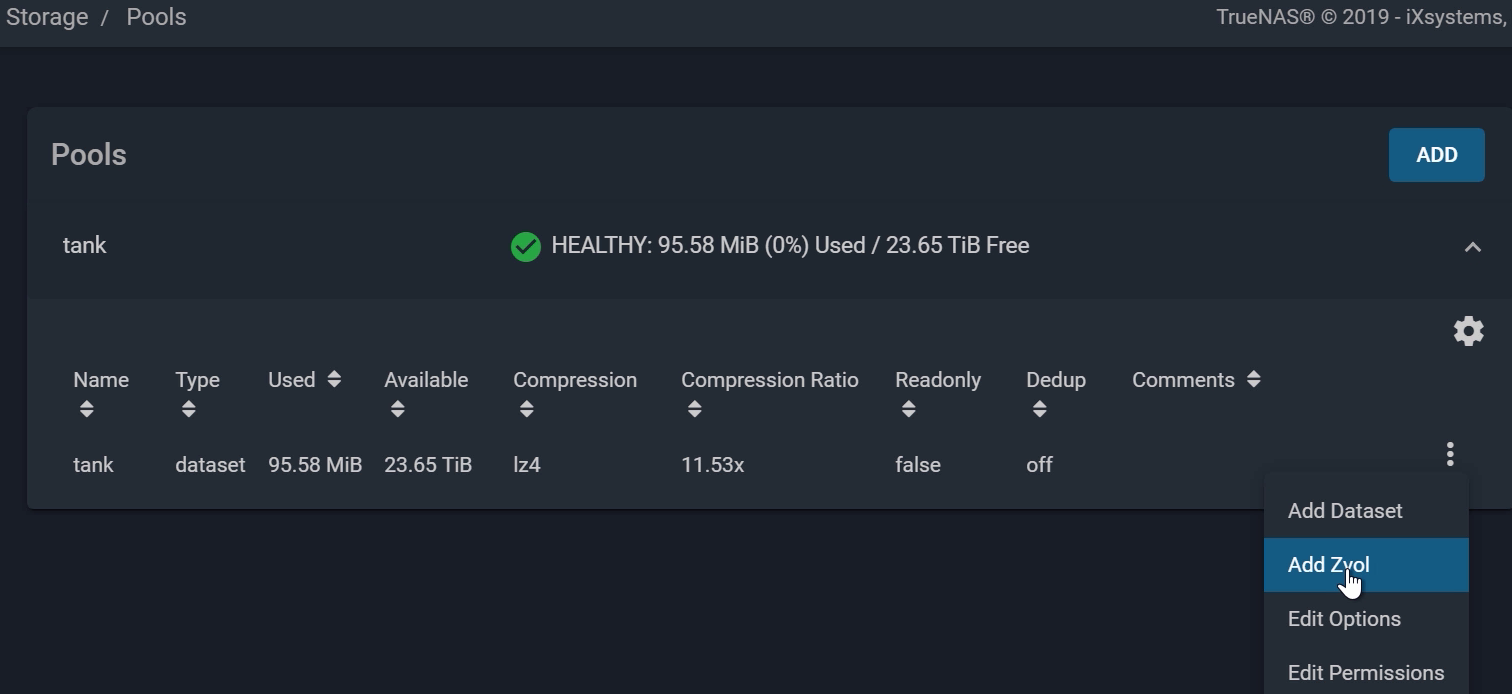
The first step to configure iSCSI is to create a ZVOL for our device extent. A ZVOL is a type of dataset available in our ZFS pool. The iSCSI Wizard also allows you to create a ZVOL or dataset, which we will talk about later.
Go to “Storage” → “Pools”, open the Pool options by clicking the three dots on the right of your pool, then “Add Zvol”.
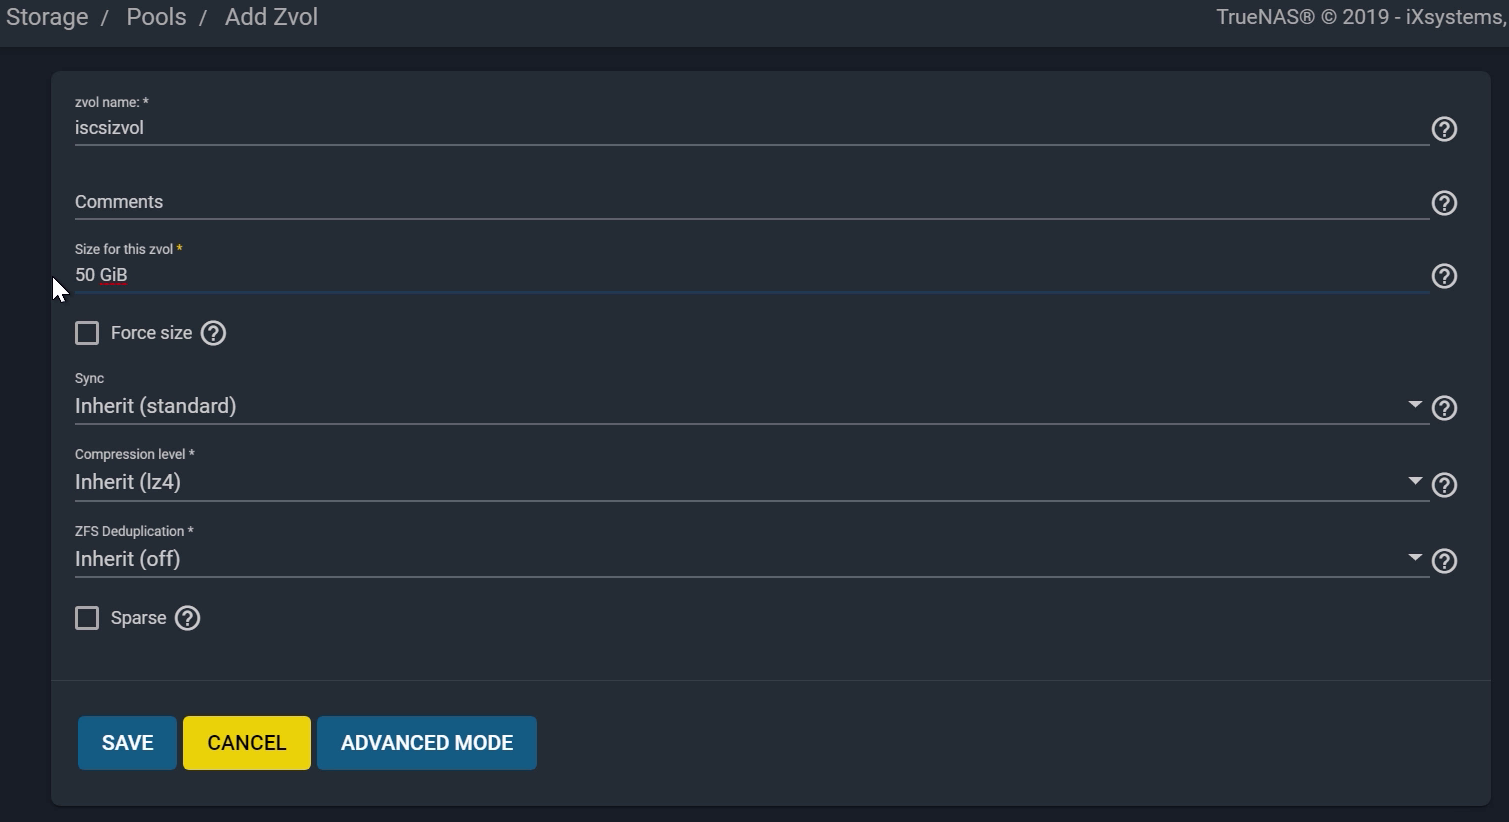
- Enter a name and size for the ZVOL then click “SAVE“.
Configuring iSCSI
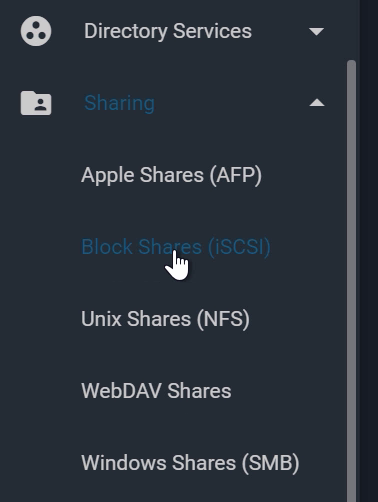
Now we will go ahead and configure iSCSI on a TrueNAS system.
On your TrueNAS machine, from the left side menu, select “Sharing” → Block Shares (iSCSI) → “Target Global Configuration”.
- Review the target global configuration parameters.
- You do not have to modify this, but remember that this is the base name that your targets will be associated with.
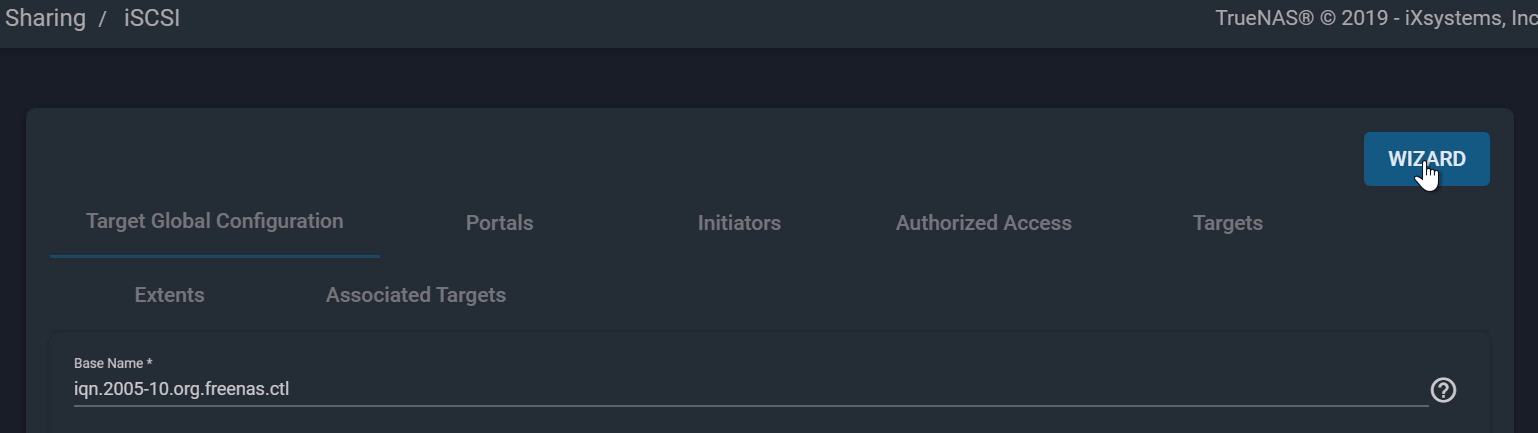
The iSCSI Wizard will help you easily create the block share with its step by step configuration. Let’s go ahead and click “Wizard”.
Give your iSCSI share a name.
- For “Type”, select this based on your dataset type. If you have configured a normal dataset from your pool, choose “File”.
- Otherwise, choose “Device” and you will be able to choose the ZVOL you created earlier, or create a ZVOL if you didn’t already. Click “Create New”, then browse to the path of your Pool.
- Set the device size limit. We recommend not using more than 80% of available capacity. * More information can be found in the documentation.
- Under “What are you using this for”, choose the entry that matches your use case. Since we’ll be connecting with Windows Server, we’ll choose “Modern OS”.
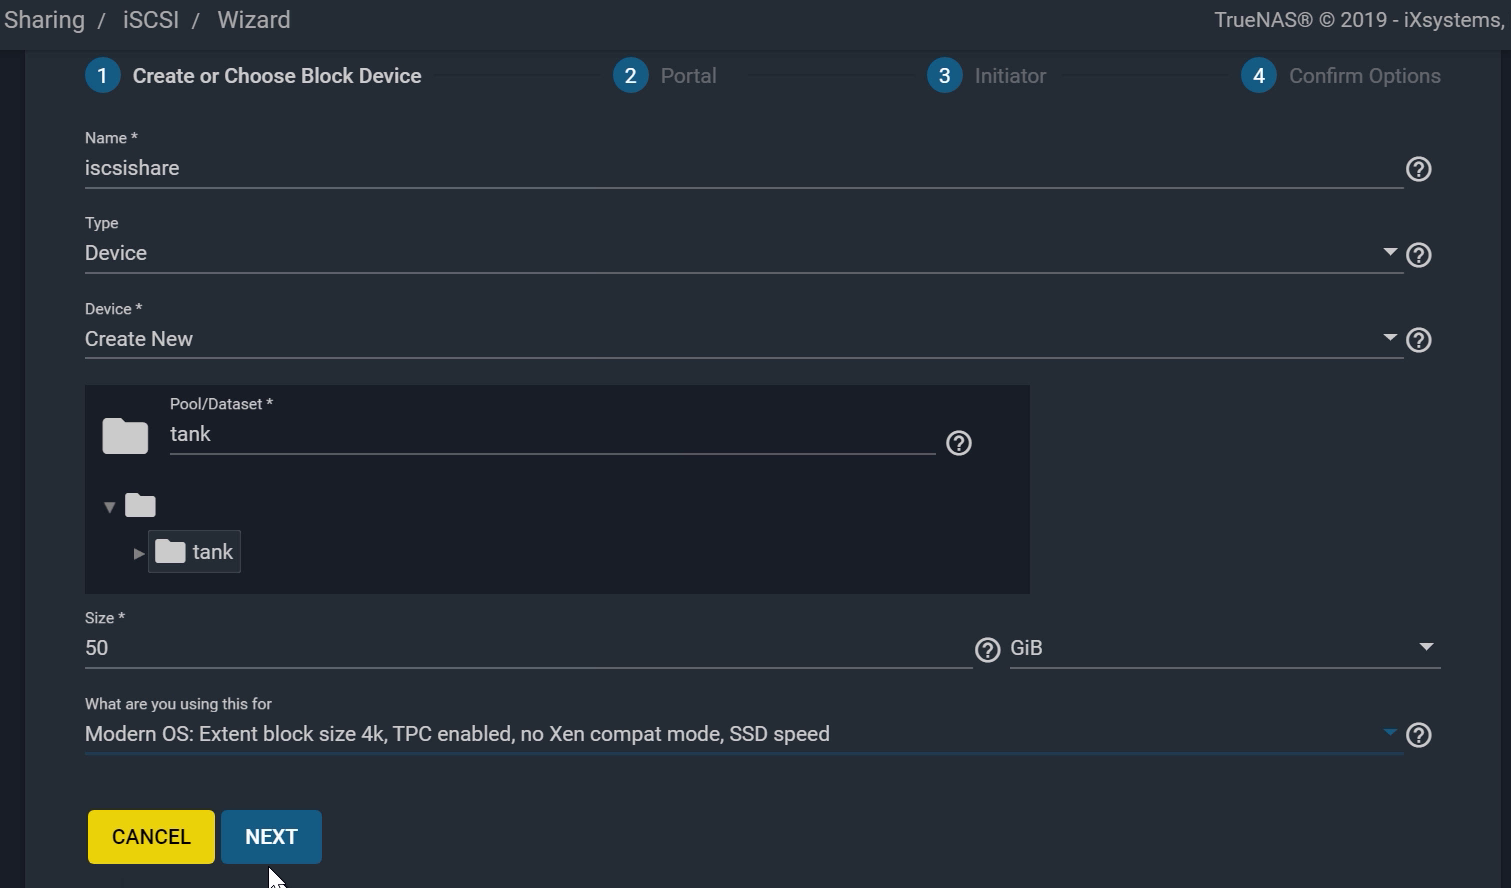
- Click “NEXT” to move into the Portal section. Since you don’t have a Portal created yet, the default option is “Create New”.
- If you want to enable security authentication, choose “CHAP” for “Discovery Auth Method” and fill out the Group ID, User, and Secret fields. The Secret must be between 12 and 16 characters.
- You can leave the IP as “0.0.0.0” which is the wildcard address of the interface.
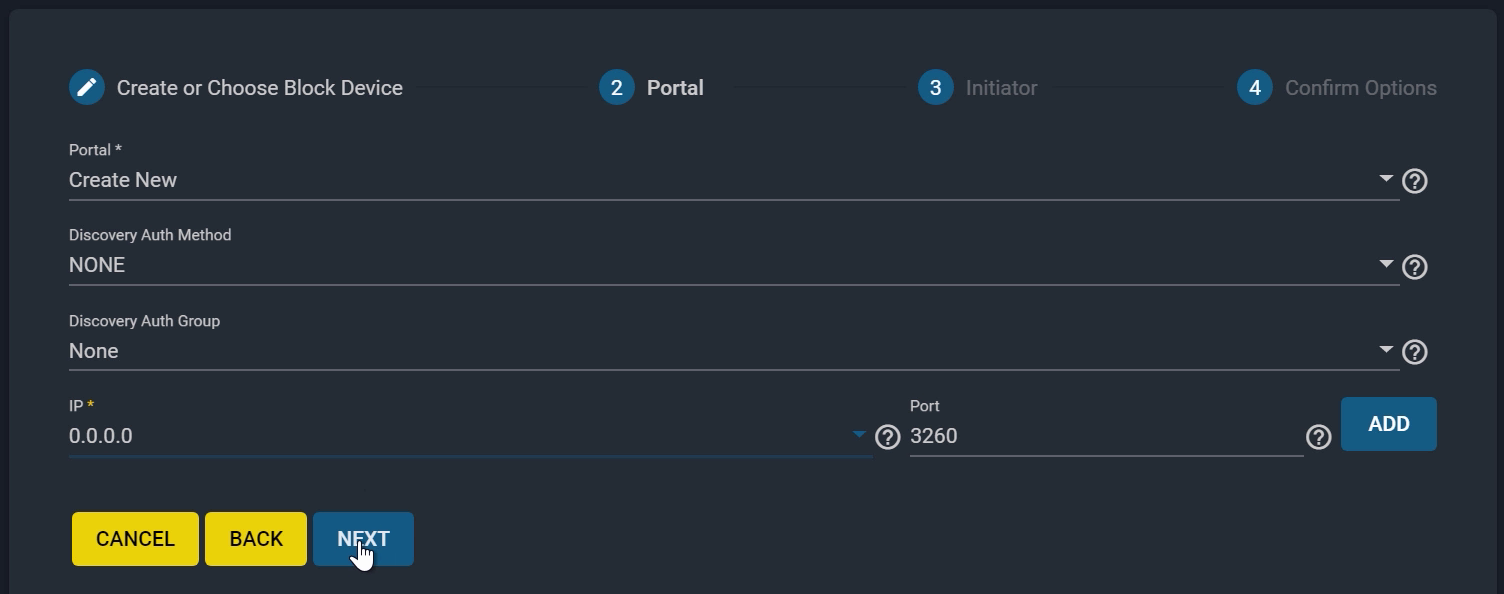
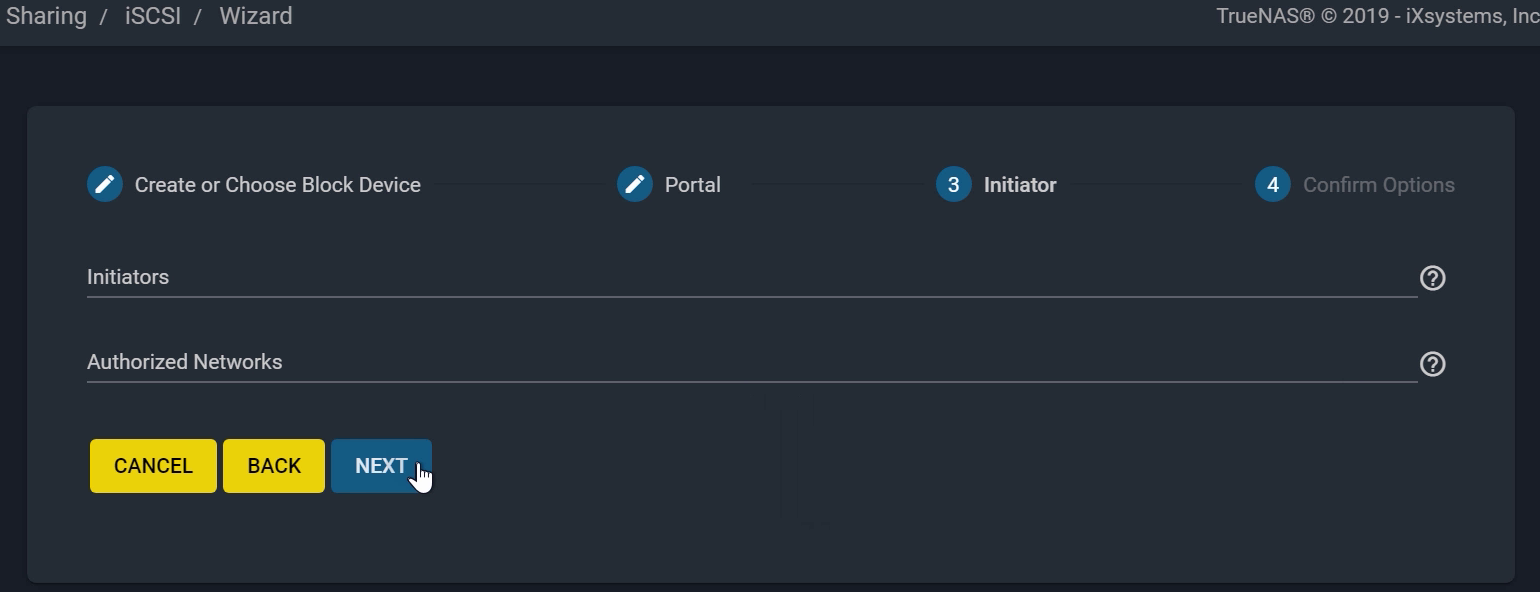
- Click “NEXT” to move on to the Initiator section. You can leave the Initiators and Authorized Networks field blank, unless you want to limit access to specific initiator clients or IPs on your network.
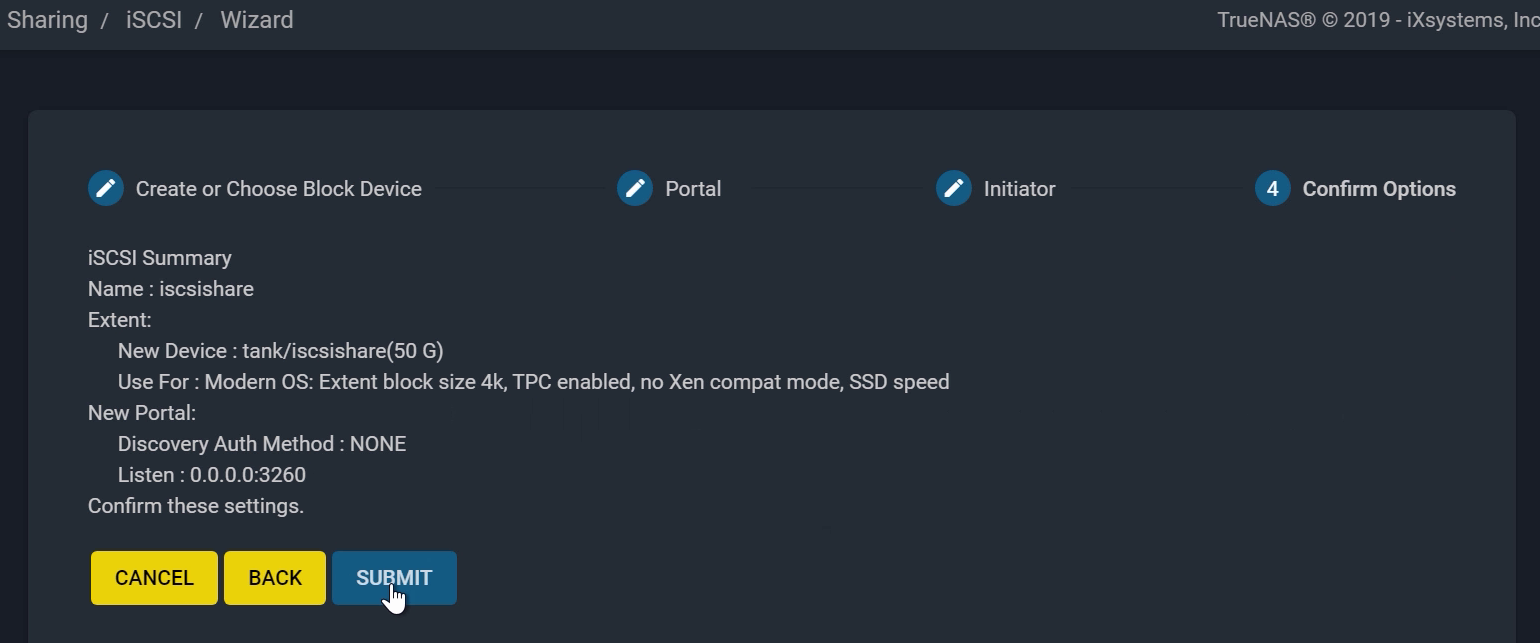
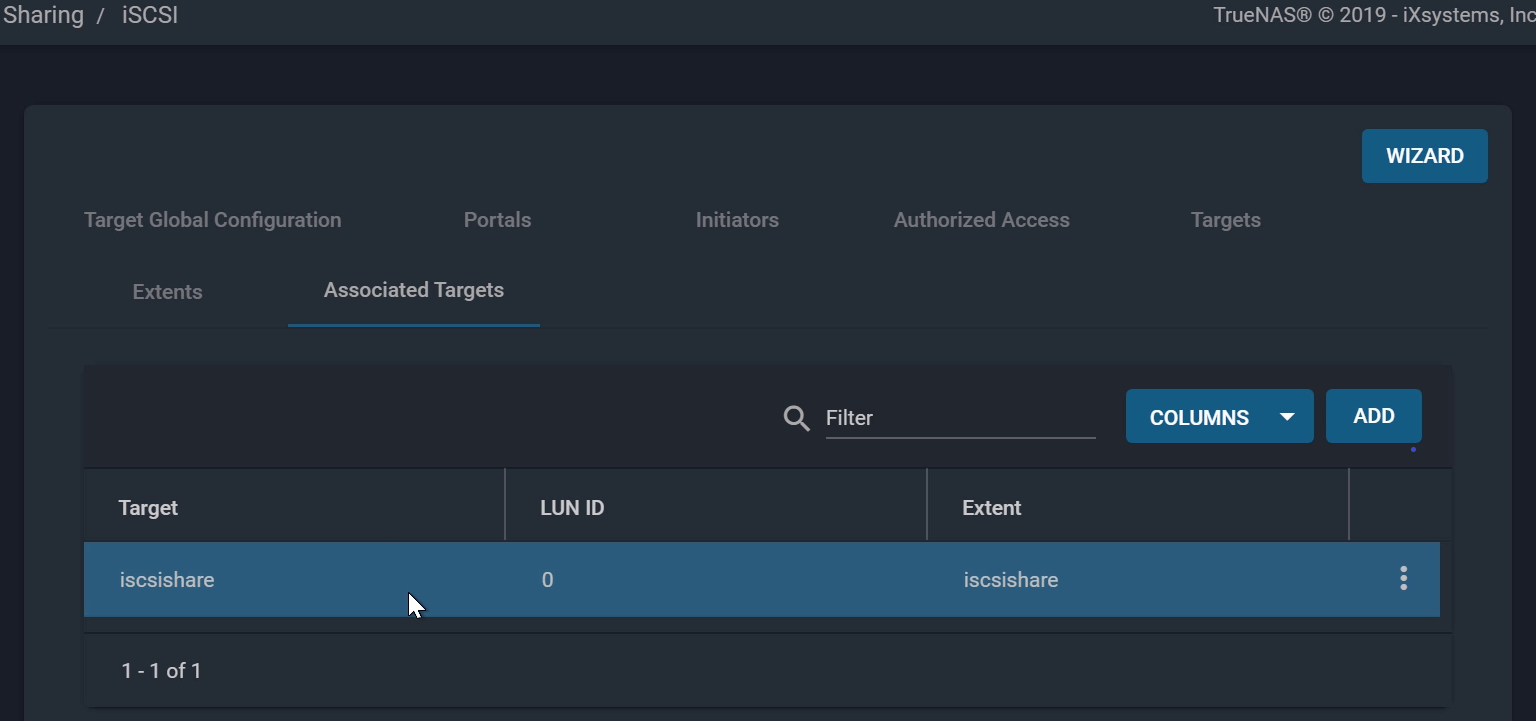
- Click “NEXT” and review your Wizard settings, then “SUBMIT”. The wizard should automatically associate your Extent with your Target.
Enable iSCSI Service
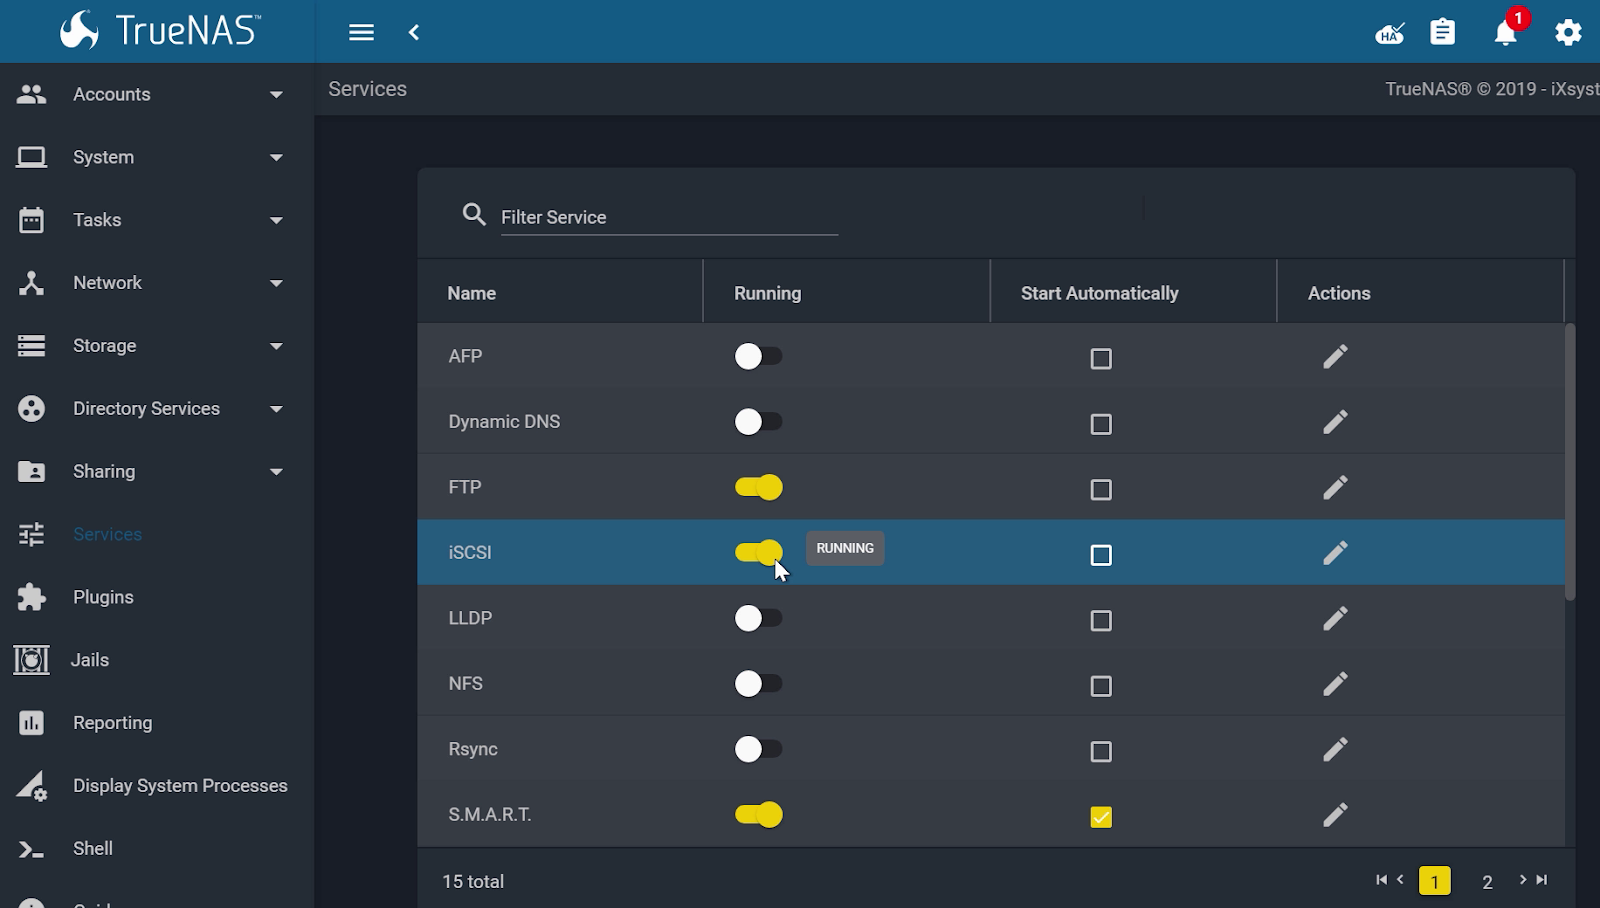
Click “Services” from the left menu and make sure iSCSI service is “Running”. Check the “Start Automatically” box to start iSCSI after every reboot.
Access Data on iSCSI share from Windows
In order to access the data on the iSCSI share, clients will need to use iSCSI Initiator software. An iSCSI Initiator client is pre-installed in Windows 7 to 10 Pro, and Windows Server 2008, 2012, and 2019. Please note that Windows Professional Edition is typically required.
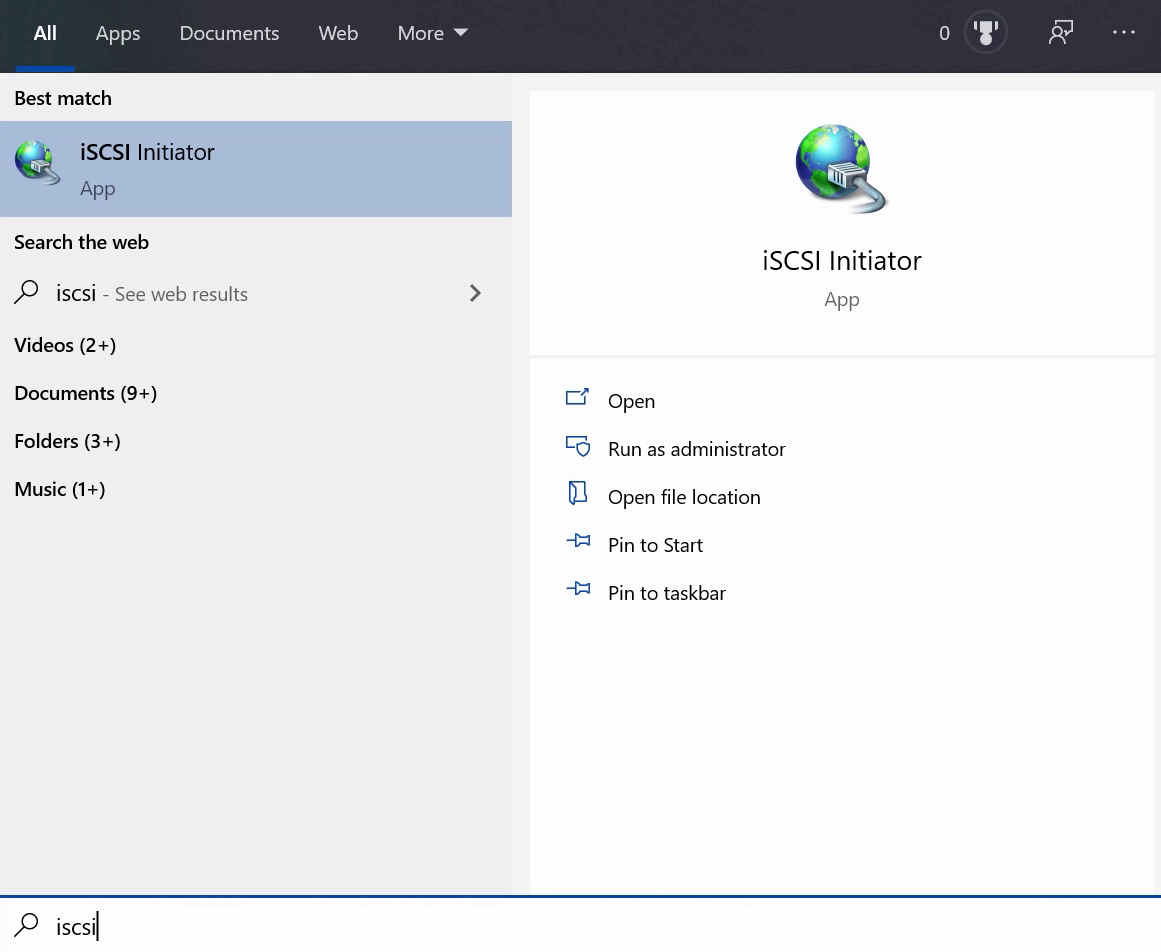
- Click the Start Menu and search for the “iSCSI Initiator”.
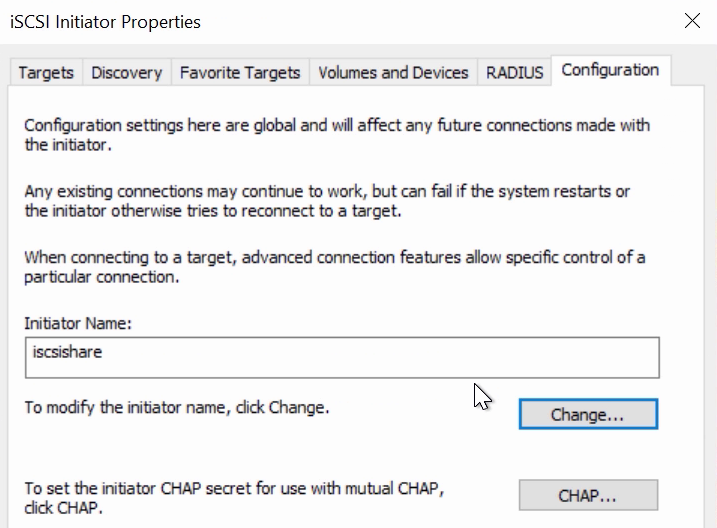
- Go to the “Configuration” tab and click “Change” to change the iSCSI initiator to the same name you created earlier, which was “iscsishare”.
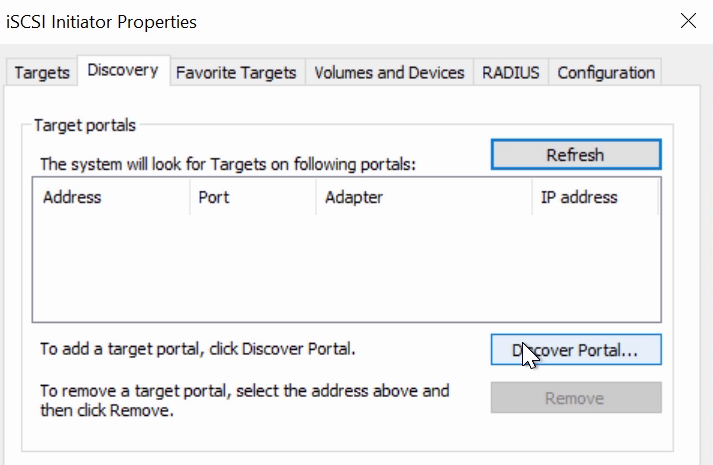
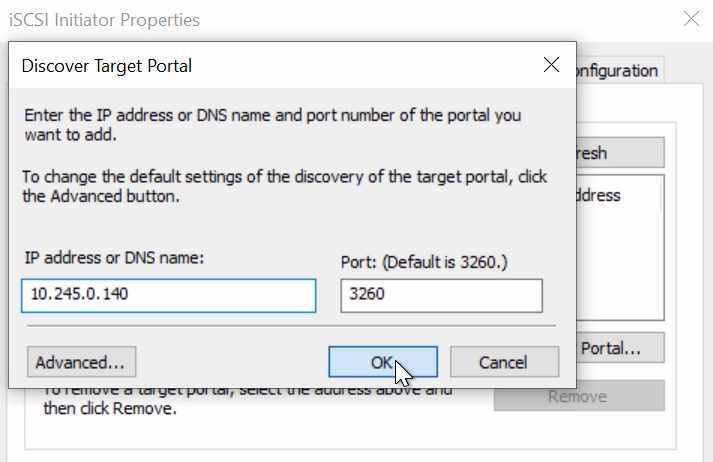
- Go to the “Discovery Tab”, proceed to “Discover Portal”, and type in your FreeNAS or TrueNAS IP address. Leave the port at 3260.
- If you set up CHAP earlier, click “Advanced Settings”, and then check “Enable CHAP log on”, then enter your initiator name and the same target/secret you set earlier on TrueNAS; otherwise, move to the next step.
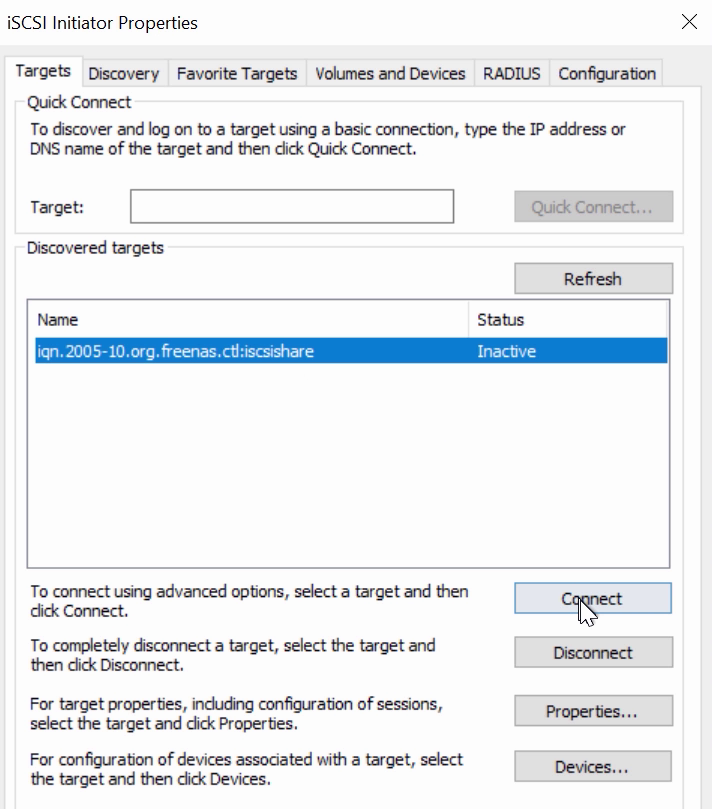
- Go back to “Targets” and click “Connect” on your iSCSI target, then click “OK”.
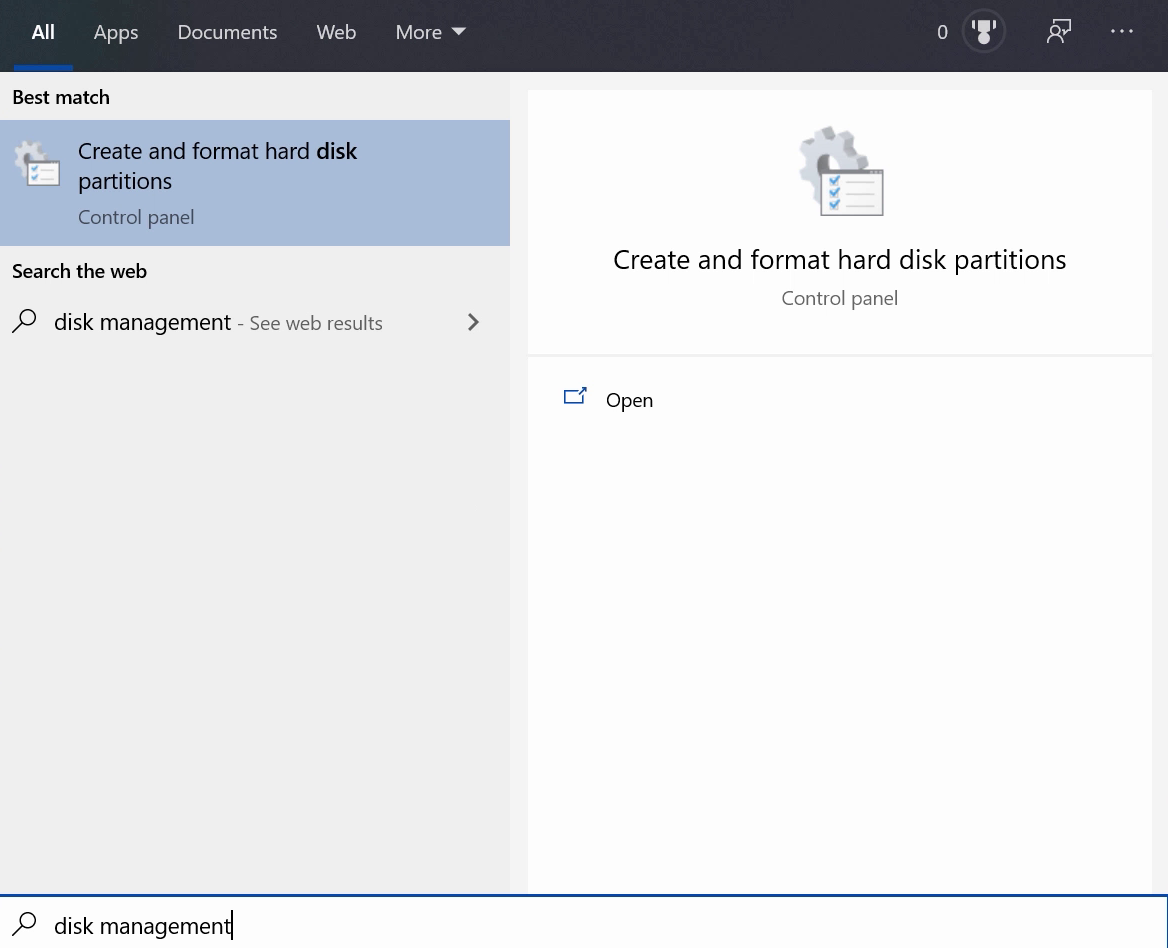
- Search for and open the “Disk Management” app in your Control Panel.
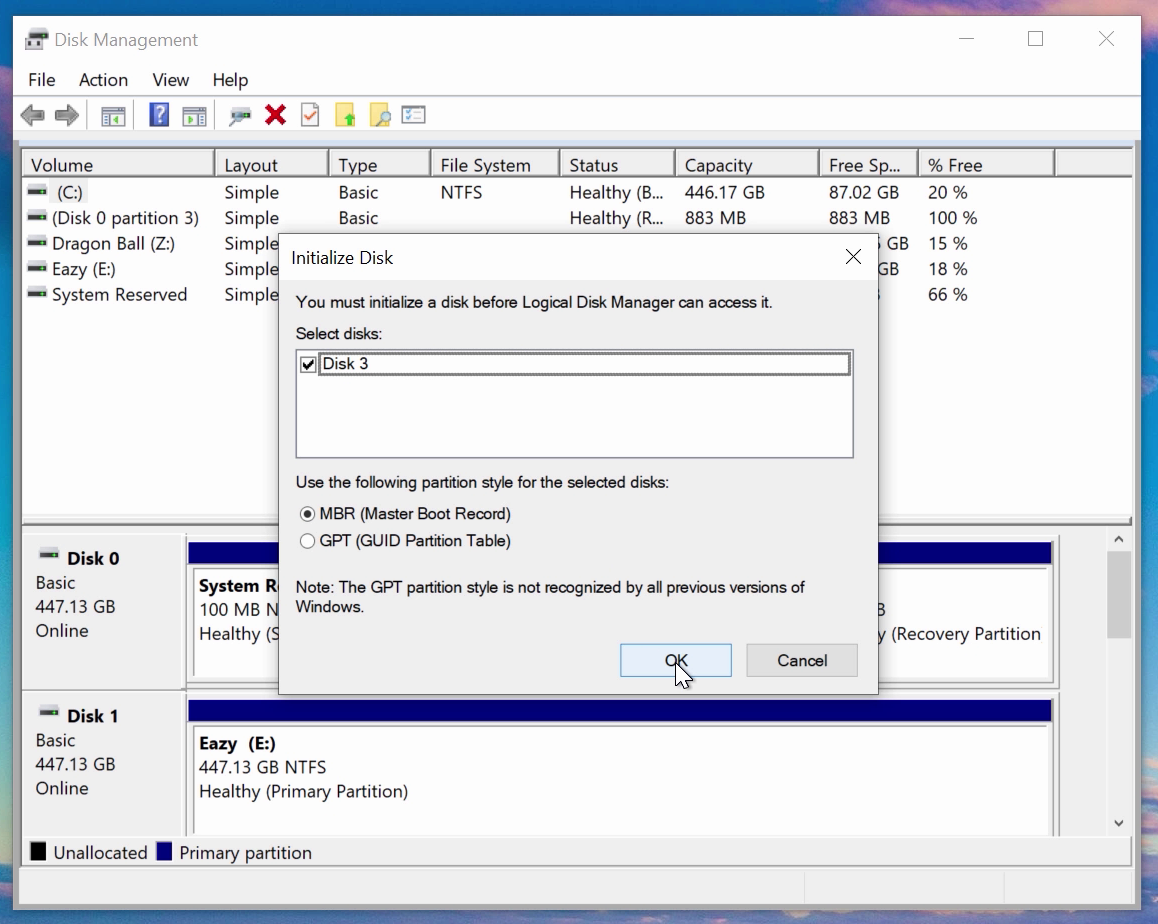
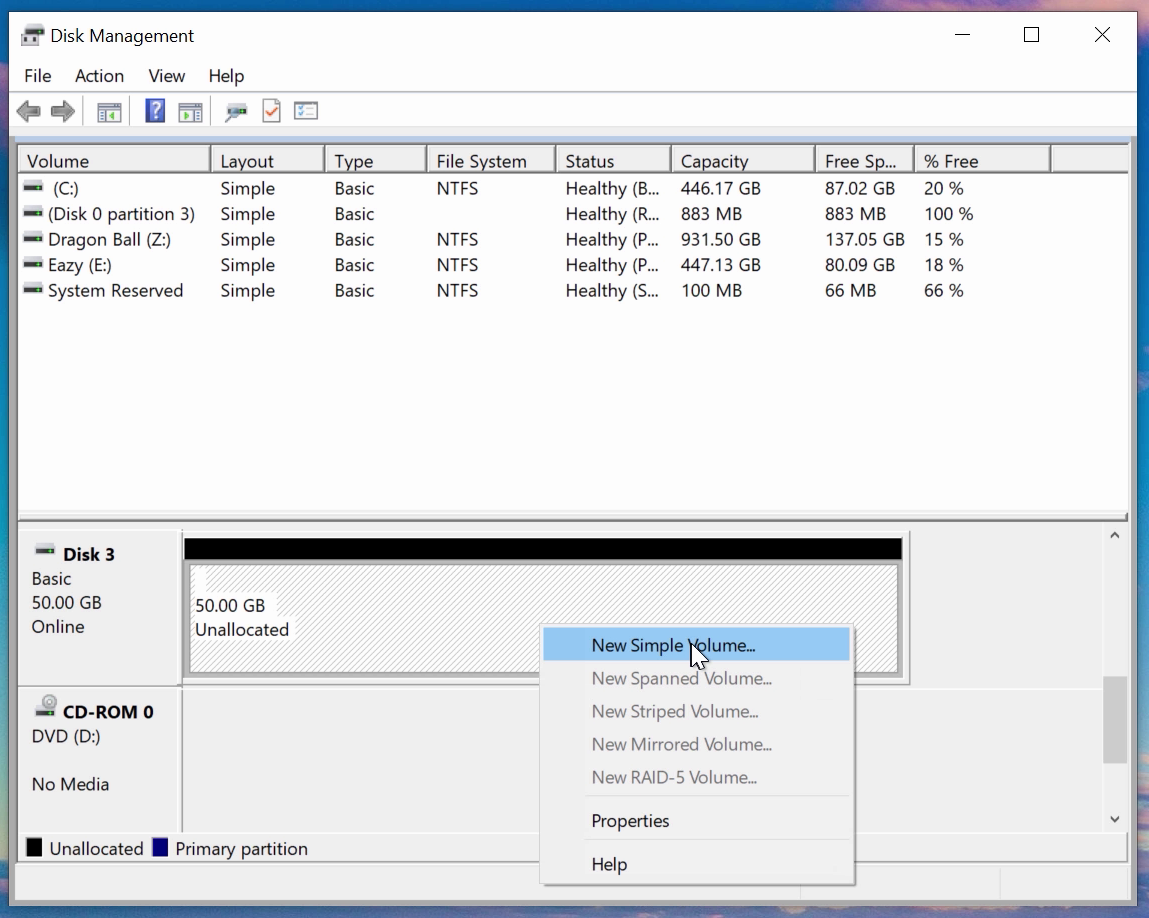
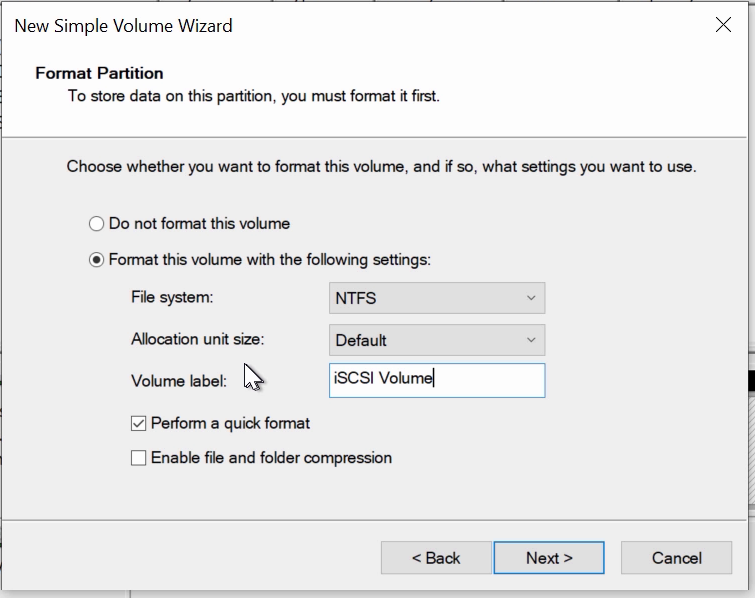
- A new window will ask you to format the drive. Your drive should currently be ”unallocated”. Complete the Wizard to format it and assign it a drive letter and name.
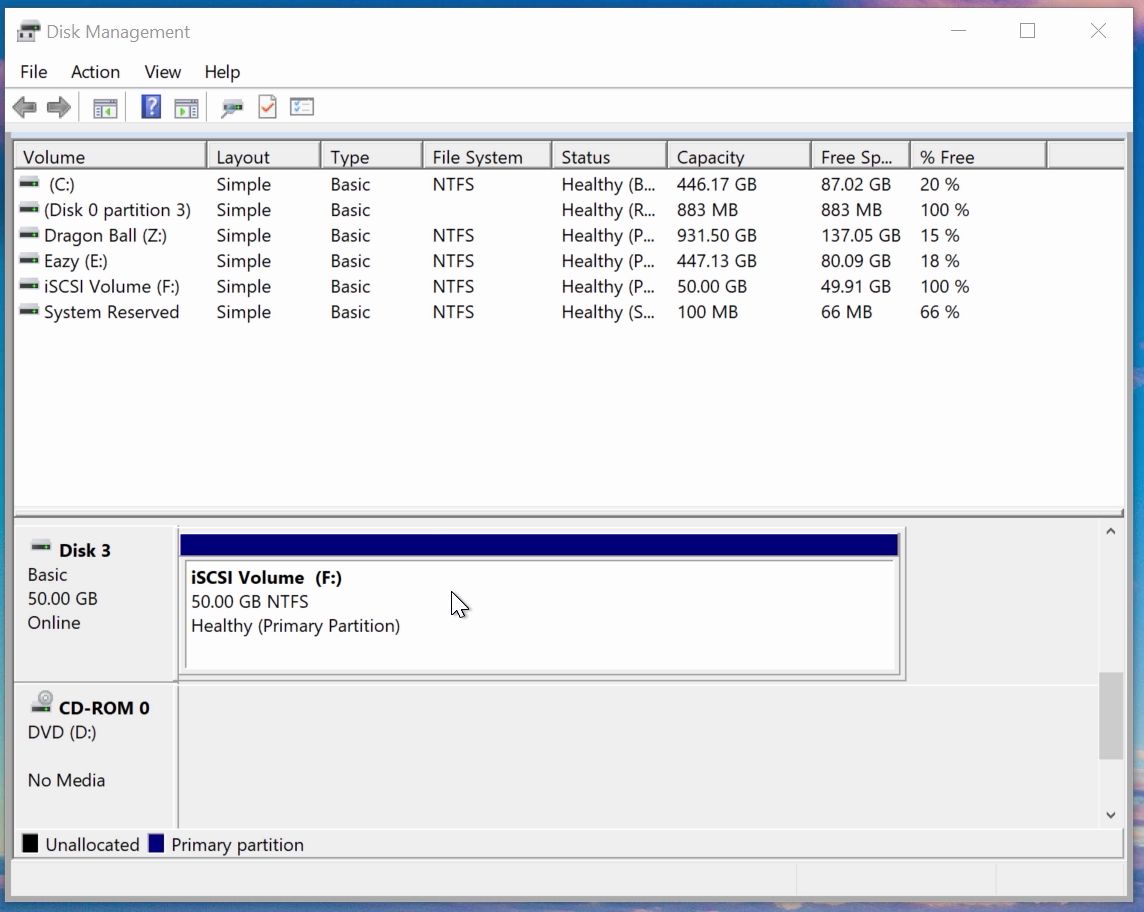
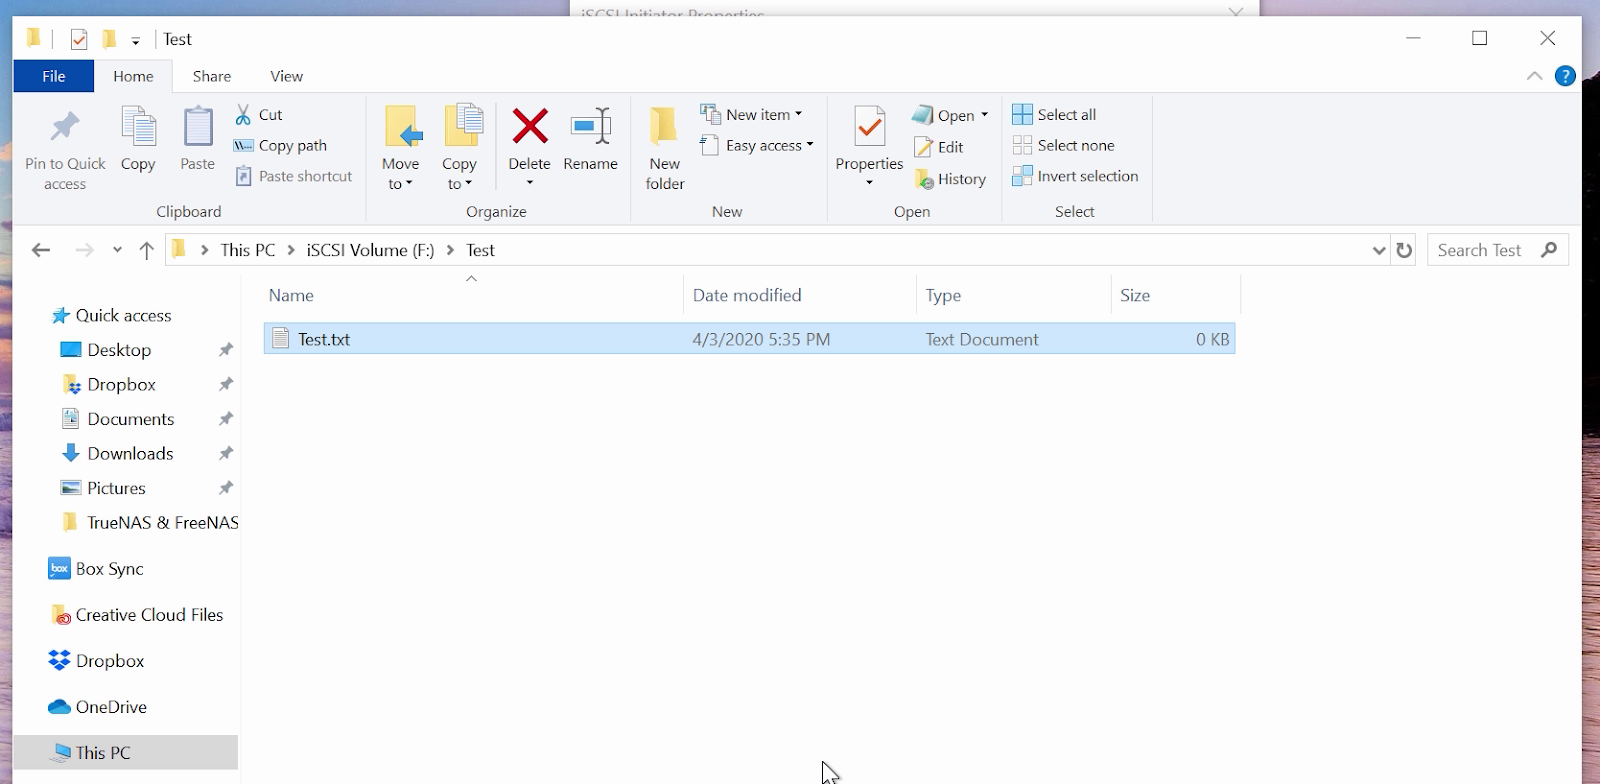
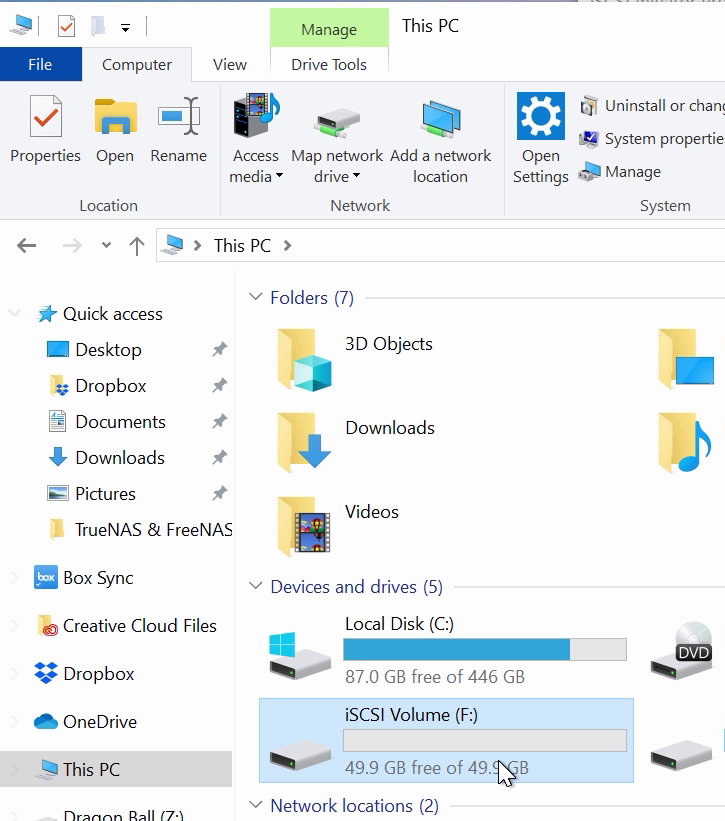
- Go to This PC or My Computer and your new iSCSI volume should show up under the list of drives. You should now be able to add, delete, and modify files and folders on your iSCSI drive.
Thank you for reading through this tutorial! Be sure to check out our other tutorial videos on our YouTube channel, and don’t forget to comment, like, and subscribe. Don’t forget to click the “notification bell” to receive alerts on new videos.



