The Complete Guide to Workload Mobility with VCF Operatio...
Cassio Homem·2026-06-26·via VMware Blogs
Welcome to the step-by-step guide on how to deploy HCX Manager in VCF 9.1 and legacy environments. This post contains the full details and a video recording covering every step of the process.
Key Points
VCF Integrated Experience (NEW): VMware Cloud Foundation Operations HCX brings centralized deployment directly through the VCF 9.1 interface.
Getting Started: Discover the step-by-step process to deploy your first HCX manager and unlock workload mobility.
About This Series
Part 1: Deploy VMware Cloud Foundation Operations HCX 9.1 directly from VCF 9.1 and manually deploy it on the legacy environment.
Part 2: Creating the Network Profile, Compute Profile, Site Pair, and Service Mesh.
Part 3: Extending the networks and performing your first migration.
Watch the full video walk-through below to see how to deploy HCX Manager in VCF 9.1:
Disclaimer: It is important to note that this blog offers general recommendations, which may not apply to all scenarios or cover every aspect of deployment. For professional services, please engage Broadcom Professional Services.
Why VCF Operations HCX?
As an administrator, migrating workloads efficiently and securely within and across data centers is a fundamental part of your private cloud strategy. To explore exactly what VCF Operations HCX can do in greater detail, check out the official Broadcom documentation on Workload Mobility and the VCF Operations Workload Mobility page.
1. Prerequisites
Before deploying the HCX appliances, it is critical to ensure your source and destination environments are ready. For an exhaustive breakdown, we highly recommend reviewing the official Broadcom documentation: Preparing for General Installation.
For the scope of this deployment guide, here are the core requirements you must have in place:
Environment Access & Credentials: For your legacy source, you need administrative access (administrator@vsphere.local or equivalent) to the vCenter Server and SSO domain. For the destination, VCF Operations handles the integrations automatically, so you simply need administrative access to the VCF Operations console.
NSX Configuration: NSX is optional at your legacy source site. On the destination side, VCF 9.1 natively includes NSX, and VCF Operations will automatically configure the NSX integration for you during deployment.
Core Infrastructure Services: Highly available DNS and NTP are required. While VCF automates the appliance configuration on the destination, you must pre-create the DNS A-records for both your Source and Destination HCX Manager FQCNs before starting.
Network & IP Planning: Identify your Management, vMotion, Replication, and Uplink networks (VLANs, subnets, and Port Groups). The Uplink network is the path used by HCX to physically reach and communicate with the remote site.
Firewall & Port Requirements:
The Source HCX Manager must be able to reach the Destination HCX Manager over TCP 443.
The site-to-site data plane appliances: Interconnect (IX) and Network Extension (NE) will require IPSec UDP 4500 to establish their secure tunnels and ports TCP/UDP 5201 for Perftest diagnostics.
2. Downloading and Deploying the VCF Operations HCX Manager
In the VCF 9.1 architecture, the deployment of the mobility components is highly streamlined and initiated directly from your centralized management interface. First, we need to ensure the installation binaries are downloaded to your specific VCF instance.
Log in to the VCF Operations unified console.
Navigate to the top menu and select Build.
In the left navigation pane, expand Lifecycle > VCF Instances, and click on your target instance name.
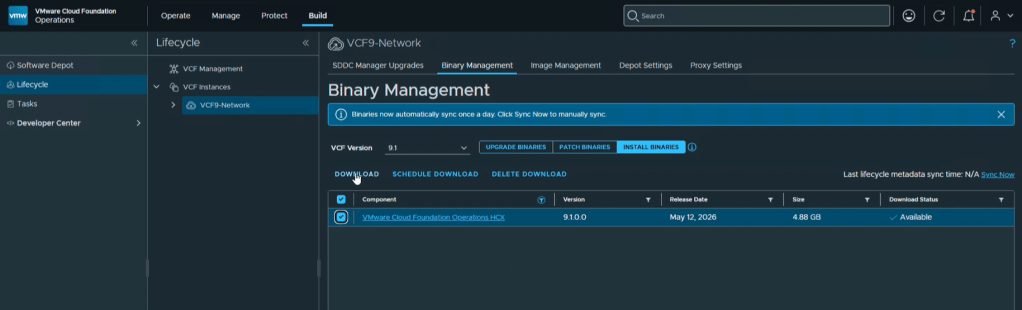
Go to the Binary Management tab and select the INSTALL BINARIES view.
From the Component list, select the latest available version of VMware Cloud Foundation Operations HCX (e.g., version 9.1.0.0) and click DOWNLOAD.
Once the binary download completes, you can proceed with deploying the manager appliance:
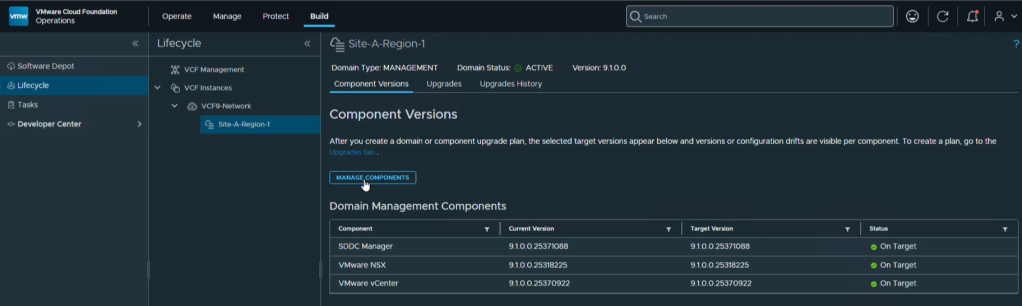
Select the domain, and under the Software Versions tab, click the MANAGE COMPONENTS button.
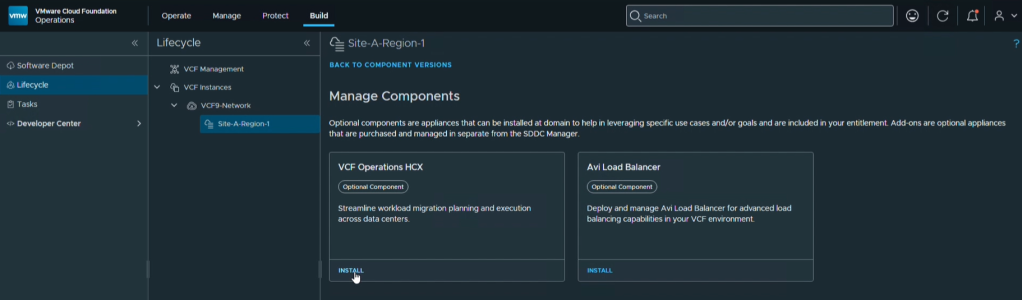
The system will display available optional components. Locate the VCF Operations HCX tile and click the INSTALL button.
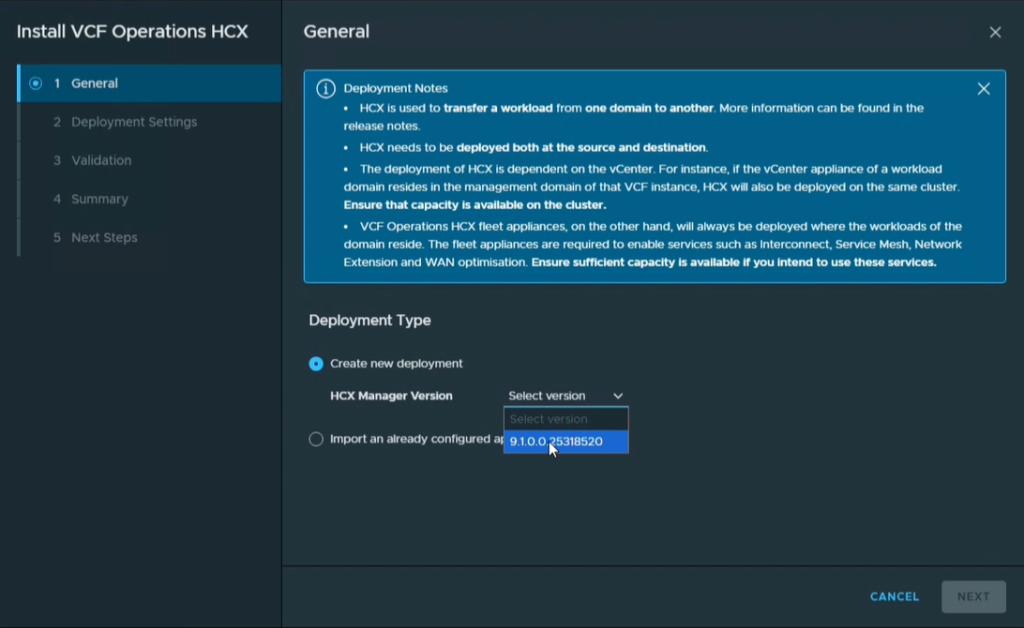
In the General deployment step, select the downloaded HCX Manager Version (e.g., 9.1.0.0 or later) from the dropdown menu and click NEXT.
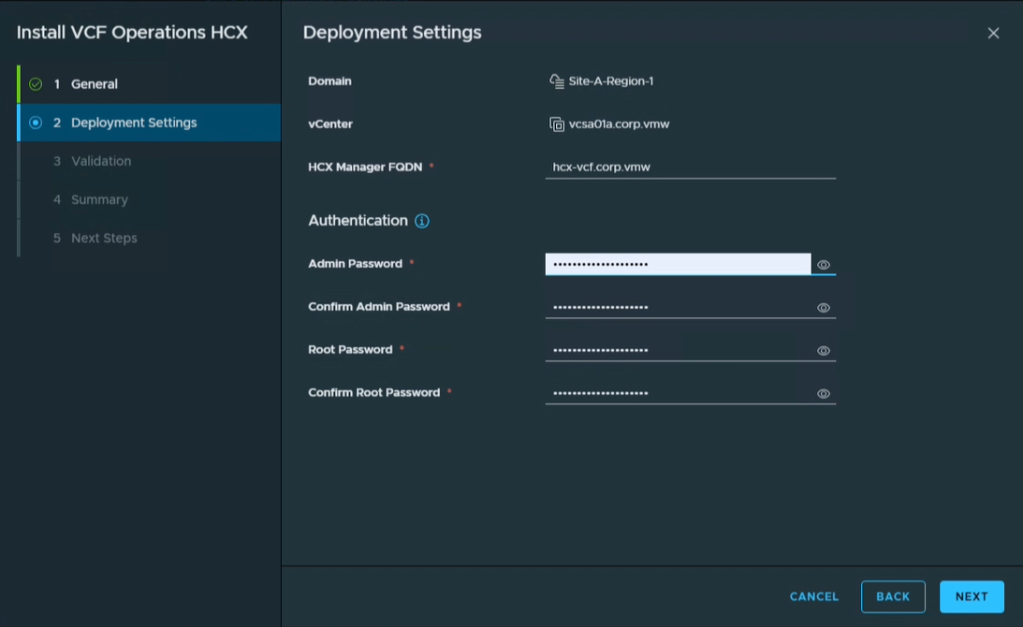
From the Deployment Settings screen, specify the HCX Manager FQDN. Ensure the corresponding DNS A-record has already been created. Next, set your admin and root credentials.
Note: Only this information is required. The remaining deployment tasks are automatically driven by the management domain components. Click NEXT.
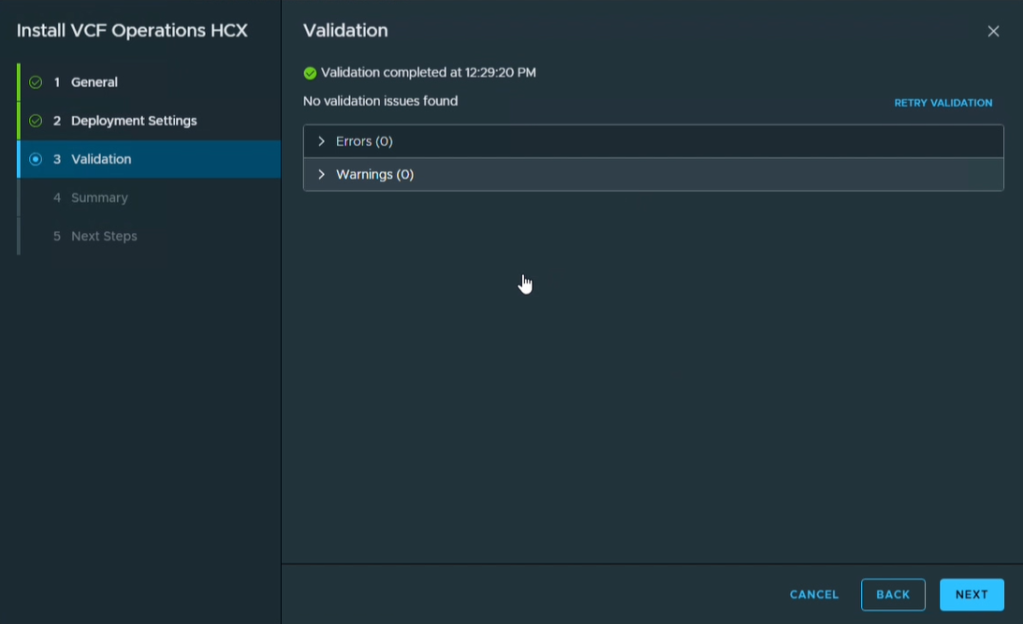
Ensure all environmental validations and tests pass on the Validation screen, then click NEXT.
On the Summary screen, confirm the information provided and click NEXT.
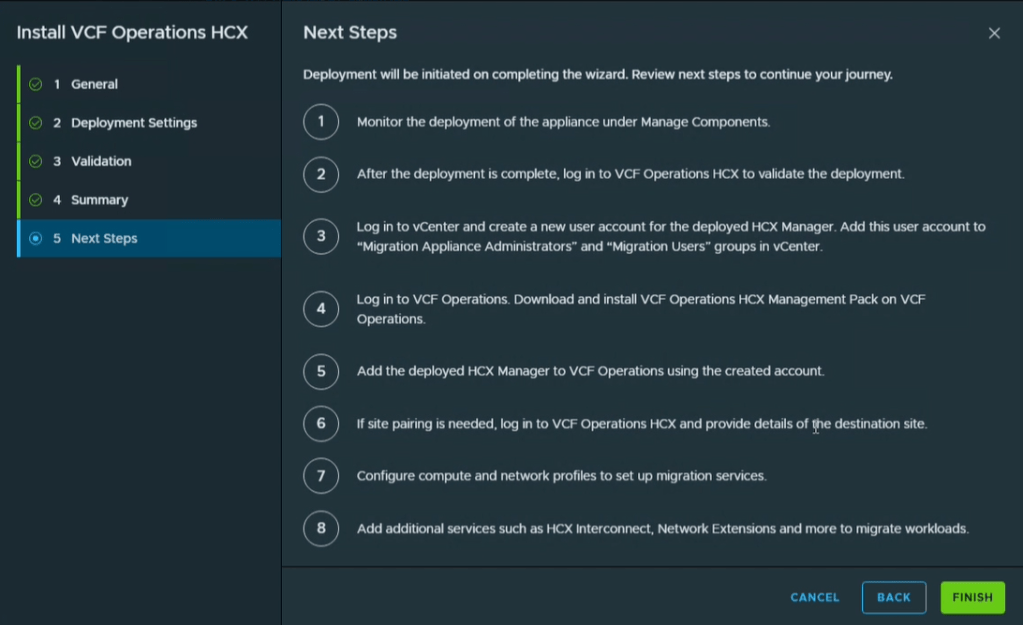
The Next Steps screen will provide an overview of the ongoing actions required to achieve workload mobility. We will guide you through all of these steps along this journey! Click FINISH to initiate the deployment.
3. Deploying the Source HCX Manager (Legacy Environment)
Now that our destination environment is actively deploying, we must repeat a manual OVA deployment process on your legacy Source environment to deploy VCF Operations HCX Manager 9.1 . Since this vSphere instance exists outside of VCF, it requires a standard OVF deployment.
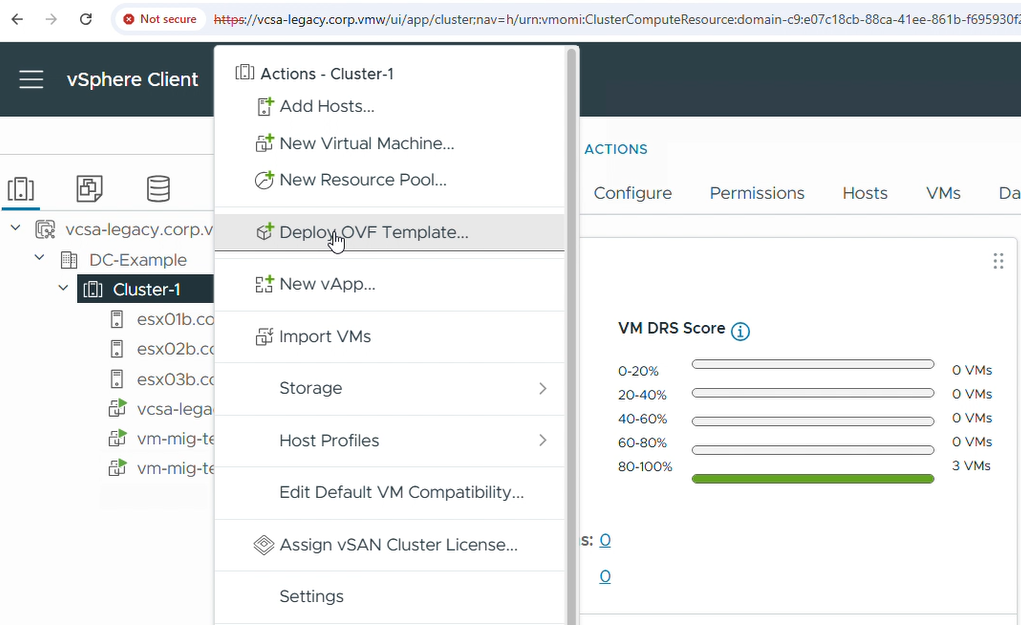
Log in to your legacy source vCenter Client, right-click the cluster where the manager will reside, and select Deploy OVF Template.
Select the local OVA file you downloaded, provide a virtual machine name, and click NEXT.
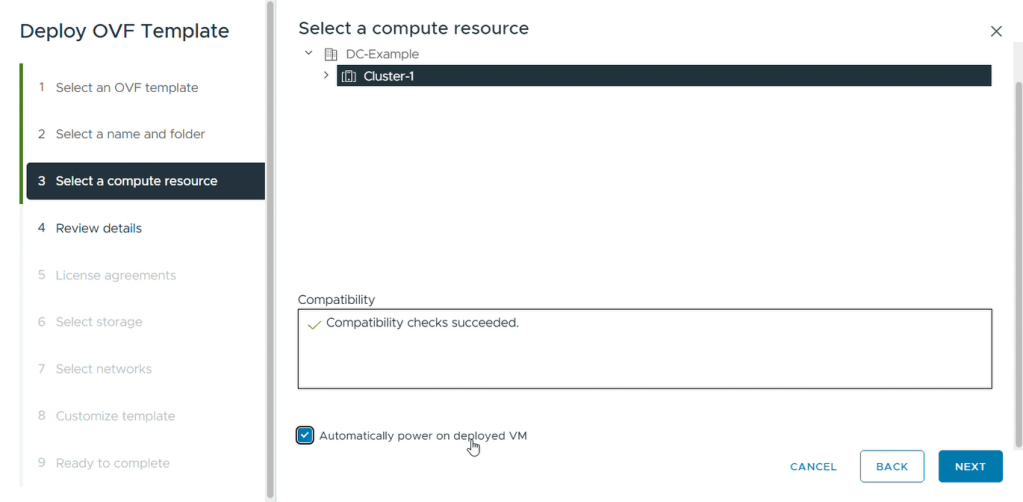
When selecting the compute cluster, ensure you check the option to Automatically power on deployed VM, then click NEXT.
Continue through the wizard to accept the license agreement, choose your datastore, and map the appliance to your management network.
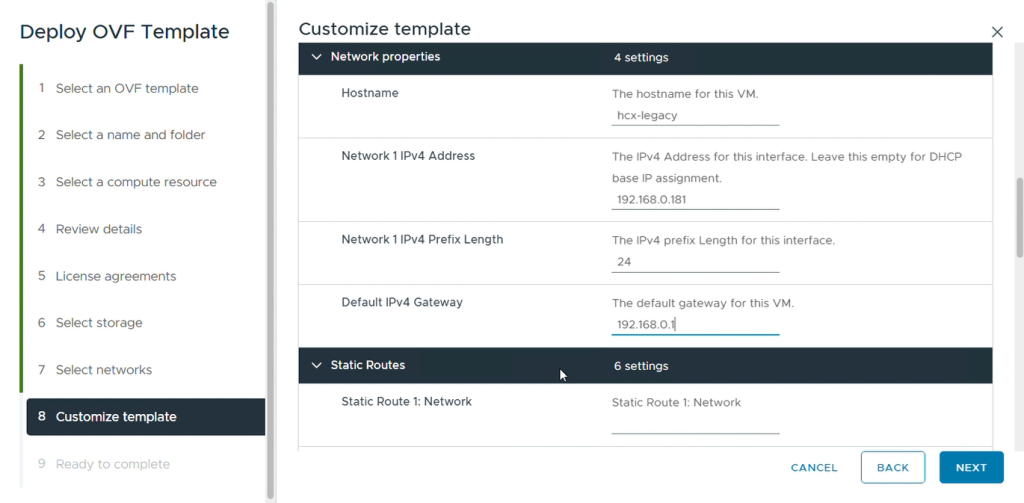
In the Customize template screen, define the admin and root passwords. Scroll down to configure your network properties, including the hostname, static IP address, prefix length, default gateway, and DNS servers.
Review your settings and click FINISH to deploy the appliance. Because we checked the auto-power-on option, the VM will boot as soon as the task completes.
Once the appliance has booted, it must be configured and linked to the source compute environment.
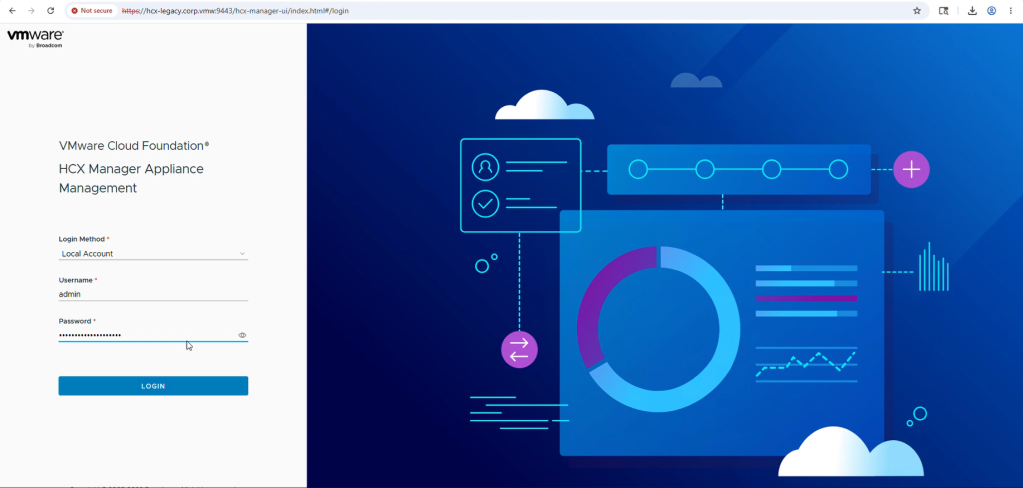
Navigate to the appliance administration interface by opening https://<Source-HCX-Manager-FQDN>:9443 in your browser.
Log in using the admin credentials you defined during the OVF deployment.
Enter a System Name and click CONTINUE.
Select vSphere as your instance type.
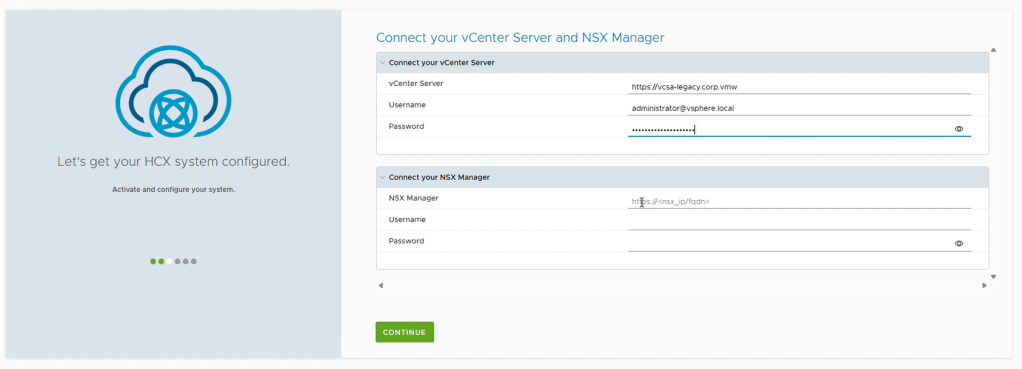
Proceed to connect your vCenter Server by entering its FQDN and administrative credentials.
Note: Since our legacy environment does not have NSX, we will leave the NSX Manager section blank and click CONTINUE.
When prompted with a certificate warning for the vCenter connection, click IMPORT CERTIFICATE.
Note: Before accepting the certificates, confirm the thumbprint is matching.
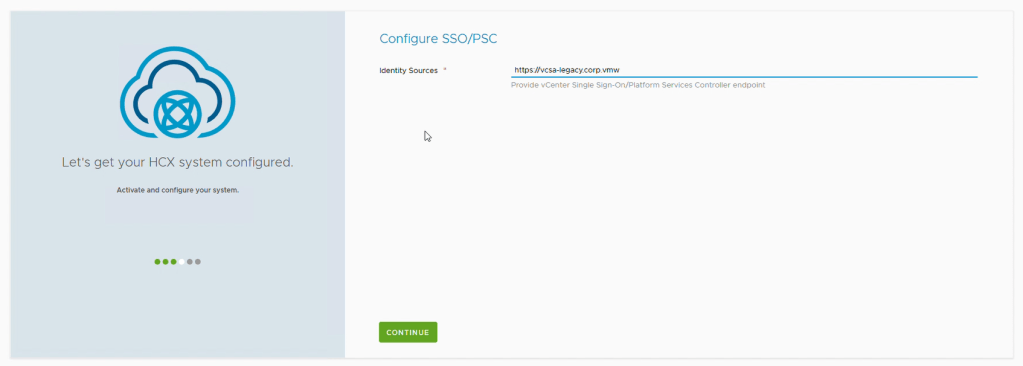
On the Configure SSO/PSC screen, enter your legacy vCenter URL in the Identity Sources field and click CONTINUE.
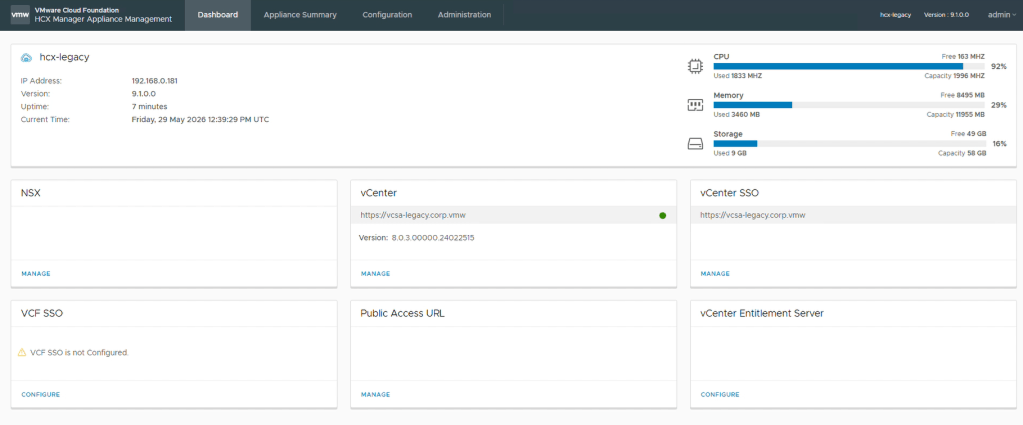
When prompted to configure VCF SSO, click CONFIGURE LATER to safely skip this step.
Click RESTART to apply the configurations to the appliance.
What’s Next?
With the VCF Operations HCX Managers deployed, the foundation is set. However, the two sites do not know about each other yet.
In Part 2: Creating the Network Profile, Compute Profile, Site Pair, and Service Mesh, we will cover how to pair the Source and Destination sites, design Compute Profiles, and deploy the Service Mesh appliances responsible for the data transfer.
Acknowledgements
Special thanks toAbhilash Kunhappan, Chris Cambbell and Jose Gonzalez Cobo (Product Management).
Discover more from VMware Cloud Foundation (VCF) Blog
Subscribe to get the latest posts sent to your email.