





由于工作需求,需要将三维雷达点云数据投影到二维平面上,以便进行后续的可视化分析或与其他2D传感器(如摄像头)的数据融合。为此,我整理并实现了完整的3D到2D投影代码,并在此记录整个过程,以备日后查阅与复用。
下图展示了投影后的效果:原始的3D点云经过坐标变换与视角映射后,成功呈现在2D图像平面上,保留了关键的空间结构信息,为后续的目标检测、场景理解等任务奠定了基础。
原始点云
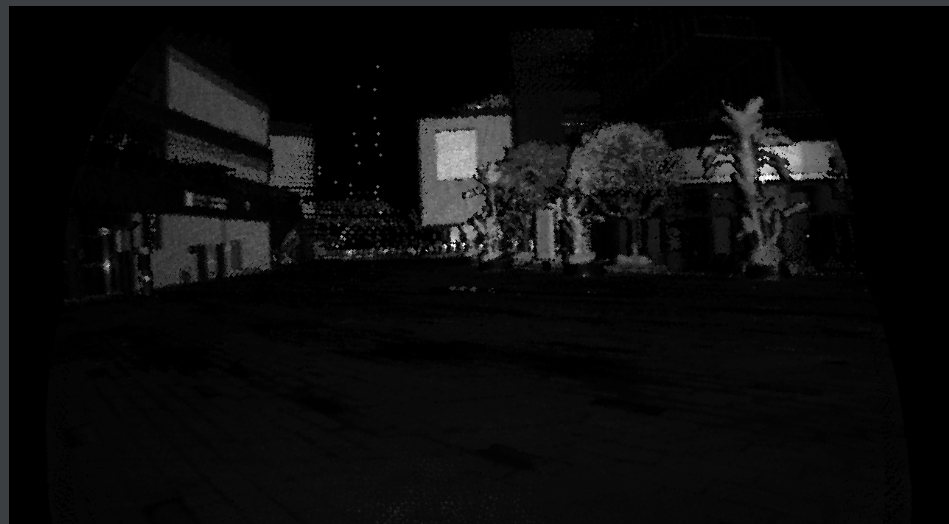
含强度信号转灰度图
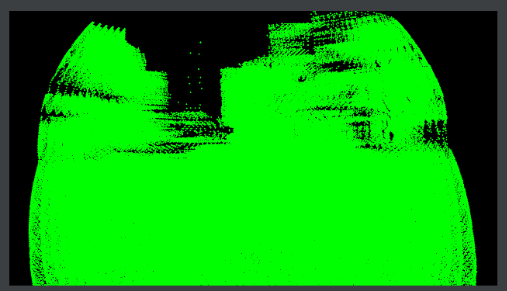
纯绿色投影投影
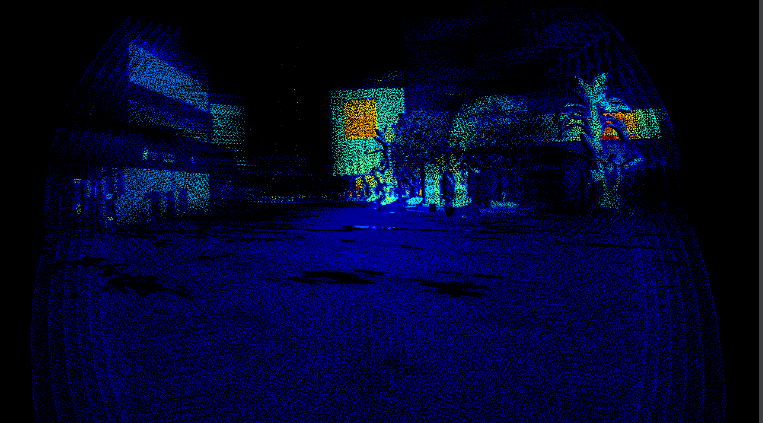
增加颜色投影
该实现充分考虑了雷达坐标系与图像坐标系之间的转换关系,支持灵活调整投影参数(如俯仰角、偏航角、视场角等),具有良好的通用性和可扩展性。
1. pcl库的安装
sudo apt install libpcl-dev
2. opencv库的安装
sudo apt-get install libopencv-dev
3. 准备摄像机的内参标定
我使用的是棋盘标定法,用matlab做的,具体参考我的另一篇博客: https://www.cnblogs.com/cqwo/p/19179297
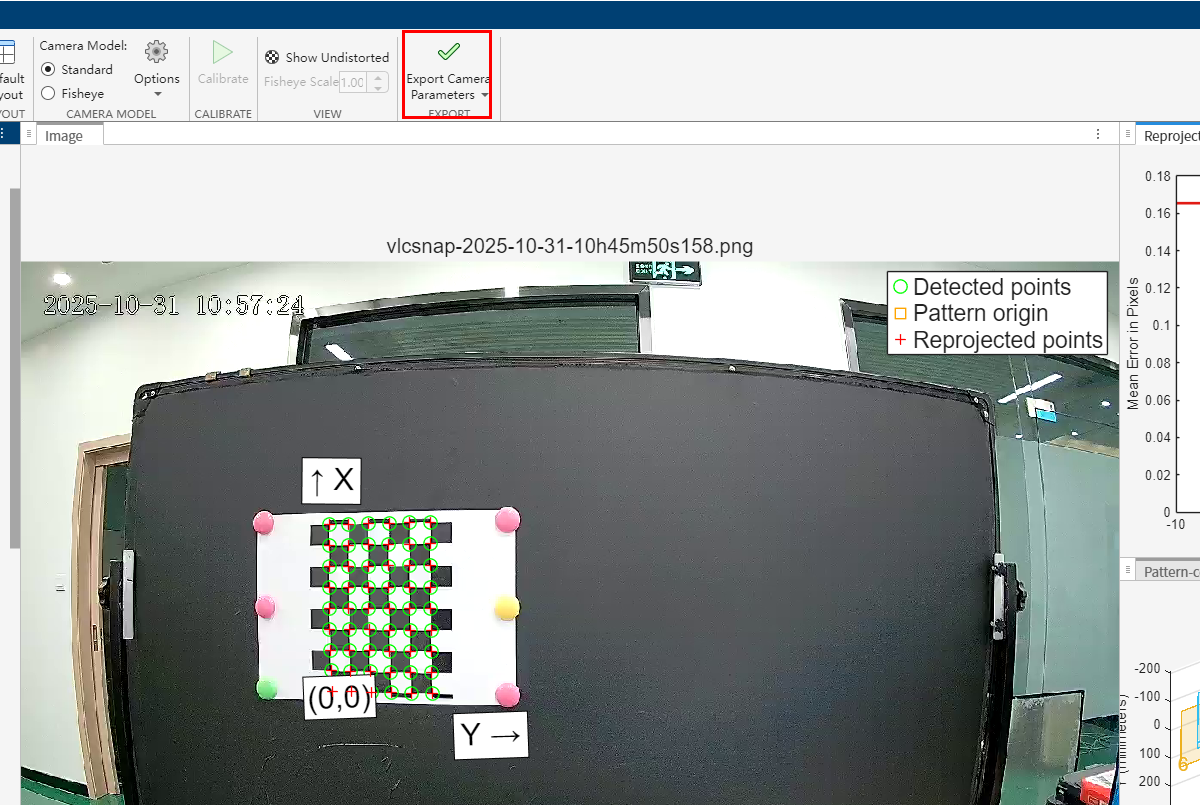
相机内参标定
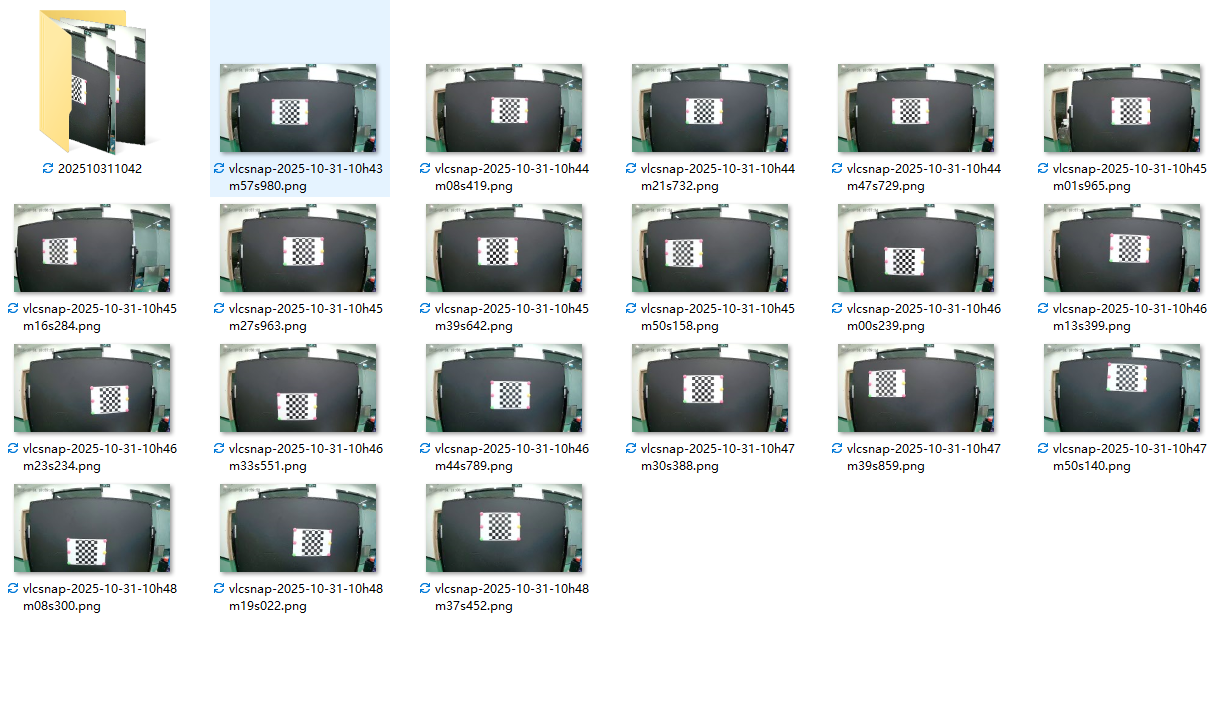
相机内参素材
4. 相机雷达参数标定
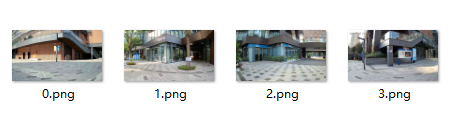
标定参数图像
标定参数对应点云
具体步骤参数下面港大论文和公共的
参考论文:http://arxiv.org/abs/2103.01627
参考代码:https://github.com/hku-mars/livox_camera_calib
代码1():
#include <iostream>
#include <opencv2/opencv.hpp>
#include <pcl/io/pcd_io.h>
#include <pcl/point_types.h>
#include <pcl/point_cloud.h>
#include <algorithm> // for min_element, max_element

int main() {
    // 1. 读取带 intensity 的 PCD
    pcl::PointCloud<pcl::PointXYZI>::Ptr cloud(new pcl::PointCloud<pcl::PointXYZI>);
    if (pcl::io::loadPCDFile<pcl::PointXYZI>("your_pointcloud.pcd", *cloud) == -1) {
        std::cerr << "❌ 无法加载 PCD 文件!" << std::endl;
        return -1;
    }

    // 2. 提取有效点(含 intensity)
    std::vector<pcl::PointXYZI> valid_points;
    for (const auto& pt : cloud->points) {
        if (std::isfinite(pt.x) && std::isfinite(pt.y) && std::isfinite(pt.z)) {
            valid_points.push_back(pt);
        }
    }

    if (valid_points.empty()) {
        std::cerr << "⚠️ 没有有效点!" << std::endl;
        return -1;
    }

    // 3. 构建 OpenCV 所需的 Point3f 列表(仅用于 projectPoints)
    std::vector<cv::Point3f> object_points;
    object_points.reserve(valid_points.size());
    for (const auto& pt : valid_points) {
        object_points.emplace_back(pt.x, pt.y, pt.z);
    }

    // 4. 相机内参(你的真实参数)
    cv::Mat cameraMatrix = (cv::Mat_<double>(3, 3) <<
        783.890724, 0.198476, 628.151868,
        0.0,        783.350933, 382.160525,
        0.0,        0.0,        1.0
    );

    // 5. 畸变系数(你的真实参数)
    cv::Mat distCoeffs = (cv::Mat_<double>(5, 1) <<
        -0.413786, 0.249752, 0.00262, -0.00224, 0.0
    );

    // 6. 外参 T_C^L(你的真实参数)
    Eigen::Matrix4f T_CL;
    T_CL << -0.013604, -0.999425, -0.031069, 0.075062,
            -0.024031,  0.031390, -0.999218, 0.037218,
             0.999619, -0.012847, -0.024444, -0.692299,
             0.0,       0.0,       0.0,       1.0;

    // 提取 R 和 t
    cv::Mat R_mat = (cv::Mat_<double>(3, 3) <<
        T_CL(0,0), T_CL(0,1), T_CL(0,2),
        T_CL(1,0), T_CL(1,1), T_CL(1,2),
        T_CL(2,0), T_CL(2,1), T_CL(2,2)
    );
    cv::Mat t_vec = (cv::Mat_<double>(3, 1) <<
        T_CL(0,3), T_CL(1,3), T_CL(2,3)
    );

    // 转为旋转向量
    cv::Mat rvec;
    cv::Rodrigues(R_mat, rvec);

    // 7. 投影
    std::vector<cv::Point2f> image_points;
    cv::projectPoints(object_points, rvec, t_vec, cameraMatrix, distCoeffs, image_points);

    // 8. 创建图像(根据你的相机分辨率)
    int img_width = 1280;   // 请确认你的图像宽度
    int img_height = 720;   // 请确认你的图像高度
    cv::Mat img = cv::Mat::zeros(img_height, img_width, CV_8UC3);

    // 9. 归一化 intensity 到 [0, 255]
    float min_i = std::numeric_limits<float>::max();
    float max_i = std::numeric_limits<float>::lowest();
    for (const auto& pt : valid_points) {
        if (pt.intensity < min_i) min_i = pt.intensity;
        if (pt.intensity > max_i) max_i = pt.intensity;
    }
    float range = max_i - min_i;
    if (range <= 0) range = 1.0f; // 防止除零

    // 10. 绘制点(灰度图)
    for (size_t i = 0; i < image_points.size(); ++i) {
        const cv::Point2f& p = image_points[i];
        if (p.x >= 0 && p.x < img_width && p.y >= 0 && p.y < img_height) {
            float norm_i = (valid_points[i].intensity - min_i) / range;
            int gray = static_cast<int>(norm_i * 255.0f);
            cv::circle(img, cv::Point(static_cast<int>(p.x), static_cast<int>(p.y)),
                       2, cv::Scalar(gray, gray, gray), -1);
        }
    }

    // 11. 保存结果
    std::string out_file = "projection_intensity.png";
    if (cv::imwrite(out_file, img)) {
        std::cout << "✅ 投影图像已保存为: " << out_file << std::endl;
        std::cout << "📊 Intensity 范围: [" << min_i << ", " << max_i << "]" << std::endl;
    } else {
        std::cerr << "❌ 无法保存图像!" << std::endl;
        return -1;
    }

    return 0;
}
附件2: 带上色的图
#include <pcl/point_types.h>
#include <pcl/io/pcd_io.h>
#include <pcl/filters/voxel_grid.h>
#include <pcl/registration/icp.h>
#include <pcl/visualization/pcl_visualizer.h>
#include <pcl/point_cloud.h>
#include <opencv2/opencv.hpp>
#include <lidar/LdsLidar.h>
#include <thread>
#include <cmath>
#include <algorithm>

#include <pcl/common/transforms.h>
#include <pcl/common/common.h>
#include <iostream>
#include <chrono>
#include <pcl/point_cloud.h>


int main() {
    // 1. 读取带 intensity 的 PCD
    pcl::PointCloud<pcl::PointXYZI>::Ptr cloud(new pcl::PointCloud<pcl::PointXYZI>);
    if (pcl::io::loadPCDFile<pcl::PointXYZI>("../Config/PCD/SLIDER.pcd", *cloud) == -1) {
        std::cerr << "❌ 无法加载 PCD 文件!" << std::endl;
        return -1;
    }

    // 2. 提取有效点(含 intensity)
    std::vector<pcl::PointXYZI> validPoints;
    for (const auto& pt : cloud->points) {
        if (std::isfinite(pt.x) && std::isfinite(pt.y) && std::isfinite(pt.z)) {
            validPoints.push_back(pt);
        }
    }

    if (validPoints.empty()) {
        std::cerr << "⚠️ 没有有效点!" << std::endl;
        return -1;
    }

    // 3. 构建 OpenCV 所需的 Point3f 列表(仅用于 projectPoints)
    std::vector<cv::Point3f> objectPoints;
    objectPoints.reserve(validPoints.size());
    for (const auto& pt : validPoints) {
        objectPoints.emplace_back(pt.x, pt.y, pt.z);
    }

    // 4. 相机内参(你的真实参数)
    cv::Mat cameraMatrix = (cv::Mat_<double>(3, 3) <<
                                                   783.890724, 0.198476, 628.151868,
            0.0,        783.350933, 382.160525,
            0.0,        0.0,        1.0
    );

    // 5. 畸变系数(你的真实参数)
    cv::Mat distCoeffs = (cv::Mat_<double>(5, 1) <<
                                                 -0.413786, 0.249752, 0.00262, -0.00224, 0.0
    );

    // 6. 外参 T_C^L(你的真实参数)
    Eigen::Matrix4f T_CL;
    T_CL << -0.013604, -0.999425, -0.031069, 0.075062,
            -0.024031,  0.031390, -0.999218, 0.037218,
            0.999619, -0.012847, -0.024444, -0.692299,
            0.0,       0.0,       0.0,       1.0;

    // 提取 R 和 t
    cv::Mat R_mat = (cv::Mat_<double>(3, 3) <<
                                            T_CL(0,0), T_CL(0,1), T_CL(0,2),
            T_CL(1,0), T_CL(1,1), T_CL(1,2),
            T_CL(2,0), T_CL(2,1), T_CL(2,2)
    );
    cv::Mat t_vec = (cv::Mat_<double>(3, 1) <<
                                            T_CL(0,3), T_CL(1,3), T_CL(2,3)
    );

    // 转为旋转向量
    cv::Mat rvec;
    cv::Rodrigues(R_mat, rvec);

    // 7. 投影
    std::vector<cv::Point2f> imagePoints;
    cv::projectPoints(objectPoints, rvec, t_vec, cameraMatrix, distCoeffs, imagePoints);

    // 8. 创建图像(根据你的相机分辨率)
    int imgWidth = 1280;   // 请确认你的图像宽度
    int imgHeight = 720;   // 请确认你的图像高度

    // 9. 归一化 intensity 到 [0, 255]
    float minI = std::numeric_limits<float>::max();
    float maxI = std::numeric_limits<float>::lowest();
    for (const auto& pt : validPoints) {
        if (pt.intensity < minI) minI = pt.intensity;
        if (pt.intensity > maxI) maxI = pt.intensity;
    }
    float range = maxI - minI;
    if (range <= 0) range = 1.0f; // 防止除零

    // === 9. 创建单通道灰度图 ===
    cv::Mat grayImg = cv::Mat::zeros(imgHeight, imgWidth, CV_8UC1);

    for (size_t i = 0; i < imagePoints.size(); ++i) {
        const cv::Point2f& p = imagePoints[i];
        int x = static_cast<int>(p.x + 0.5);
        int y = static_cast<int>(p.y + 0.5);

        if (x >= 0 && x < imgWidth && y >= 0 && y < imgHeight) {
            float norm_i = (validPoints[i].intensity - minI) / range;
            uint8_t val = static_cast<uint8_t>(std::min(255.0f, std::max(0.0f, norm_i * 255.0f)));

            // 可选:保留最强反射(最大 intensity)
            auto& current = grayImg.at<uint8_t>(y, x);
            if (val > current) {
                current = val;
            }
        }
    }
    // === 10. 应用 JET 伪彩色 ===
    cv::Mat colorImg;
    cv::applyColorMap(grayImg, colorImg, cv::COLORMAP_JET);

    // === 11. 将无点区域设为黑色(默认 JET 中 0=深蓝,我们改为黑)===
    cv::Mat mask = (grayImg == 0);
    colorImg.setTo(cv::Scalar(0, 0, 0), mask); // BGR 黑色

    // 12. 保存结果
    std::string outFile = "projection_color.png";
    if (cv::imwrite(outFile, colorImg)) {
        std::cout << "✅ 投影图像已保存为: " << outFile << std::endl;
        std::cout << "📊 Intensity 范围: [" << minI << ", " << maxI << "]" << std::endl;
    } else {
        std::cerr << "❌ 无法保存图像!" << std::endl;
        return -1;
    }

    return 0;
}
此内容由惯性聚合(RSS阅读器)自动聚合整理,仅供阅读参考。 原文来自 — 版权归原作者所有。