惯性聚合 高效追踪和阅读你感兴趣的博客、新闻、科技资讯
阅读原文 在惯性聚合中打开

推荐订阅源

P
Proofpoint News Feed
Blog — PlanetScale
Blog — PlanetScale
GbyAI
GbyAI
C
Check Point Blog
腾讯CDC
Stack Overflow Blog
Stack Overflow Blog
Cyber Security Advisories - MS-ISAC
The GitHub Blog
The GitHub Blog
A
About on SuperTechFans
Recent Announcements
L
LangChain Blog
Microsoft Azure Blog
小众软件
小众软件
J
Java Code Geeks
博客园_首页
Jina AI
Jina AI
美团技术团队
H
Help Net Security
MyScale Blog
MyScale Blog
Engineering at Meta
Engineering at Meta
奇客Solidot–传递最新科技情报
奇客Solidot–传递最新科技情报
人人都是产品经理
人人都是产品经理
Y
Y Combinator Blog
S
SegmentFault 最新的问题

Runpod Blog.

DeepSeek V4 in the wild, and how to run it on Runpod New Runpod datacenter now live: AP-IN-1 Track GPU spend across your team with Cost Centers The GPU supply supercycle is here. Here’s what AI builders need to know. Community Spotlight: One-click AI image and video generation on Runpod with SwarmUI | Runpod Blog Community Spotlight: LoRA Pilot Data Prep to Inference Introducing the Runpod Assistant: Manage Your Cloud GPU Resources with Natural Language OpenAI's Parameter Golf: Train the Best Language Model That Fits in 16MB on Runpod LLM inference optimization: techniques that actually reduce latency and cost Pruna P-Video and Vidu Q3 public endpoints now available on Runpod Runpod brand spelling guide Quickstart - Runpod Documentation The AI market looks nothing like the narrative Training StyleGAN3 with Vision-Aided GAN on Runpod KoboldAI – The Other Roleplay Front End, And Why You May Want to Use It How to Connect Cursor to LLM Pods on Runpod for Seamless AI Dev Community Spotlight: How AnonAI Scaled Its Private Chatbot Platform with Runpod Prompt Scheduling with Disco Diffusion on Runpod Runpod's Latest Innovation: Dockerless CLI for Streamlined AI Development Run Your Own AI from Your iPhone Using Runpod Introducing Flash: Run GPU workloads on Runpod Serverless: No Docker required Use Claude Code with your own model on Runpod: No Anthropic account required Avoid Errors by Selecting the Proper Resources for Your Pod What hackers built on Runpod at TreeHacks 2026 Easily Back Up and Restore Your Pod with Cloud Sync + Backblaze B2 The Complete Guide to GPU Requirements for LLM Fine-Tuning AI Guides, Tutorials & GPU Infrastructure Insights | Runpod Your first Claude Code project within Runpod: a complete setup guide 10 billion Serverless requests and counting Building for resilience: Runpod’s response to the AWS us-east-1 outage
Deploy ComfyUI as a Serverless API Endpoint
Eliot Cowley · 2026-01-20 · via Runpod Blog.

Deploy ComfyUI as a Serverless API Endpoint

In a previous blog post, we explored Runpod Serverless, a pay-as-you-go cloud computing solution that doesn’t require managing servers to scale and maintain your applications. We deployed some basic code from templates that just printed some text to the console, but now let’s do something more performance-intensive.

ComfyUI is an open-source, node-based application for generative AI workflows. You can deploy ComfyUI as an API endpoint on Runpod Serverless, send workflows via API calls, and receive AI-generated images in response.

What you’ll learn

In this blog post you’ll learn how to:

  • Deploy ComfyUI to a serverless endpoint using the Runpod Hub and Docker images
  • Call the endpoint in Python and generate images based on ComfyUI workflows
  • Use different models with ComfyUI

Requirements

Deploy ComfyUI from Runpod Hub with FLUX.1-dev model

Runpod Hub provides convenient repositories that you can quickly deploy to Runpod Serverless without much setup. Let’s deploy the ComfyUI repo from Runpod Hub to a serverless endpoint, which will allow us to make requests to it from code.

  1. Sign in to the Runpod Console.
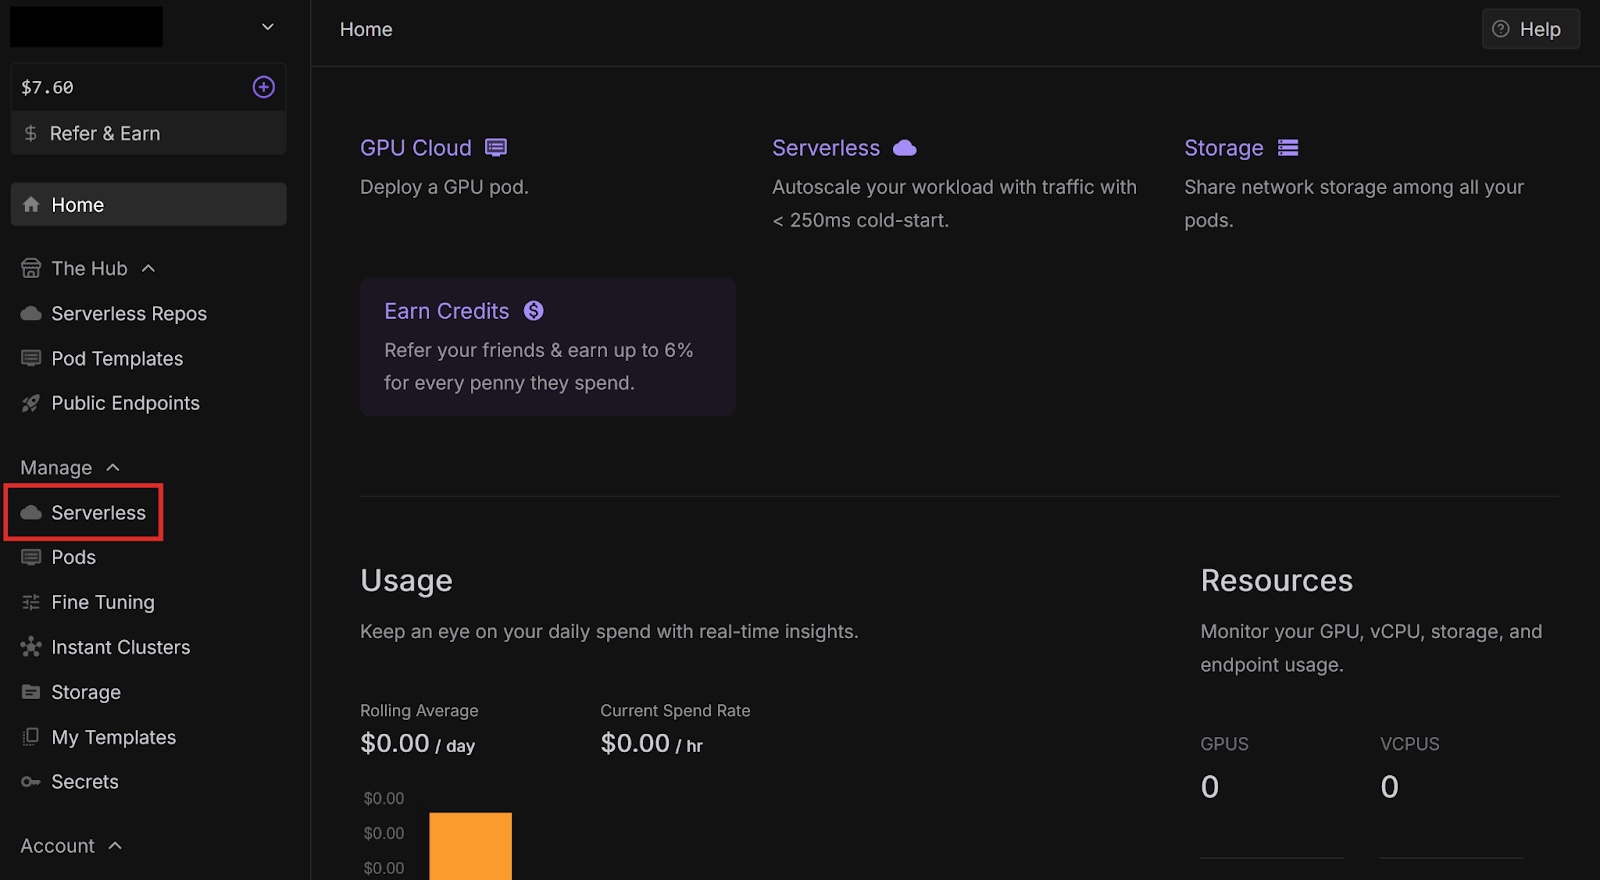
  2. Select Serverless from the left menUnder Ready-to-Deploy Repos, select ComfyUI.

Runpod console home page with Serverless highlighted in the sidebar menu

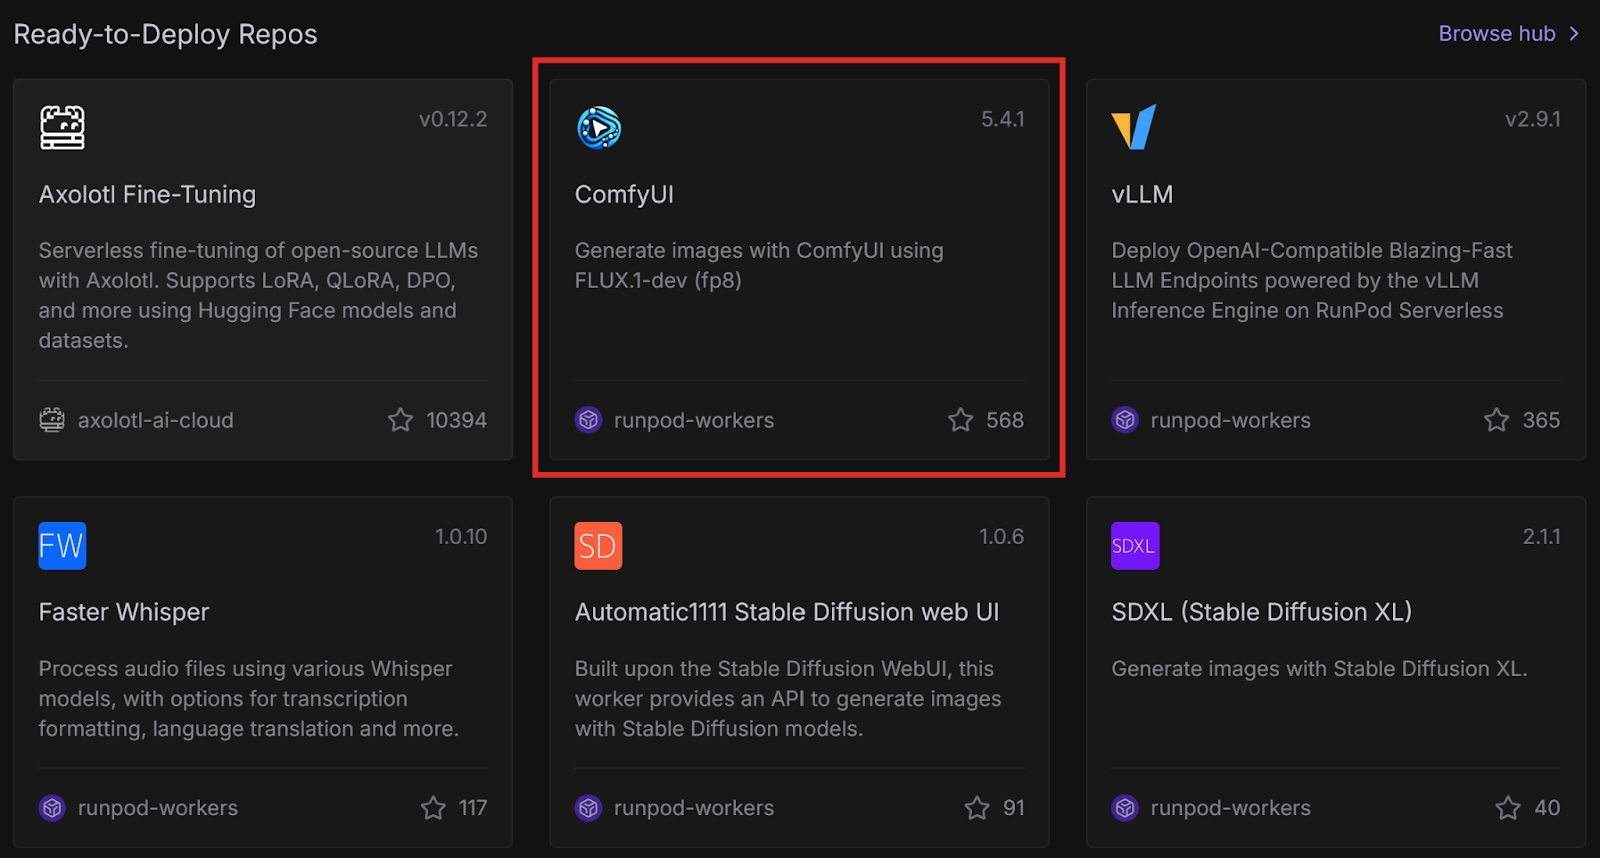
  1. Under Ready-to-Deploy Repos, select ComfyUI.

Runpod Hub ready-to-deploy repos with the ComfyUI worker highlighted

This is a ready-to-deploy template from the Runpod Hub. It uses the FLUX.1-dev-fp8 model and only works with this model. Later in this post, we will deploy this template with other models using Docker.

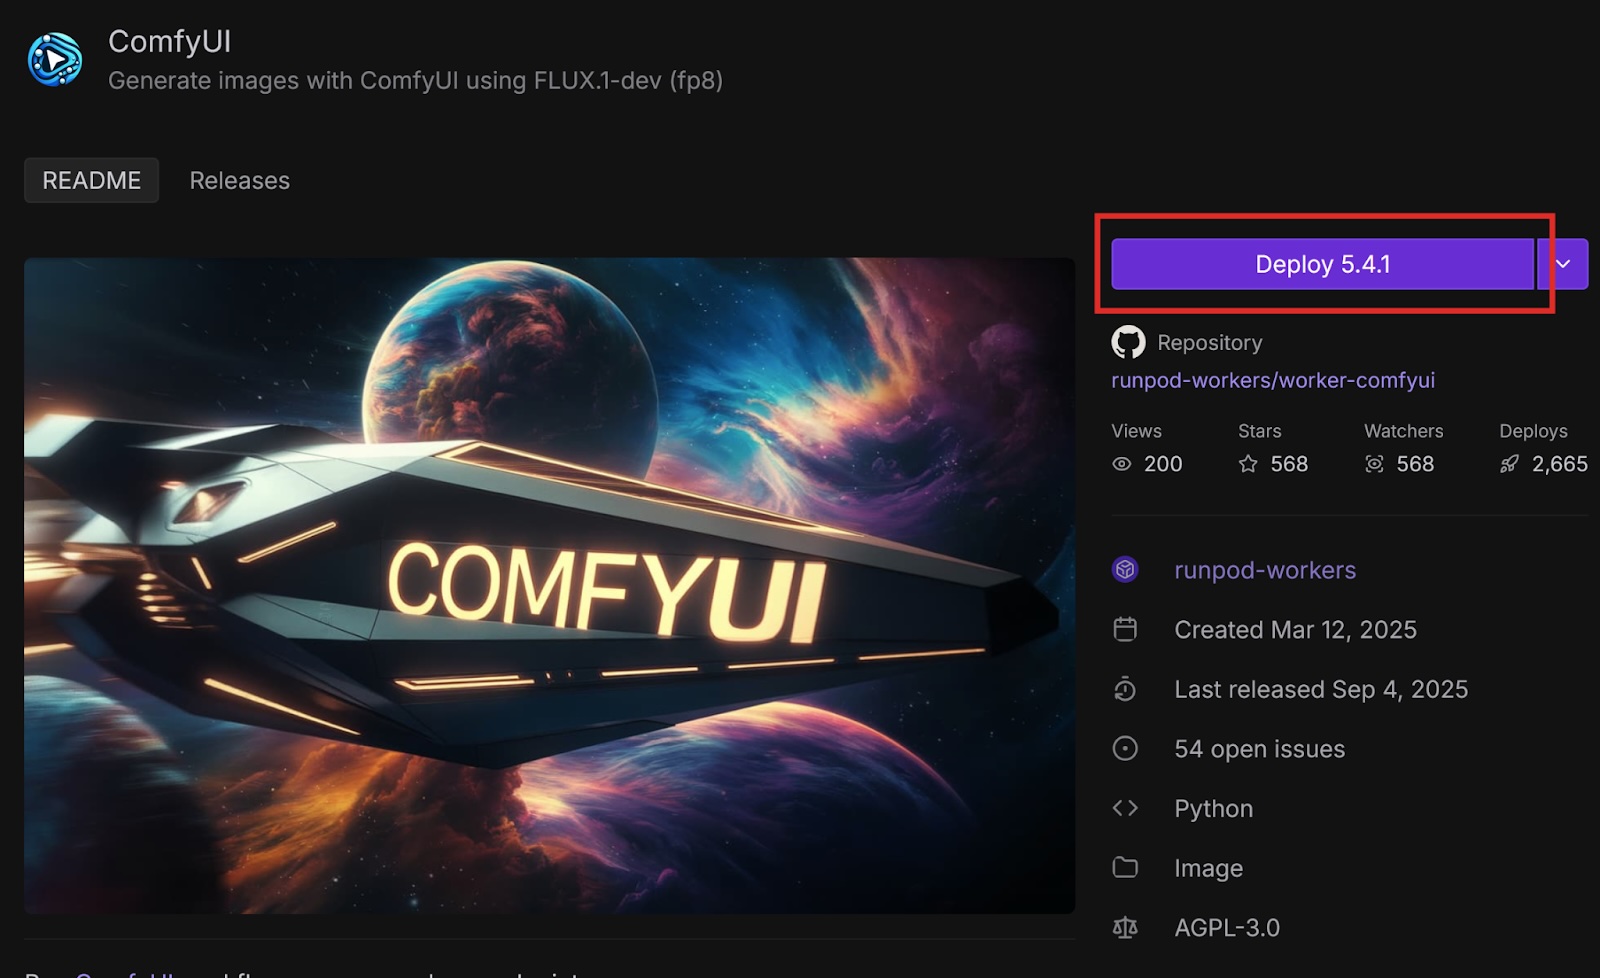
  1. Select Deploy to deploy the latest version of the template.

ComfyUI listing in the Runpod Hub with the Deploy button highlighted

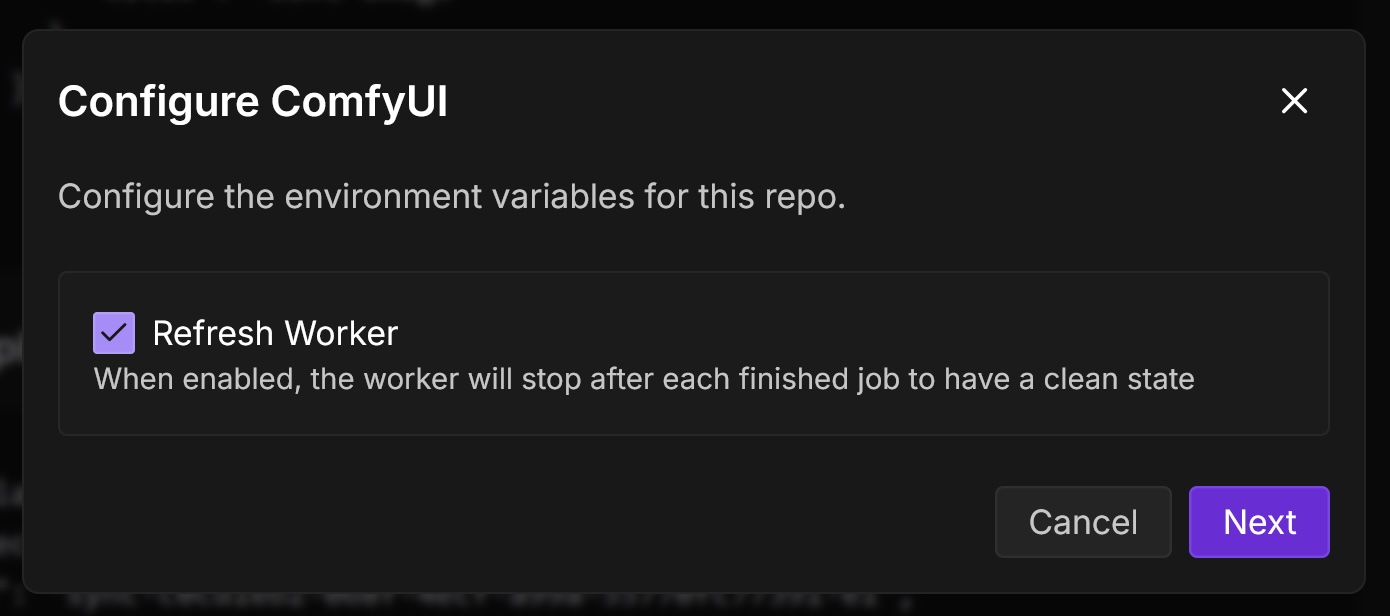
  1. In the Configure ComfyUI dialog, check Refresh Worker. This will ensure that the worker stops after each finished job. Then, select Next.

Configure ComfyUI dialog with the Refresh Worker option enabled

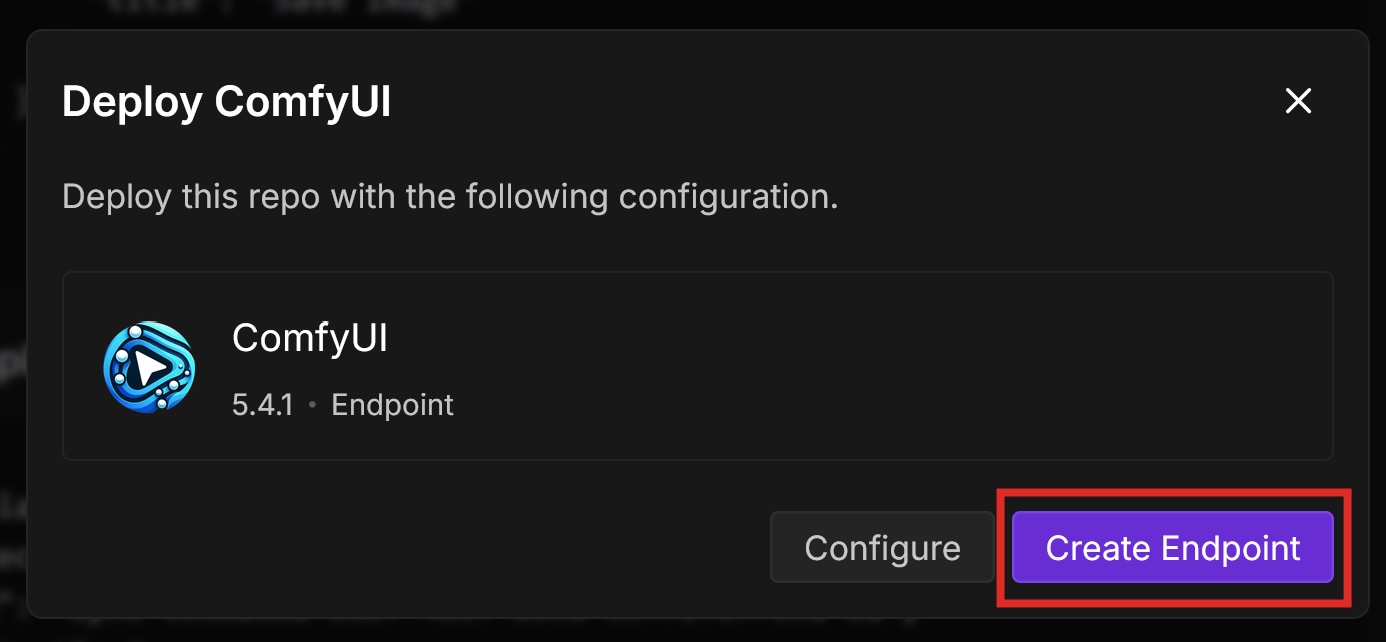
  1. In the Deploy ComfyUI dialog, select Create Endpoint.

Deploy ComfyUI dialog with the Create Endpoint button highlighted

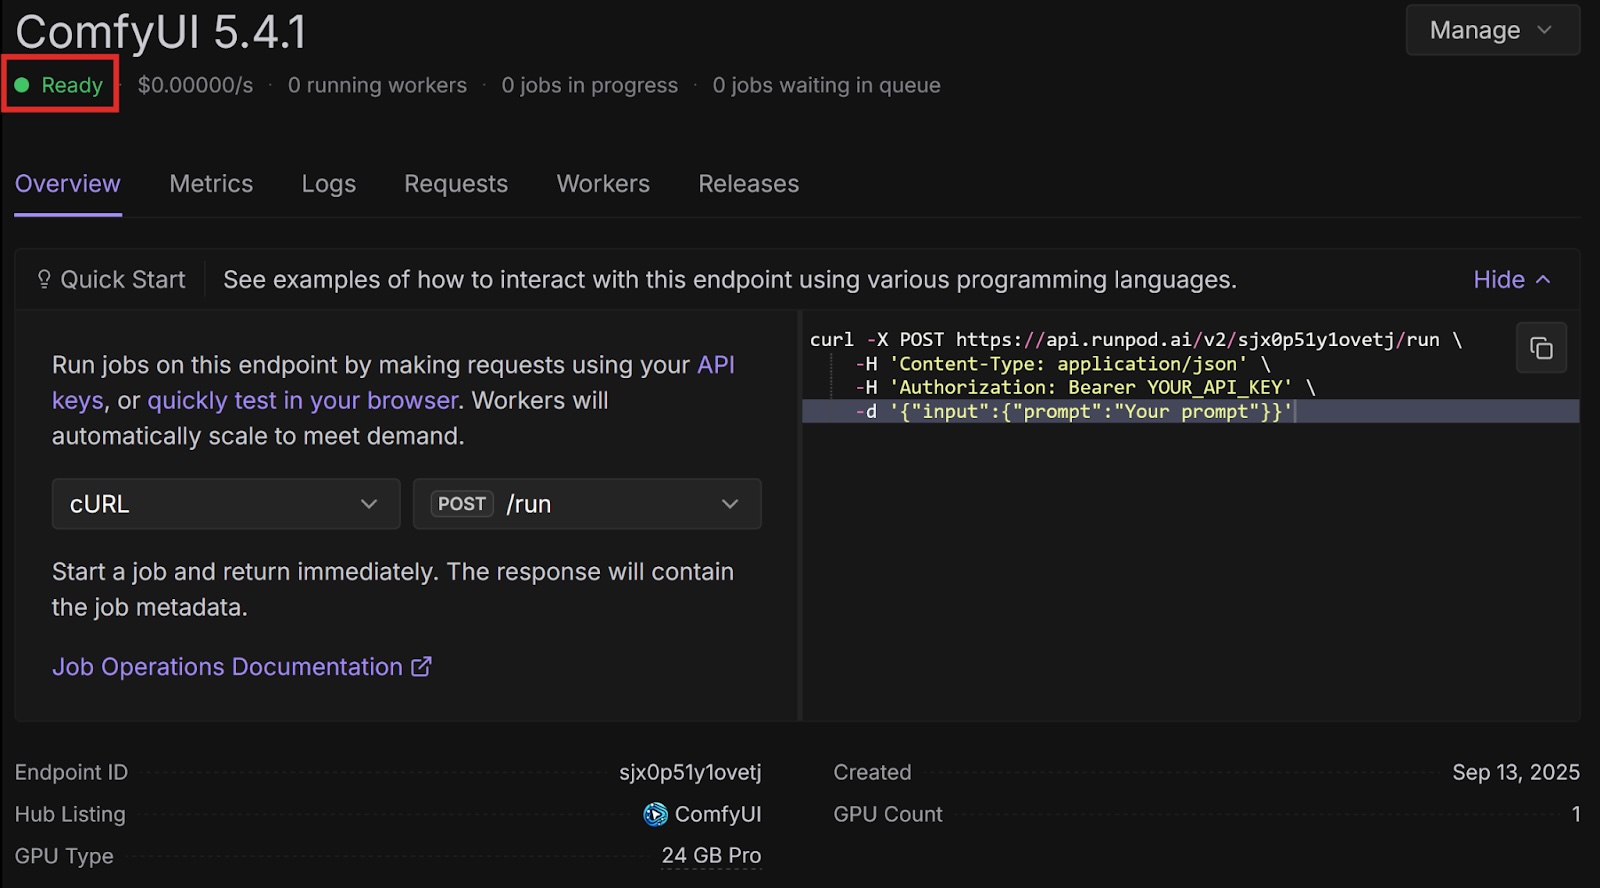
  1. On the endpoint overview page, wait for the status to say Ready.

ComfyUI serverless endpoint overview in the Runpod console showing Ready status and quick start examples

  1. Let’s call our endpoint using Python. Create a folder on your computer for this project and open it in your preferred code editor (I’ll be using VSCodium).
  2. Set up the development environment by following Prerequisites.
  3. In your virtual environment, create a Python file (name it whatever you like).
  4. Add the following import statements at the top of the file:

Requests to ComfyUI return images in the form of base-64 strings by default, so we need the base64 library to decode them.

The requests library helps us send requests to our API endpoint.

  1. Add the following headers. Enter your Runpod API key.
  1. Next, let’s add the ComfyUI workflow which defines the parameters ComfyUI should use to generate images. You can create your own using ComfyUI, or you can use an example like this one:
  1. Back in the Runpod console, on the page for your endpoint, select the Requests tab. Next to the Run button, select the drop-down arrow and select RunSync. The /runsync endpoint is for synchronous requests that wait for the job to complete and return the result directly. Copy the URL in the text box - this is your endpoint URL. Send the request to your endpoint and store the first image in the response in a variable:
  1. Convert the base-64 string into an image file:
  1. Run the program and open the image file that it outputs. It should be an image that the FLUX.1-dev-fp8 model generated based on the description in input.workflow.6.inputs.text (in the case of the example, a cat looking at a birthday cake).
    Here is the full code example:

Deploy ComfyUI with a different model

The ComfyUI template on the Runpod Hub makes it easy to deploy as a serverless endpoint, but it is restricted to the FLUX.1-dev-fp8 model. If you want to use a different model, you can use the worker-comfyui repository on GitHub.

Runpod provides official container images on Docker Hub that deploy ComfyUI with various models. In this tutorial, we will use one of these images, but if you want to use a model that Runpod does not have an image for, you can use the latest base image and supply your own model.

  1. Log in to the Runpod Console. Open the Serverless page and select New Endpoint.
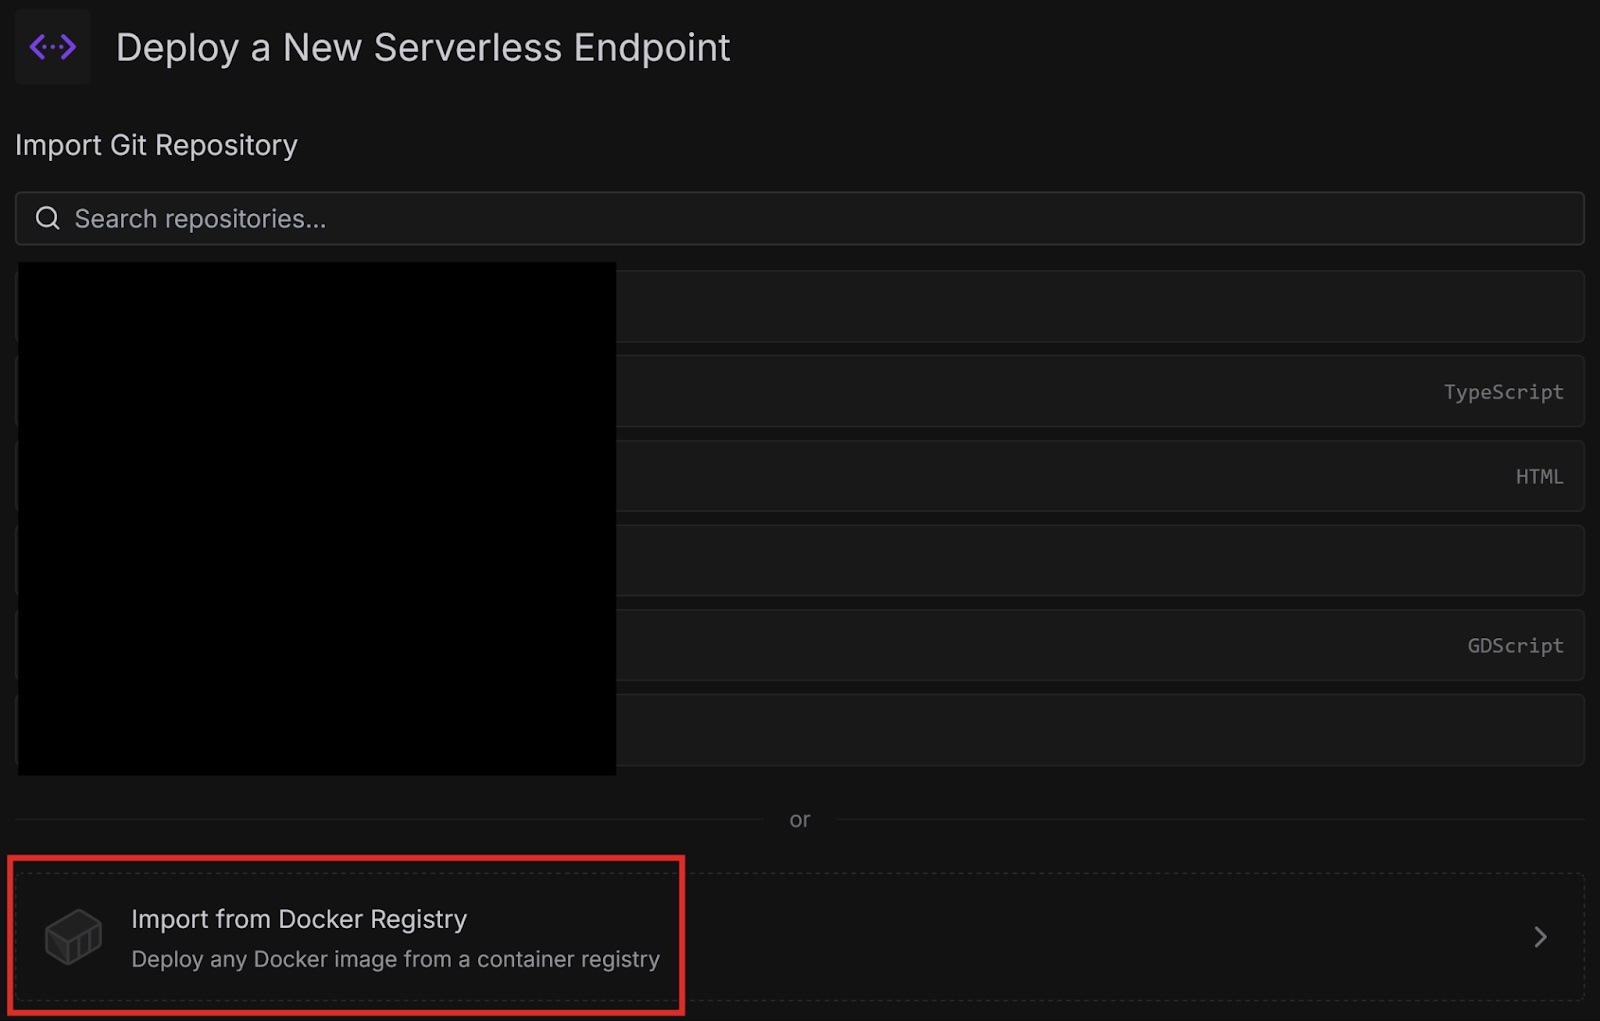
  2. On the Deploy a New Serverless Endpoint page, select Import from Docker Registry.

Runpod serverless endpoint creation screen with Import from Docker Registry highlighted

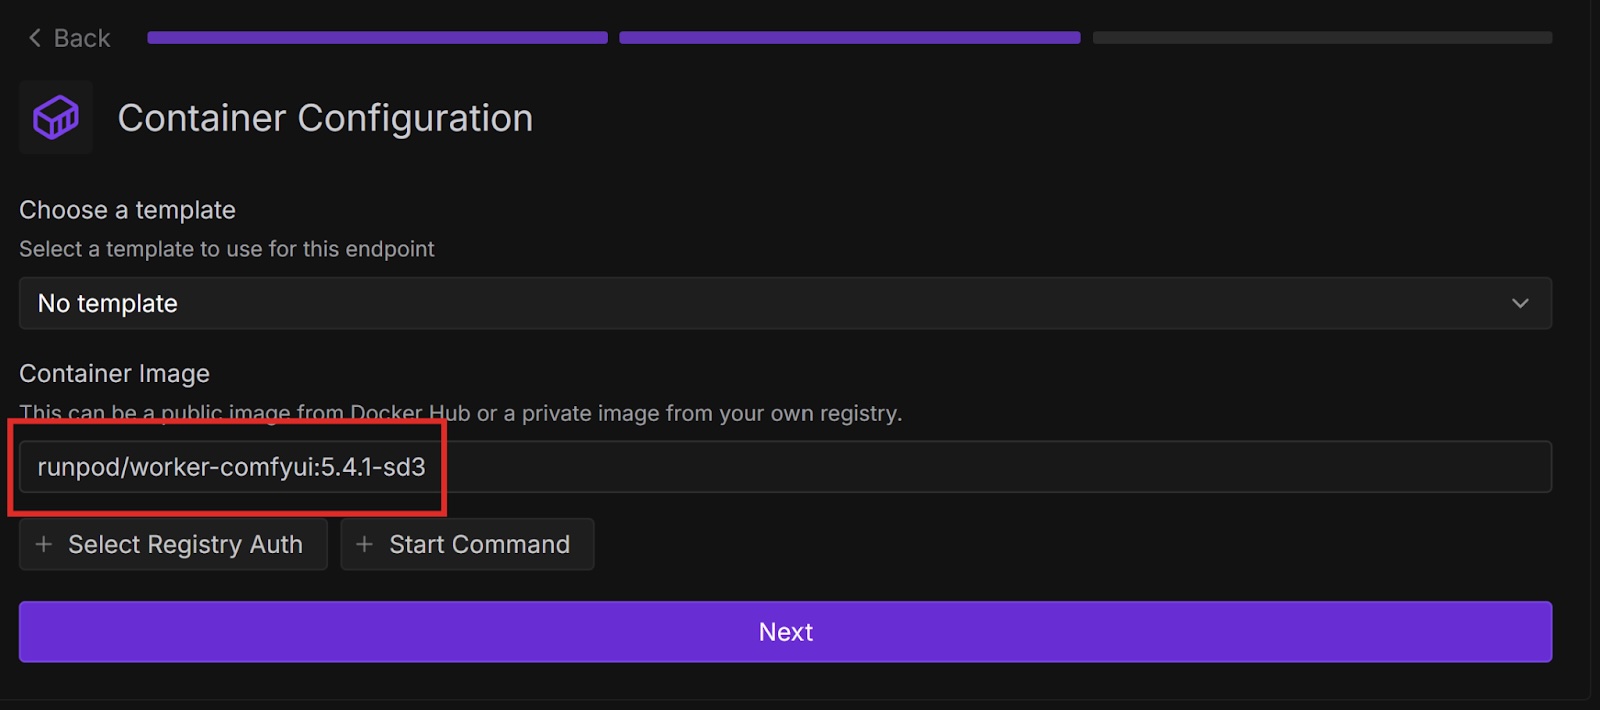
  1. On the Container Configuration page, paste the name of the container image from Docker, then select Next. In my case, I am using the Stable Diffusion 3 Medium model.

Runpod container configuration form with the worker-ComfyUI container image entered

  1. Enter an Endpoint Name, and select the GPU Configuration for your model based on the minimum VRAM required in GPU recommendations. For Stable Diffusion 3 Medium, I chose 16 GB.
  2. Open Container Configuration and set the Container Disk to the recommended container size for your model in GPU recommendations. For Stable Diffusion 3 Medium, I used 20 GB.
  3. Select Deploy Endpoint.
  4. Wait for the status to be Ready. Then, select the Requests tab. Select the drop-down arrow next to Run and select RunSync. Copy the new endpoint URL and paste it into your Python program that we wrote earlier (in the requests.post() call).
  5. Create a workflow for your model in ComfyUI and paste the JSON into the data variable. Runpod has some example workflows in the worker-comfyui repository on GitHub. For Stable Diffusion 3 Medium, I used this workflow.
  6. Run the program and check the output. It should generate an image based on the new workflow.

Next steps

Congratulations, you successfully deployed ComfyUI to a serverless endpoint both from a Runpod Hub repository and a Docker image! Runpod provides many ways to quickly start running common AI workloads without much setup.

Is there a particular model that you want to use with ComfyUI, but isn’t in any of Runpod’s Docker images? Try customizing your setup by creating your own Dockerfile starting from one of the base images and baking the model you want into your image. Then deploy it to Runpod either from Docker or your own GitHub repository.

Author profile: Eliot Cowley

The Chips Got Faster. The Stack Didn't.

The Chips Got Faster. The Stack Didn't.

Explore why faster chips have shifted the bottleneck to AI infrastructure, and what that means for teams running production workloads.

All

Multi-Instance GPUs on Runpod: Stop Paying for Compute You Don't Need

Multi-Instance GPUs on Runpod: Stop Paying for Compute You Don't Need

With MIG, we can partition RTX 6000 Pro cards into isolated 24 GB instances. Here's when it makes sense for your workloads.

All

OpenAI Parameter Golf: what 1,100 researchers built in six weeks

OpenAI Parameter Golf: what 1,100 researchers built in six weeks

How 1,100 researchers beat OpenAI's own baseline with 16 megabytes and 10 minutes.

All

Build what’s next.

Build, train, and scale AI workloads on Runpod with cloud GPUs, Serverless, and Clusters.