




I’m Dom, one of the engineers here at Replicate. My background is web engineering, not machine learning. I have a pretty good sense of what machine learning can do from the outside – image generation, detecting objects in images, self-driving cars – but only a faint idea of how it actually works on the inside. I studied some AI as part of my degree, many years ago, which gives me a basic (if very out of date) grounding in things like neural networks, but that’s a long way off knowing what it’s like to actually build machine learning models.
Luckily for me I work with a team of people who have PhDs in this stuff, so I’ve been working with our co-founder Andreas to learn more about how it works.
One of the models on Replicate that I’ve found most fascinating is CLIPDraw. You give it a prompt, it generates a whole bunch of random squiggles on a canvas, and then slowly morphs those squiggles into something representing your prompt. It’s nowhere near as configurable nor refined as something like pixray/text2image, but it somehow feels much more human and grokkable in the way it uses paths to create an image.
My desktop is full of outputs from this model, so it was the natural choice when choosing something to work on. 
Inspired by some of dribnet’s art (the author of pixray/text2image), the first change I wanted to make was to encourage clipdraw to do most of its drawing in the middle of the canvas. Sometimes the outputs it generates feel a bit scruffy and spread out, and I wanted to see what it would look like more tightly bunched.
I’m working on an M1 Macbook, which isn’t all that compatible with developing GPU-based machine learning models. (Though, hot off the press! PyTorch have announced M1 support, which I’m keen to try out.) To get around that, we used a Google Cloud Platform instance with an attached T4 GPU – the same GPU we use to run models on replicate.com.
Create the instance:
gcloud compute instances create
my-dev-instance
—zone=us-central1-c
—machine-type=n1-standard-8
—accelerator type=nvidia-tesla-t4,count=1
—boot-disk-size=1024GB
—image-project=deeplearning-platform-release
—image-family=common-cu113
—maintenance-policy TERMINATE
—restart-on-failure
—scopes=default,storage-rw
—metadata=“install-nvidia-driver=True”
SSH into your instance with port forwarding, for Jupyter notebook, and key forwarding, for GitHub:
gcloud compute ssh —zone us-central1-c my-dev-instance — -L 8888:localhost:8888 -A
Install Cog, clone your model repo, and then run your Cog model with a notebook:
cog run -p 8888 jupyter notebook —allow-root —ip=0.0.0.0
Once it’s running, open the link it prints out, and you should have access to your notebook!
Once you’ve got your instance set up you can stop and start it as needed. It’ll keep your cloned repo, and you’ll just need to rerun the cog run command each time.
This was my first experience working with PyTorch. Along the way I encountered a few issues, and learning opportunities: code which seemed to run, but didn’t produce any results because the gradient flow was interrupted; learning about vectorisation and how to run operations on tensors; and rethinking how to design my code, to take it from something procedural to something differentiable.
With my background in web engineering, my initial approach to this problem would be something like: for each point, calculate its distance from the centre, and add to the loss for anything further away than some minimum. In code, after getting to grips with how tensors work, that might look something like:
That runs, but unfortunately it makes absolutely no difference to the output. When we print out the value we’re adding to loss, it looks like it should work. And it’s a big number, so it should completely dominate the loss from CLIP for making it look like the prompt. In order to work out what’s going on, we tried to isolate this so that the loss from prompt similarity wasn’t a factor:
This fails with the error element 0 of tensors does not require grad and does not have a grad_fn. At this point Andreas patiently explained to me that the way this works is that PyTorch is keeping track of all the variables and operations involved in calculating loss, so that when it comes time to minimise it, it can work out how to change the variables to make the total loss smaller. For that to work, there needs to be a connection through every operation we perform on loss. By creating a new tensor we’re breaking that chain, and PyTorch can’t backtrack through our operations to work out how to minimise the loss.
One of the hardest parts about debugging this issue is that the failure was completely opaque. Andreas tells me it’s a common issue when working with ML models — you have to develop an intuition for what’s causing it to break, so you can step through the right part and work out the fix. Simplifying your code down to isolate the problem is a useful approach.
One option to fix our broken chain is to use torch.stack() instead of creating a new tensor:
That works, but the route we actually took was to remove the list comprehension and use vectorisation, so we never have to make a new tensor in the first place. This approach is something that came pretty naturally to Andreas, who’s got a lot of experience with differentiable programming. When working with tensors, we can apply an operation to all the items in the tensor at once. In our code above, path_points is a two dimensional tensor:
We can subtract 112 from the tensor as a whole, rather than each individual element:
Operations like ** 2 or torch.sqrt work in the same way. To sum along one dimension of a tensor (rather than summing the entire thing), we can use axis:
Putting that together gives us this:

That works! When we run it, the points very quickly move to the centre of the canvas and just stay there in a compact blob. So it’s doing what we want, but it’s putting way more weight behind “be in the centre” than behind “look like the prompt”. Let’s fix that:
Dividing by num_paths means the weight will be consistent whether we’re using 32 paths or 512 – it makes it a relative weight, rather than one that gets heavier and heavier as we add more paths. Multiplying by 0.001 drops the total value a few orders of magnitude to make it comparable with the loss from the similarity-to-prompt check. We didn’t apply any great science to that, we just printed out the loss from each source and tweaked it until they felt about right.

Although this is working, I think we can make it better. The model is using relatively few strokes outside of the centre to convey “this is a submarine”. That means there’s not a lot of detail. We want the points to be nearer the centre, not actually in it, so let’s subtract a threshold. And we don’t mind points being a little bit away from the centre, but we really don’t want them in the far corners, so let’s square the distance.
That works! We’re getting cute, dense, outputs now:

As cute as that output is, it’s a little too little, so let’s try upping the distance where the penalty starts kicking in:
Oops, we made a doughnut.

We’re getting a doughtnut because we’re penalising the model for putting points in the centre almost as much as if they were on the outside edges of the image. To fix that, we need to stop penalising the model for any points within our threshold.
If the distance is within the circle, we won’t apply a penalty. If it’s outside the circle, we’ll apply a penalty that increases the further away it is. Here’s some fairly procedural pseudocode for this:
It’s hard to make that code vectorisable as is, so we can’t just drop it in. One issue is that our pseudo code only operates on single points, and we’re currently operating on a tensor of multiple points. The second issue is that an if/else isn’t differentiable. To work out how we were going to implement this, Andreas encouraged me to think in terms of a mathematical function: f(x) = y. (As is often the case in programming there’s more than one way to implement this, and there’s a version using torch.maximum which will do the right thing here! But part of doing this was to help me think more in terms of differentiable programming, so we didn’t do it that way.)
We’re still using an if statement, so it isn’t differentiable yet, but it is good enough to be able to sketch out what our graph would look like. From that, we can work out how to model it with differentiable operations in PyTorch.
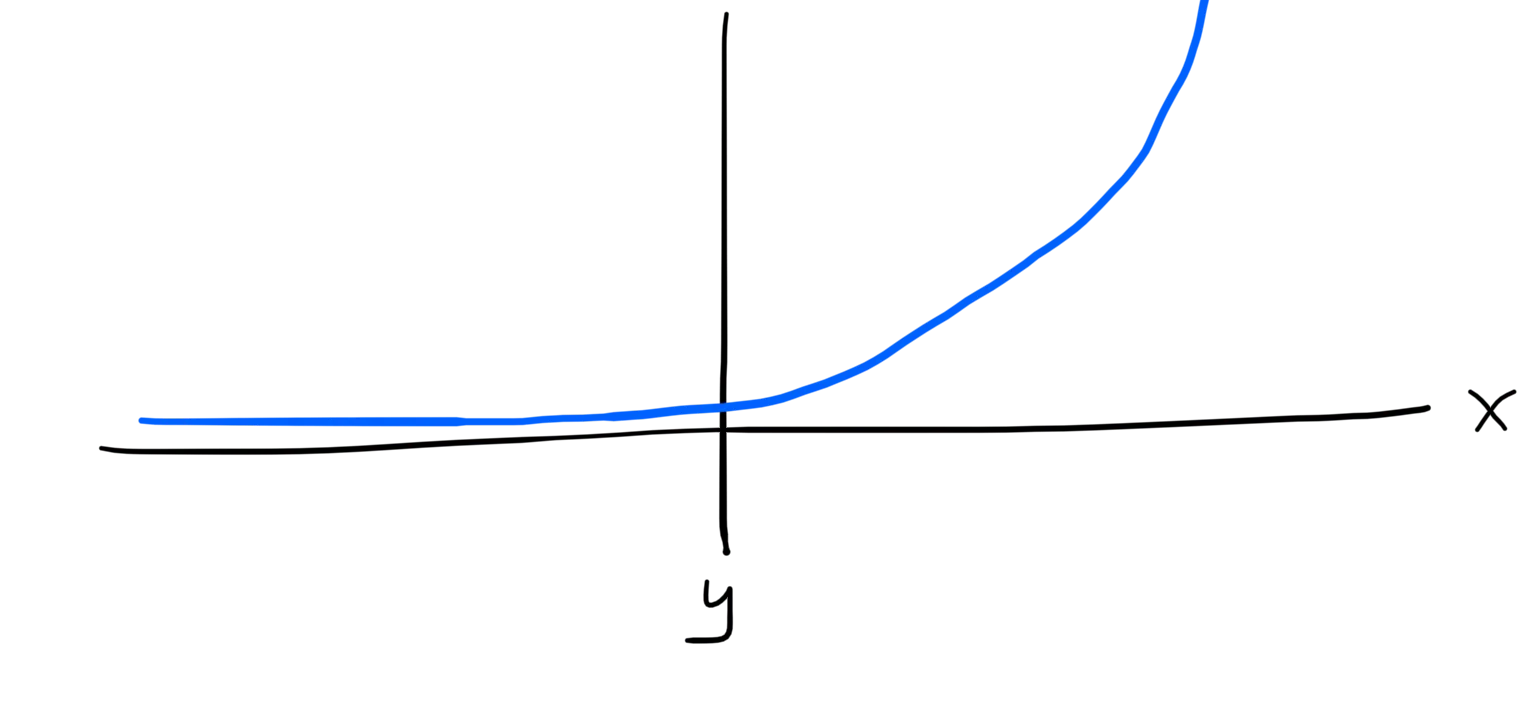
ReLU, or the Rectified Linear Unit function, is a function that’ll let us model that discontinuity at x=0. To get the quadratic curve for x>0 we can square our tensor, either before or after we apply ReLU. Armed with that, we can take a final run at this constraint:

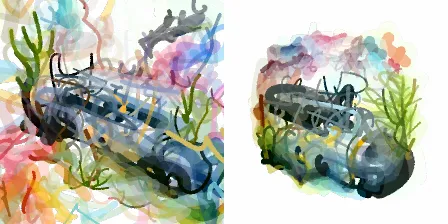
Here are a couple of outputs compared to the original clipdraw. The prompt for this one is “watercolor painting of an underwater submarine”:
And the prompt for this one is “a bonfire”:
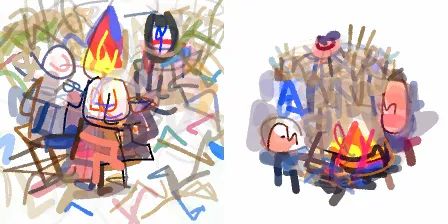
That’s it for now! We’re still a long way from anything as compelling as dribnet’s art, so there are loads more changes I want to make when I get the chance. Watch this space!
In the meantime you can check out the final code on GitHub and you can run the model for yourself on replicate.com. If you want to chat about this, or whatever models you’re working on, hop into our Discord and say hello.
👋
此内容由惯性聚合(RSS阅读器)自动聚合整理,仅供阅读参考。 原文来自 — 版权归原作者所有。