


在wp7中,所有的控件都无法实现图文混排,这个控件解决了无法图文混排的问题,使微博和聊天软件不在只是文字显示那么单调了。但是这个控件目前还并不完善,只能够显示而无法进行输入,另外使用起来也比较麻烦。以下就是这个控件的使用方法:
1. XAML中直接添加
这个控件无法显示在ToolBox列表中,需要通过手工方式来自已添加。
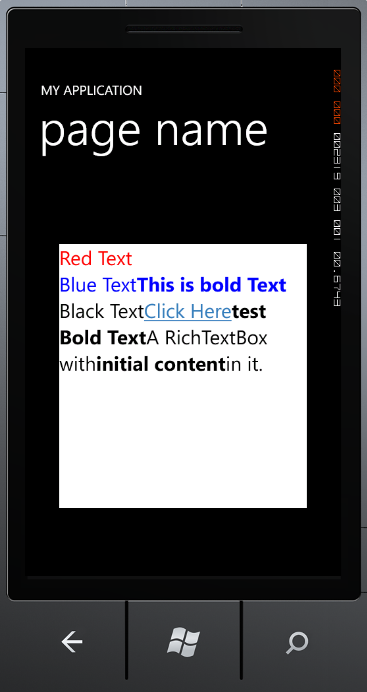
<RichTextBox Width="400" Height="400" Background="White" IsReadOnly="True" FontSize="30" VerticalContentAlignment="Top"><Paragraph><Run Foreground="Red" FontStyle="Italic" Text="Red Text"/></Paragraph><Paragraph Foreground="Blue"><Run Text="Blue Text "/><Bold>This is bold</Bold></Paragraph><Paragraph Foreground="Black"><Run Text="Black Text "/><Hyperlink>Click Here</Hyperlink><Bold>test Bold Text</Bold></Paragraph><Paragraph>
A RichTextBox with
<Bold>initial content</Bold> in it.</Paragraph></RichTextBox>这样就实现了图文混排,以及多种文字效果的同时显示。
2. 代码实现
RichTextBox rtb = new RichTextBox();
rtb.Width
= 400;rtb.Height
= 400;rtb.FontSize
= 30;rtb.Background
= new SolidColorBrush(Colors.White);rtb.VerticalContentAlignment
= System.Windows.VerticalAlignment.Top;Paragraph parag
= new Paragraph();Run run
= new Run();run.Foreground
= new SolidColorBrush(Colors.Red);run.Text
= "Red Text";parag.Inlines.Add(run);
rtb.Blocks.Add(parag);
parag
= new Paragraph();parag.Foreground
= new SolidColorBrush(Colors.Blue);run
= new Run();run.Text
= "Blue Text";parag.Inlines.Add(run);
Bold bold
= new Bold();bold.Inlines.Add(
"This is bold Text");parag.Inlines.Add(bold);
rtb.Blocks.Add(parag);
parag
= new Paragraph();parag.Foreground
= new SolidColorBrush(Colors.Black);run
= new Run();run.Text
= "Black Text";parag.Inlines.Add(run);
Hyperlink hl
= new Hyperlink();hl.Inlines.Add(
"Click Here");parag.Inlines.Add(hl);
bold
= new Bold();bold.Inlines.Add(
"test Bold Text");parag.Inlines.Add(bold);
run
= new Run();run.Text
= "A RichTextBox with";parag.Inlines.Add(run);
bold
= new Bold();bold.Inlines.Add(
"initial content");parag.Inlines.Add(bold);
run
= new Run();run.Text
= "in it.";parag.Inlines.Add(run);
rtb.Blocks.Add(parag);
ContentPanel.Children.Add(rtb);
这两种方法实现的是同一个效果。
3. 注意事项
l 这个控件在加入到工程之前,需要在APP.xaml文件的Resource节中添加如下xaml,否则无法显示。
<Application.Resources><Style TargetType="RichTextBox"><Setter Property="FontSize" Value="{StaticResource PhoneFontSizeNormal}" /><Setter Property="Foreground" Value="{StaticResource PhoneForegroundBrush}" /><Setter Property="Background" Value="Transparent" /><Setter Property="BorderBrush" Value="Transparent" /><Setter Property="BorderThickness" Value="0"/><Setter Property="HorizontalContentAlignment" Value="Stretch" /><Setter Property="VerticalContentAlignment" Value="Center" /><Setter Property="Padding" Value="0" /><Setter Property="Template"><Setter.Value><ControlTemplate TargetType="RichTextBox"><Grid Background="Transparent"><Border Background="{TemplateBinding Background}"
BorderBrush
="{TemplateBinding BorderBrush}"BorderThickness
="{TemplateBinding BorderThickness}"Margin
="{StaticResource PhoneHorizontalMargin}"><ContentControl x:Name="ContentElement"HorizontalContentAlignment
="{TemplateBinding HorizontalContentAlignment}"VerticalContentAlignment
="{TemplateBinding VerticalContentAlignment}"Padding
="{TemplateBinding Padding}"/></Border></Grid></ControlTemplate></Setter.Value></Setter></Style></Application.Resources>l 另外,目前只能添加Hyperlink、Button控件到RichTextBox中,Image控件加入后,当在模拟器中运行时,无法显示。
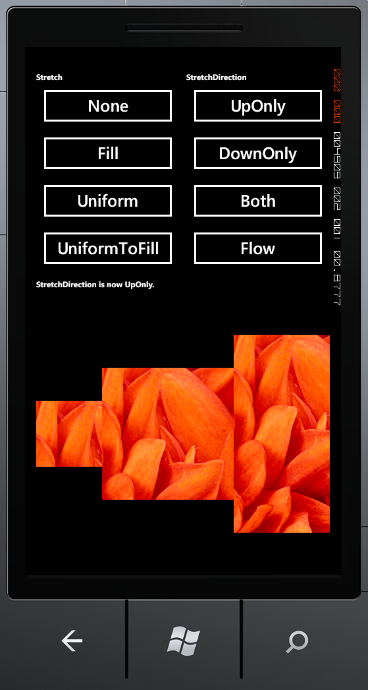
这个控件可以对加入其内的控件进行缩放、拉伸等的操作。
1. 常用属性
l Stretch:与图片的这个属性基本相同。
l StretchDirection:这个属性用于设置子控件的缩放方向。
n UpOnly:放大
n DownOnly:缩小
n Both:放大或缩小
l FlowDirection:设置子控件的放置方向。
2. 示例代码
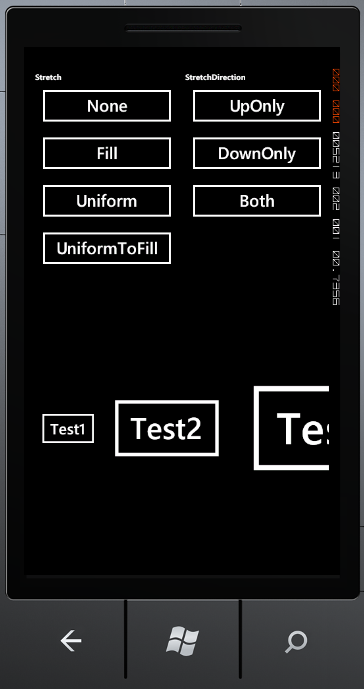
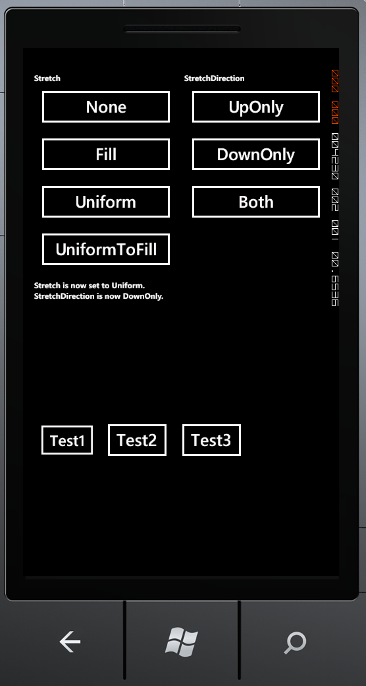
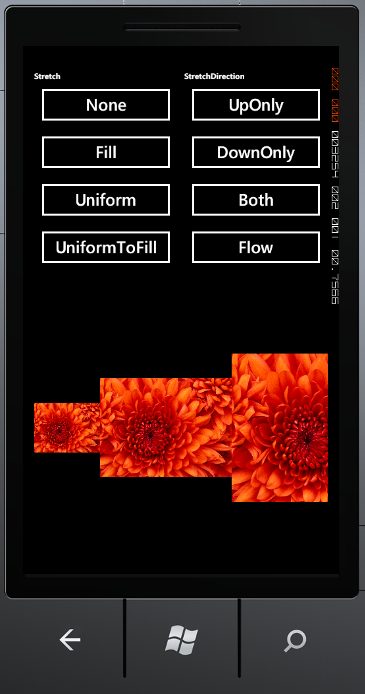
<StackPanel Grid.Row="0" Grid.Column="0" Margin="5,5,5,5" Orientation="Vertical"><TextBlock Text="Stretch" FontWeight="Bold" FontSize="12" /><Button Name="btn1" Click="stretchNone" Content="None" /><Button Name="btn2" Click="stretchFill" Content="Fill" /><Button Name="btn3" Click="stretchUni" Content="Uniform" /><Button Name="btn4" Click="stretchUniFill" Content="UniformToFill" /></StackPanel><StackPanel Grid.Row="0" Grid.Column="1" Margin="5,5,5,5" Orientation="Vertical"><TextBlock Text="StretchDirection" FontWeight="Bold" FontSize="12" /><Button Name="btn5" Click="sdUpOnly" Content="UpOnly" /><Button Name="btn6" Click="sdDownOnly" Content="DownOnly" /><Button Name="btn7" Click="sdBoth" Content="Both" /><Button Name="btn8" Click="sdFlow" Content="Flow" /></StackPanel><StackPanel Grid.Row="1" Grid.Column="0" Grid.ColumnSpan="2" Margin="5,5,5,5" Orientation="Vertical"><TextBlock Name="txt1" FontSize="12" FontWeight="Bold" /><TextBlock Name="txt2" FontSize="12" FontWeight="Bold" /></StackPanel><StackPanel Grid.Row="2" Grid.Column="0" Grid.ColumnSpan="2" Margin="5,5,5,5" Orientation="Horizontal"><Viewbox MaxWidth="100" MaxHeight="100" Name="vb1"><Image Source="Chrysanthemum.jpg"/><!--<Button Content="Test1"/>--></Viewbox><Viewbox MaxWidth="200" MaxHeight="200" Name="vb2"><Image Source="Chrysanthemum.jpg"/><!--<Button Content="Test2"/>--></Viewbox><Viewbox MaxWidth="300" MaxHeight="300" Name="vb3"><Image Source="Chrysanthemum.jpg"/><!--<Button Content="Test3"/>--></Viewbox></StackPanel>
private void stretchNone(object sender, RoutedEventArgs e)
{
vb1.Stretch
= Stretch.None;vb2.Stretch
= Stretch.None;vb3.Stretch
= Stretch.None;txt1.Text
= "Stretch is now set to None.";}
//Setting the Stretch property to Fill{
vb1.Stretch
= Stretch.Fill;vb2.Stretch
= Stretch.Fill;vb3.Stretch
= Stretch.Fill;txt1.Text
= "Stretch is now set to Fill.";}
//Setting the Stretch property to Uniform{
vb1.Stretch
= Stretch.Uniform;vb2.Stretch
= Stretch.Uniform;vb3.Stretch
= Stretch.Uniform;txt1.Text
= "Stretch is now set to Uniform.";}
private void stretchUniFill(object sender, RoutedEventArgs e){
vb1.Stretch
= Stretch.UniformToFill;vb2.Stretch
= Stretch.UniformToFill;vb3.Stretch
= Stretch.UniformToFill;txt1.Text
= "Stretch is now set to UniformToFill.";}
private void sdUpOnly(object sender, RoutedEventArgs e){
vb1.StretchDirection
= StretchDirection.UpOnly;vb2.StretchDirection
= StretchDirection.UpOnly;vb3.StretchDirection
= StretchDirection.UpOnly;txt2.Text
= "StretchDirection is now UpOnly.";}
private void sdDownOnly(object sender, RoutedEventArgs e){
vb1.StretchDirection
= StretchDirection.DownOnly;vb2.StretchDirection
= StretchDirection.DownOnly;vb3.StretchDirection
= StretchDirection.DownOnly;txt2.Text
= "StretchDirection is now DownOnly.";}
private void sdBoth(object sender, RoutedEventArgs e){
vb1.StretchDirection
= StretchDirection.Both;vb2.StretchDirection
= StretchDirection.Both;vb3.StretchDirection
= StretchDirection.Both;txt2.Text
= "StretchDirection is now Both.";}
private void sdFlow(object sender, RoutedEventArgs e){
vb1.FlowDirection
= System.Windows.FlowDirection.RightToLeft;vb2.FlowDirection
= System.Windows.FlowDirection.RightToLeft;vb3.FlowDirection
= System.Windows.FlowDirection.RightToLeft;txt2.Text
= "FlowDirection is RighToLeft.";}
显示效果:

3. 注意事项
这个控件并不是所有的属性都可用,如AllowDrop属性会引起异常。目前MSDN上的说明文档可能还是用的Silverlight的,所以会略有出入。
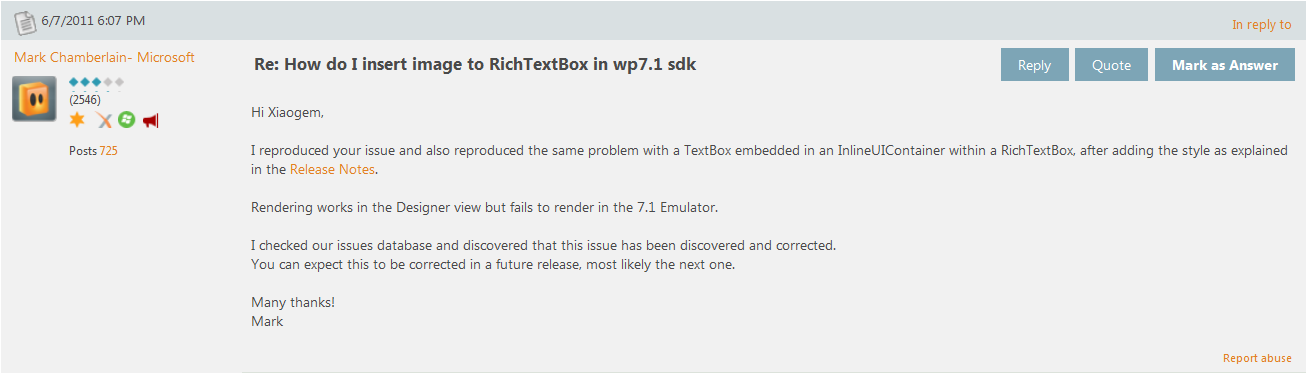
另外RichTextBox这一版中无法实现图文混排,要等到下一个版本了。以下是我在微软官方论坛提问得到的答案。
示例代码:http://www.52winphone.com/bbs/viewthread.php?tid=743&extra=page%3D1
此内容由惯性聚合(RSS阅读器)自动聚合整理,仅供阅读参考。 原文来自 — 版权归原作者所有。