







Filed to: Wikipedia
by Gina Trapani
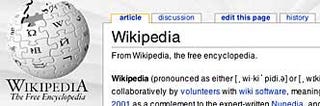
The collaboratively-edited Wikipedia is a vast, searchable repository of information, constantly written and re-written over time by its readers. Don't you wish you or your group could have your own editable encyclopedia of braindumps and documentation like Wikipedia? Well, you can. The software that runs Wikipedia, called MediaWiki, is freely available for anyone to install. Today we'll set up MediaWiki on your Windows PC and get started with a video demonstration on how to add, edit and compare page revisions in your new, local personalpedia.
Note: MediaWiki is advanced wiki software that requires Apache web server, the PHP scripting language and the MySQL database server installed to run. If this makes your tummy hurt, a simpler (and less-featured) alternative to MediaWiki is the excellent Instiki. See previous feature How to host a personal wiki on your home computer for more on installing Instiki. As always, know that setting up a server on your personal computer can be a security risk. Make sure you are behind a firewall that prevents unauthorized access to your server.

by Gina Trapani Read more Read more
WAMP is an all-in-one PHP/MySQL/Apache installation for Windows. Download WAMP from here. Install WAMP in the C:\wamp\ directory. (If you must install it elsewhere, make sure the folder you choose has no spaces or special characters in its name.) Check the Autostart option. When the installation is complete, visit http://localhost/ in your web browser to see the front page of your new web server.
You're already running a firewall (right?) but just to be on the safe side, we're going to assign a password to your new database server because we're healthily paranoid like that. From the homepage of your WAMP installation (http://localhost/), go to the link on the page on the left under Tools that reads "PHPmyadmin 2.7.0-pl2." From there click on the "Privileges" link. Check all users besides "root" and choose Delete. Then, click the edit button next to the root user, and change the password to something you'll remember and save. Once that's done, PHPmyadmin will no longer be able to access your database because it doesn't have your new password. We can remedy that easily.
Open the C:\wamp\phpmyadmin\config.inc.php file in a text editor. Change the line that reads:
$cfg['Servers'][$i]['password'] = '';
to
$cfg['Servers'][$i]['password'] = 'yournewpassword';
Where yournewpassword is the password you just set up in PHPmyadmin. See more on changing your db password here.
Download MediaWiki from here. Unzip and untar the package using a utility like 7-Zip. Rename the resulting folder from "media-wiki-1.5.8" to "mywikipedia" and move the entire directory to c:\wamp\www\mywikipedia\.
Access your new MediaWiki installation at http://localhost/mywikipedia/. Click on the "set the wiki up!" link. The next screen requires all of MediaWiki's configuration options. Be sure to choose a site name (mine is "Ginapedia") and a WikiSysOp password. Under the Database Configuration, set the Database User to root and the password to whatever you chose in step 2. This seems like a long and complicated questionnaire, but it's not. Click here to see my full configuration screen all filled in.
Then click the "Install!" button and let MediaWiki work its magic. All goes well, you'll get a message at the bottom of the screen that reads, "Move the config/LocalSettings.php file into the parent directory, then follow this link to your wiki." So let's do just that: Cut and paste the c:\wamp\www\mywikipedia\config\LocalSettings.php file to c:\wamp\www\mywikipedia\LocalSettings.php.
Congratulations! You got MediaWiki up and running, you big tech stud. You'll notice that the image in the upper lefthand corner isn't very personal. To set it to something prettier than this:
Crop and resize an image of your choice to 135x135 pixels (72 dpi), and save it in C:\wamp\www\mywikipedia\skins\common\images\mywikilogo.jpg. Then, open the c:\wamp\www\mywikipedia\LocalSettings.php file and change the line that reads:
$wgLogo = "$wgStylePath/common/images/wiki.png";
to:
$wgLogo = "$wgStylePath/common/images/mywikilogo.jpg";
Refresh the page to see your new logo.
Now you've got a clean, new, customized local installation of MediaWiki all ready for you to use how you please. As evidenced by Wikipedia, the best application of a wiki is open, group collaboration on a set of documents. However, wiki's come in handy for individual use as well, to track lists, notes, links, images, or anything else you want to search or reference over time. Wiki's are especially good for writing projects, as they keep multiple version history and allow for very easy adding and editing of pages. Keith, Adam and I use a Lifehacker MediaWiki installation to collaborate on site ideas and drafts, and I use a wiki to keep personal notes on programming techniques, to track software serial numbers, quotes I like, and other relevant links and articles.
The main learning curve with MediaWiki is the special markup (Wikitext) that it uses to format a page. However, using Wikitext to author and add pages is very easy. Here's a quick video demonstration of using my new personalpedia to start writing a novel. (Warning: audio of my not-made-for-TV voice ahead.)
此内容由惯性聚合(RSS阅读器)自动聚合整理,仅供阅读参考。 原文来自 — 版权归原作者所有。