惯性聚合 高效追踪和阅读你感兴趣的博客、新闻、科技资讯
阅读原文 在惯性聚合中打开

推荐订阅源

量子位
Google DeepMind News
爱范儿
爱范儿
OSCHINA 社区最新新闻
OSCHINA 社区最新新闻
NISL@THU
NISL@THU
T
Threat Research - Cisco Blogs
freeCodeCamp Programming Tutorials: Python, JavaScript, Git & More
L
Lohrmann on Cybersecurity
V
Visual Studio Blog
Cyberwarzone
Cyberwarzone
D
Docker
The Hacker News
The Hacker News
C
CERT Recently Published Vulnerability Notes
Vercel News
Vercel News
Project Zero
Project Zero
S
Schneier on Security
aimingoo的专栏
aimingoo的专栏
I
Intezer
腾讯CDC
M
MIT News - Artificial intelligence
Hugging Face - Blog
Hugging Face - Blog
P
Palo Alto Networks Blog
C
CXSECURITY Database RSS Feed - CXSecurity.com
AWS News Blog
AWS News Blog
GbyAI
GbyAI
MongoDB | Blog
MongoDB | Blog
Cyber Security Advisories - MS-ISAC
V
Vulnerabilities – Threatpost
G
Google Developers Blog
N
Netflix TechBlog - Medium
The Cloudflare Blog
Microsoft Security Blog
Y
Y Combinator Blog
A
Arctic Wolf
S
Securelist
酷 壳 – CoolShell
酷 壳 – CoolShell
Cisco Talos Blog
Cisco Talos Blog
Recent Announcements
C
Cyber Attacks, Cyber Crime and Cyber Security
L
LINUX DO - 热门话题
T
Threatpost
Latest news
Latest news
Blog — PlanetScale
Blog — PlanetScale
Security Latest
Security Latest
Engineering at Meta
Engineering at Meta
大猫的无限游戏
大猫的无限游戏
H
Help Net Security
The GitHub Blog
The GitHub Blog
T
Tor Project blog
P
Proofpoint News Feed

博客园 - 至尊龙骑

LAN配置--配置静态DHCP Linux服务器离线安装Docker全攻略--离线安装(一件安装docker以及docker-compose--执行自定义脚本) C# 使用FFmpeg 命令录音录像时设置 水印以及水印位置 C# 使用FFmpeg 命令 水印以及水印位置 录音录像时设置分辨率-分辨率一般是宽高比是 4:3 和16:9 少数是 5:4 FFmpeg 命令 水印以及水印位置 FFmpeg 命令录音录像时分辨率 FFmpeg 查看分辨率以及指定分辨率 C# 中监听 IPv6 回环地址----HttpListener C# 中监听 IPv6 回环地址(Loopback Address)----socket和tcp IPv6 地址 后端设置了跨域但是还是提示跨域问题,原因是这里有两个独立的安全策略在起作用:Chrome和Edge浏览器安全策略强制修改方案 开放所有跨域 ----前端和后端 Win11 上遇到的 WinForm 文件拖拽功能失效,但在 Win10 或其他系统上正常的问题 设置iis的后缀名可以下载 linux执行systemctl enable redis.service 报 Failed to execute operation: Bad message linux redis 8.2.1软件开机启动redis.service与etc下的rc.local配置2种方式 Linux redis 8.2.1源码编译 Linux开机启动设置全攻略 Linux 设置nginx 以及java jar自启动 DistributedLock 实现.Net分布式锁 Windows 10\11 离线安装.NET Framework 3.5(包括.NET 2.0和3.0) - 至尊龙骑 跨域处理 utools无法搜索快捷方式和部分软件问题
Linux系统简单源码安装NGINX版本1.28.0
至尊龙骑 · 2025-09-11 · via 博客园 - 至尊龙骑

我的Linux系统上的nginx版本是1.20.1,有用需要,现在需要升级高版本的nginx,因此使用源码安装NGINX最新版本。

第一先停止原来的nginx

linux 终端中输入:ps -aux|grep nginx

或者netstat -tunlp|grep nginx

0

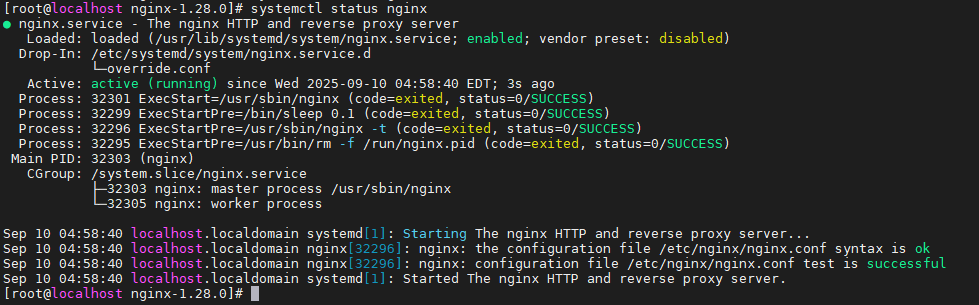
或者输入:systemctl status nginx 查看状态

0

停止nginx :systemctl status nginx

下面安装最新的nginx--1.28.0版本

一、先安装依赖工具:

sudo yum install -y gcc gcc-c++ make automake autoconf libtool zlib-devel openssl-devel pcre-devel pcre2-devel

二、下载NGINX源码

0

终端 输入:

切换目录到tmp中下载的源码放置在/tmp下,系统重启后自动清理,避免残留

cd /tmp

下载源代码:

或者

下载之后,解压缩

tar -zxvf nginx-1.28.0.tar.gz

切换到解压缩文件目录

cd nginx-1.28.0

三、配置、编译、安装

预编译:

./configure

--prefix=/usr/share/nginx \ #用于指定NGINX安装后的根目录路径#

--sbin-path=/usr/sbin/nginx \ #用于指定NGINX主程序(二进制文件)的安装路径#

--conf-path=/etc/nginx/nginx.conf \ #用于指定NGINX主配置文件的安装位置#

--with-http_ssl_module \ #用于启用HTTPS协议支持#

--with-http_v2_module #启用HTTP/2协议#

输入:

./configure

--prefix=/usr/share/nginx \

--sbin-path=/usr/sbin/nginx \

--conf-path=/etc/nginx/nginx.conf \

--with-http_ssl_module \

--with-http_v2_module

这些编译参数只是简易版本,能够实现最基础的网页发布,旨在记录安装流程。

反向代理、负载均衡等功能需要另外添加参数。如下:
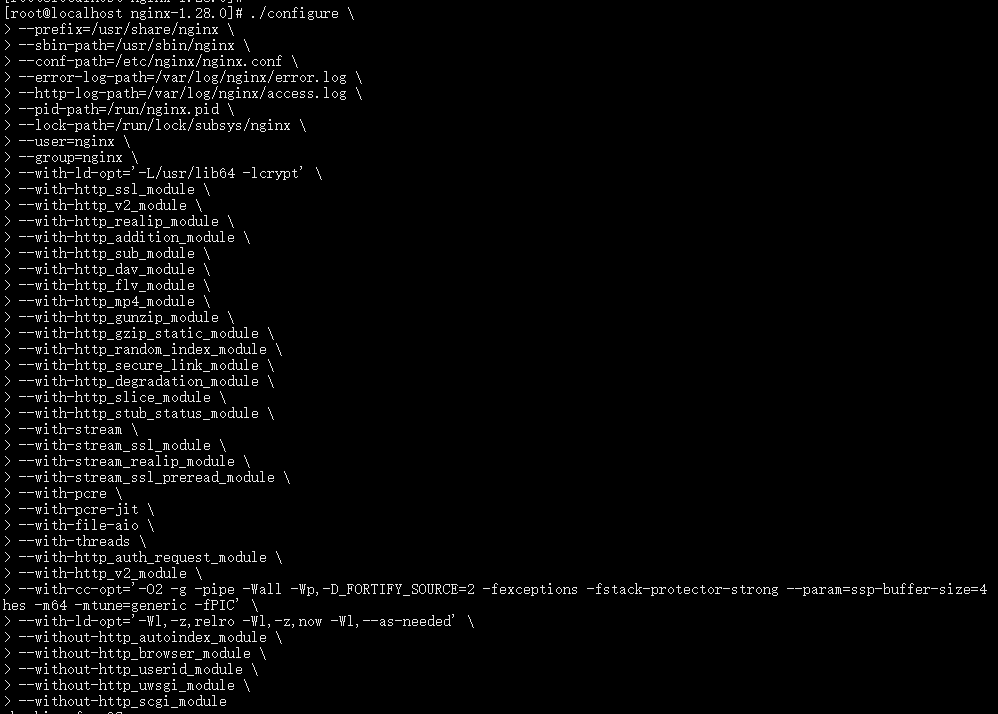
0

在我的Linux环境中预编译时有依赖项not found的部分,可以不用管,也可以根据提示自行处理。

经过了解,上述警告都属于常见警告,无需处理,只有crypt()在需要密码加密时才有用。

安装:

make && sudo make install

之后编译就顺利编译成功,

我们先暂时关闭防火墙

systemctl stop fiewalld

启动NGINX

systemctl stop nginx

或者切换到nginx所在的目录,启动,如:/usr/local/nginx/sbin/nginx 即可,

用浏览器访问到默认页面就说明安装成功

Welcome to nginx! 即表示成功

或者使用 wget localhost

或者使用 curl localhost

如果返回html中有Welcome to nginx! 即表示成功

如果无法访问,可能是防护墙的问题

开放端口(例如开放端口8080 TCP):

sudo firewall-cmd --zone=public --add-port=8080/tcp --permanent

重新加载防火墙以应用更改:

sudo firewall-cmd --reload

还有一种是安装策略问题,需要设置enforce=0,这个只是暂时关闭安全策略。

sudo setenforce 0

关闭防火墙
systemctl disable firewalld
systemctl stop firewalld

关闭iptables
iptables -F

关闭selinux
1、临时
getenforce
setenforce 0
2、永久
修改配置文件 vim /etc/selinux/config SELINUX=enforcing改为disabled
ELINUX=disabled