1 基本命令
ROS2 中的所有命令都集成在 ros2 命令中,后面参数表示不同的操作目的如 node 表示节点操作,topic 表示话题操作等等,在后面可以再跟参数表示具体干什么。
(1) 帮助命令
(2) 运行节点
1
2
3
4
ros2 run <package_name> <node_name> # e.g. # ros2 run turtlesim turtlesim_node # ros2 run turtlesim turtle_teleop_key
(3) 查看节点
打印节点列表:
打印节点信息:
1
2
ros2 node info /<node_name> # ros2 node info /turtlesim
(4) 查看话题
打印话题列表:
订阅话题和打印
1
2
3
ros2 topic echo <topic_name> # e.g. # ros2 topic echo /turtle1/cmd_vel
手动发布话题
1
2
3
ros2 topic pub --rate <rate> <publish_topic> <data_type> <data> # e.g. # ros2 topic pub --rate 1 /turtle1/cmd_vel geometry_msgs/msg/Twist "{linear: {x: 2.0, y: 0.0, z: 0.0}, angular: {x: 0.0, y: 0.0, z: 1.8}}"
(5) 服务
调用服务
1
2
3
ros2 service call <service_name> <service_params> # e.g. # ros2 service call_ /_spawn turtlesim_/srv/_Spawn_ "{x: 2, y: 2, theta: 0.2, name: 'turtle2'}"
(6) 数据录制
ROS bag 数据录制
1 ros2 bag record <topic_name> -o <save_path>
ROS bag 数据播放
1 ros2 bag play <rosbag_filename>
(7) Launch
ROS2 中的 launch 文件是基于 Python 描述的,启动 launch 文件
1 ros2 launch <node_name> simple.launch.py
(8) Rviz
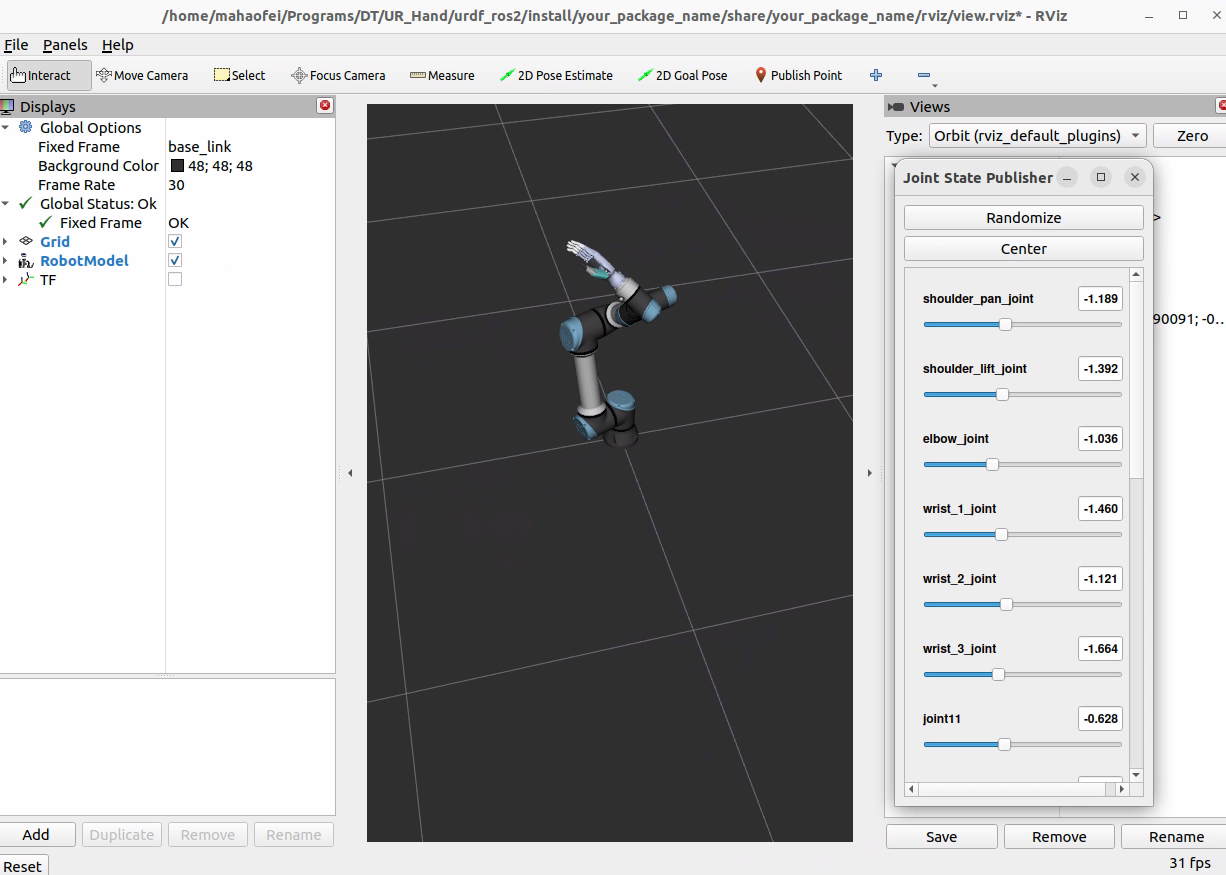
启动 Rviz 可视化信息
2 工作空间
(1) 创建工作空间
1
2
3
mkdir -p ~/ros2_ws/src cd ~/ros2_ws/src git clone https://github.com/ros/ros_tutorials.git -b humble
(2) 自动安装依赖
1
2
cd ~/ros2_ws/ rosdep install -i --from-path src --rosdistro humble -y
(3) 编译工作空间
1
2
cd ~/ros2_ws/ colcon build
(4) 设置环境变量
1 source install/local_setup.sh
3 功能包
(1) 创建功能包
1
2
3
cd ~/ros2_ws/src ros2 pkg create --build-type ament_cmake c_pkg_name ros2 pkg create --build-type ament_python python_pkg_name
(2) 编译功能包
1
2
3
cd ~/ros2_ws/src colcon build source install/local_setup.bash
4 基础代码示例
4.1 创建节点
编写节点的 python 程序 scripts/node_helloworld.py
1
2
3
4
5
6
7
8
9
10
11
12
13
14
15
16
17
18
19
20
21
22
23
import rclpy from rclpy.node import Node import time""" 创建一个HelloWorld节点, 初始化时输出“hello world”日志 """ class HelloWorldNode (Node ): def __init__ (self, name ): super ().__init__(name) while rclpy.ok(): self.get_logger().info("Hello World" ) time.sleep(0.5 ) def main (args=None ): rclpy.init(args=args) node = HelloWorldNode("node_helloworld_class" ) rclpy.spin(node) node.destroy_node() rclpy.shutdown()
修改功能包的 setup.py 文件
1
2
3
4
entry_points={ 'console_scripts' : [ 'node_helloworld = scripts.node_helloworld:main' , ],
4.2 话题
(1) 发布者
编写发布者的 python 程序:scripts/publisher_node.py
1
2
3
4
5
6
7
8
9
10
11
12
13
14
15
16
17
18
19
20
21
22
23
24
25
26
27
28
29
import rclpy from rclpy.node import Node from std_msgs.msg import String """ 创建一个发布者节点 """ class PublisherNode (Node ): def __init__ (self, name ): super ().__init__(name) self.pub = self.create_publisher(String, "chatter" , 10 ) self.timer = self.create_timer(0.5 , self.timer_callback) def timer_callback (self ): msg = String() msg.data = 'Hello World' self.pub.publish(msg) self.get_logger().info('Publishing: "%s"' % msg.data) def main (args=None ): rclpy.init(args=args) node = PublisherNode("topic_helloworld_pub" ) rclpy.spin(node) node.destroy_node() rclpy.shutdown()
(2) 订阅者
编写发布者的 python 程序:scripts/subscriber_node.py
1
2
3
4
5
6
7
8
9
10
11
12
13
14
15
16
17
18
19
20
21
22
23
24
25
26
import rclpy from rclpy.node import Node from std_msgs.msg import String """ 创建一个订阅者节点 """ class SubscriberNode (Node ): def __init__ (self, name ): super ().__init__(name) self.sub = self.create_subscription(\ String, "chatter" , self.listener_callback, 10 ) def listener_callback (self, msg ): self.get_logger().info('I heard: "%s"' % msg.data) def main (args=None ): rclpy.init(args=args) node = SubscriberNode("topic_helloworld_sub" ) rclpy.spin(node) node.destroy_node() rclpy.shutdown()
(3) 修改 setup.py
打开功能包的setup.py文件,加入如下入口点的配置:
1
2
3
4
5
6
entry_points={ 'console_scripts' : [ 'publisher_node = scripts.publisher_node:main' , 'subscriber_node = scripts.subscriber_node:main' , ], },
4.3 服务
(1) 客户端
客户端发送数据代码如下:scripts/client.py
1
2
3
4
5
6
7
8
9
10
11
12
13
14
15
16
17
18
19
20
21
22
23
24
25
26
27
28
29
30
31
32
33
34
35
36
37
38
39
40
41
42
43
44
import sysimport rclpy from rclpy.node import Node from learning_interface.srv import AddTwoInts class adderClient (Node ): def __init__ (self, name ): super ().__init__(name) self.client = self.create_client(AddTwoInts, 'add_two_ints' ) while not self.client.wait_for_service(timeout_sec=1.0 ): self.get_logger().info('service not available, waiting again...' ) self.request = AddTwoInts.Request() def send_request (self ): self.request.a = int (sys.argv[1 ]) self.request.b = int (sys.argv[2 ]) self.future = self.client.call_async(self.request) def main (args=None ): rclpy.init(args=args) node = adderClient("service_adder_client" ) node.send_request() while rclpy.ok(): rclpy.spin_once(node) if node.future.done(): try : response = node.future.result() except Exception as e: node.get_logger().info( 'Service call failed %r' % (e,)) else : node.get_logger().info( 'Result of add_two_ints: for %d + %d = %d' % (node.request.a, node.request.b, response.sum )) break node.destroy_node() rclpy.shutdown()
(2) 服务端
服务端请求数据代码如下:scripts/server.py
1
2
3
4
5
6
7
8
9
10
11
12
13
14
15
16
17
18
19
20
21
22
23
import rclpy from rclpy.node import Node from learning_interface.srv import AddTwoInts class adderServer (Node ): def __init__ (self, name ): super ().__init__(name) self.srv = self.create_service(AddTwoInts, 'add_two_ints' , self.adder_callback) def adder_callback (self, request, response ): response.sum = request.a + request.b self.get_logger().info('Incoming request\na: %d b: %d' % (request.a, request.b)) return response def main (args=None ): rclpy.init(args=args) node = adderServer("service_adder_server" ) rclpy.spin(node) node.destroy_node() rclpy.shutdown()
(3) 编辑 setup.py
1
2
3
4
5
6
entry_points={ 'console_scripts' : [ 'client = scripts.client:main' , 'server = scripts.server:main' , ], },
5 URDF 相关
(1)创建功能包
1
2
3
4
mkdir -p ~/ros2_ws/src cd ~/ros2_ws/src ros2 pkg create urdf_view --build-type ament_python --dependencies rclpy --license Apache-2.0 cd urdf_view
(2)创建 URDF 文件
下载 URDF 文件 并保存在 ~/ros2_ws/src/urdf_view/urdf/r2d2.urdf.xml
(3)发布状态
在 ~/ros2_ws/src/urdf_view/urdf_view/ 目录下创建一个文件 state_publisher.py,并粘贴以下内容:
1
2
3
4
5
6
7
8
9
10
11
12
13
14
15
16
17
18
19
20
21
22
23
24
25
26
27
28
29
30
31
32
33
34
35
36
37
38
39
40
41
42
43
44
45
46
47
48
49
50
51
52
53
54
55
56
57
58
59
60
61
62
63
64
65
66
67
68
69
70
71
72
73
74
75
76
77
78
79
80
81
82
83
84
85
86
87
88
from math import sin, cos, piimport rclpyfrom rclpy.node import Nodefrom rclpy.qos import QoSProfilefrom geometry_msgs.msg import Quaternionfrom sensor_msgs.msg import JointStatefrom tf2_ros import TransformBroadcaster, TransformStampedclass StatePublisher (Node ): def __init__ (self ): rclpy.init() super ().__init__('state_publisher' ) qos_profile = QoSProfile(depth=10 ) self.joint_pub = self.create_publisher(JointState, 'joint_states' , qos_profile) self.broadcaster = TransformBroadcaster(self, qos=qos_profile) self.nodeName = self.get_name() self.get_logger().info("{0} started" .format (self.nodeName)) degree = pi / 180.0 loop_rate = self.create_rate(30 ) tilt = 0. tinc = degree swivel = 0. angle = 0. height = 0. hinc = 0.005 odom_trans = TransformStamped() odom_trans.header.frame_id = 'odom' odom_trans.child_frame_id = 'axis' joint_state = JointState() try : while rclpy.ok(): rclpy.spin_once(self) now = self.get_clock().now() joint_state.header.stamp = now.to_msg() joint_state.name = ['swivel' , 'tilt' , 'periscope' ] joint_state.position = [swivel, tilt, height] odom_trans.header.stamp = now.to_msg() odom_trans.transform.translation.x = cos(angle)*2 odom_trans.transform.translation.y = sin(angle)*2 odom_trans.transform.translation.z = 0.7 odom_trans.transform.rotation = \ euler_to_quaternion(0 , 0 , angle + pi/2 ) self.joint_pub.publish(joint_state) self.broadcaster.sendTransform(odom_trans) tilt += tinc if tilt < -0.5 or tilt > 0.0 : tinc *= -1 height += hinc if height > 0.2 or height < 0.0 : hinc *= -1 swivel += degree angle += degree/4 loop_rate.sleep() except KeyboardInterrupt: pass def euler_to_quaternion (roll, pitch, yaw ): qx = sin(roll/2 ) * cos(pitch/2 ) * cos(yaw/2 ) - cos(roll/2 ) * sin(pitch/2 ) * sin(yaw/2 ) qy = cos(roll/2 ) * sin(pitch/2 ) * cos(yaw/2 ) + sin(roll/2 ) * cos(pitch/2 ) * sin(yaw/2 ) qz = cos(roll/2 ) * cos(pitch/2 ) * sin(yaw/2 ) - sin(roll/2 ) * sin(pitch/2 ) * cos(yaw/2 ) qw = cos(roll/2 ) * cos(pitch/2 ) * cos(yaw/2 ) + sin(roll/2 ) * sin(pitch/2 ) * sin(yaw/2 ) return Quaternion(x=qx, y=qy, z=qz, w=qw) def main (): node = StatePublisher() if __name__ == '__main__' : main()
(4)创建 launch 文件
创建一个 ~/ros2_ws/src/urdf_view/launch 文件夹,并在其中创建一个 demo.launch.py 文件。
1
2
3
4
5
6
7
8
9
10
11
12
13
14
15
16
17
18
19
20
21
22
23
24
25
26
27
28
29
30
31
32
33
34
35
36
import osfrom ament_index_python.packages import get_package_share_directoryfrom launch import LaunchDescriptionfrom launch.actions import DeclareLaunchArgumentfrom launch.substitutions import LaunchConfigurationfrom launch_ros.actions import Nodedef generate_launch_description (): use_sim_time = LaunchConfiguration('use_sim_time' , default='false' ) urdf_file_name = 'r2d2.urdf.xml' urdf = os.path.join( get_package_share_directory('urdf_view' ), urdf_file_name) with open (urdf, 'r' ) as infp: robot_desc = infp.read() return LaunchDescription([ DeclareLaunchArgument( 'use_sim_time' , default_value='false' , description='Use simulation (Gazebo) clock if true' ), Node( package='robot_state_publisher' , executable='robot_state+_publisher' , name='robot_state_publisher' , output='screen' , parameters=[{'use_sim_time' : use_sim_time, 'robot_description' : robot_desc}], arguments=[urdf]), Node( package='urdf_view' , executable='state_publisher' , name='state_publisher' , output='screen' ), ])
(5)更新 setup.py
为了能够正常安装 python,必须告诉 colcon 编译工具如何安装我们刚才创建的 python 包,编辑 ~/ros2_ws/src/urdf_view/setup.py 如下:
导入必要库
1
2
3
4
import osfrom glob import globfrom setuptools import setupfrom setuptools import find_packages
在 data_files 中添加两行
1
2
3
4
5
data_files=[ ... (os.path.join('share' , package_name, 'launch' ), glob(os.path.join('launch' , '*launch.[pxy][yma]*' ))), (os.path.join('share' , package_name), glob('urdf/*' )), ],
修改 entry_points 列表,保证可以从命令行运行 state_publisher
1
2
3
'console_scripts' : [ 'state_publisher = urdf_view.state_publisher:main' ],
(6)安装包
1
2
3
cd ~/ros2_ws colcon build --symlink-install --packages-select urdf_view source install/setup.bash
(7)可视化结果
启动package
1 ros2 launch urdf_view demo.launch.py
打开一个新终端,运行 Rviz