发表于|更新于|前端
|总字数:2.4k|阅读时长:10分钟|浏览量:|
由于未来项目需要(PM说的),于是展开了一个新的技能树,在此记录Angular入门学习过程。今天从0开始接触。
话外:
AngularJS和Angular的区别
老的angular也就是1.x版本的称为AngularJS,新的2.x以上的版本重命名为Angular。所以肯定上手新的Angular。
开始安装
每个框架一般都有自己的脚手架,方便进行开发,使开发人员专注于开发,而不花费时间在环境配置上。
Angular CLI就是Angular的脚手架。
全局安装Angular CLI(前提是已经安装node.js)
1
| npm install -g @angular/cli
|
创建一个新的、基本的 Angular 项目
1
2
3
| ng new my-first-project #新建名为my-first-project项目
cd my-first-project #打开my-first-project
ng serve -o #启动项目并从默认浏览器打开
|
开始学习
根据官方例子进行学习
一、模版语法
1、通过*ngFor进行遍历操作,并用插值语法 {{}}进行显示。
1
2
3
4
5
6
| <h2>Products</h2>
<div *ngFor="let product of products">
<h3>
{ { product.name }}
</h3>
</div>
|
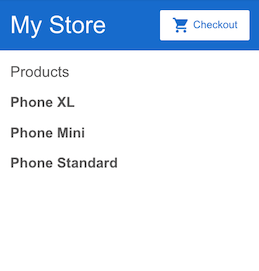
2、鼠标悬停预览详情
1
2
3
4
5
6
7
8
| <h2>Products</h2>
<div *ngFor="let product of products">
<h3>
<a [title]="product.name + ' details'">
{ { product.name }}
</a>
</h3>
</div>
|
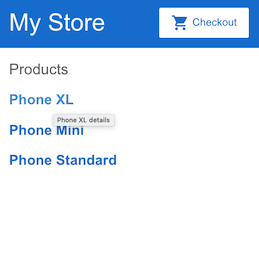
3、添加商品说明。在< p >标签上,用*ngIf指令,这样 Angular 只会在当前商品有描述信息的情况下创建这个< p >元素。
1
2
3
4
5
6
7
8
9
10
11
| <h2>Products</h2>
<div *ngFor="let product of products">
<h3>
<a [title]="product.name + ' details'">
{ { product.name }}
</a>
</h3>
<p *ngIf="product.description">
Description: { { product.description }}
</p>
</div>
|
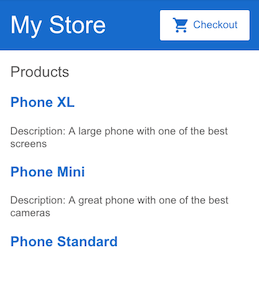
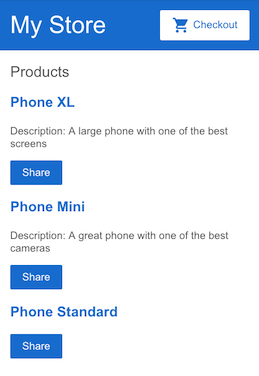
4、添加一个按钮,以便让用户可与朋友分享商品。
把button的click事件绑定到我们替你定义好的share()方法上(位于product-list.component.ts)。
事件绑定是通过把事件名称包裹在圆括号()中完成的。
1
2
3
4
5
6
7
8
9
10
11
12
13
14
| <h2>Products</h2>
<div *ngFor="let product of products">
<h3>
<a [title]="product.name + ' details'">
{ { product.name }}
</a>
</h3>
<p *ngIf="product.description">
Description: { { product.description }}
</p>
<button (click)="share()">
Share
</button>
</div>
|
小结:
该应用现在具有商品列表和共享功能。Angular 模板语法的五个常用特性:
-
*ngFor
-
*ngIf
-
插值 {{}}
-
属性绑定 []
-
事件绑定()
二、组件
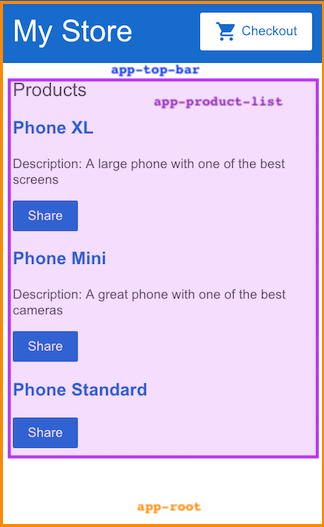
-
app-root(橙色框)是应用的外壳。这是第一个组件,也是所有其它组件的父组件。可以把它想象成一个基础页面。
-
app-top-bar(蓝色背景)是商店名称和结帐按钮。
-
app-product-list(紫色框)是你在上一节中修改过的商品列表。
1、创建一个新组件:product-alerts,包含三个主要文件:样式文件css,模版文件html,类文件ts。
1
| ng generate component product-alerts
|
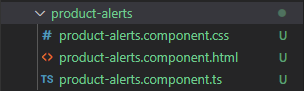
用命令生成的文件都是有默认模版的,规定以下带注释的都是后添加的。
文件product-alerts.component.ts
1
2
3
4
5
6
7
8
9
10
11
12
13
14
15
16
17
18
19
20
21
22
23
24
25
26
| import { Component, OnInit } from '@angular/core';
//从angular导入Input装饰器
import { Input } from '@angular/core';
//从angular导入Ouput装饰器、EventEmitter事件发射器
import { Output, EventEmitter } from '@angular/core';
@Component({
selector: 'app-product-alerts',
templateUrl: './product-alerts.component.html',
styleUrls: ['./product-alerts.component.css']
})
export class ProductAlertsComponent implements OnInit {
//定义一个带 @Input() 装饰器的 product 属性。
//@Input() 装饰器指出其属性值是从该组件的父组件商品列表组件中传入的。
@Input() product;
//用 @Output() 装饰器和一个事件发射器 EventEmitter() 实例定义一个名为 notify 的属性。
//这可以让商品提醒组件在 notify 属性发生变化时发出事件。
@Output() notify = new EventEmitter();
constructor() { }
ngOnInit() {
}
}
|
文件product-alerts.component.html
1
2
3
4
5
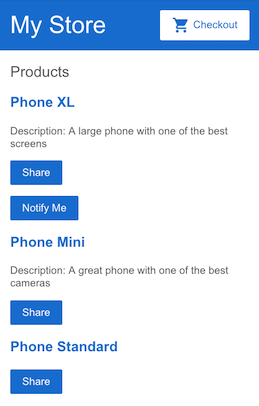
| <!-- 如果商品价格超过 700 美元就要显示出来的“通知我”按钮。 -->
<p *ngIf="product.price > 700">
<!-- 用事件绑定更新“Notify Me”按钮,以调用 notify.emit() 方法。 -->
<button (click)="notify.emit()">Notify Me</button>
</p>
|
文件product-list.component.ts
1
2
3
4
5
6
7
8
9
10
11
12
13
14
15
16
17
18
19
20
| import { Component } from '@angular/core';
import { products } from '../products';
@Component({
selector: 'app-product-list',
templateUrl: './product-list.component.html',
styleUrls: ['./product-list.component.css']
})
export class ProductListComponent {
products = products;
share() {
window.alert('The product has been shared!');
}
//应该由父组件(商品列表组件)采取行动,而不是商品提醒组件。
onNotify() {
window.alert('You will be notified when the product goes on sale');
}
}
|
将product-alert作为组件写入product-list
文件product-list.component.html
1
2
3
4
5
6
7
8
9
10
11
12
13
14
15
16
17
18
19
20
21
| <h2>Products</h2>
<div *ngFor="let product of products">
<h3>
<a [title]="product.name + ' details'">
{ { product.name }}
</a>
</h3>
<p *ngIf="product.description">
Description: { { product.description }}
</p>
<button (click)="share()">
Share
</button>
<!-- product-alert组件 -->
<!-- 修改商品列表组件以接收商品提醒组件的输出。 -->
<app-product-alerts
[product]="product"
(notify)="onNotify()">
</app-product-alerts>
</div>
|
三、路由
将商品详情建立为组件,通过路由跳转访问详情。
注册路由
文件app.module.ts
1
2
3
4
5
6
7
8
9
10
11
| @NgModule({
imports: [
BrowserModule,
ReactiveFormsModule,
RouterModule.forRoot([
{ path: '', component: ProductListComponent },
//添加一个商品详情路由,该路由的 path 是 products/:productId
{ path: 'products/:productId', component: ProductDetailsComponent },
])
],
|
文件product-list.component.html
1
2
3
4
5
6
7
8
9
| <!-- 把商品索引赋值给productId -->
<div *ngFor="let product of products; index as productId">
<h3>
<!-- 设置路由链接 -->
<a [title]="product.name + ' details'" [routerLink]="['/products', productId]">
{ { product.name }}
</a>
</h3>
</div>
|
新建商品详情组件
1
| ng generate component product-details
|
文件product-details.component.ts
1
2
3
4
5
6
7
8
9
10
11
12
13
14
15
16
17
18
19
20
21
22
23
24
| import { Component, OnInit } from "@angular/core";
import { ActivatedRoute } from "@angular/router";
//从 ../products 文件导入 products 数组
import { products } from "../products";
@Component({
selector: "app-product-details",
templateUrl: "./product-details.component.html",
styleUrls: ["./product-details.component.css"]
})
export class ProductDetailsComponent implements OnInit {
//定义 product 属性,并把它加入构造函数括号中作为参数,以便把 ActivatedRoute 注入到构造函数中
product;
constructor(
private route: ActivatedRoute,
) {}
//在 ngOnInit() 方法中订阅了路由参数,并且根据 productId 获取了该产品
ngOnInit() {
this.route.paramMap.subscribe(params => {
this.product = products[+params.get("productId")];
});
}
}
|
文件product-details.component.html
1
2
3
4
5
6
| <h2>Product Details</h2>
<div *ngIf="product">
<h3>{ { product.name }}</h3>
<h4>{ { product.price | currency }}</h4>
<p>{ { product.description }}</p>
</div>
|
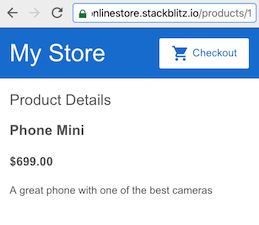
现在,当用户点击商品列表中的某个名字时,路由器就会导航到商品的不同网址。
用商品详情组件代替商品列表组件,并显示商品详情。
四、管理数据
服务是 Angular 应用的重要组成部分。
在 Angular 中,服务是一个类的实例,它可以借助 Angular 的依赖注入系统来让应用中的任何一个部件都能使用它。
服务可以让你在应用的各个部件之间共享数据。对于在线商店,购物车服务就是存放购物车的数据和方法的地方。
1、定义购物车服务
1
| ng generate service cart
|
文件cart.service.ts
1
2
3
4
5
6
7
8
9
10
11
12
13
14
15
16
17
18
19
20
21
22
23
24
| import { Injectable } from "@angular/core";
import { HttpClient } from '@angular/common/http';
@Injectable({
providedIn: "root"
})
export class CartService {
//定义一个 items 属性来把当前商品的数组存储在购物车中
items = [];
constructor() {}
//把商品添加到购物车方法
addToCart(product) {
this.items.push(product);
}
//返回购物车商品方法
getItems() {
return this.items;
}
//清除购物车商品的方法
clearCart() {
this.items = [];
return this.items;
}
}
|
2、使用购物车服务
文件product-details.component.ts
1
2
3
4
5
6
7
8
9
10
11
12
13
14
15
16
17
18
19
20
21
22
23
24
25
26
27
28
29
30
31
32
33
34
| import { Component, OnInit } from "@angular/core";
import { ActivatedRoute } from "@angular/router";
import { products } from "../products";
//导入购物车服务
import { CartService } from "../cart.service";
@Component({
selector: "app-product-details",
templateUrl: "./product-details.component.html",
styleUrls: ["./product-details.component.css"]
})
export class ProductDetailsComponent implements OnInit {
product;
//通过把购物车服务注入到这里的 constructor() 中来注入它
constructor(
private route: ActivatedRoute,
private cartService: CartService
) {}
//定义 addToCart() 方法,该方法会当前商品添加到购物车中
addToCart(product) {
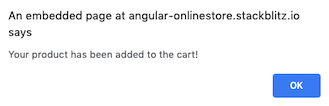
window.alert('Your product has been added to the cart!');
this.cartService.addToCart(product);
}
ngOnInit() {
this.route.paramMap.subscribe(params => {
this.product = products[+params.get("productId")];
});
}
}
|
文件product-details.component.html
1
2
3
4
5
6
7
8
| <h2>Product Details</h2>
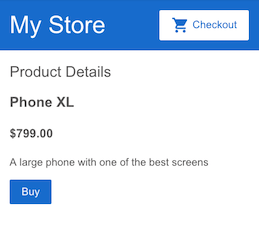
<div *ngIf="product">
<h3>{ { product.name }}</h3>
<h4>{ { product.price | currency }}</h4>
<p>{ { product.description }}</p>
<!-- 添加一个标签为“Buy”的按钮,并把其 click() 事件绑定到 addToCart() 方法 -->
<button (click)="addToCart(product)">Buy</button>
</div>
|
3、创建购物车页面
1
| ng generate component cart
|
文件cart.component.html
1
2
3
4
5
6
| <h3>Cart</h3>
<div class="cart-item" *ngFor="let item of items">
<span>{ { item.name }}</span>
<span>{ { item.price | currency }}</span>
</div>
|
4、为购物车组件添加路由(URL 模式)
文件app.module.ts
1
2
3
4
5
6
7
8
9
10
11
| @NgModule({
imports: [
BrowserModule,
ReactiveFormsModule,
RouterModule.forRoot([
{ path: '', component: ProductListComponent },
{ path: 'products/:productId', component: ProductDetailsComponent },
//为组件 CartComponent 添加一个路由,其路由为 cart
{ path: 'cart', component: CartComponent },
])
],
|






