






Editor’s Note: The first Three.js Conference is coming to Paris this September, and we’re getting into the spirit of it! Over the coming weeks, we’ll be bringing you lots of Three.js gems from wonderful people in the community, generously sharing their experiments, techniques, and creative ideas with us. We’re kicking things off with this beautiful interactive xylophone by Sujen! Enjoy!
🎟️ Going to Paris? As part of our partnership with the first Three.js Conference, Codrops readers can use the code CODROPS to get 15% off tickets. If you’ve been waiting for a sign, this might be it. Get your ticket →
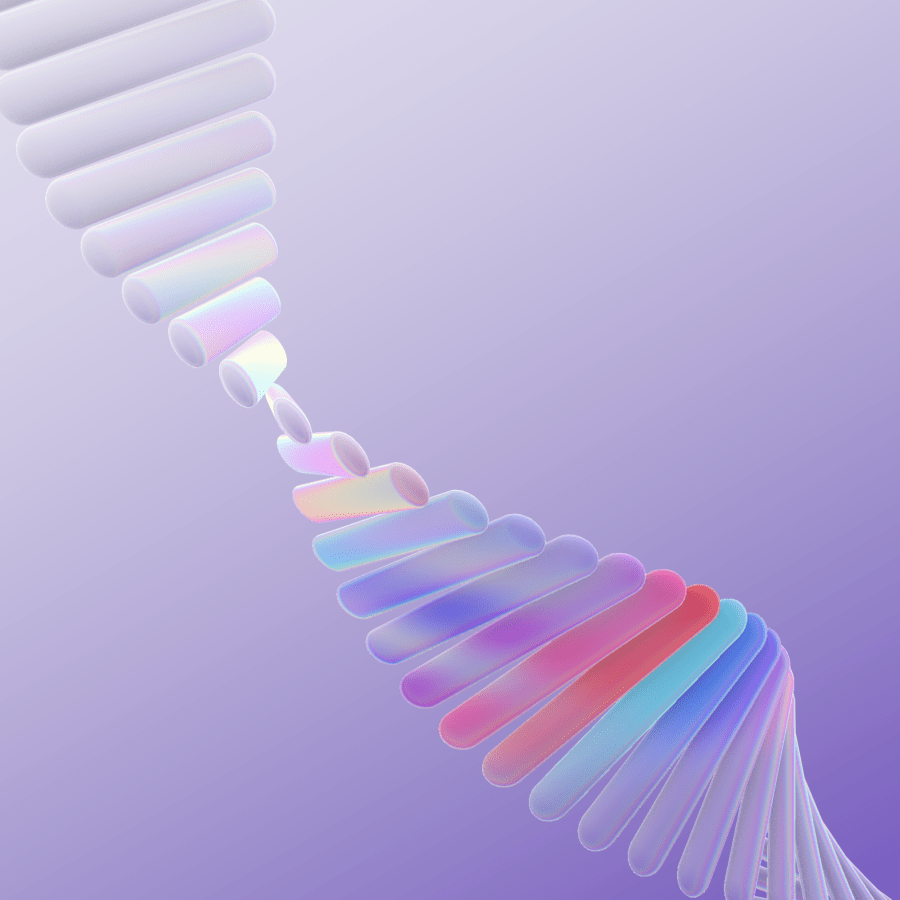
This is a xylophone you play with your cursor. Sweep across the bars and each one rings its note, swings like a struck chime, and floods with colour as the wake passes over it.
The column never ends, either. Scroll as long as you like and there are always more bars, sixty-four of them cycling forever up a helix of frosted glass.
I’ve always been drawn to materials that are almost translucent but still hold a bit of sheen, enough to catch light and stay distinct. Fancy, but minimal. This is where that idea landed.
Here’s what we’ll cover:
It’s built with Three.js on plain Vite, with postprocessing running the pass pipeline. It assumes you’re comfortable with Three.js and have written a shader before.
This one started with doomscrolling. I have a love-hate relationship with Twitter, where I get inspired by everyone’s great ideas and then feel slightly buried by everyone’s great ideas. Any one else?
I came across a post I couldn’t stop looking at: the interaction, the colours, the smoothness of the animation. So I set out to work out how. And to make it more interesting, I decided to fold in a traditional xylophone too.

We start by constructing the shape and the helix, then add the scroll and the interaction, then the material that sells the xylophone’s glassiness.
I modelled the bar as a capsule reminiscent of a xylophone key, but rounded, so it has some depth to catch light with. It exports as a single bar in a .glb, and we instance it 64 times from one InstancedBufferGeometry.

I modelled the bar as a capsule reminiscent of a xylophone key, but rounded, so it has some depth to catch light with. It exports as a single bar in a .glb, and we instance it 64 times from one InstancedBufferGeometry.
const geometry = new InstancedBufferGeometry()

geometry.index = model.index

geometry.setAttribute("position", model.getAttribute("position"))

geometry.setAttribute("normal", model.getAttribute("normal"))

geometry.setAttribute("uv", model.getAttribute("uv"))

geometry.setAttribute("aPos", new InstancedBufferAttribute(transforms.positions, 3))

geometry.setAttribute("aRot", new InstancedBufferAttribute(transforms.rotations, 4))

geometry.setAttribute("aTintOffset", new InstancedBufferAttribute(transforms.tintOffsets, 1))
Laying those 64 out into a helix is mostly what you’d expect. Walk an angle around a circle, step up in Y, turn each bar to face outward. The part that isn’t obvious is the third rotation:
const tiltX = Math.atan2(geometryHeight, cfg.radius * cfg.tiltFalloff)

for (let i = 0; i < cfg.count; i++) {

  const s = wrap(i + phase, cfg.count)

  const theta = s * cfg.thetaStep + cfg.thetaOffset

  positions[i * 3] = cfg.radius * Math.cos(theta)

  positions[i * 3 + 1] = s * geometryHeight - halfHeight

  positions[i * 3 + 2] = cfg.radius * Math.sin(theta)

  e.set(tiltX, -theta, 0) // Euler order "YXZ"

  q.setFromEuler(e)

}
tiltX is what lets each bar lean into the climb instead of sitting flat. Think of a spiral staircase: without the tilt you get the steps, level plates stacked one above the next. But with it, you get the handrail, running smoothly along the slope. The angle itself is just rise over run. The rise is one bar height, because that’s how far we go up between one bar and the next. The run is how far we travel sideways in that same step, which scales with the radius: a wide helix climbs gently, a narrow one climbs steeply. Math.atan2 turns those two lengths into the angle, and tiltFalloff is a configuration on top to flatten or raise it.
The Euler order matters as well. "YXZ" applies the global rotation before adding the custom tilt onto the bar’s local X rotation.
Vertical spacing is exactly one bounding-box height, so the bars stack flush with no gap. Angular spacing works out to a little under two full turns across the 64. The whole group is then tilted and rolled so the helix enters top-left and leaves bottom-right, and scaled down to fit.

Scrolling doesn’t move the group, or the camera, or anything else. Scroll accumulates into a single phase value measured in bar-index units, which gets eased and fed into the wrap() from that loop above:
function wrap(a: number, n: number): number {

  return ((a % n) + n) % n

}
Because phase feeds the layout rather than an index, each bar slides continuously up the spiral, and the moment one passes the top it reappears at the bottom. The envelope (how tall it is, how wide, how it sits in frame) is fixed. You can scroll for ten minutes and the composition stays exactly where I put it.
Two small things keep it cheap. The easing uses MathUtils.damp rather than a lerp, so it settles at the same speed on a 60Hz screen and a 120Hz one. And the instance buffers are only rewritten when the eased phase has actually moved.
Note: 64 bars at this angular step will cause the recycling to jump rotation, though it’s invisible because it happens out of frame. If you want the recycling to be genuinely seamless, pick a step that divides evenly into 2π.
I spent an embarrassing number of hours on the colour and the speed of the movement, then many more just playing with it.
The colour was the hard part. I knew I wanted a fluid simulation, but I also wanted every bar to keep its own colour, like a real xylophone. My first instinct was to light the whole bar up on hover. It worked, but it was boring.
Here’s the arrangement I landed on. Every bar carries one number: its position in the row, from 0 at the bottom to 1 at the top. This number is its permanent slot on a gradient texture.
The gradient is built at runtime on a canvas: a prism ramp running red, magenta, violet, blue, cyan.
const ctx = canvas.getContext("2d")!
const grad = ctx.createLinearGradient(0, 0, width, 0)
grad.addColorStop(0.0, "#ff0033")
grad.addColorStop(0.3, "#ff00d4")
grad.addColorStop(0.5, "#6a00ff")
grad.addColorStop(0.8, "#0090ff")
grad.addColorStop(1.0, "#00ffe1")
ctx.fillStyle = grad
ctx.fillRect(0, 0, width, 1)
The fluid’s velocity field then decides how much of it you can see:
float velocity = smoothstep(0.0, 0.2, length(texture2D(u_tFluid, vScreenUv).xy));
float reveal = clamp(velocity * u_fluidStrength, 0.0, 1.0);
vec3 tint = texture2D(u_tGradient, vec2(fract(vTintOffset * u_tintWrap), 0.5)).rgb;
Something worth noticing is that each fragment samples the fluid’s velocity at its own position on screen, so the reveal follows the shape of the swirl as it drifts and decays. At rest the bars sit near-white. Sweep across and the wake uncovers each bar’s own colour, never the cursor’s.
We add a config u_tintWrap, so the ramp cycles ten times up the 64 bars instead of once. This is the number to play with if you build something similar.
The fluid simulation itself is a fairly standard Stable Fluids solver but heavily simplified. It runs at 128×128. It does a single pressure iteration where a real solver would do dozens. There’s barely any vorticity.
The one thing I didn’t skimp on is splatting along a segment rather than at a point:
vec2 ab = b - a;
float t = clamp(dot(uv - a, ab) / max(dot(ab, ab), 1e-6), 0.0, 1.0);
vec2 p = uv - (a + t * ab);
vec3 splat = exp(-dot(p, p) / (u_splatRadius / 50.0)) * u_splatColor;
Splatting along the line from the previous position to the current one creates a smooth brush stroke.
Working out which bar you’re hovering is deliberately unsophisticated. We loop over all 64 and raycast against a bounding box. The trick is pushing the ray into each bar’s local space rather than transforming the box, which is much cheaper. Every temporary object is allocated once up front, so a frame of picking allocates nothing.
When you sweep across a bar, it swings. The obvious way to build that is a tween per bar, ticked on the CPU every frame. I went with the cheaper route instead and animated it in the shader.
float dt  = u_time - aStrikeTime;
float env = step(0.0, dt) * exp(-dt * SWING_DECAY);
float ang = env * SWING_AMP * sin(dt * SWING_FREQ) * u_swingScale;

vec4 swing = vec4(normalize(u_swingAxis) * sin(ang * 0.5), cos(ang * 0.5));
rot = qmul(rot, swing);
The formula is a damped pendulum, written out in one line instead of stepped through frame by frame. Give it the time since the strike and it hands back an angle, wide at first and dying out after about a second. All the CPU ever does is note when each bar was hit, so sixty-four bars can swing independently and it never knows.
There are two small details to note here:
aStrikeTime is initially set to a time very far in the past, so decay collapses to 0.qmul is important. Right now, the bar pivots around its end. If flipped, the bars will orbit around the centre of the helix.Then, of course, a xylophone needs to make sound. I downloaded a single note sample and pitch-shifted it across a pentatonic scale, so sweeping across bars in a hurry doesn’t sound horrifying.
We used three octaves up from C5, which gives fifteen notes across sixty-four bars, so roughly four neighbouring bars share a pitch. That’s deliberate. Spreading sixty-four distinct notes across the range would push the extremes far from the sample’s original speed, and a sample stretched that hard starts to sound like a cartoon.
Note: Notes fire when the cursor enters a bar rather than while it sits there, which is closer to how a real xylophone behaves.
Now the part that started all of this: the glassy, matte, faintly shiny surface. This is a moodboard of the ideal material I wanted.

The obvious approach is MeshPhysicalMaterial with transmission turned on, and I want to be clear I didn’t purposefully avoid it. It genuinely can’t work here. All 64 bars are a single instanced draw call, and Three.js can’t depth-sort instances against each other. So the bars stay completely opaque.
We run a few passes to get the ideal material. The passes run in this order:
Step 1 uses a layer mask rather than a second scene. The background quad lives on its own layer; the pass narrows the camera’s mask to that layer, renders, then puts the mask back.
Step 2 hands the sharp background to postprocessing’s GaussianBlurPass, which blurs one target into another and manages its own scratch buffers. It works at a quarter of the screen resolution and runs a few passes over it, which gives a wide, milky frost without paying for a wide kernel at full size. A single frost value sits on top of it, so the strength is tunable at runtime.
And then, after all that setup, transmission is a single texture read:
vec2 buv = vScreenUv + N.xy * u_refractStrength; // screen-space refraction
vec3 trans = texture2D(u_tBackdrop, buv).rgb;
trans = mix(trans, tint, reveal);
vec3 frosted = mix(body, trans, u_transmission * (1.0 - 0.6 * reveal));
Nudging that lookup by the surface normal is what bends the background at the edges and sells the thickness.
The (1.0 - 0.6 * reveal) is a small thing I like. Wherever the wake is revealing colour, we let less milky backdrop through, so the tint stays vivid instead of being washed out by frost.
The blur is genuinely hard to see against a plain background, so there’s a patterned-background toggle sitting behind the dev-only tuning panel. It never ships, but it’s the first thing I reach for when the frost looks wrong.

Fresnel comes next, mixing the bar toward a sky colour at grazing angles. That’s what gives the edges definition and lifts each bar off the background. There’s no environment map behind it, just a three-stop ramp from ground to horizon to sky, generated in the fragment shader. The sheen only reads at grazing angles, where a real HDR is indistinguishable from a gradient, so it isn’t worth the megabyte.
The bars still looked dull, so I added iridescence, a cosine palette standing in for real thin-film interference. There’s a term in the phase that varies with the surface normal, acting as fake thickness variation so the interior isn’t one flat hue. It’s cheap, and it does the job.


Then contact shadows, except there’s no floor. The composition floats in space, so there’s nothing for a shadow to fall onto. Instead the bars occluding each other become the shadow, via SSAO.

That needs one non-obvious piece. SSAO wants a buffer of surface normals, and Three’s built-in normal pass draws with a generic material that knows nothing about our per-bar spin and strike swing. So we render normals using the same vertex shader as the display material, sharing the same uniform objects by reference rather than copying values across. Shared references can’t drift apart, so the normal buffer physically cannot fall out of step with what you see.
We finish with SMAA to clean up the edges.
There are a lot of passes here, which doesn’t sound like a recipe for performance. So rather than cutting passes, I made each one cheap.
The fluid solve is idle-gated. After a couple of seconds without input, the entire solve is skipped. And the scroll conveyor rewrites its buffers only when the eased phase has genuinely moved, so settled scroll means zero rewrites and zero uploads.
After that it’s a handful of small decisions. The fluid simulation runs small and coarse. One background render feeds both the sharp copy for refraction and the blurred copy for transmission.
Phones get their own tier. Device pixel ratio is capped everywhere. On a coarse-pointer device with a small viewport the cap drops further, and the two full-resolution buffers (the surface normals and the occlusion pass) drop to half. Those three together are what a phone GPU can’t hold at 60fps; everything else was already cheap enough to leave alone.
Resizes are measured from a sizer element rather than the window, and guarded so identical sizes don’t churn render targets.
The bars are the interesting case here, and the fix is one line:
this.uniforms.u_swingScale.value = reduceMotion ? 0 : 1Multiply the swing angle by zero and the motion is gone. Nothing else changes. The bar still lights up, the note still plays, the colour still reveals.
The tempting move is to gate the whole interaction behind one boolean. But that doesn’t hand someone a calmer version of the instrument; it takes the instrument away from them. Reduced motion should remove the vestibular problem, not the feature.
Note: there’s no keyboard route to playing the instrument. Striking a bar needs a pointer raycast, so a keyboard user gets the page and the sound toggle but can’t play a note. The fix I’d reach for is arrow keys walking a focus index through the bars and firing the same strike path.
The takeaway, which I refused to admit, is how much effort it takes to make something look simple.
A few things worth trying:
u_tintWrap around and watch how much of this thing’s personality lives in that one number.此内容由惯性聚合(RSS阅读器)自动聚合整理,仅供阅读参考。 原文来自 — 版权归原作者所有。