


Explore how depth maps, TSL, and WebGPU can be combined to turn flat 2D images into dynamic surfaces with realistic lighting, surface detail, and self-shadowing.

Editor’s note: And we are continuing our celebration of the Three.js community as we count down to the first Three.js Conference in Paris this September. In this new tutorial, Dominik Fojcik shares a little magic trick for making 2D images come alive with depth, light, and shadow, using Three.js, TSL, and WebGPU.
🇫🇷 Is Paris on your mind? As part of our partnership with the first Three.js Conference, Codrops readers can use the code CODROPS to get 15% off. Get your ticket →
I’ve seen many cool image effects on the web, but most of them stay on the surface. What if you could take it further and make the effect dive into the image? Something that actually gets inside the picture like a light.
The key for that is a depth map. Something that before seemed to be magic is now doable thanks to depth estimation models, which have become really good at estimating depth from 2D images.
Depth Map
This is the main ingredient of our effect. To get one, we need to feed a depth estimation model with our image and use it to generate a depth map. You can install a model like Depth Anything 3 yourself or use a Depth Generation Tool I created for this article.
The raw depth map has a problem you can’t see, but the light can. It’s an 8-bit image, so it only has 256 possible depth values, and smooth surfaces get quantized into flat steps. The lighting reads the slope from this map, and at every step edge the slope suddenly spikes, so shading that should flow across smooth stone breaks up into gritty, blotchy noise. To fix it, we convert the depth map to floats and blur it to smooth out those steps.
First, we convert the 8-bit depth values into floating-point values, blur them to remove the visible steps, and then store the result as half-float data so we can preserve smoother depth information.
const { data } = context.getImageData(0, 0, width, height)
const values = new Float32Array(width * height)
for (let i = 0; i < values.length; i++) {
  values[i] = data[i * 4] / 255
}

// blur just enough to melt the 8-bit steps together
smoothBands({ values, width, height }, radius)

const halfFloats = new Uint16Array(values.length)
for (let i = 0; i < halfFloats.length; i++) {
  halfFloats[i] = DataUtils.toHalfFloat(values[i])
}
Faking the Surface with a Normal Map
How do we make light act like our image is 3D? The answer is a normal map.
Lighting doesn’t actually care about the shape itself, it cares about normals: the direction each point on a surface faces. A point facing the light is bright, a point tilted away is dark. That’s the entire trick of this effect.
So instead of building real geometry, we can give each pixel a normal that makes the plane appear three-dimensional to the light.
To create the normal map, we’re going to use our depth map. The depthGradient function samples the depth map texture and calculates the surface slope that we can use to create our normal map.
const depthGradient = Fn(([vUv, step]) => {
  const left = smoothDepthNode.sample(vUv.sub(alongX)).r
  const right = smoothDepthNode.sample(vUv.add(alongX)).r
  const bottom = smoothDepthNode.sample(vUv.sub(alongY)).r
  const top = smoothDepthNode.sample(vUv.add(alongY)).r

  return vec2(right.sub(left), top.sub(bottom)).mul(0.5)
})
When visualized as colors, the normal map looks like this:
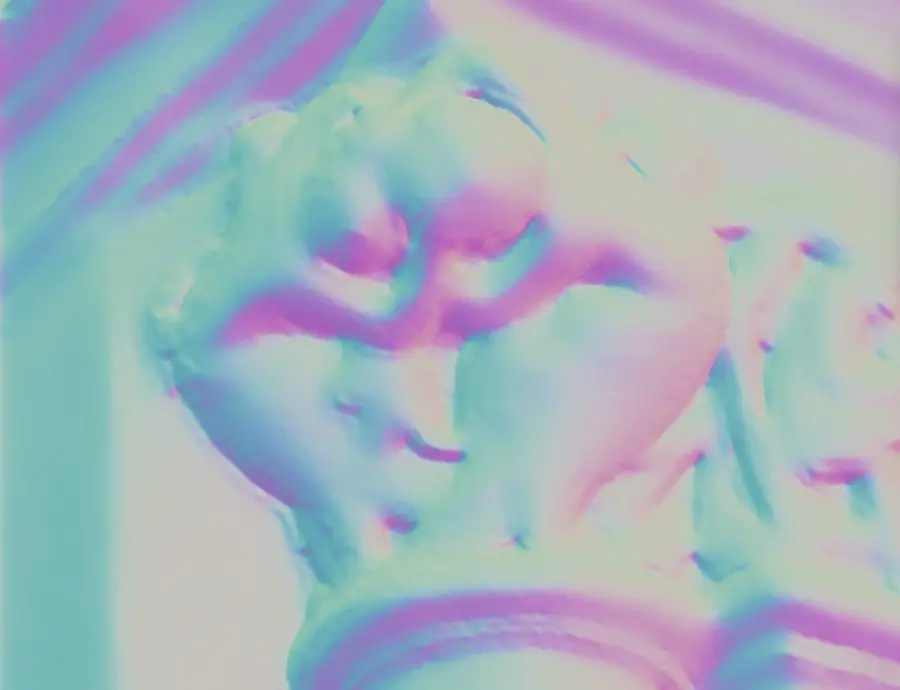
To add even more detail, I run the same trick on the photo itself, using its brightness instead of depth. It’s a cheat—a dark painted stripe tilts the normal in the same way a real groove would—but under a moving light it reads as surface detail. The two gradients are simply added together:
const shape = vec3(slope.x.negate(), slope.y.negate(), float(1))
return shape.add(vec3(detail.x.negate(), detail.y.negate(), 0)).normalize()
Here is the normal before and after adding the details.
Shadows
Normals make the image react to light like a 3D surface, but they can’t make one part cast a shadow on another. To find shadows, each pixel traces a line toward the light through the depth map. If it detects a bump along the way, the pixel is in shadow.
The depth map is sampled at several points along this path, and the amount of occlusion is accumulated to create a soft shadow.
const occlusion = float(0).toVar()

Loop(SHADOW_STEPS, ({ i }) => {
  const travel = float(i).add(1).div(SHADOW_STEPS)
  const rayDepth = surfaceDepth.add(headroom.mul(travel))
  const blockerDepth = smoothDepthNode.sample(vUv.add(sweep.mul(travel))).r
  const softness = uShadowSoftness.mul(travel.mul(SOFTNESS_GROWTH).add(1))
  const blocked = blockerDepth.sub(rayDepth).div(softness).clamp(0, 1)

  occlusion.assign(occlusion.max(blocked))
})
Material
All three ingredients are passed to MeshPhongNodeMaterial, which handles the actual lighting calculation for us:
const material = new MeshPhongNodeMaterial({ specular: 0x000000 })
material.colorNode = diffuseNode(vUv, depth)   // our image
material.normalNode = normalNode(vUv)          // fake normals from depth-map
material.aoNode = shadowNode(vUv, depth)       // shadows
Here, the image becomes the material’s color, our generated normals control how the surface reacts to light, and the depth-based shadows are added as ambient occlusion.
Final Words
I hope this little magic trick gives you some inspiration to create your own interesting effects with depth maps. There is still a lot of unexplored potential in this field.
Wishing you all the best at the upcoming Three.js conference! I couldn’t make it this year, but hopefully next time!
