








因为博客使用 Gatsbyjs 进行搭建,Markdown 文章写完之后会打包成静态 HTML 文件,文章是存在项目文件中并非数据库中,所以每次进行博客文章更新后,都需要重新进行打包构建。在进行 git push 后,我需要连到云服务器中,然后进入项目目录,执行 git pull / npm run clean / npm run build 等命令。
为了简化该操作,通过使用 Github 的 Webhooks 服务,在服务端监听 git push 事件,然后自动执行编写好的脚本从而实现自动化构建部署。以后 Git push 后就无需再进行后续操作,由脚本完成。
目前主流的自动化构建部署工具可以选择 Jenkins,Jenkins 是一个持续集成管理平台,提供超过 1000 个插件来支持构建、部署、自动化, 满足任何项目的需要。但由于 Jenkins 是基于Java环境,而且功能过于强大,对于个人的项目来说有点大材小用,而且加重个人服务器资源的压力。所以没有采用 Jenkins 进行自动化构建部署,而是采用自己编写的Koa2服务来接收 Github Webhook 来实现简单自动化构建。
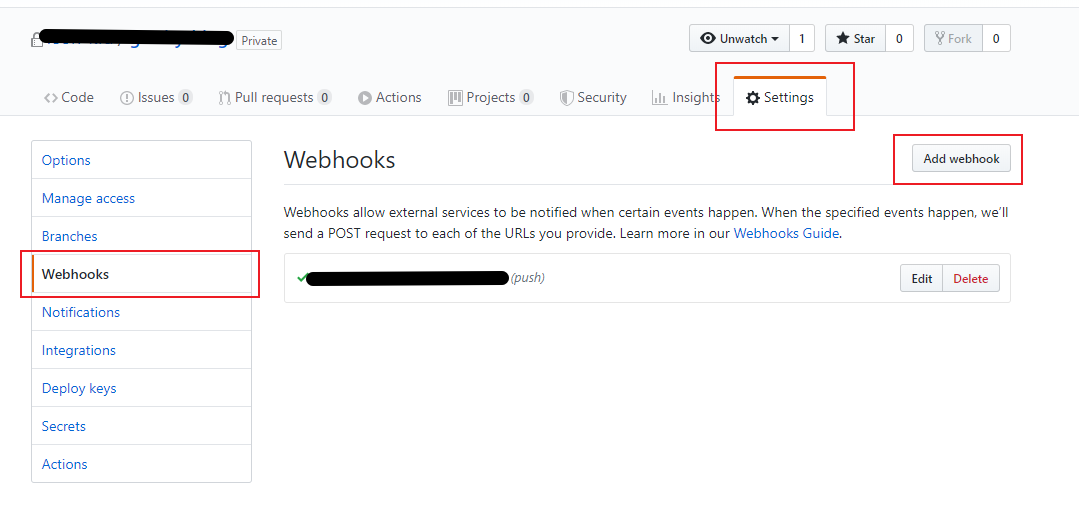
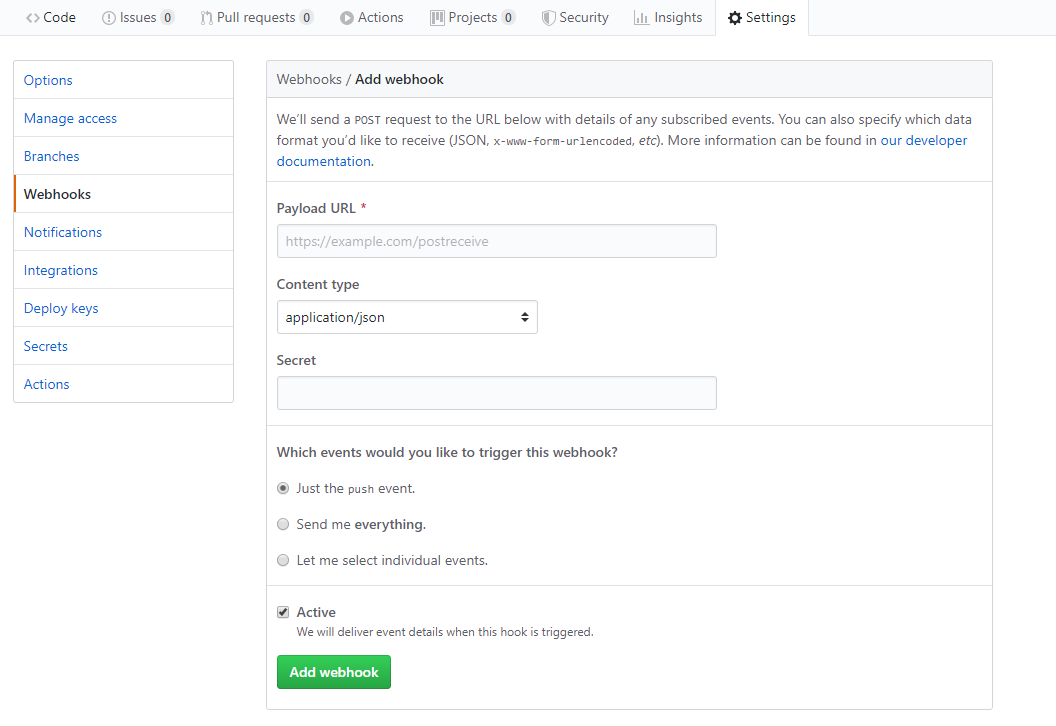
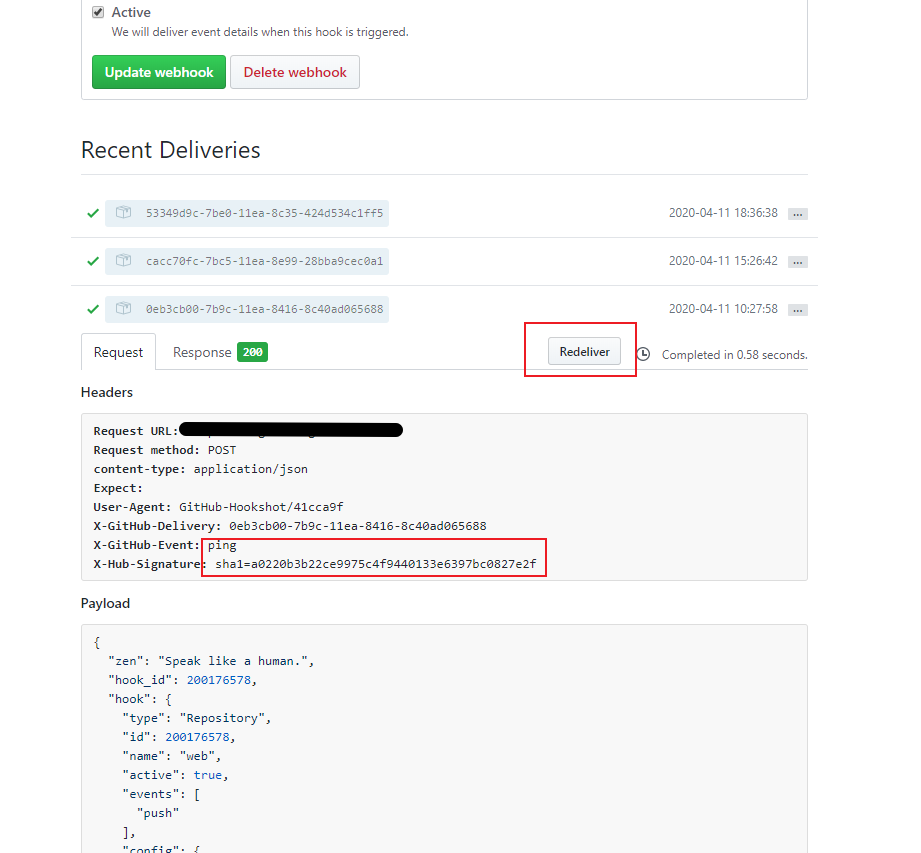
后端的 Koa2 服务是本功能的最重要的环节。其处理流程:
const Router = require("koa-router");
const Response = require("../utils/response");
const crypto = require("crypto");
const { exec } = require("child_process");

const logger = require("../utils/log");
const { webhookSecret } = require("../config/config");

const r = new Response();
const router = new Router();

// router的路由路径在Github配置webhook时配置,webhook为向该路径发送请求
router.post("/****", async (ctx) => {
  const requestData = ctx.request.body;
  const sig = ctx.headers["x-hub-signature"];
  const event = ctx.headers["x-github-event"];
  const id = ctx.headers["x-github-delivery"];
  if (!sig || !event || !id) {
    ctx.body = r.error(310, "No Github hook headers");
    return;
  }
  if (!["ping", "push"].includes(event)) {
    ctx.body = r.error(311, "Gihub Hook events not allow");
    return;
  }
  const { repository, sender } = requestData;
  if (!repository || !sender) {
    ctx.body = r.error(312, "Missing essential parameters");
    return;
  }
  const { name: repositoryName } = repository;
  logger("接收到Webhook", 1, `event:${event}, respository: ${repositoryName}`);
  const clientSig = `sha1=${crypto
    .createHmac("sha1", webhookSecret)
    .update(JSON.stringify(requestData))
    .digest("hex")}`;
  if (sig !== clientSig) {
    logger("Webhook X-Hub-Signature解码", 0, "解码不匹配");
    ctx.body = r.error(313, "X-Hub-Signature does not match");
    return;
  }
  if (event === "ping") {
    ctx.body = {
      errCode: 200,
      errMsg: "Success",
    };
  } else if (event === "push") {
    ctx.body = {
      errCode: 200,
      errMsg: "Success",
    };
    if (repositoryName === "****") {
      updateBlog();
    }
  }
});

// updateBlog为接收到hook后要执行的操作
const updateBlog = () => {
  exec("****.bat", (err) => {
    if (err) {
      logger("执行****.bat", 0, err);
      return;
    }
    logger("执行****.bat", 1);
  });
};

module.exports = {
  githubWebhookRouter: router,
};
在新建 Webhooks 后,github 会发送一个 ping 事件到目标服务器,所以这里加多了一种 ping 事件的处理(直接返回 200)。
本次我设置了只有 push 事件会发请求,所以只处理了 push 事件,如果设置 Webhooks 监听其他事件,例如 release、issues、star 等,可自行扩展对应功能。
shelljs、exec-sh等 NPM 包可以更优雅的编写脚本命令。Github Page方式部署,这时候可以利用Github Action去实现,具体后面再写一篇文章说明。以上内容未经授权请勿随意转载。
此内容由惯性聚合(RSS阅读器)自动聚合整理,仅供阅读参考。 原文来自 — 版权归原作者所有。