








上一篇博客提到XNA可以在Silverlight中绘制资源,但是,一旦一个Silverlight页面由XNA接管后,就无法直接显示页面上的控件了,这样就无法体现Silverlight与XNA的优势了,为了解决这个问题,实现Silverlight与XNA混合调用,windows phone7.1又提供了一个新的UIElementRender类。通过这个类来加载所要绘制的控件。以下是一个示例工程。
1. 首先同样要先使用3d模板创建一个3d工程。
2. 在GamePage.xaml中加入控件,用三个按钮来控制碰撞的红色方块的开始与停止以及透明度的变化。
<Grid>
<Grid.RowDefinitions>
<RowDefinition Height="71*" />
<RowDefinition Height="650*" />
<RowDefinition Height="79*" />
</Grid.RowDefinitions>
<Button Content="开始" Height="72" HorizontalAlignment="Left" Margin="69,-1,0,0" Name="button1" VerticalAlignment="Top" Width="330" Click="button1_Click" />
<Grid Grid.Row="1" Name="ContentPanel">
<Image Source="Lighthouse.jpg" Stretch="Fill"/>
</Grid>
<Button Content="不透明" Grid.Row="2" Height="72" HorizontalAlignment="Left" Name="button2" VerticalAlignment="Top" Width="153" Click="button2_Click" />
<Button Content="半透明" Grid.Row="2" Height="72" HorizontalAlignment="Right" Margin="0,0,151,0" Name="button3" VerticalAlignment="Top" Width="170" Click="button3_Click" />
<Button Content="透明" Grid.Row="2" Height="72" HorizontalAlignment="Right" Name="button4" VerticalAlignment="Top" Width="145" Click="button4_Click" />
</Grid>
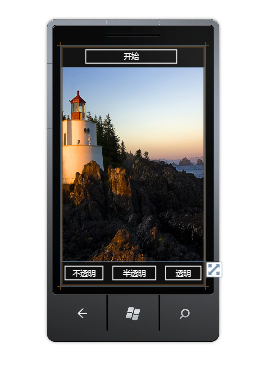
3. 在GamePage.xaml.cs中加入代码
声明一个UIElementRenderer实例 UIElementRenderer renderer;
委托LayoutUpdate事件 LayoutUpdated += new EventHandler(GamePage_LayoutUpdated);
在这个事件的响应函数中初始化UIElementRenderer实例,这时将整个页面做为rootElement renderer = new UIElementRenderer(this, (int)ActualWidth, (int)ActualHeight);
绘制这个实例
if(IsStart)
spriteBatch.Draw(texture, spritePosition, new Color(255, 255, 255, alpha));
按钮执行的效果代码
private void button1_Click(object sender, RoutedEventArgs e)
{
IsStart = !IsStart;
}
private void button2_Click(object sender, RoutedEventArgs e)
{
alpha = 255;
}
private void button3_Click(object sender, RoutedEventArgs e)
{
alpha = 150;
}
private void button4_Click(object sender, RoutedEventArgs e)
{
alpha = 50;
}
4. 运行效果
点击开始按钮,出现红色移动的小块。
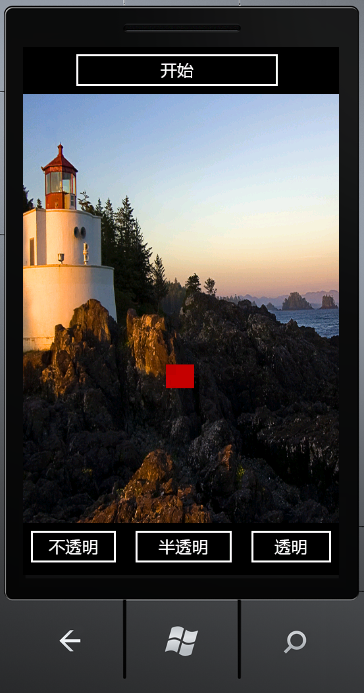
点击半透明按钮,可以看到红色小块开始透明。

点击透明按钮,红色小块更加透明了。

示例代码:http://www.52winphone.com/bbs/viewthread.php?tid=745&extra=page%3D1
此内容由惯性聚合(RSS阅读器)自动聚合整理,仅供阅读参考。 原文来自 — 版权归原作者所有。