AI coding sessions can feel like a black box. Route OpenCode through the Otari Gateway to track costs, token usage, and model activity in real time. Get budget controls and visibility across every session without changing a single line of application code.

AI coding sessions can feel like operating in a black box. You fire up OpenCode, pick a model, and start working. By the end of the session however, you have no idea what it actually cost you, which requests failed, or how your usage breaks down across models. Even when you're running a capable open-source model like Kimi K2.6 with a 256K context window, inference for those sessions gets expensive fast.
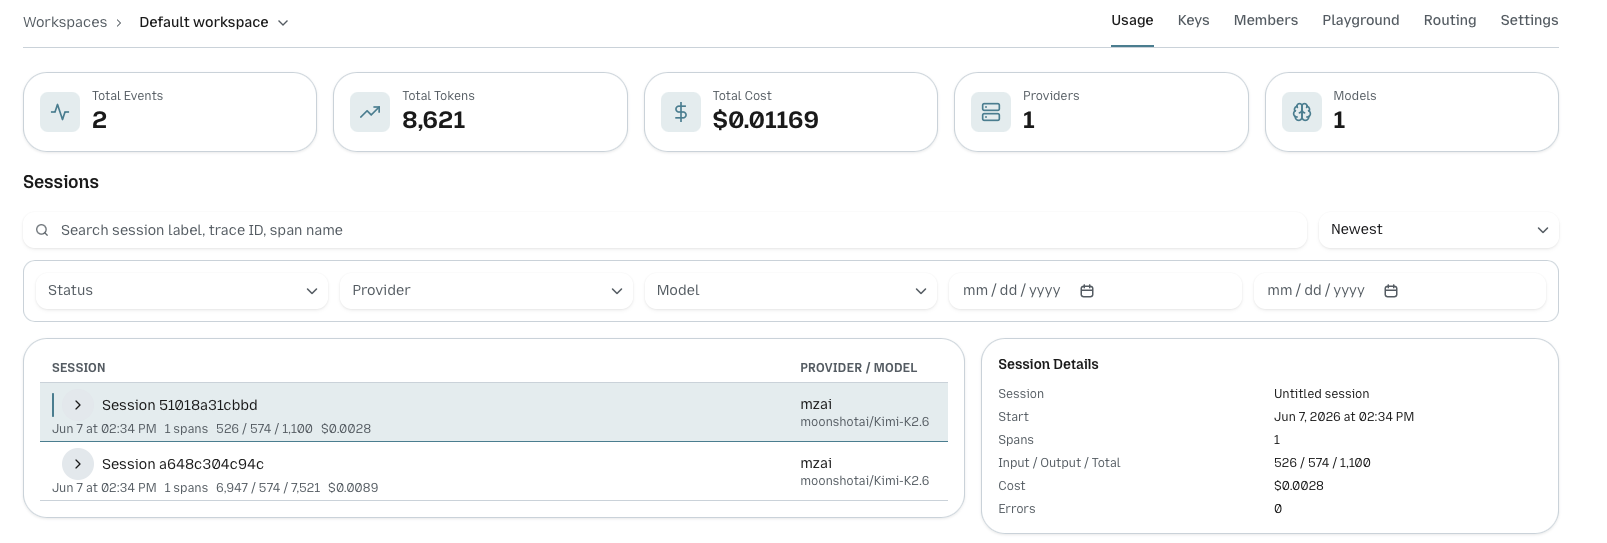
Routing OpenCode through Otari solves that. Every request you make to OpenCode flows through Otari, so you get per-session cost tracking, budget enforcement, and usage visibility. No changes to application code required.
Otari sits between OpenCode and the model provider, resolves credentials server-side, and logs metadata: token counts, model names, timestamps. Your prompts and completions stay yours.
Here's how to set it up in three steps.
1. Set up your Otari account and create a key
Sign up (or log in) at otari.ai.
Generate an API token
- Open an existing workspace (or create a new one).
- Navigate to the API Keys tab.
- Click Generate and copy the tk_... key.
Note: This is a one-time reveal, so store your key securely.
Your key talks to the gateway at https://api.otari.ai/v1, the OpenAI-compatible endpoint that any standard client can point to.
Optional: Add your provider key
Go to Settings → Keys → Provider Keys . Under Your Keys (BYOK), click Add and paste your upstream API key (OpenAI, Anthropic, or whichever provider you're using). Otari stores this and uses it to call the provider on your behalf. Your application never touches it directly.
2. Point OpenCode at Otari
Add Otari as a provider in your opencode.jsonc. Set baseURL to the gateway and apiKey to the tk_... key you just created:
{
  "$schema": "https://opencode.ai/config.json",
  "provider": {
    "otari": {
      "npm": "@ai-sdk/openai-compatible",
      "name": "Otari Gateway",
      "options": {
        "baseURL": "https://api.otari.ai/v1",
        "apiKey": "tk_YOUR_OTARI_KEY..."
      },
      "models": {
        "mzai:moonshotai/Kimi-K2.6": {
          "name": "Kimi K2.6 (via Otari)",
          "limit": { "context": 256000, "output": 32000 }
        }
      }
    }
  }
}
Tip: To avoid committing secrets to version control, it is highly recommended to pass your actual API key via an environment variable rather than hardcoding it into the JSON file.
In the above example, we are using Kimi K2.6, a model hosted by Mozilla.ai's managed mzai provider. Kimi K2.6 is an open-source, agentic model with tool calling and a 256K context window.
3. Start Coding
Pick the Otari model in OpenCode and start working:
opencode --model otari/mzai:moonshotai/Kimi-K2.6That's it. Every request now flows through the gateway, so you get usage and strict budget tracking across all your models, without changing a single line of your application code.
To verify everything is working, run a quick prompt and check your Otari dashboard.You should see usage stats appearing immediately.