








Penetration Tester. Developer. Pure GNU/Linux Phone Enthusiast.
As a tester, I do all my work inside a Virtual Machine (VM). Recently, I found myself in a situation where I needed to get a VM on a Windows PC. The problem is, I did not want to create an account with Broadcom or work with VirtualBox. I needed to get QEMU (https://www.qemu.org/), the Quick Emulator, up and running. QEMU is open-sourced (always a win in my book!) and allows for running virtual machines from a qcow2 image.
That started the quest to find a decent QEMU walkthrough to get started and one did not exist, so I decided to write my own.
QEMU is both an emulator and a virtualizer. As an emulator, QEMU can run VMs that use a different architecture than your host. Android Virtual Device (AVD), for example, uses QEMU to run ARM-based Android systems regardless of your host’s physical architecture. This feature is especially useful in the event you are working with IoT firmware, where translating instructions between the two architectures can be difficult/cumbersome/impossible.
As a virtualizer, QEMU uses hardware virtualization on the host to create a virtual machine.
Whatever your requirements, QEMU can do both!
On to how to get QEMU to work with Windows. I could install QEMU directly on the Windows PC, but that would require manual configuration and managing dependencies. I wanted the easy button. I also wanted to use an open-source project to accomplish this. That is where MSYS2 (https://www.msys2.org/) came in. An open-sourced project, MSYS2 gave me the UNIX shell I wanted to set up QEMU, which is more native to QEMU’s design. MSYS2 automatically handles the dependencies, saving time. Also, it has an Arch Linux vibe and uses Pacman package manager so bonus points! Keep in mind that when you install MSYS2, multiple terminals will be installed. For this write-up, we are using MSYS2 MinGW 64-bit shell. This shell gives us a native Windows environment.
Installing MSYS2 is as easy as downloading the installer and running the installer. Once you install MSYS2, open a MSYS2 terminal, update the package databases, and install QEMU:
Update:
pacman -Syu
Install:
pacman -S mingw-w64-x86_64-qemu
Verify the install:
qemu-system-x86_64 --version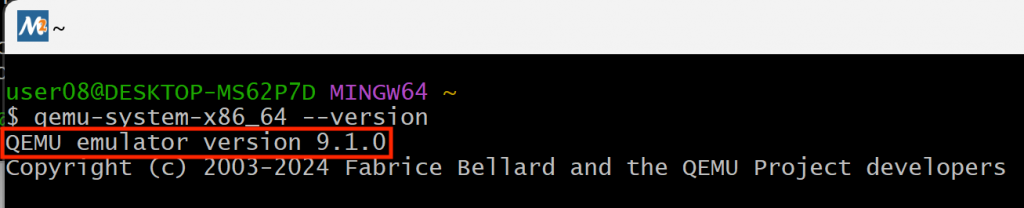
Awesome – QEMU is up and running. Next, download your favorite GNU Linux distro (I guess you could use Windows, and there are BSD people out there, but we are sticking with GNU Linux). We are grabbing a 64-bit Kali virtual machine image for this walkthrough, which will give us a virtualized environment.
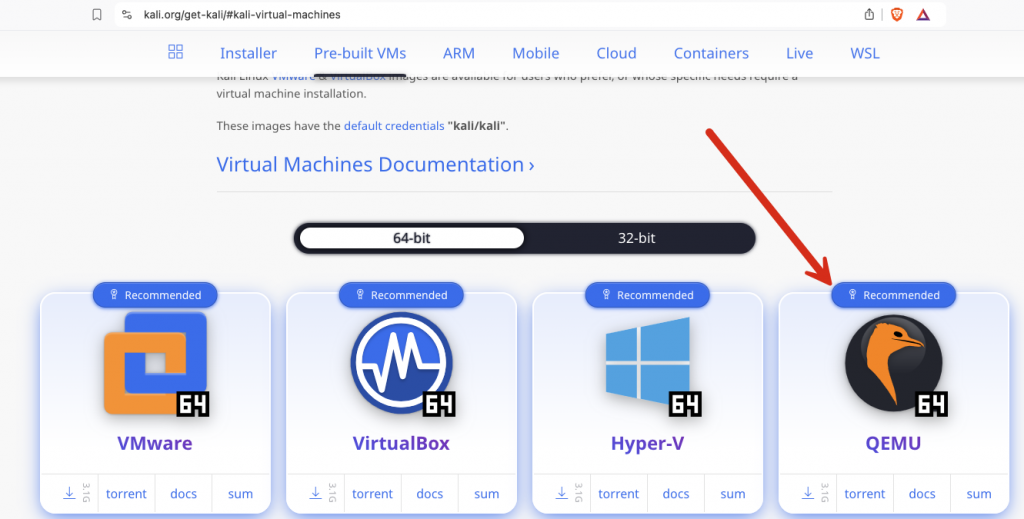
Once you have your image, create a snapshot if you would like. You will more than likely need to run this from a MYSYS2 console opened as Administrator:
qemu-img create -f qcow2 -F qcow2 -b "C:\path\to\image\kali-linux-2024.2-qemu-amd64.qcow2" "C:\path\to\snapshot\kali-snapshot.qcow2"Then, running this command will give you a Kali VM. A description of the flags is provided in the comments:
qemu-system-x86_64 \
        #Uses a modern PC chipset model and enables Windows Hypervisor Platform
        -machine type=q35,accel=whpx \
        #Basic x86_64 CPU model.
        -cpu qemu64 \
        #2 CPU cores to VM
        -smp 2 \
        #4GB of RAM
        -m 4G \
        #Path to qcow2 image. MSYS2 also accepts this format: /c/Path/to/snapshot
        -drive file="C:\Path\to\your\kali-snapshot.qcow2",format=qcow2,if=virtio \
        #virtuio GPU for performance
        -vga virtio \
        #Display is using SDL
        -display sdl \
        #Setting this option improves mouse performance and integration
        -device usb-tablet \
        #Gives VM networking
        -netdev user,id=net0 \
        -device virtio-net-pci,netdev=net0
This is the command I used for improved performance. Your mileage will vary based on your host.
qemu-system-x86_64 \
    -name "Kali Qemu" \
    -machine type=q35,accel=whpx,kernel-irqchip=off \
    -cpu qemu64,hv_relaxed,hv_spinlocks=0x1fff,hv_vapic,hv_time \
    -smp cores=2,threads=1 \
    -m 4G \
    -drive file="C:\Path\to\your\kali-snapshot.qcow2",format=qcow2,if=virtio \
    -boot menu=on \
    -vga virtio \
    -display sdl,gl=off \
    -device usb-tablet \
    -usb \
    -device usb-ehci,id=ehci \
    -device nec-usb-xhci,id=xhci \
    -netdev user,id=net0 \
    -device virtio-net-pci,netdev=net0 \
    -audiodev id=audio1,driver=dsound \
    -device ich9-intel-hda \
    -device hda-output,audiodev=audio1 \
    -device virtio-balloon-pci \
    -monitor stdio
And there we have it, a working VM using QEMU.

But what if there are only VMWare virtual machine files? We can work with that. QEMU offers a disk utility that can convert VDMK files to a qcow2 file. I recently went to training that used SOF-ELK (https://github.com/philhagen/sof-elk) for the VM. A brief description of SOF-ELK provided in the project’s README file is as follows: “SOF-ELK® is a “big data analytics” platform focused on the typical needs of computer forensic investigators/analysts and information security operations personnel.”
The pre-packaged VM comes configured as a VMWare package, including a VDMK file and the VMWare Configuration File (VMX). A qcow2 image was not available.

We can use QEMU’s disk imaging tool to convert the VDMK file to a qcow2 file. The file conversion alone will not allow you to run the VM in QEMU as it does not address the virtual machine configuration that is defined in the VMX file.
qemu-img convert -f vmdk -O qcow2 /c/path/to/sof.vmdk /c/path/SOF-ELK.qcow2
The VMX File can be viewed with your text editor of choice. I am using Emacs and I encourage you to use Emacs as well! We want to review the VMX configuration to ensure we match the settings when running with QEMU.
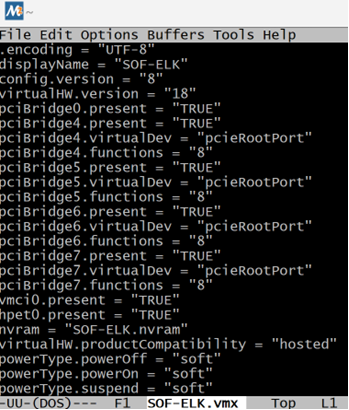
Further down the configuration file, there is a reference to UEFI bios settings. Since MSYS2 uses Arch’s Pacman package manager, we need to address for a known issue (https://bugs.archlinux.org/task/64175) where libvirt fails to locate OVMF images. OVMF is an open-sourced UEFI firmware implementation for virtualized environments, which is required to run SOF-ELK. However, the edk2-ovmf package used by Arch Linux was unavailable using Pacman at the time.
There are a number of workarounds for this issue — here is mine. At this repo: (https://www.kraxel.org/repos/jenkins/edk2/), we can grab the x64 RPM which contains OVMF files.

Once downloaded, we need to extract the RPM and access the files packaged in the RPM. Go ahead and extract the RPM file, I am using bsdtar (https://man.archlinux.org/man/bsdtar.1). In the example below, the files save in the MSYS2 path and not the Windows path.

With the RPM extracted, we can now access the OVMF files contained in the path: /usr/share/edk2.git/ovmf-x64. The OVMF files are the UEFI firmware image needed to boot the VM using UEFI instead of BIOS. The OVMF files can be identified by the fd extension. While there are multiple fd files, I used the OVMF-pure-efi.fd image which I moved to my working directory.

Now that we have a UEFI boot solution, we need to match our instructions to the Virtual Machine to match the VMWare Configuration. The command below mirrors the important VMWare Configuration values. The comments show the instructions added to match the VMX file.
qemu-system-x86_64 \
  -name "SOF-ELK" \
  -machine q35 \
  #Matching AMD configuration
  -cpu EPYC,hv_vendor_id=AuthenticAMD \
  #Matching 4 CPU Cores
  -smp cores=4,threads=1,sockets=1 \
  #Memory from VMX
  -m 4096 \
  -drive file=SOF-ELK.qcow2,if=none,id=hd0,format=qcow2 \
  #VMX used SATA and could not 1:1 match – Provides a compatible disk interface
  -device ide-hd,drive=hd0,bus=ide.0 \
  -device vmxnet3,netdev=net0 \
  -netdev user,id=net0 \
  #USB Support that was in original VMX file
  -device usb-ehci \
  -device usb-tablet \
  #Sets up Audio that was in VMX file
  -device intel-hda \
  -device hda-duplex \
  #Emulating VMWare graphics
  -vga vmware \
  -display gtk \
  #Sets boot order to start from hard drive – Set in VMX file
  -boot order=c,menu=on \
  #OVMF File using UEFI firmware
  -bios "OVMF-pure-efi.fd" \
  #Uses host local time – How VMWare would handle time
  -rtc base=localtime,clock=host \
  -serial stdio
  #Sets MAC Address defined in VMX File
  -device vmxnet3,netdev=net0,mac=00:0c:29:ae:1b:b0 -netdev user,id=net0
Running the command gives us a SOF-ELK Virtual Machine with QEMU!
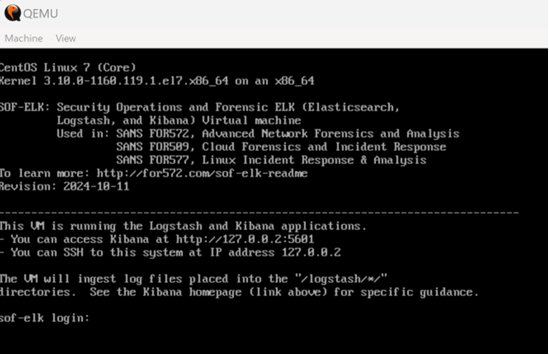
Remember that QEMU is highly customizable, so research your host limitations and requirements and make the most of this open-source alternative for machine virtualization and emulation.
When troubleshooting, a couple things to look for are:
1.) If Hyper-V is enabled, it becomes the root hypervisor. Hyper-V can slow down QEMU, especially if not using Windows Hypervisor Platform (WHPX) accelerator. QEMU’s default accelerator Hardware Accelerated Execution Manager (HAXM) accelerator does not work with Hyper-V enabled.
2.) When connecting physical USB devices to your VM, you may need your MSYS2 terminal opened as Administrator.
3.) For performance, tailor your QEMU command to leverage your host’s CPU, GPU, and memory.
5.) For networking, virtio-net drivers offer better performance. Virtio-net drivers reduce overhead compared to emulated network adapters and are especially useful if using more than one core.
Ready to learn more?
Level up your skills with affordable classes from Antisyphon!
Available live/virtual and on-demand
此内容由惯性聚合(RSS阅读器)自动聚合整理,仅供阅读参考。 原文来自 — 版权归原作者所有。