







The Serverless Framework is great for building Node applications on AWS Lambda. The only thing missing is a serverless database. In this article, we will explore how to use PlanetScale as the database for a serverless Node application.
Prerequisites
Before deploying to AWS Lambda, you will need:
- an AWS account (to create one, go to aws.amazon.com and click Sign up),
- the
serverlessCLI installed on your computer.
Note
While the example of this article should stay under the AWS free tier (1 million free AWS Lambda invocations per month), be advised that building on AWS can incur costs.
You can install the serverless CLI using NPM:
npm install -g serverless
If you don't have NPM or want to learn more, read the Serverless documentation.
Now connect the serverless CLI to your AWS account via AWS access keys. Create AWS access keys by following this guide, then set them up on your computer using the following command:
serverless config credentials --provider aws --key <key> --secret <secret>
Creating a new serverless Node application
Serverless Framework is a CLI tool that helps us create and deploy serverless applications. Its configuration is stored in a serverless.yml file, which describes what will be deployed to AWS.
To deploy a Node application, we can create a simple serverless.yml file:
service: demo # name of the application

provider:
  name: aws
  runtime: nodejs18.x
  region: us-east-1

functions:
  api:
    handler: index.handler
    url: true
In the configuration above, we define a single AWS Lambda function called api, running NodeJS 18, with a public URL.
Our API handler will be a handler() function returned by index.js (learn more about handlers in the AWS Lambda documentation). Let's create the index.js file:
export async function handler(event) {
  return {
    hello: 'world'
  }
}
Note that we will be using ESM features (like export and import), so let's create a package.json file with "type": "module":
Our simple Node example is ready to be deployed with serverless deploy, but let's add PlanetScale into the mix first!
Connecting to PlanetScale
In your PlanetScale account, start by creating a database in the same region as the AWS application (us-east-1 in our example). Then, click the Connect button and select "Connect with: @planetscale/database". That will let us retrieve the database username and password.
To connect to the database in our code, we will use the PlanetScale serverless driver. Let's install it with NPM:
npm install @planetscale/database
Now that the driver is installed, we can connect to our PlanetScale database with the connect() function:
import { connect } from '@planetscale/database'

const conn = connect({
  // With the serverless driver, the host is always 'aws.connect.psdb.cloud'
  host: 'aws.connect.psdb.cloud',
  username: '<user>',
  password: '<password>'
})

export async function handler(event) {
  const result = await conn.execute('SELECT * FROM records')

  return result.rows
}
Note the following details:
- We are connecting to the database outside the
handler()function. This is to reuse the same connection for all HTTP requests. If we were to connect inside thehandler()function, a new connection would be created for each request, which would be inefficient. - We are querying the
recordstable. This table doesn't exist yet, we will create it below. - We don't want to store the database credentials in the code. We will use environment variables instead.
Let's update our code to use environment variables. For the sake of the example, we will also create the records table on the fly:
import { connect } from '@planetscale/database'

const conn = connect({
  // With the serverless driver, the host is always the same
  host: 'aws.connect.psdb.cloud',
  username: process.env.DATABASE_USERNAME,
  password: process.env.DATABASE_PASSWORD
})

// Create the table if it doesn't exist (just for demo purposes)
// In a real application, we would run database migrations outside the function
await conn.execute('CREATE TABLE IF NOT EXISTS records (id INT PRIMARY KEY auto_increment, name VARCHAR(255))')

export async function handler(event) {
  // Insert a new record
  const queryParameter = event.queryStringParameters?.name ?? 'test'
  await conn.execute('INSERT INTO records (name) VALUES (?)', [queryParameter])

  // Retrieve all records
  const result = await conn.execute('SELECT * FROM records')

  return result.rows
}
We now need to set the DATABASE_USERNAME and DATABASE_PASSWORD environment variables. We can define them in serverless.yml and use AWS SSM to store the database password securely:
provider:
  name: aws
  runtime: nodejs18.x
  region: us-east-1
  environment:
    DATABASE_USERNAME: <username-here>
    DATABASE_PASSWORD: ${ssm:/planetscale/db-password}
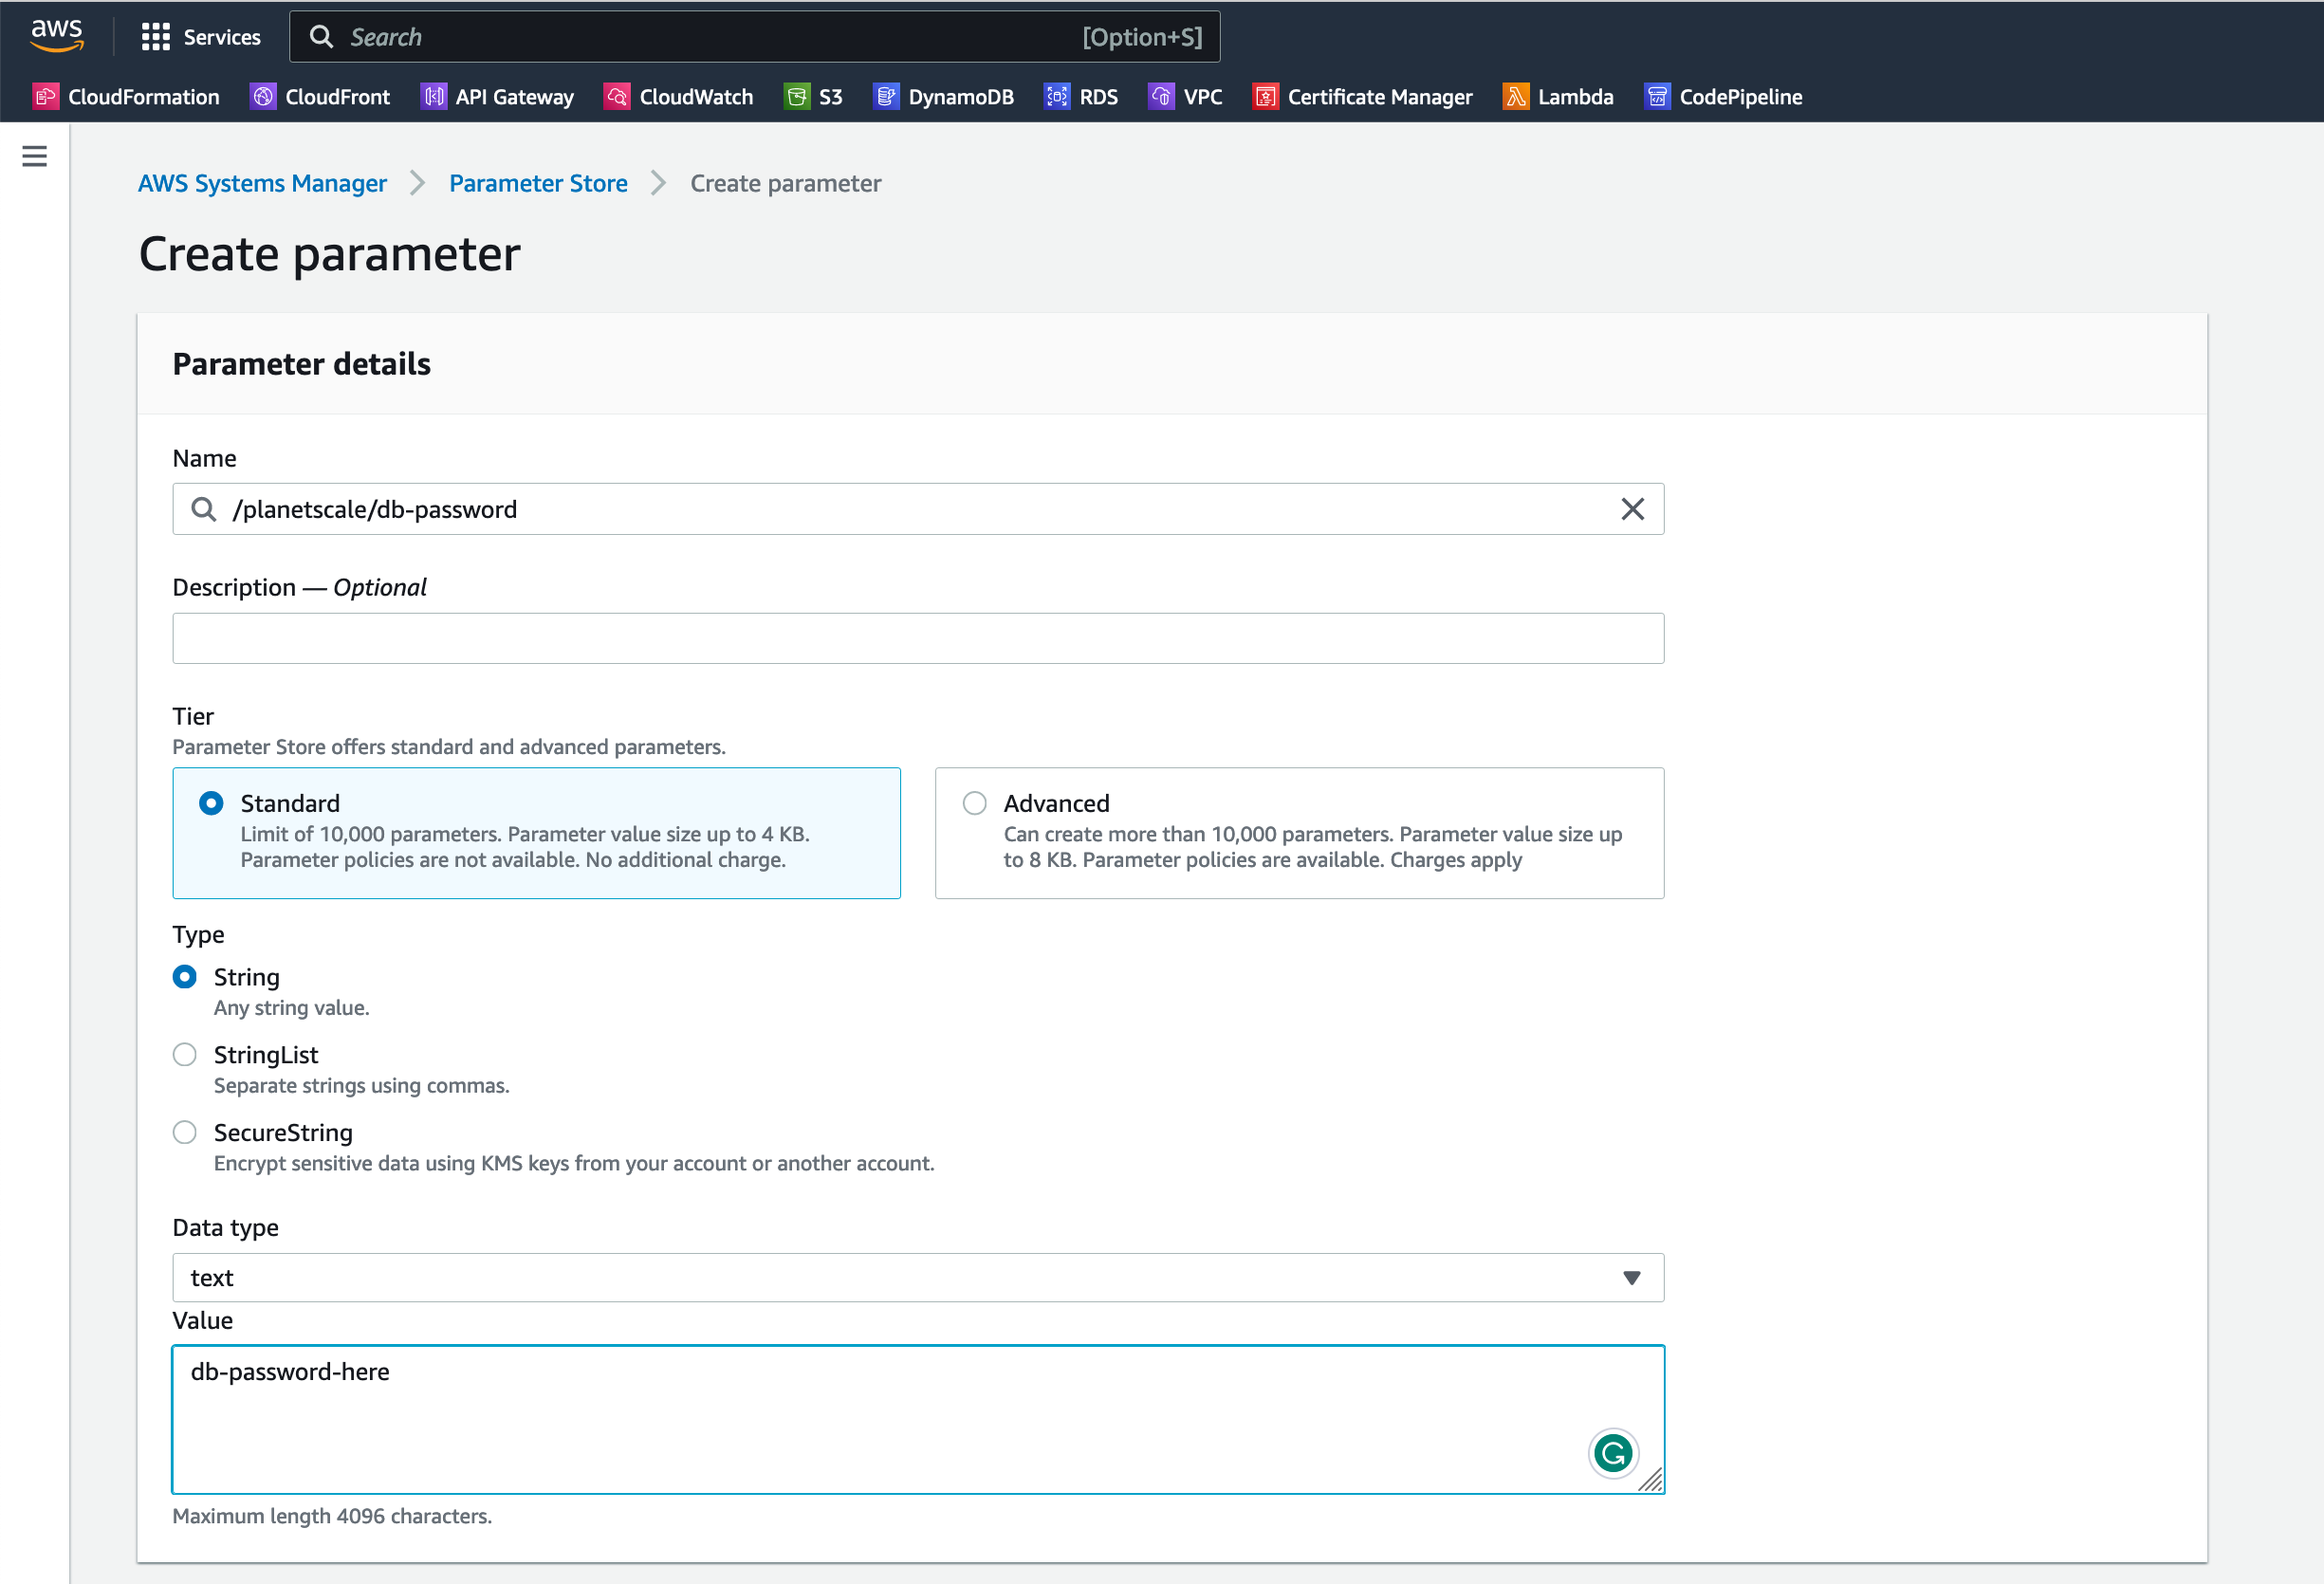
The database password will be stored in AWS SSM (at no extra cost) so it is not visible in the code. The ${ssm:/planetscale/db-password} variable will retrieve the value from SSM on deployment. The SSM parameter can be created with the AWS CLI via the following command:
aws ssm put-parameter --region us-east-1 --name '/planetscale/db-password' --type SecureString --value 'replace-me'

# replace the `replace-me` string with the database password!
If you don't use the AWS CLI, you can also create the parameter in the AWS Console:
Our application is now ready! Let's deploy it:
When finished, the deploy command will display the URL of our Node application. The URL should look like this: https://<id>.lambda-url.us-east-1.on.aws/. We can open it in the browser or request it with curl:
curl https://<id>.lambda-url.us-east-1.on.aws/
The response should list the records in the records table. A new record will be created every time the URL is requested. We can also provide a name parameter to change the name of the record inserted in the database:
curl https://<id>.lambda-url.us-east-1.on.aws/?name=hello
Stage parameters
Besides the incredible scalability provided by the combination of AWS Lambda and PlanetScale, another benefit we get from this setup is the ability to combine Serverless Framework stages and PlanetScale branches.
We could imagine, for example, a dev stage for development and a prod stage for production. The dev stage would use a development branch in PlanetScale, while the prod stage would use the main production branch.
Using stage parameters, we can set different credentials to use to connect to PlanetScale depending on the stage:
provider:
  name: aws
  runtime: nodejs18.x
  region: us-east-1
  environment:
    DATABASE_USERNAME: ${param:dbUser}
    DATABASE_PASSWORD: ${param:dbPassword}

params:
  dev:
    dbUser: <dev-username-here>
    dbPassword: ${ssm:/planetscale/dev/db-password}
  prod:
    dbUser: <prod-username-here>
    dbPassword: ${ssm:/planetscale/prod/db-password}
When deploying, we can specify the stage to deploy via the --stage option:
serverless deploy --stage dev

serverless deploy --stage prod
Each stage (dev and prod) will result in entirely separate infrastructures on AWS, and each one will use its own PlanetScale branch.
That setup makes it easy to test code changes and database schema changes in a development environment that is identical to and isolated from the production environment. Once approved, schema changes can be applied to the production branch with a PlanetScale deploy request, and code changes can be deployed to production via the serverless deploy command.
Next steps
In this article, we learned how to integrate PlanetScale with Node applications built using the Serverless Framework on AWS. This gives us a completely serverless stack with extreme scalability yet simple to set up and maintain.
Now that we have a basic application running we can explore more complex topics, such as:
- Creating multiple HTTP routes
- Setting up a complete deployment workflow for the Node application
- Dive into the PlanetScale workflow for branching databases, non-blocking schema changes, and more
Feel free to explore the PlanetScale documentation as well as the Serverless Framework documentation to learn more.