






SQLAlchemy is a popular Python library that gives you many tools to interact with SQL databases. With SQLAlchemy, you can do things like send raw queries to a database, programmatically construct SQL statements, and even map Python classes to database tables with the object-relational mapper (ORM). SQLAlchemy doesn't force you to use any particular features, so it has the flexibility to support many different approaches to working with databases. You can use SQLAlchemy for one-off scripts, web apps, desktop apps, and more. Anywhere that you'd use a SQL database along with Python, you can use SQLAlchemy.
This tutorial will cover setting up an engine object in Python SQLAlchemy 2.0, which is the first step to using SQLAlchemy. Then, it will cover two specific ways of interacting with a database: with raw SQL statements and by using the object-relational mapper.
Note
This tutorial covers the most recent version of SQLAlchemy, which is 2.0, as of writing this. After running pip install sqlalchemy, you can run pip list to verify your SQLAlchemy version is greater than 2.0.
Set up PlanetScale database
To demonstrate the examples in this SQLAlchemy tutorial, you'll need a MySQL-compatible database. If you don't have one already, you can get a database by signing up for a PlanetScale account.
Warning
This blog post is over a year old and may be out of date.
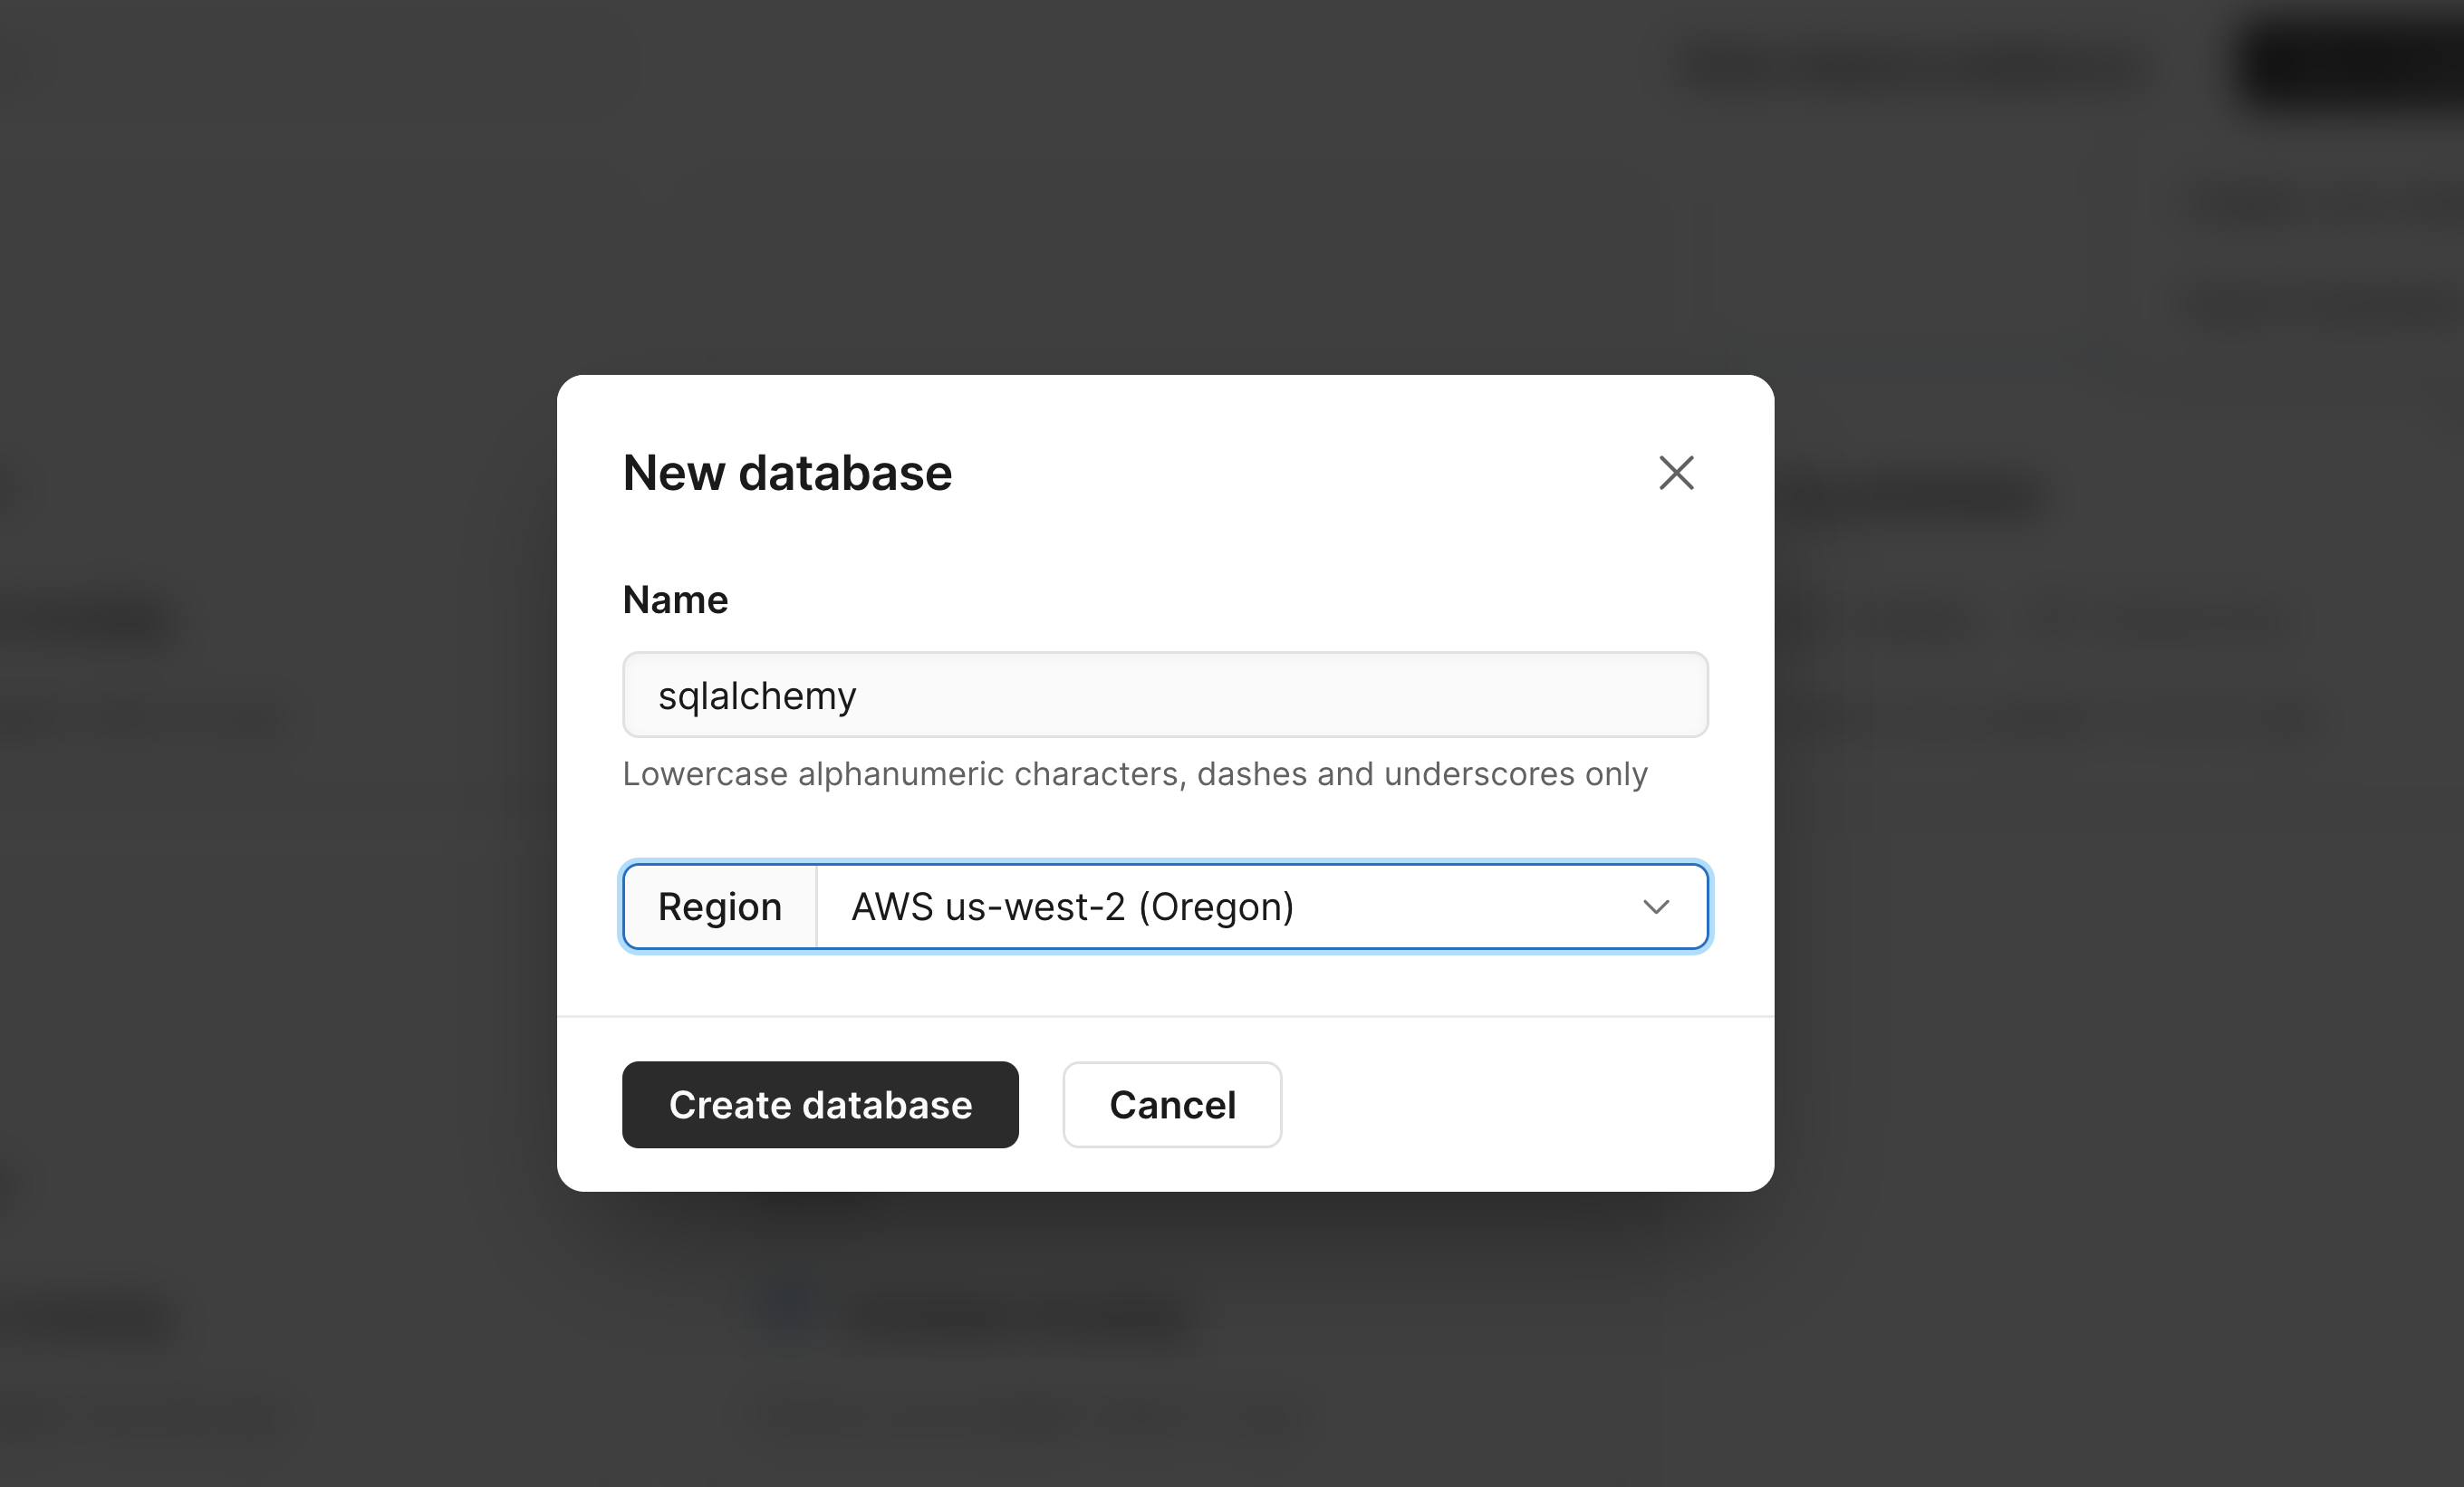
Once you have an account and are on the dashboard, create a new database by doing the following:
- Click the "Create" link at the bottom of the dashboard.
- Give your database a name.
- Select a region.
- Click the "Create database" button.
- Finally, you can click on the "Connect" button and select "General" in the dropdown to see your database credentials. You'll need these credentials to create an engine in SQLAlchemy.
Note
PlanetScale uses a branching workflow, similar to git, so you can branch off of your production database when you need to make schema changes. This workflow lets you easily test changes before merging them into your production schema (again, very similar to what we're used to when deploying code changes). For this tutorial, you can just use the default initial branch, main, for development.
Set up the engine object
The first thing to do when using SQLAlchemy is to set up the engine object. The engine object is used by SQLAlchemy to manage connections to your database. Later, when you go to perform some action on the database, a connection will be requested from the engine and used to send the request.
Before creating the engine, you first need to know the credentials of your database along with the database driver you'll use to connect to the database. For MySQL, connection strings look like this:
mysql+<drivername>://<username>:<password>@<server>:<port>/dbname
Install the Python MySQL database driver
Since SQLAlchemy works with many different database types, you'll need an underlying library, called a database driver, to connect to your database and communicate with it. You don't have to use this driver directly, because as long as SQLAlchemy has the correct driver, it will automatically use it for everything. The Python MySQL Connector is used as the driver in this tutorial, but other good ones are PyMySQL and MySQLdb.
You'll need to install your driver with pip.
pip install mysql-connector-python
So let's say your username, password, hostname, port, and database name are user1, pscale_pw_abc123, us-east.connect.psdb.cloud, and 3306, respectively. Your connection string would look like the following if you were using mysqlconnector as your driver to connect to a database named sqlalchemy.
mysql+mysqlconnector://user1:pscale_pw_abc123@us-east.connect.psdb.cloud:3306/sqlalchemy
Create SQLAlchemy engine object
Once you have your driver installed and your connection string ready to go, you can create an engine like this:
from sqlalchemy import create_engine
connection_string = "mysql+mysqlconnector://user1:pscale_pw_abc123@us-east.connect.psdb.cloud:3306/sqlalchemy"
engine = create_engine(connection_string, echo=True)
Typically, you don't need echo set to True, but it's here so you can see the SQL statements that SQLAlchemy sends to your database.
By default, SSL/TLS usage in mysql-connector-python is enabled, which is required to connect to PlanetScale. This means you do not need to pass it into create_engine() as a connection arguement. See the Python connection arguments MySQL docs for more info and to see all of the possible arguments.
If you run the code and get no errors, then SQLAlchemy has no trouble connecting to your database. If you get an error like "access denied" or "server not found," then you'll need to fix your connection string before proceeding.
With the engine object working, you can then continue with SQLAlchemy in various ways. This article covers how to use it to send raw queries to your database and how to use it as an ORM.
Raw SQL statements in SQLAlchemy
Now that we have our engine object working let's use it to send raw SQL statements to the database and receive the results in return.
Create a connection object
To start sending queries over, you'll need to create a connection object. Since the engine manages connections, you need to ask the engine for a connection before you can send statements over to the database.
We need to call engine.connect() to get a connection, and because the connect method is defined with a context manager, we can use a with statement to work with the connection.
with engine.connect() as connection:
Now that you have the connection, you can execute any SQL statement that works on your database by importing the text function from SQLAlchemy. Add from sqlalchemy import text in your Python file. You then pass the query as a string to the text function and then finally pass the text function to connection.execute().
Create a table
To create a table, you can run the following code:
connection.execute(text("CREATE TABLE example (id INTEGER, name VARCHAR(20))"))
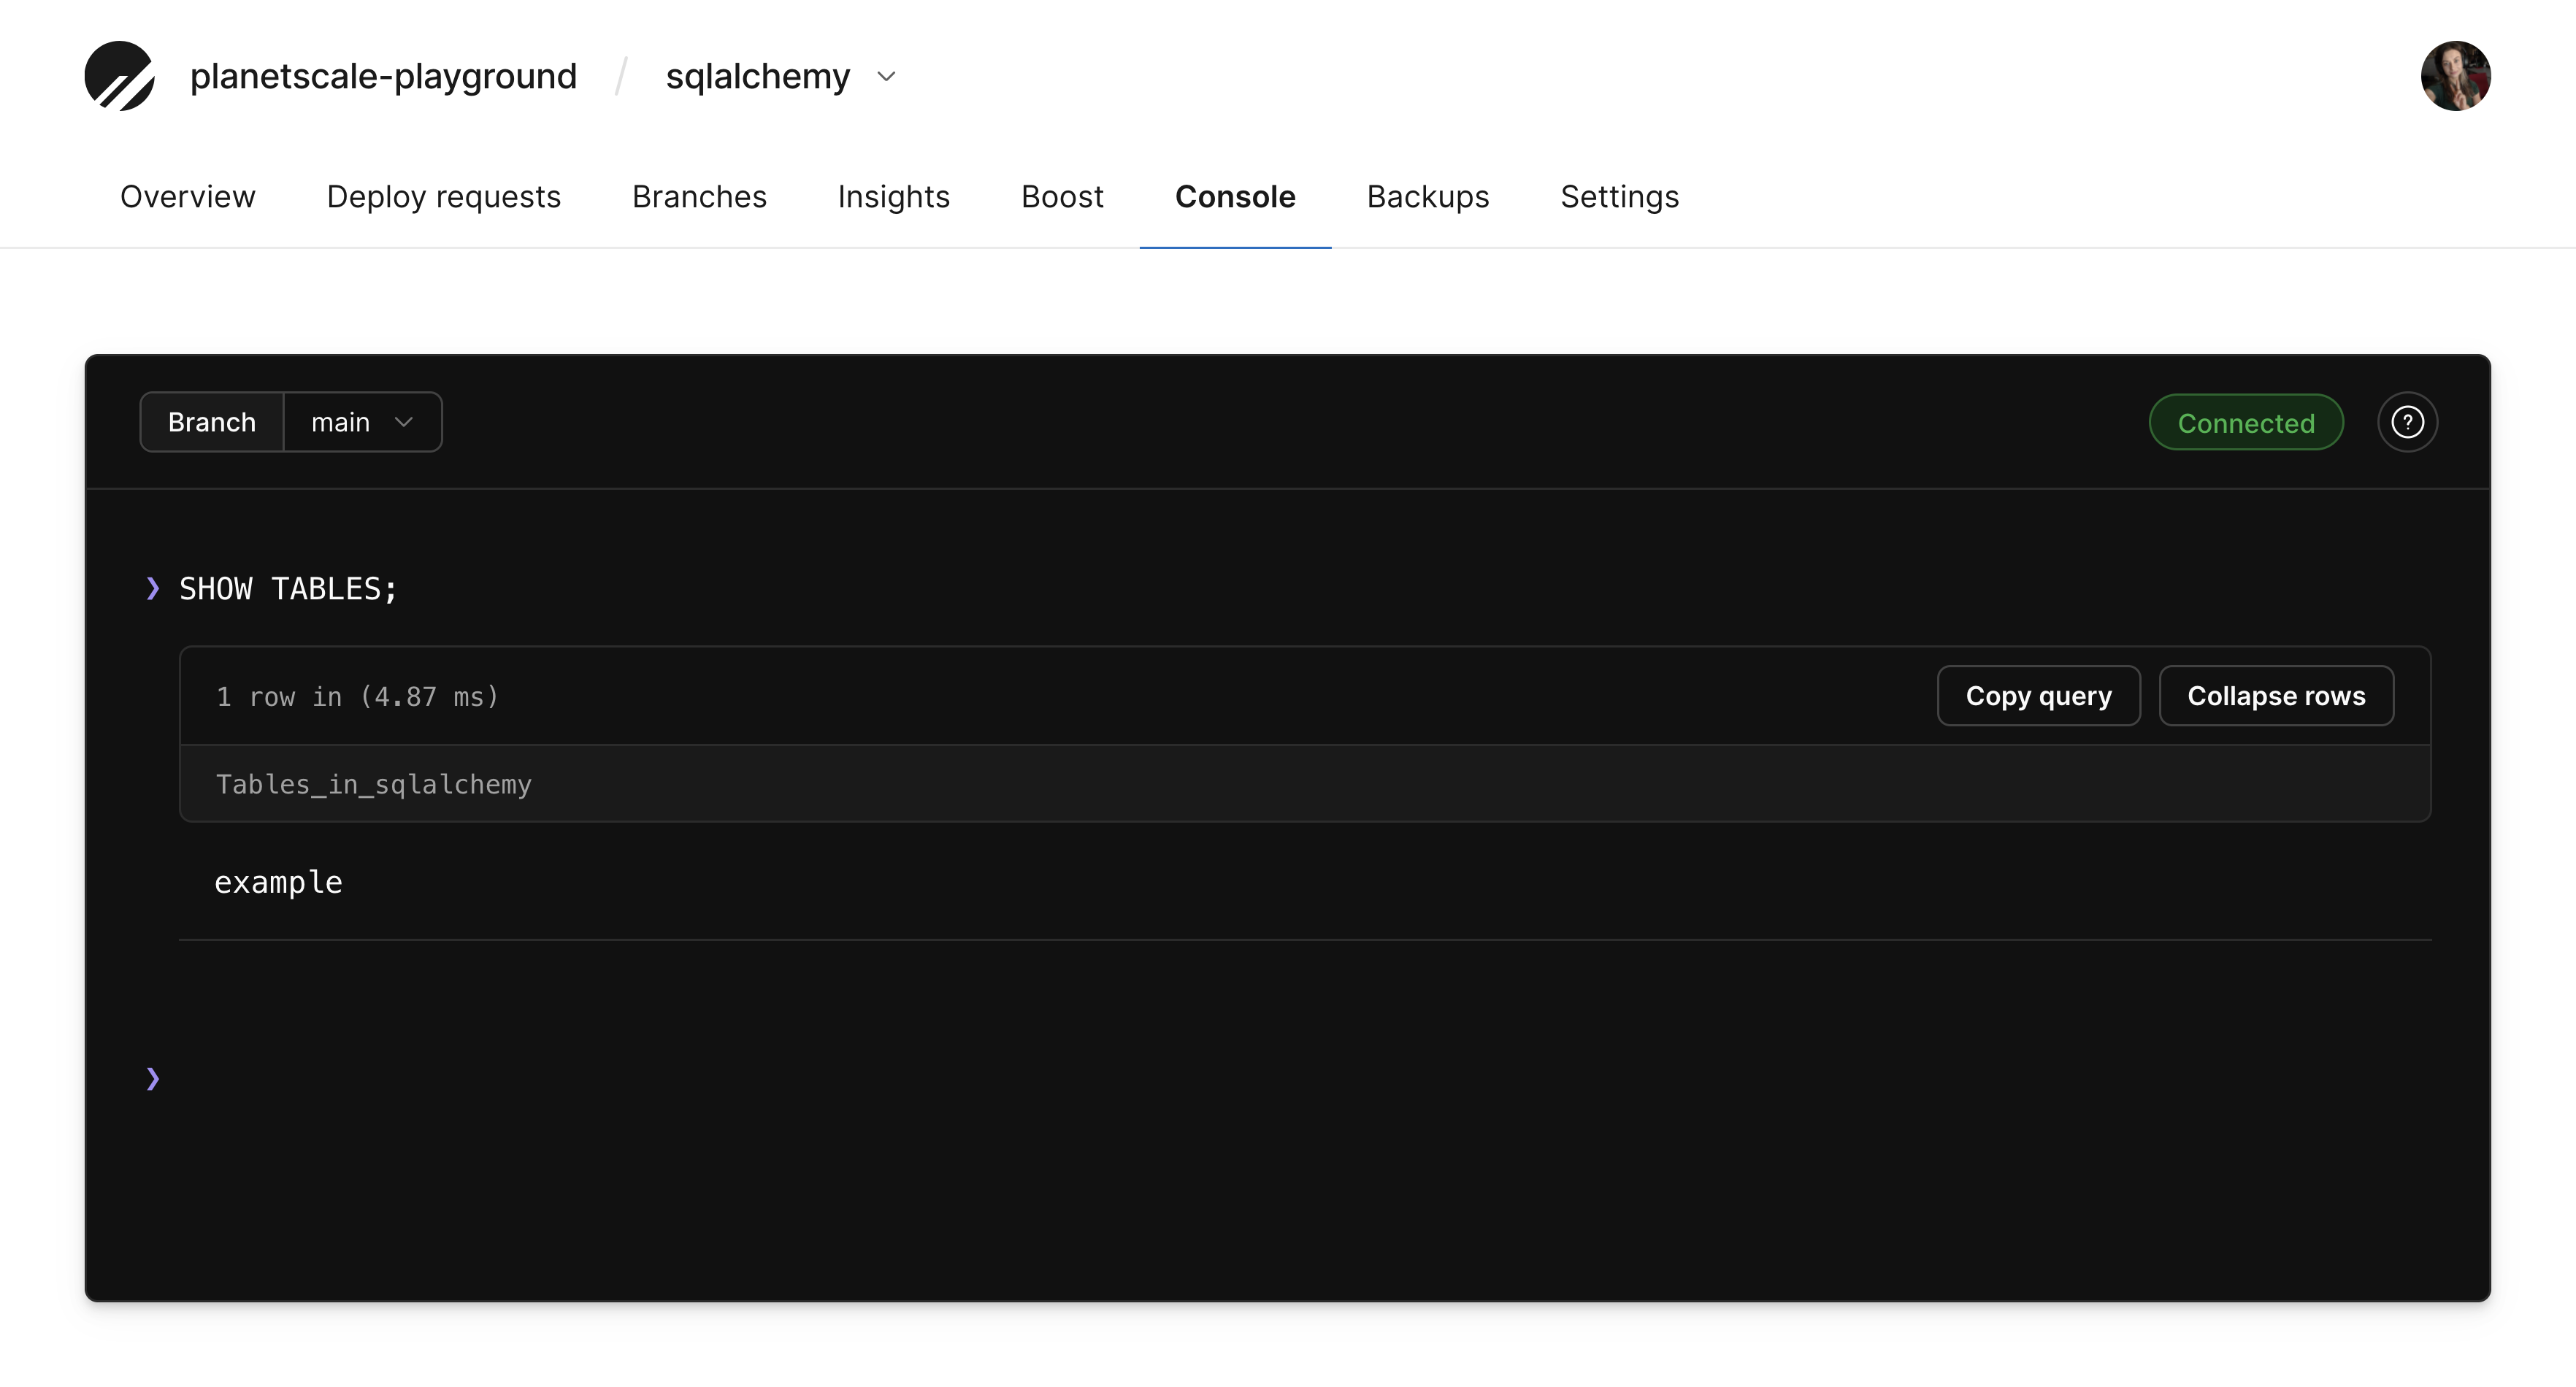
If you run that and get no errors, that means the table was created. If you try to run the code again, you'll get an error saying the table already exists.
You can also go back to your PlanetScale dashboard to confirm the table was added. Click on your database, click "Console", connect to your branch, and run the following:
Add data to a table
Next, let's insert some data into our new table.
connection.execute(text("INSERT INTO example (name) VALUES (:name)"), {"name": "Ashley"})
connection.execute(text("INSERT INTO example (name) VALUES (:name)"), [{"name": "Barry"}, {"name": "Christina"}])
connection.commit()
The first execute statement will create just one row because a single dictionary was passed. But the second statement will create two rows since a list of two dictionaries was passed. Just make sure the keys in the dictionary match the placeholders you have with a colon in front of the name.
Even though we aren't dealing with user input here, it's still a good idea to make a habit of passing in parameters instead of the data directly inside of an insert statement or select statement.
Unlike CREATE statements, INSERT statements happen in transactions, so we have to save them to the database by calling .commit() after we execute our insert statements.
Query data
Finally, now that we have some data in the database, let's go ahead and query that data so we can see it again. We can assign the result of connection.execute() to a variable called result, and if we loop over result.mappings(), we'll see that we get dictionaries for each row, where the key in each dictionary represents the column name. This makes it easy for us to retrieve the data and display it in a loop.
result = connection.execute(text("SELECT * FROM example WHERE name = :name"), dict(name="Ashley"))

for row in result.mappings():
    print("Author:" , row["name"])
As you can see, you only need to know a few things to write raw queries using SQLAlchemy. If you want to use it as an ORM, you can do that as well.
Using SQLAlchemy ORM to write queries
The idea behind ORM (object-relational mapping) is to create a code representation of your database using classes and objects instead of writing raw SQL statements. The classes represent the tables in your database, and the objects of those classes represent rows. So the first step to using ORM is to define classes that map to your tables. Classes that represent tables in an ORM are called models.
Before we can do the mapping, we need something called the DeclarativeBase from SQLAlchemy. Even though our classes could inherit directly from DeclarativeBase, we will instead create our own Base class that inherits it and then call pass. This makes it easy to add additional settings to our Base class in the future since all of our models will inherit from this one.
class Base(DeclarativeBase):
    pass
Create models
Now we can create our models. Let's first create an Author model which will map to an author table. The idea here is to first define a tablename, which is the attribute __tablename__.
Define the columns
Next, we need to define the columns. Starting in SQLAlchemy 2.0, we can use the Python typing system to define the columns for us. So the format of each column is the name of the column, followed by a class called Mapped with the Python type that closest matches the type you want in the database.
So for an ID column, we would have id: Mapped[int]. Next, that attribute is going to be set equal to the mapped_column function call, where we could set additional properties on our column like primary key, max length, nullable, etc.
So let's create an Author model with two fields: id and name, which means we'll have a table with two columns. SQLAlchemy requires each model to have a primary key so it can internally keep track of each object, so let's make ID the primary key.
class Author(Base):
    __tablename__ = "author"

    id: Mapped[int] = mapped_column(primary_key=True)
    name: Mapped[str] = mapped_column(String(30))
Handling relationships and foreign key constraints
Note
PlanetScale now supports foreign key constraints. This information below is out of date, but it will still correctly work.
Next, let's create a Post model, which will have a relationship to the Author model. We can create an author_id column inside of Post that holds the reference to the author who created the post. For most database systems, you'd pass ForeignKey to mapped_column to create an actual foreign key constraint in the database. But with PlanetScale, we don't recommend using foreign key constraints. However, we can still use SQLAlchemy to manage the relationship for us.
Since databases with foreign key constraints are very common, variations for those databases are included in the commented-out lines.
class Post(Base):
    __tablename__ = "post"

    id: Mapped[int] = mapped_column(primary_key=True)
    title: Mapped[str] = mapped_column(String(30))
    #author_id: Mapped[int] = mapped_column(ForeignKey("author.id"))
    author_id: Mapped[int]
The advantages of having no foreign keys are we can have multiple versions of our database schema in the same way we have multiple versions of code through things like git branches. It also allows us to make schema changes to production databases without any downtime. And finally, it makes it easier to scale the database through sharding.
But even without a foreign key, we can still have a relationship between two tables. To get SQLAlchemy to manage the relationship for us, we can create a relationship attribute. Unlike the attributes for the columns, no column gets created in the database. Instead, the relationship only exists in our code while it's running.
So we can add a relationship attribute and the type will be a list of Author classes, which we can pass to the Mapped class as the type.
posts: Mapped[list["Post"]] = relationship(primaryjoin='foreign(Post.author_id) == Author.id')
Since we're not using ForeignKey, we need to tell SQLAlchemy how to handle our relationship. We can do that we the primaryjoin argument to relationship. If we used a database with foreign keys, then the ForeignKey being passed to the mapped_column would be enough.
We can also create a Tag model in a similar way. This Tag model represents tags that each post could have.
class Tag(Base):
    __tablename__ = "tag"

    id: Mapped[int] = mapped_column(primary_key=True)
    text: Mapped[str] = mapped_column(String(30))
Because one post can have many tags and one tag can belong to many posts, we need to create a many-to-many relationship. We can create a post_tag table to represent this relationship. Many-to-many relationships have the foreign key stored in a separate table called an association table. We can create that table directly in SQLAlchemy. You could also use a model for this, but it's better to use a table because you won't be working with this table directly. Instead, SQLAlchemy will automatically manage the data in this table for you by using the relationships you define.
You can create the table like this:
post_tag = Table(
    "post_tag",
    Base.metadata,
    #Column("author_id", ForeignKey("author.id"), primary_key=True),
    #Column("tag_id", ForeignKey("tag.id"), primary_key=True),
    Column("post_id", Integer, primary_key=True),
    Column("tag_id", Integer, primary_key=True)
)
Create tables with create_all()
Now that we have the Tag table defined, to create the tables in the database, you can call create_all on your Base class. The create_all call takes an engine object, so you can reuse the one we created earlier.
Create_all will take about DeclarativeBase and instruct it to create statements for each one of our tables and add them to the database. You'll see that printed to your terminal when you run.
Base.metadata.create_all(engine)
With our tables created, we can go ahead and insert data into the tables and then query the tables.
Since we're working with the ORM, the way to create new rows is first by creating objects. So for example, to create a new Author, we can instantiate an author object.
For relationships, we can set one object to be related to another when we instantiate the related object. We want to use the relationship attribute instead of the _id field directly because SQLAlchemy will take care of the ID field for us. For many-to-many relationships, we append to the relationship attribute like it's a Python list. We only need to append children of the relationship.
To add them to the database, we need to first add them to the session. Finally, we need to call commit to save them to the database. When you run the script, you'll see the actual insert statements being printed.
with Session(engine) as session:
    author = Author(name="David")
    post = Post(title="Python Essentials", author=author)
    session.add(author)
    session.add(post)

    post2 = Post(title="SQL Secrets", author=author)
    post3 = Post(title="Advanced MySQL", author=author)
    session.add_all([post2, post3])

    tag1 = Tag(text="python")
    tag2 = Tag(text="sql")
    tag3 = Tag(text="mysql")
    session.add_all([tag1, tag2, tag3])

    post.tags.append(tag1)
    post2.tags.append(tag2)
    post3.tags.append(tag2)
    post3.tags.append(tag3)

    session.commit()
Query the data
Now that we have some data in the database, we can go ahead and query that data. First, we write our query statement.
Start by passing your Model call to the select function. Then you have the option to use the where attribute on the resulting object. We can then pass all of that to session.scalar to run the query. With the result of scalar, we can print out the results to the terminal. We can also look at the values in the relationship. For each post, we can look at the tags as well.
If you want to leave out the where and get all of the posts, you will use scalars instead of scalar. Then we can loop over the object returned and print out all the titles.
stmt = select(Author).where(Author.name == "David")
author = session.scalar(stmt)

for post in author.posts:
    print(post.title)
    for tag in post.tags:
        print(" ", tag.text)

for post in session.scalars(select(Post)):
    print(post.title)
Conclusion
With your new knowledge of SQLAlchemy, you should have a good starting point to continue using it in any Python project that uses a SQL database. As long as you can set up the engine object, you'll be able to decide whether you want to simply send raw SQL statements, construct SQL statements using the SQLAlchemy API, or map your Python classes and objects to your database tables and data.