







In this hands-on guide, I’ll show you how to transform a USB drive into a macOS Golden Gate USB installer. Having access to a macOS Golden Gate USB installer is useful for upgrading from macOS Tahoe or earlier versions of macOS across multiple Macs, among other use cases. Have a look at my full hands-on video walkthrough, and be sure to subscribe to 9to5Mac on YouTube for more Mac guides and tutorials.
Before we begin, please remember that a USB installer is not a requirement to install macOS Golden Gate. Upon its release, and even in beta, you can use macOS Software Update to download and install it. As noted at the outset, one of the main benefits of creating a macOS Golden Gate USB install drive is that it lets users install macOS across multiple Macs and/or speeds up the process on a Mac with a slower Internet connection.
You’ll need a blank USB drive with at least 16GB of storage to follow this tutorial. Almost any drive, including an SSD, will work, but I’m using a portable SanDisk flash drive with both USB-C and USB-A connections for added flexibility. You can purchase the same USB flash drive, with 128GB of storage, for a very reasonable price.
Subscribe to 9to5Mac on YouTube for more videos
You can download the macOS Golden Gate installer in several ways, but I prefer utilizing Terminal’s softwareupdate command. To do so, open a new Terminal window and do the following:
Step 1: Step 10: Copy and paste the following command in the Terminal:
softwareupdate --list-full-installers
Note: if the macOS Golden Gate version you wish to download is a beta, you’ll need to enable Beta Updates in Settings → General → Software Updates before running the Terminal command above.
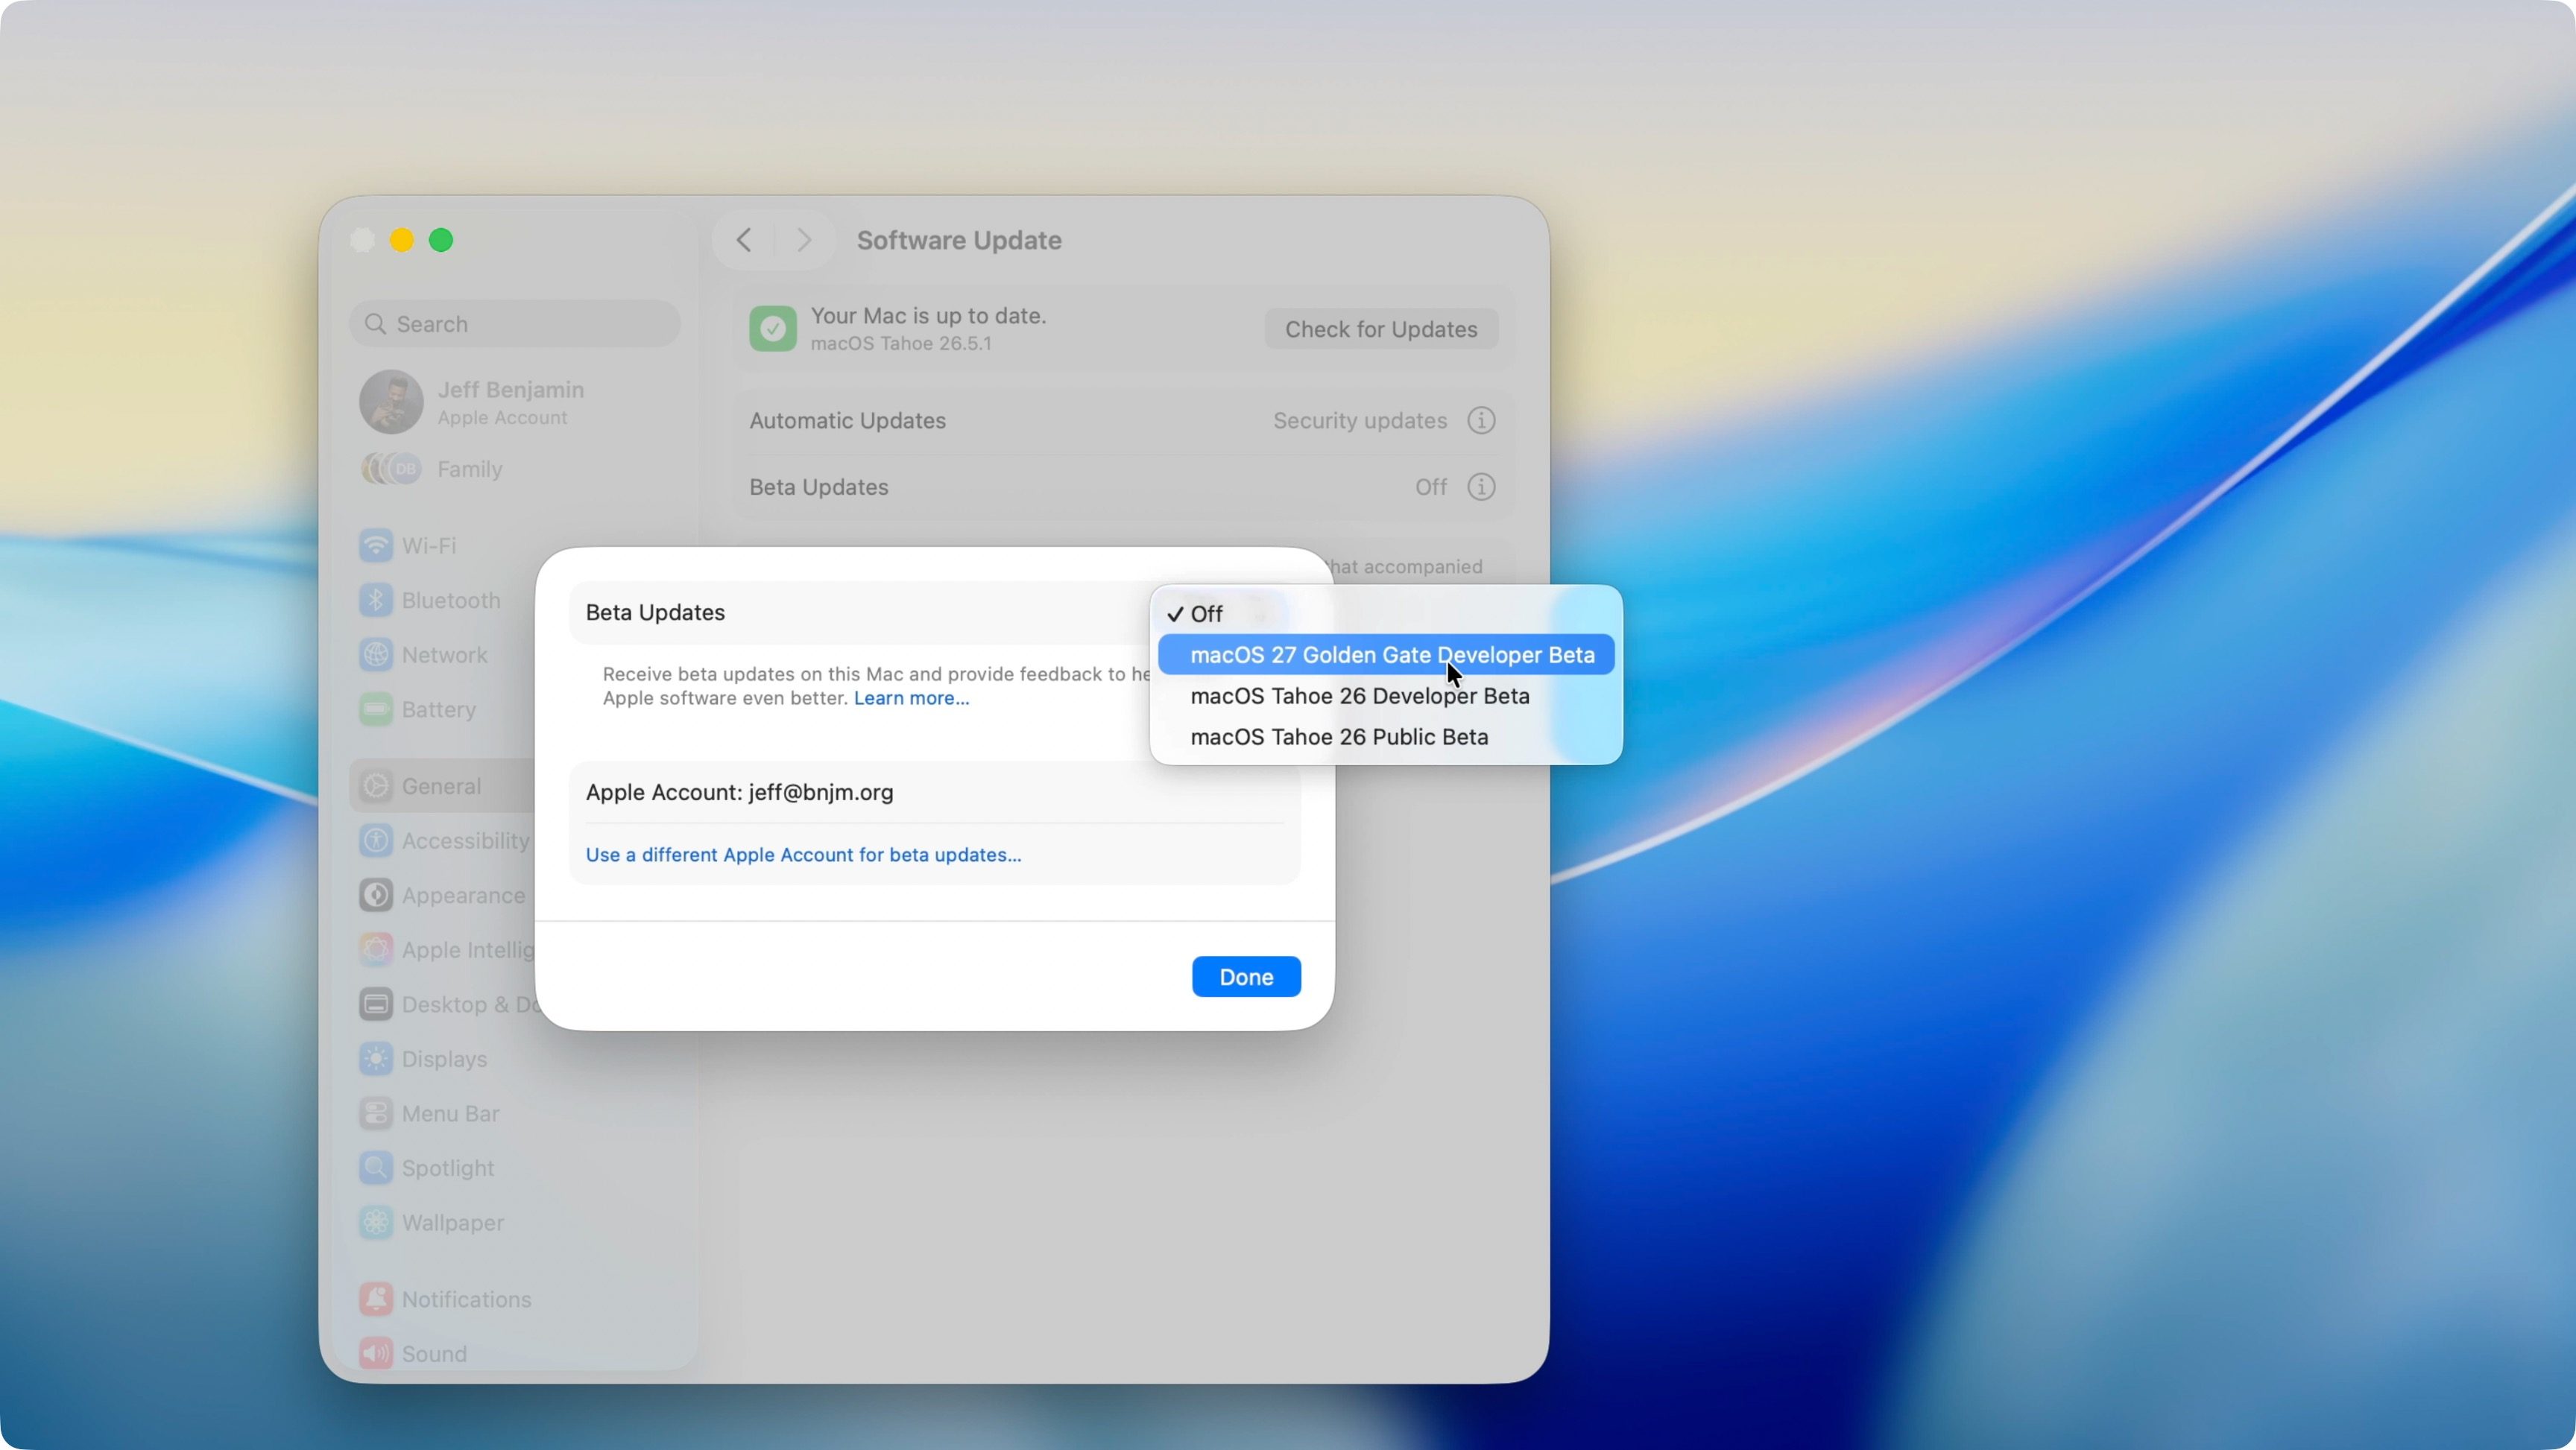
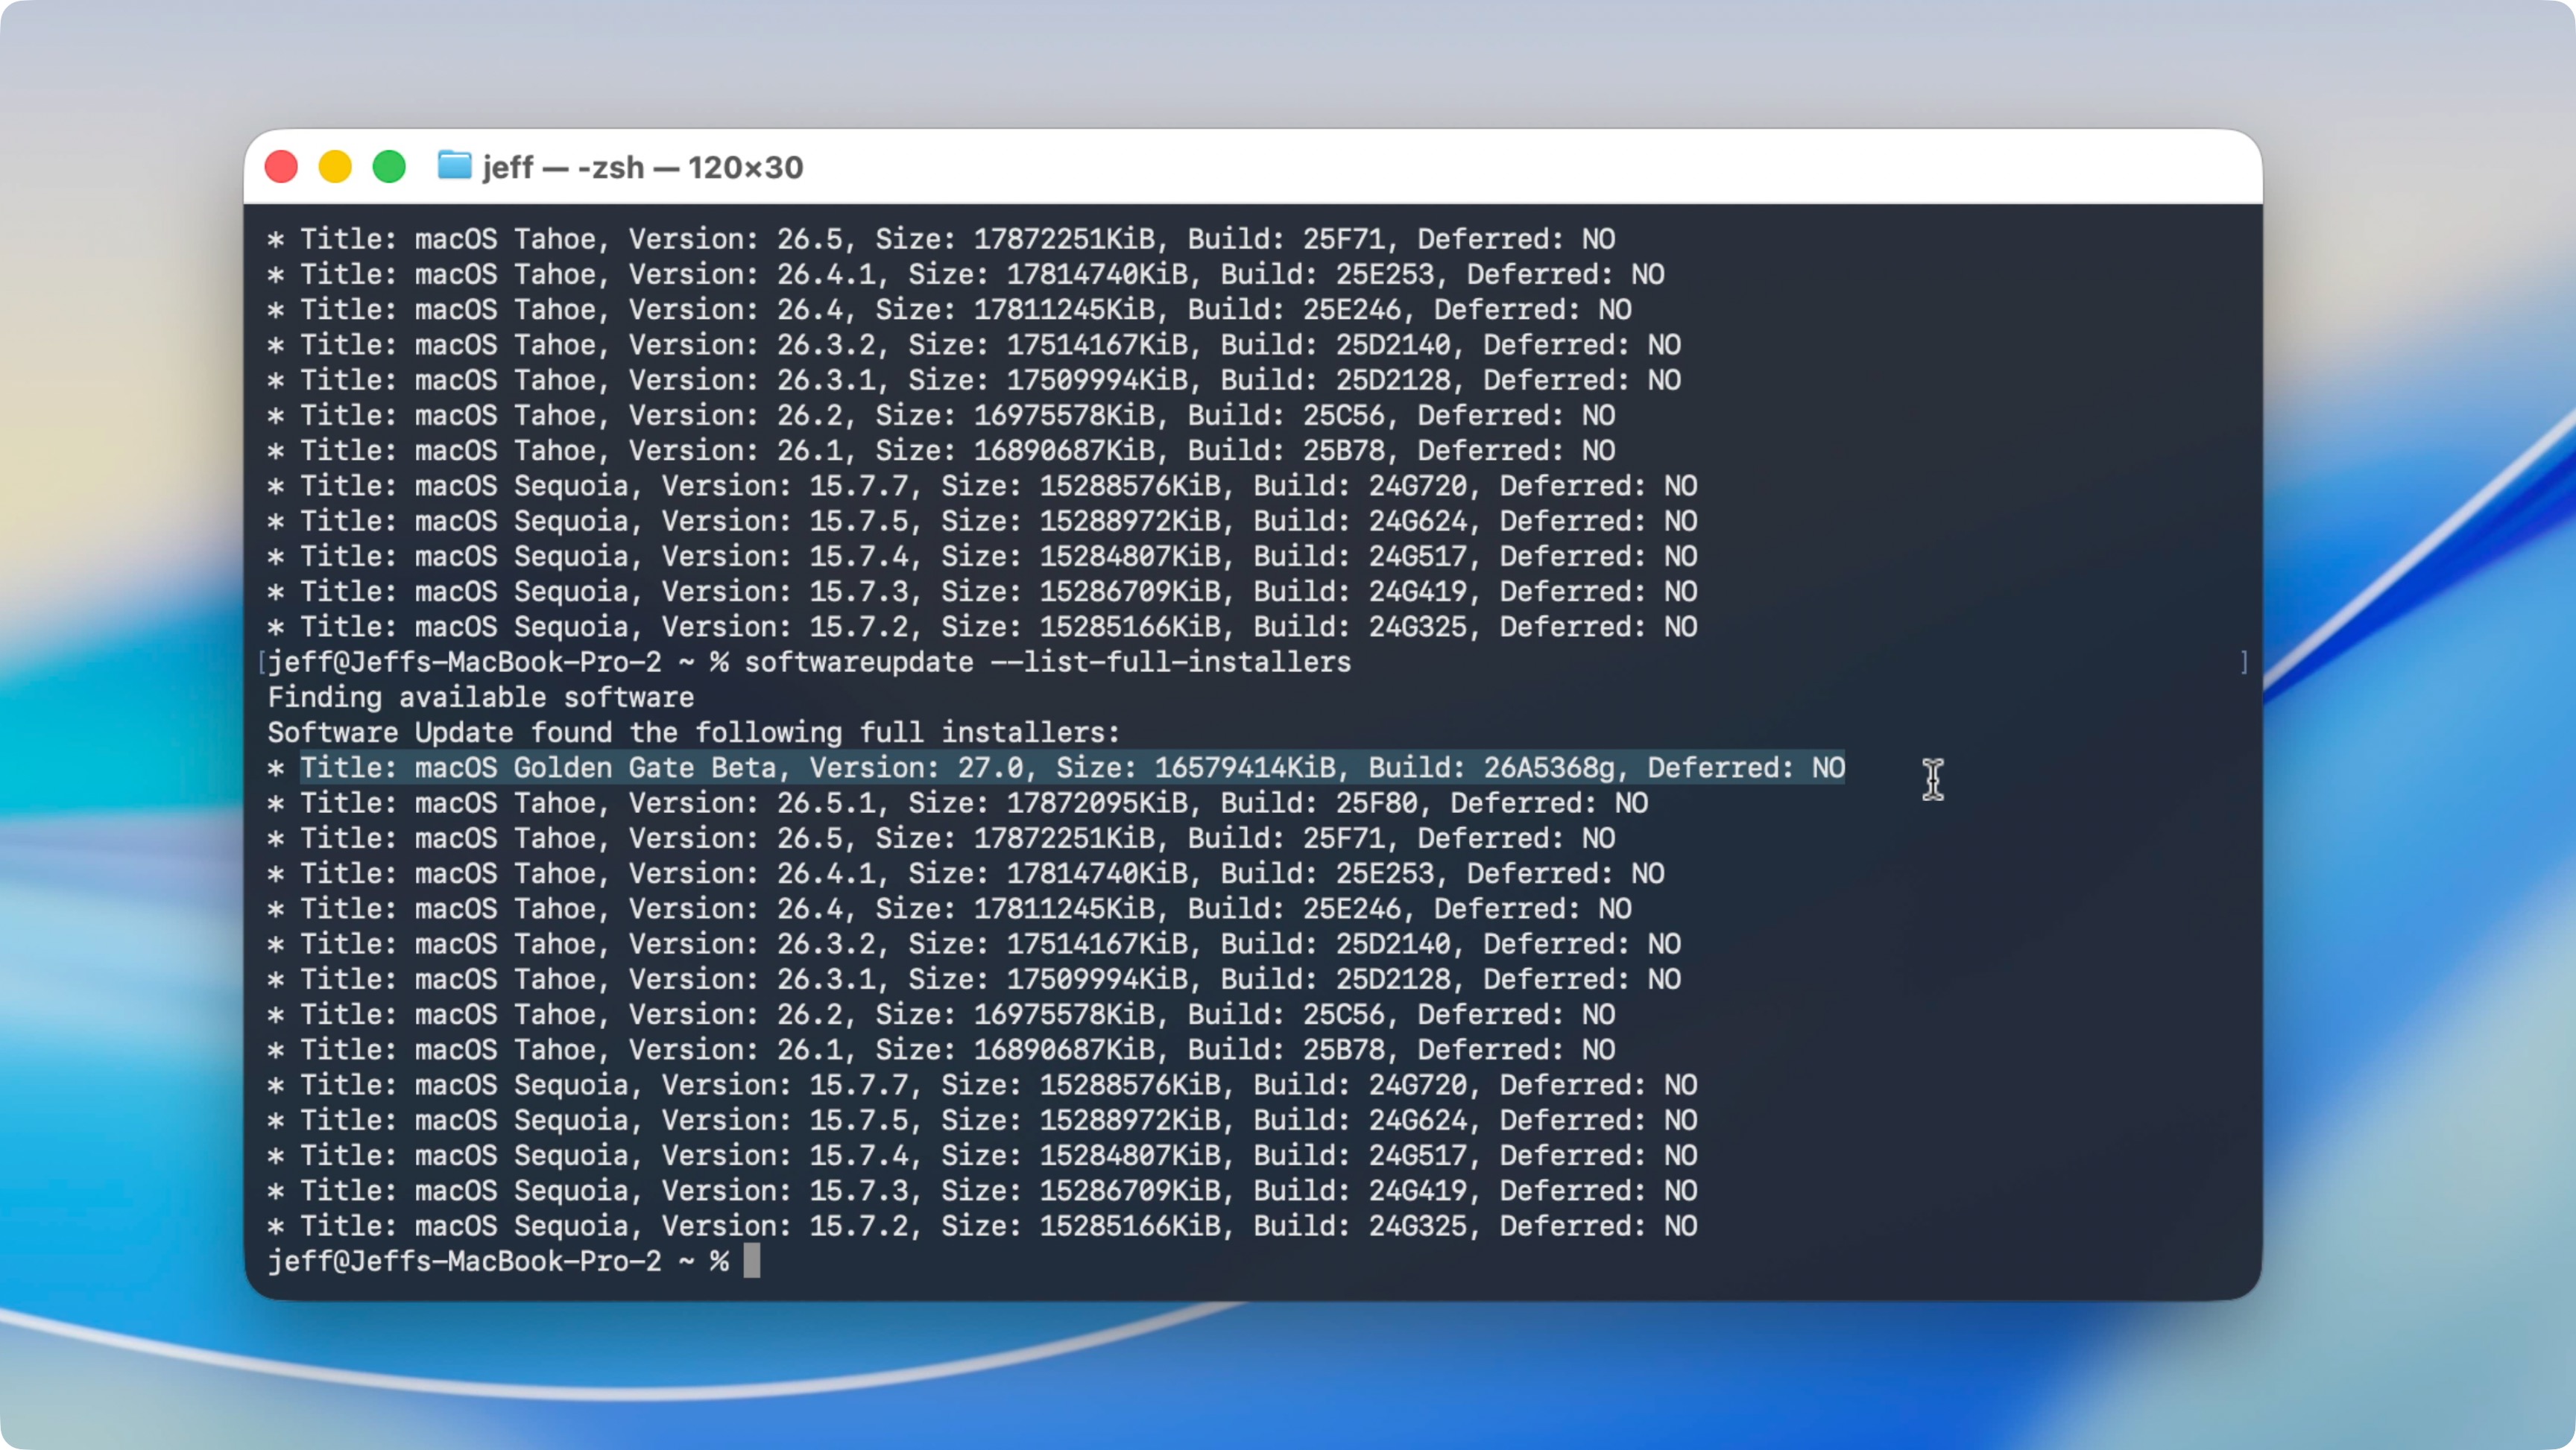
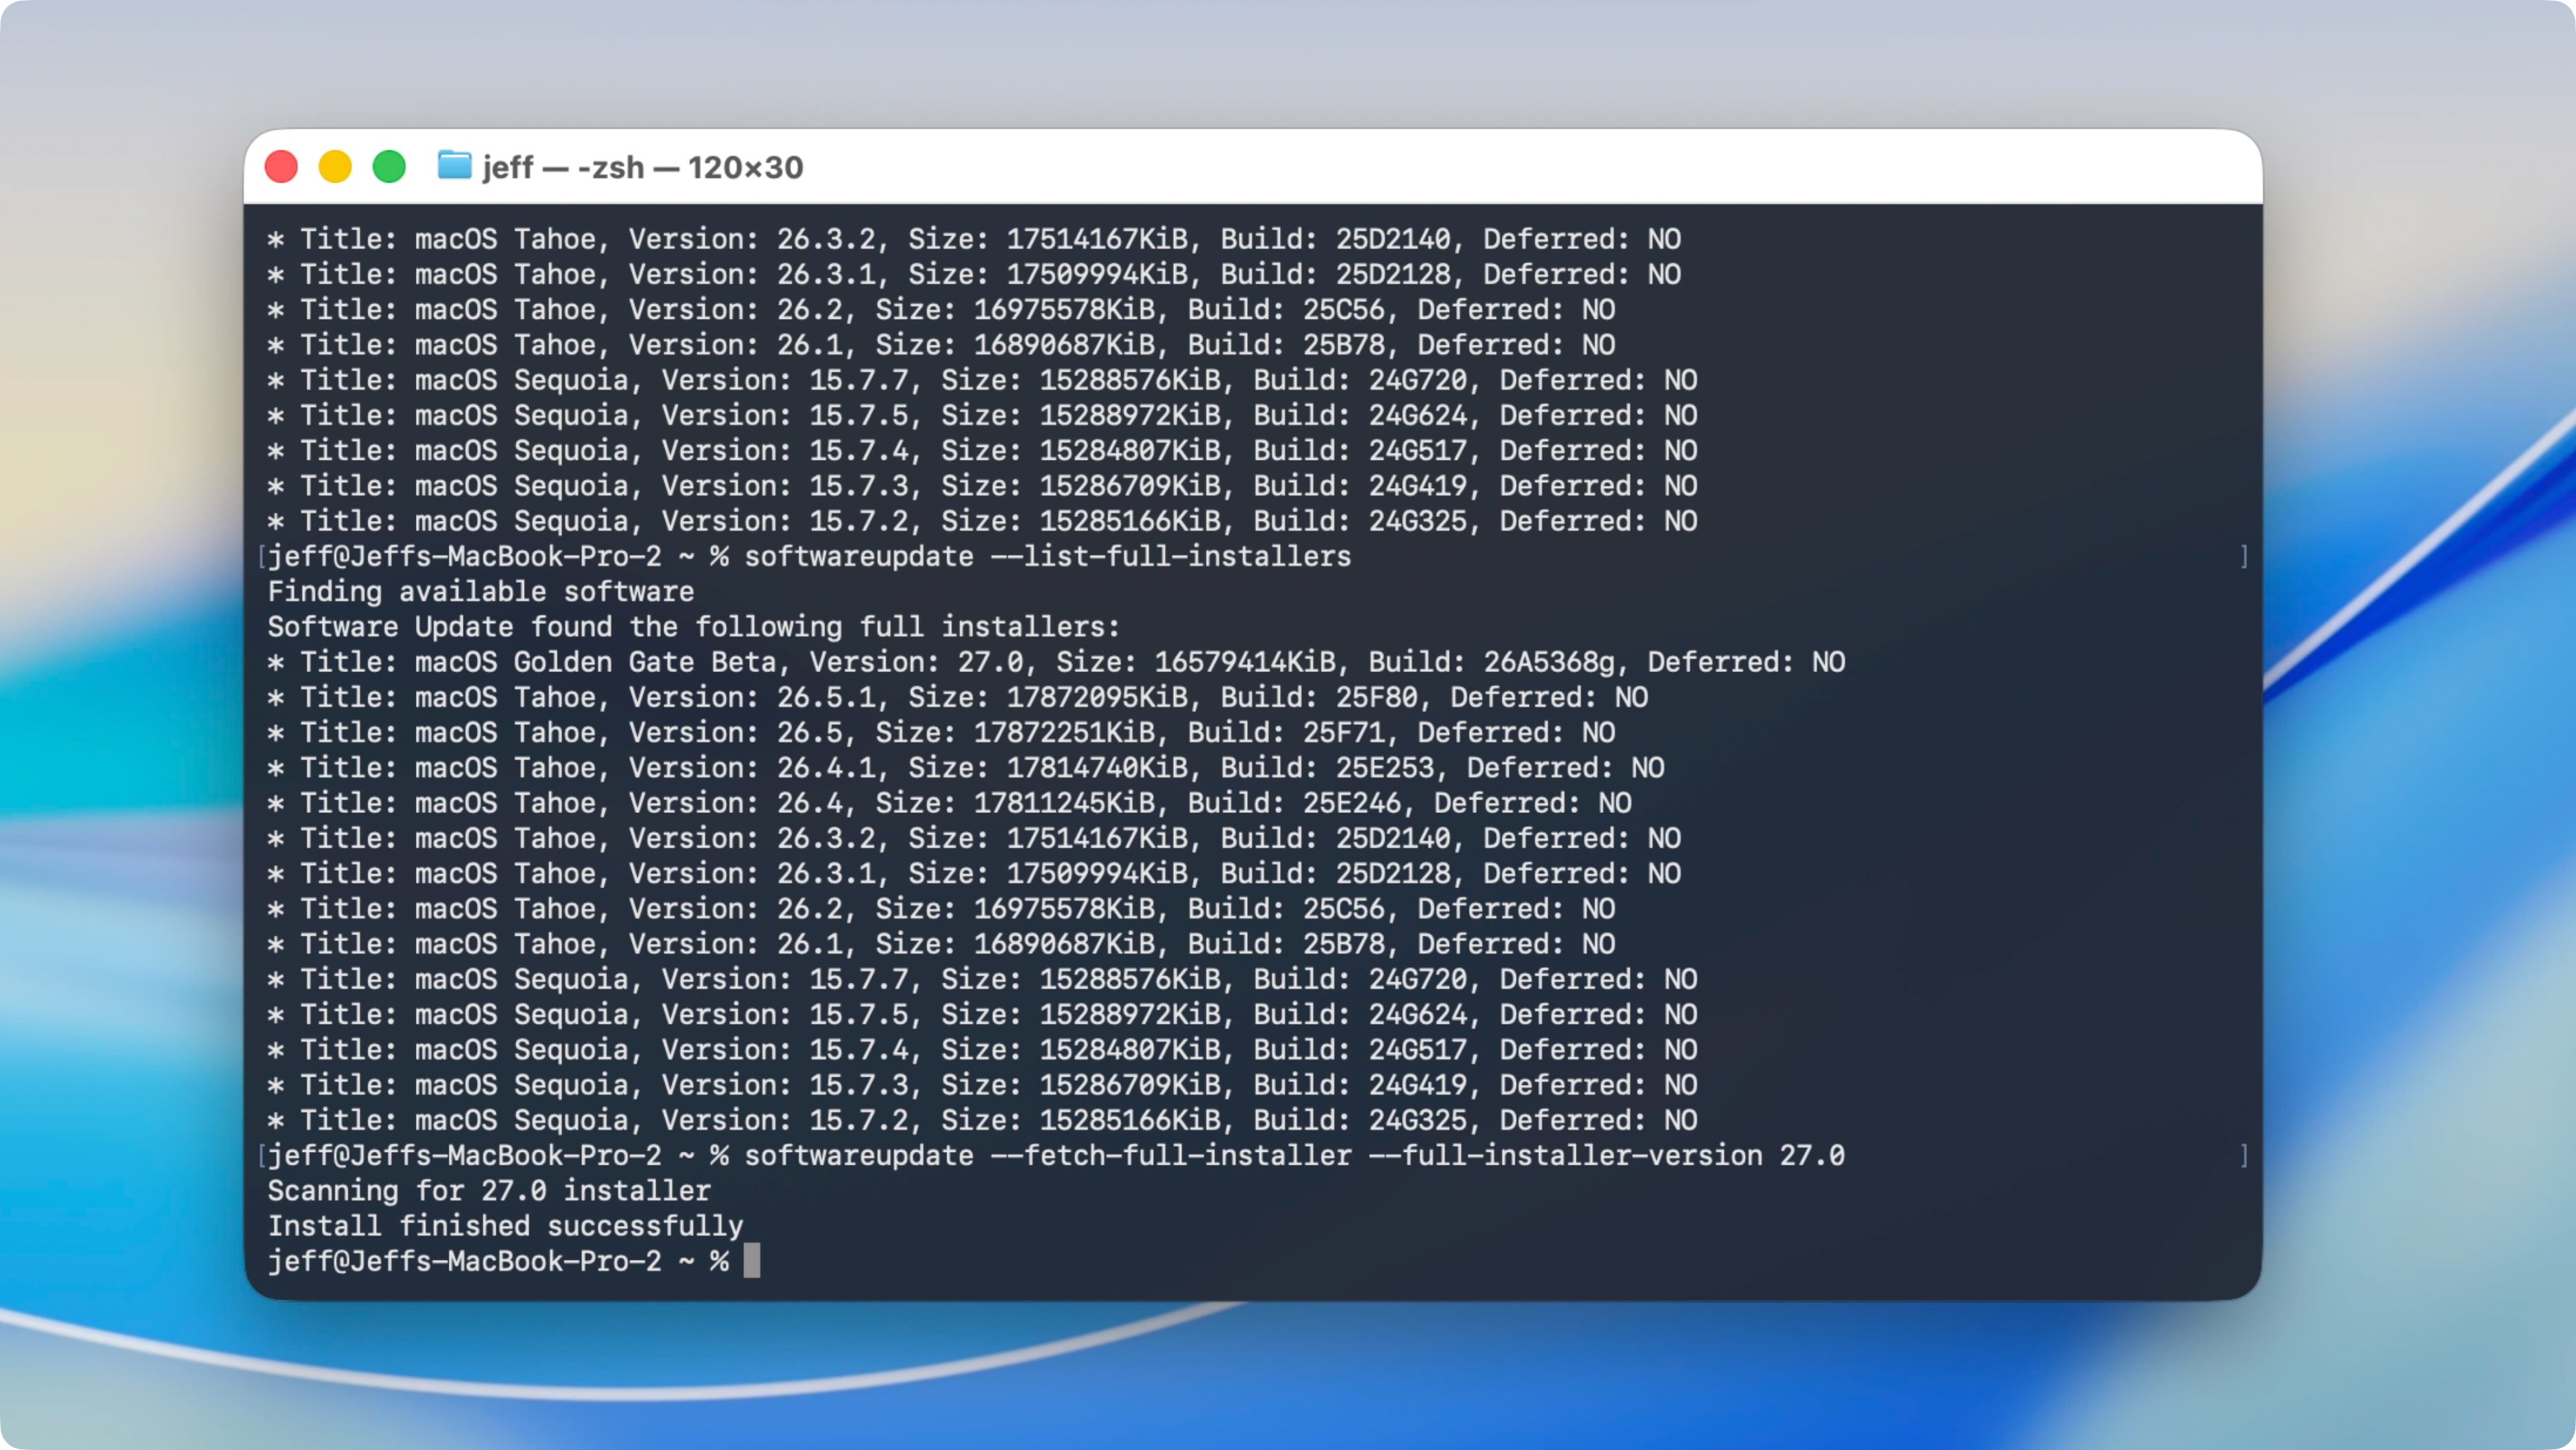
Step 2: Copy and paste the next command in Terminal. Be sure to replace the version number with the desired version found via Step 1. After pasting the command, press Return on your Mac’s keyboard. The macOS Golden Gate download will commence and save the installer to your Mac’s Application folder as Install macOS Golden Gate. For the beta version, it’ll say “Install macOS Golden Gate Beta.”
softwareupdate --fetch-full-installer --full-installer-version 27.0
Step 3: Navigate to Finder → Applications, and right-click on Install macOS Golden Gate beta → Show Package Contents. Then open Contents → Resources.
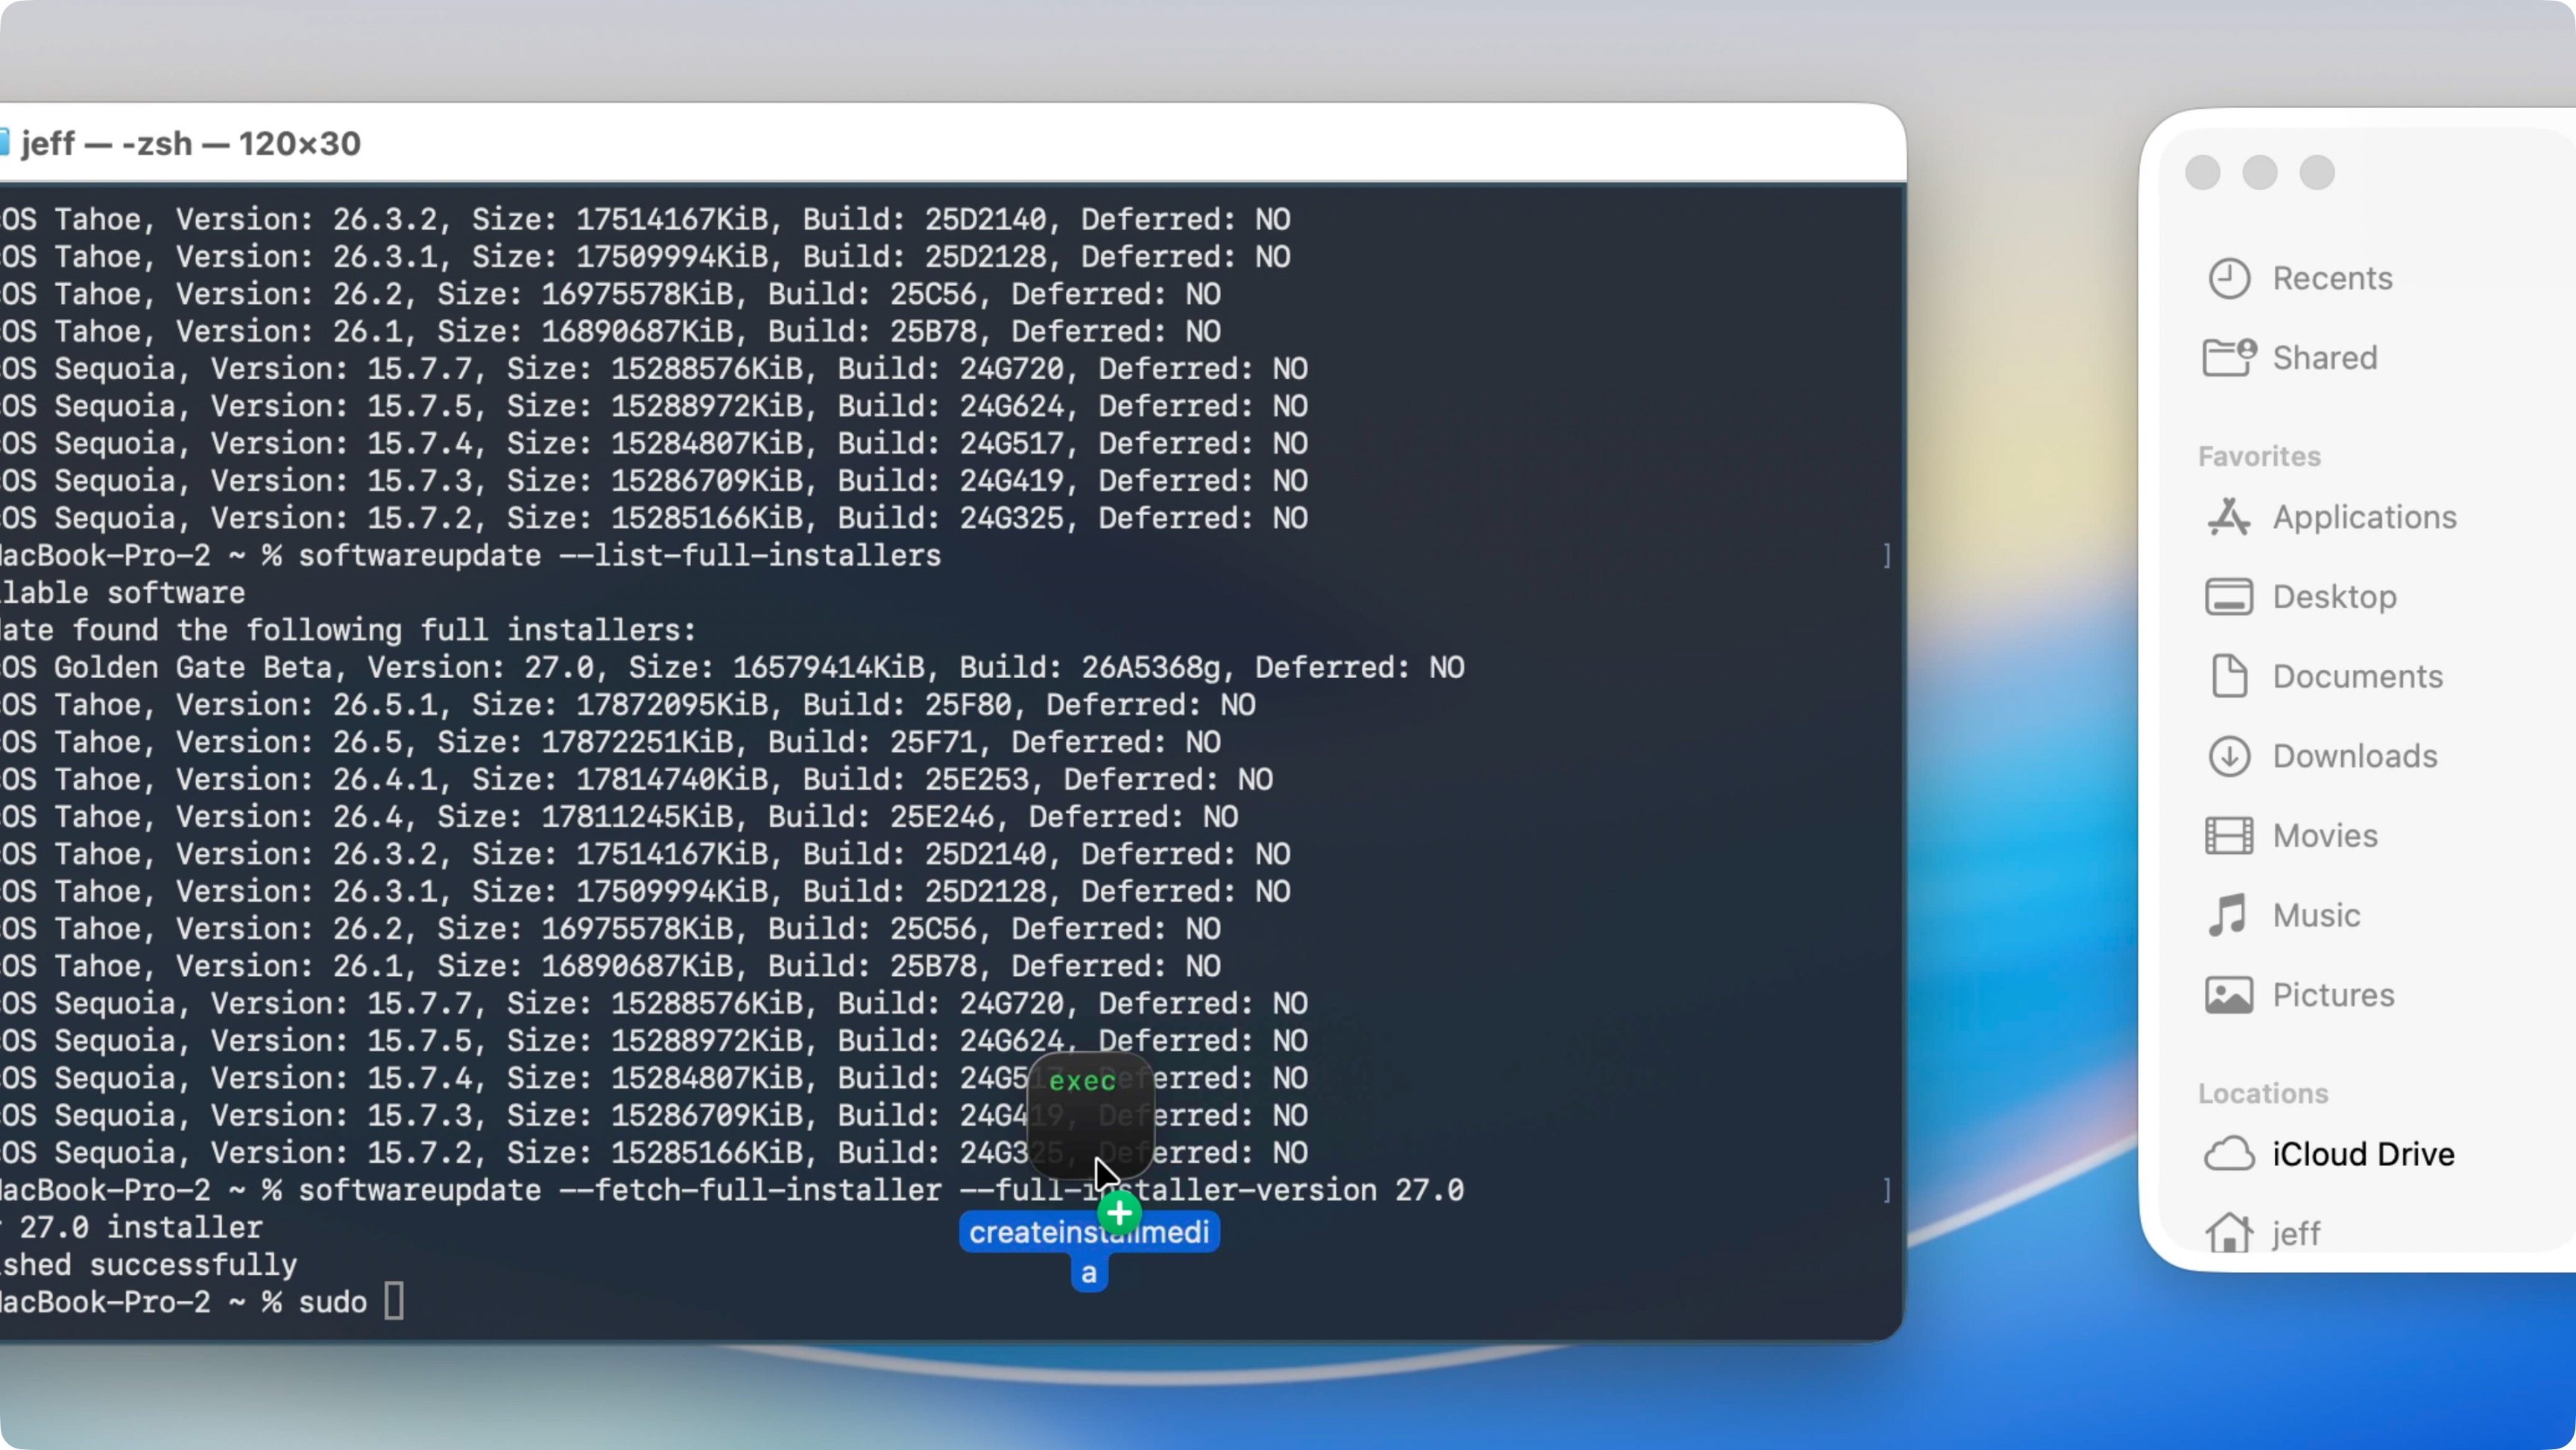
Step 4: In the Terminal window, type sudo followed by a space.
Step 5: Drag and drop createinstallmedia from the Resources folder referenced directly into the Terminal window, and then type --volume followed by a space.

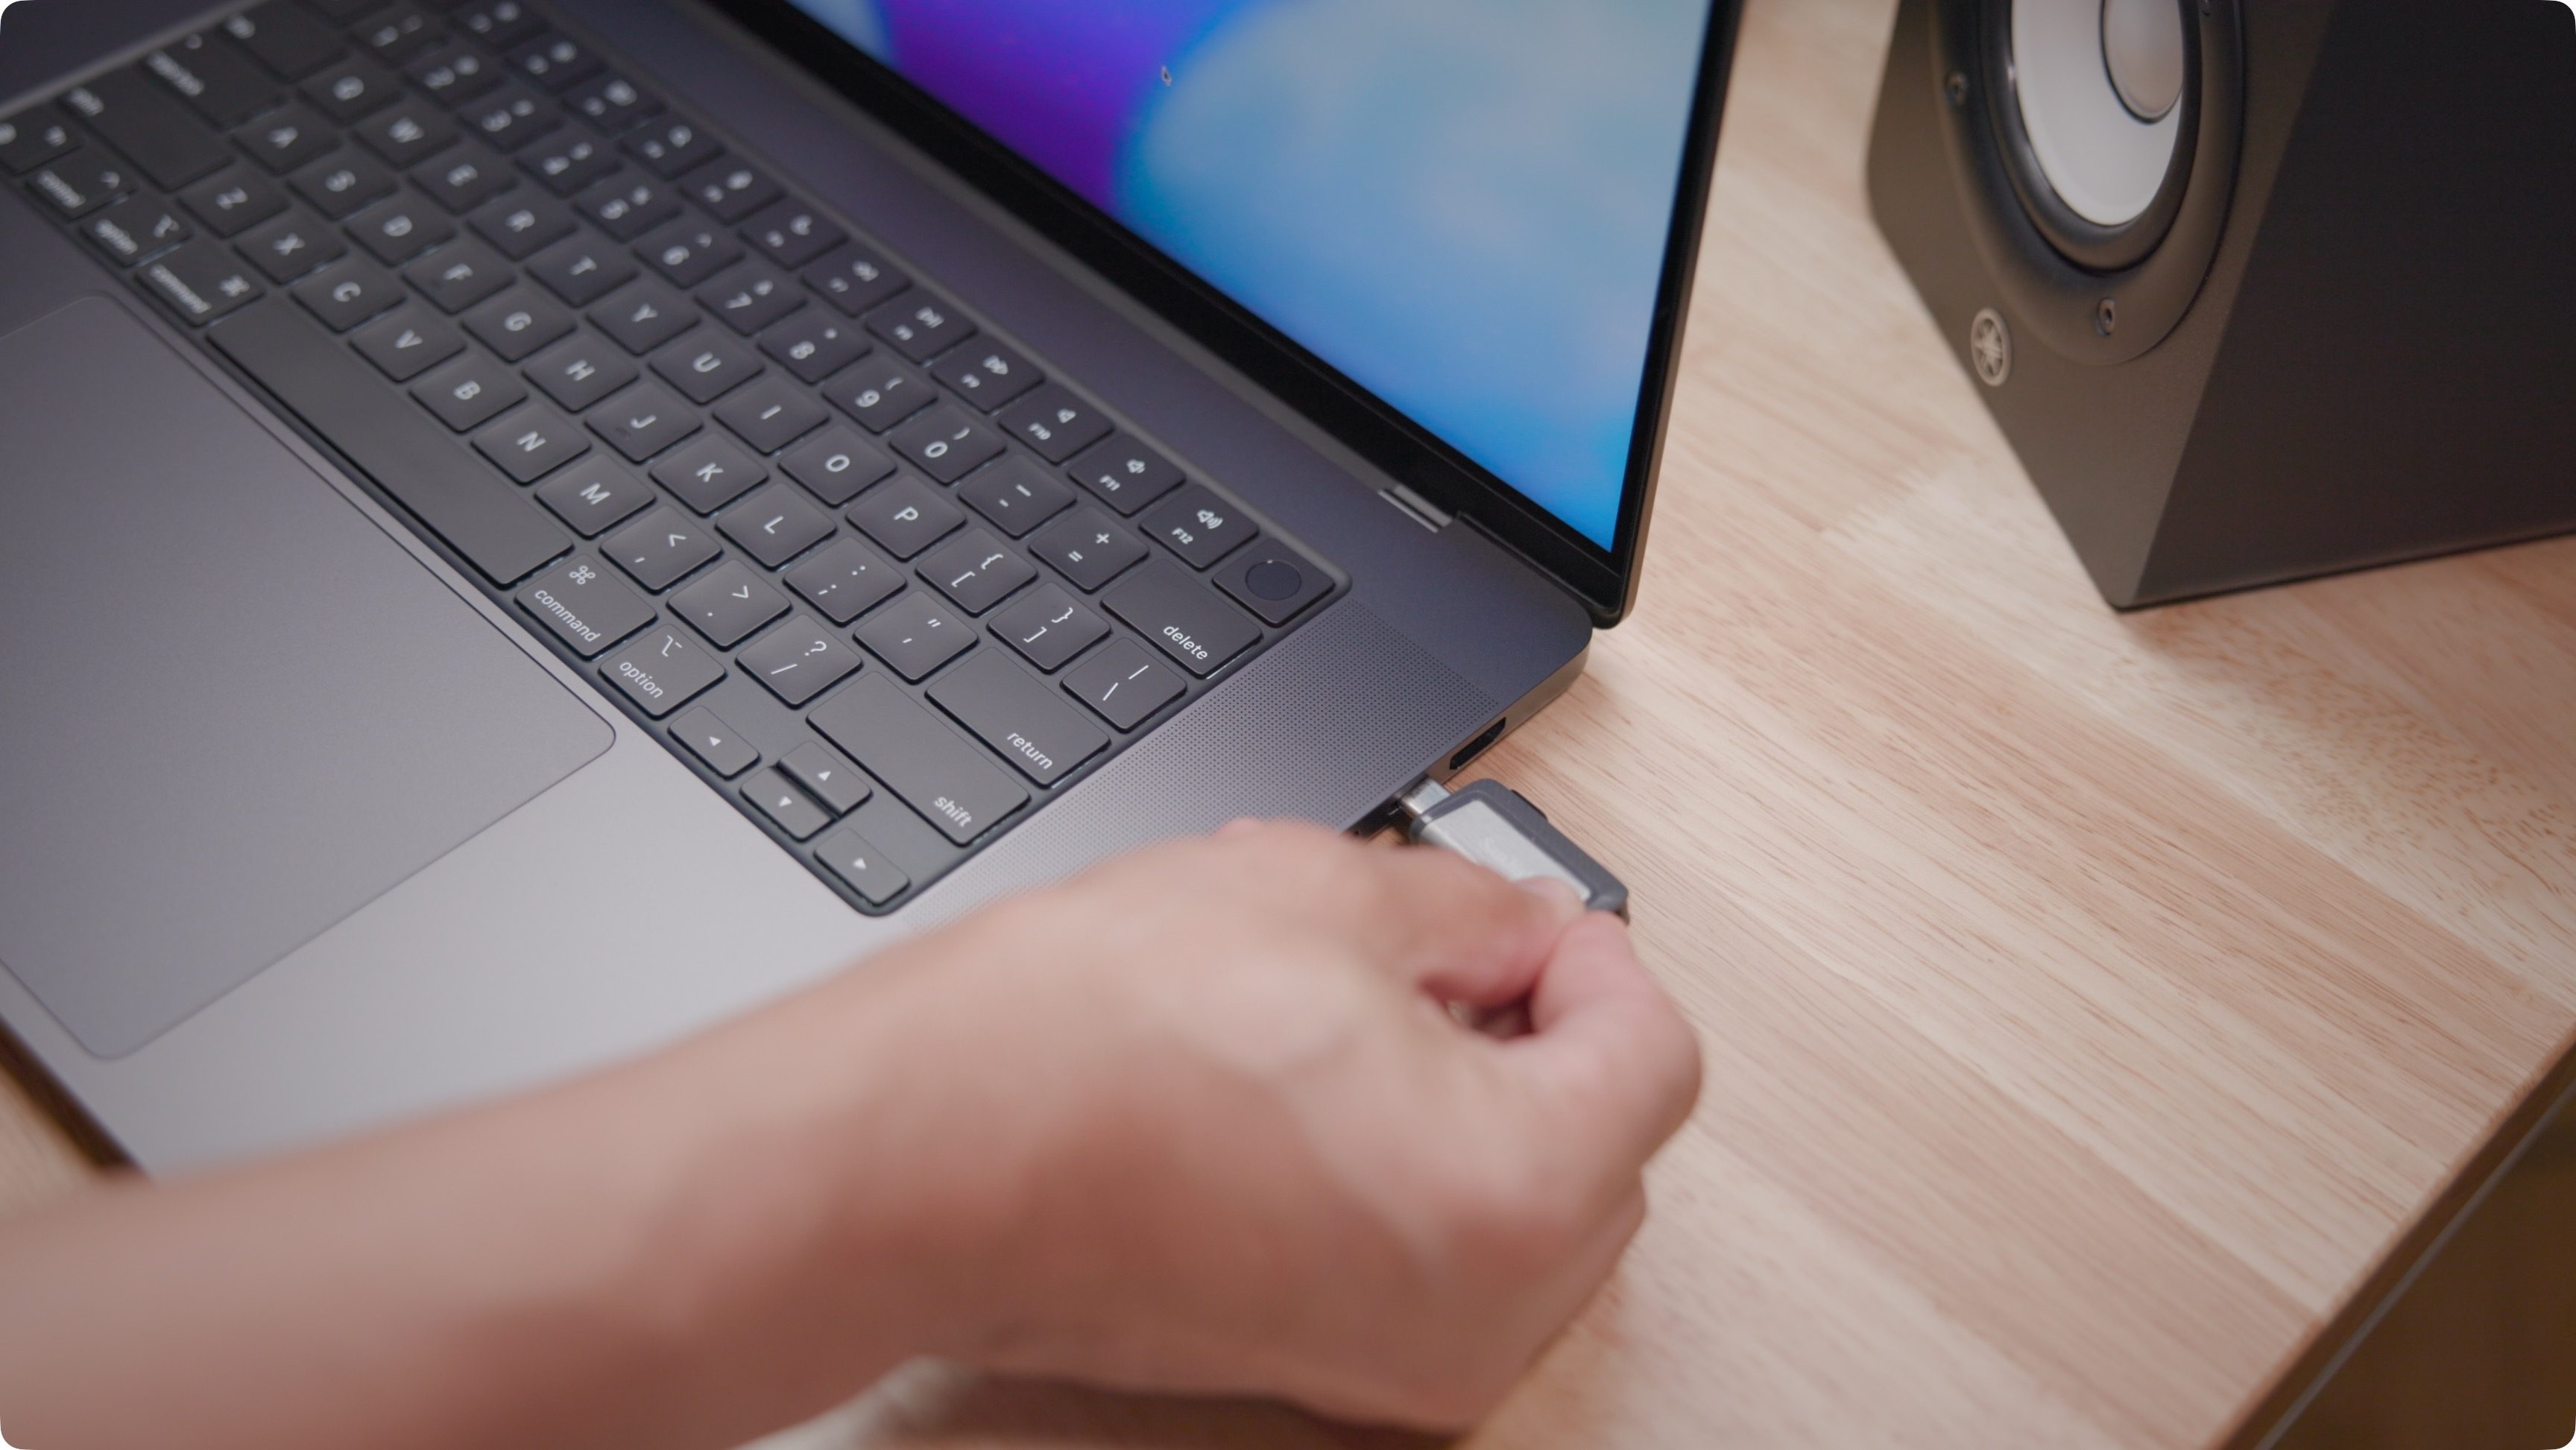
Step 6: Connect your USB Drive to your Mac and open it in Finder. Make sure that nothing on it is needed. If there’s existing data on the drive you need, back it up first, because the next steps will completely erase its contents.
Note: APFS-formatted drives can’t be used to create USB installers. If your USB Drive is APFS-formatted, open Applications → Utilities → Disk Utility, select the drive, and click Erase. For format, choose Mac OS Extended (Journaled), then click Erase.
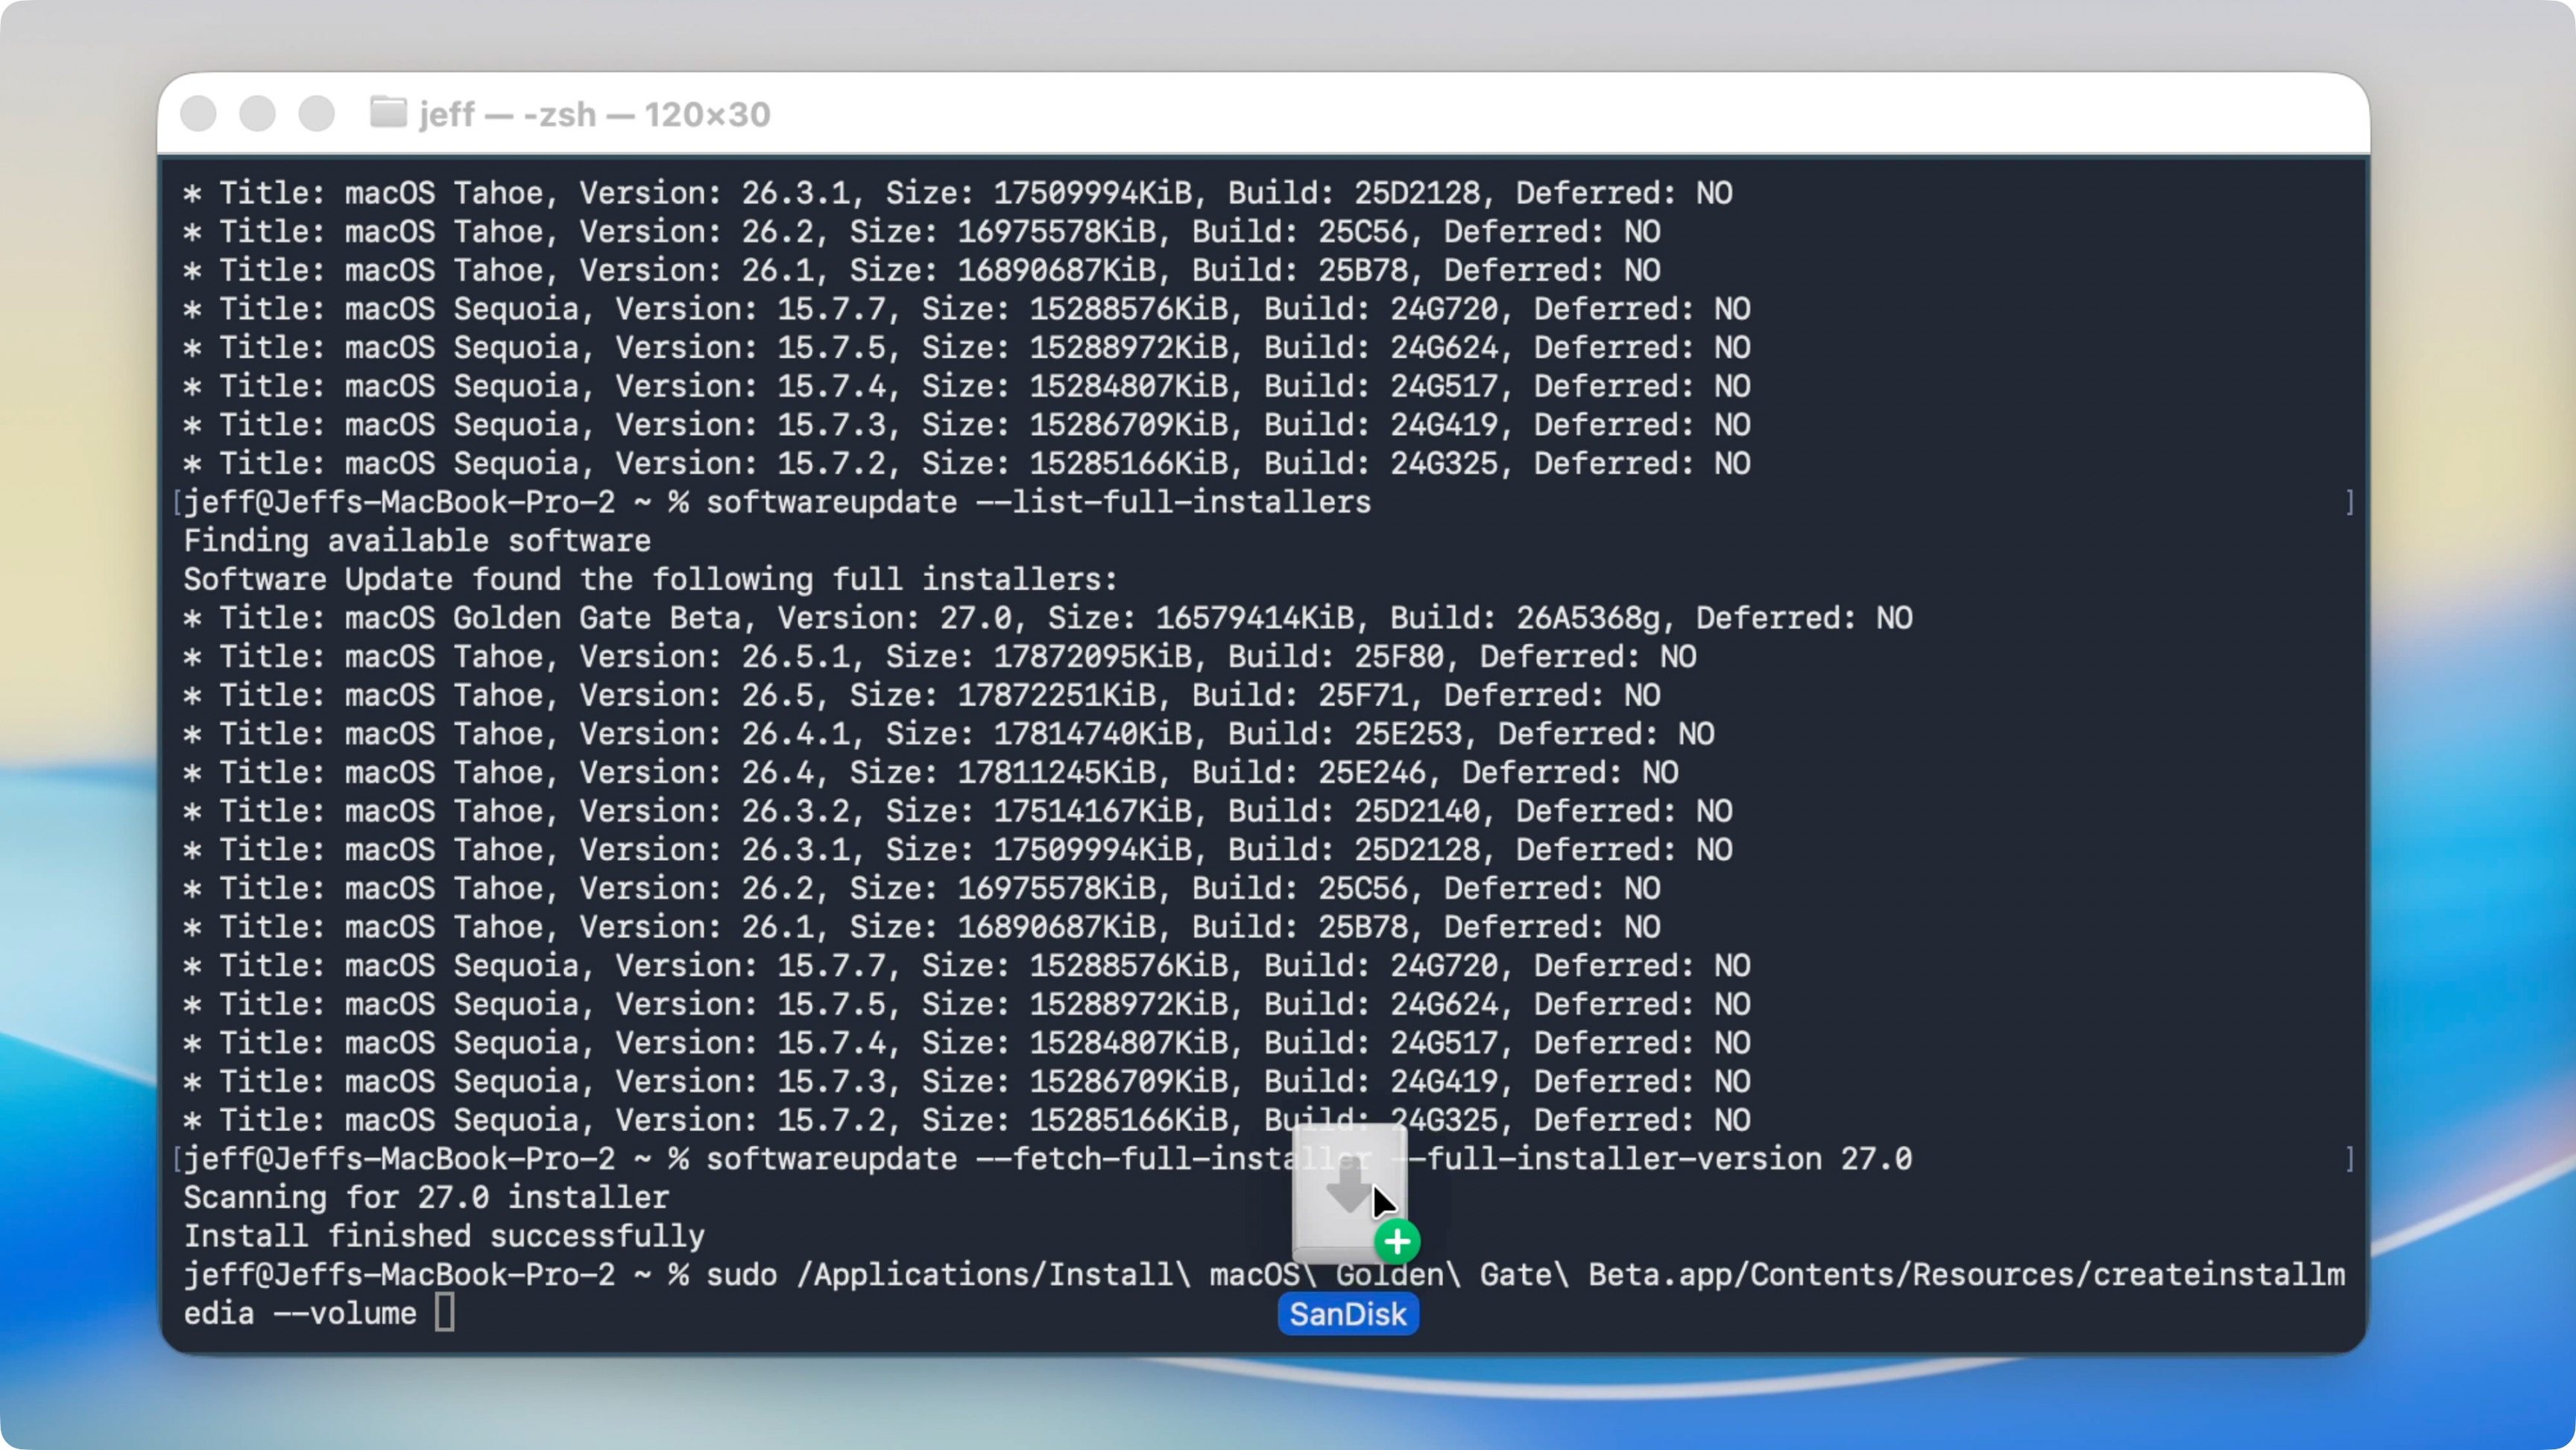
Step 7: Open Finder → Go → Go To Folder… then type /Volumes and press return on your keyboard to explore all connected volumes.
Step 8: Identify the USB drive that you connected in step 6. Double-check that you select the correct USB drive; otherwise, you risk deleting the contents of the wrong drive. Once identified, drag and drop the USB drive volume into the Terminal window.
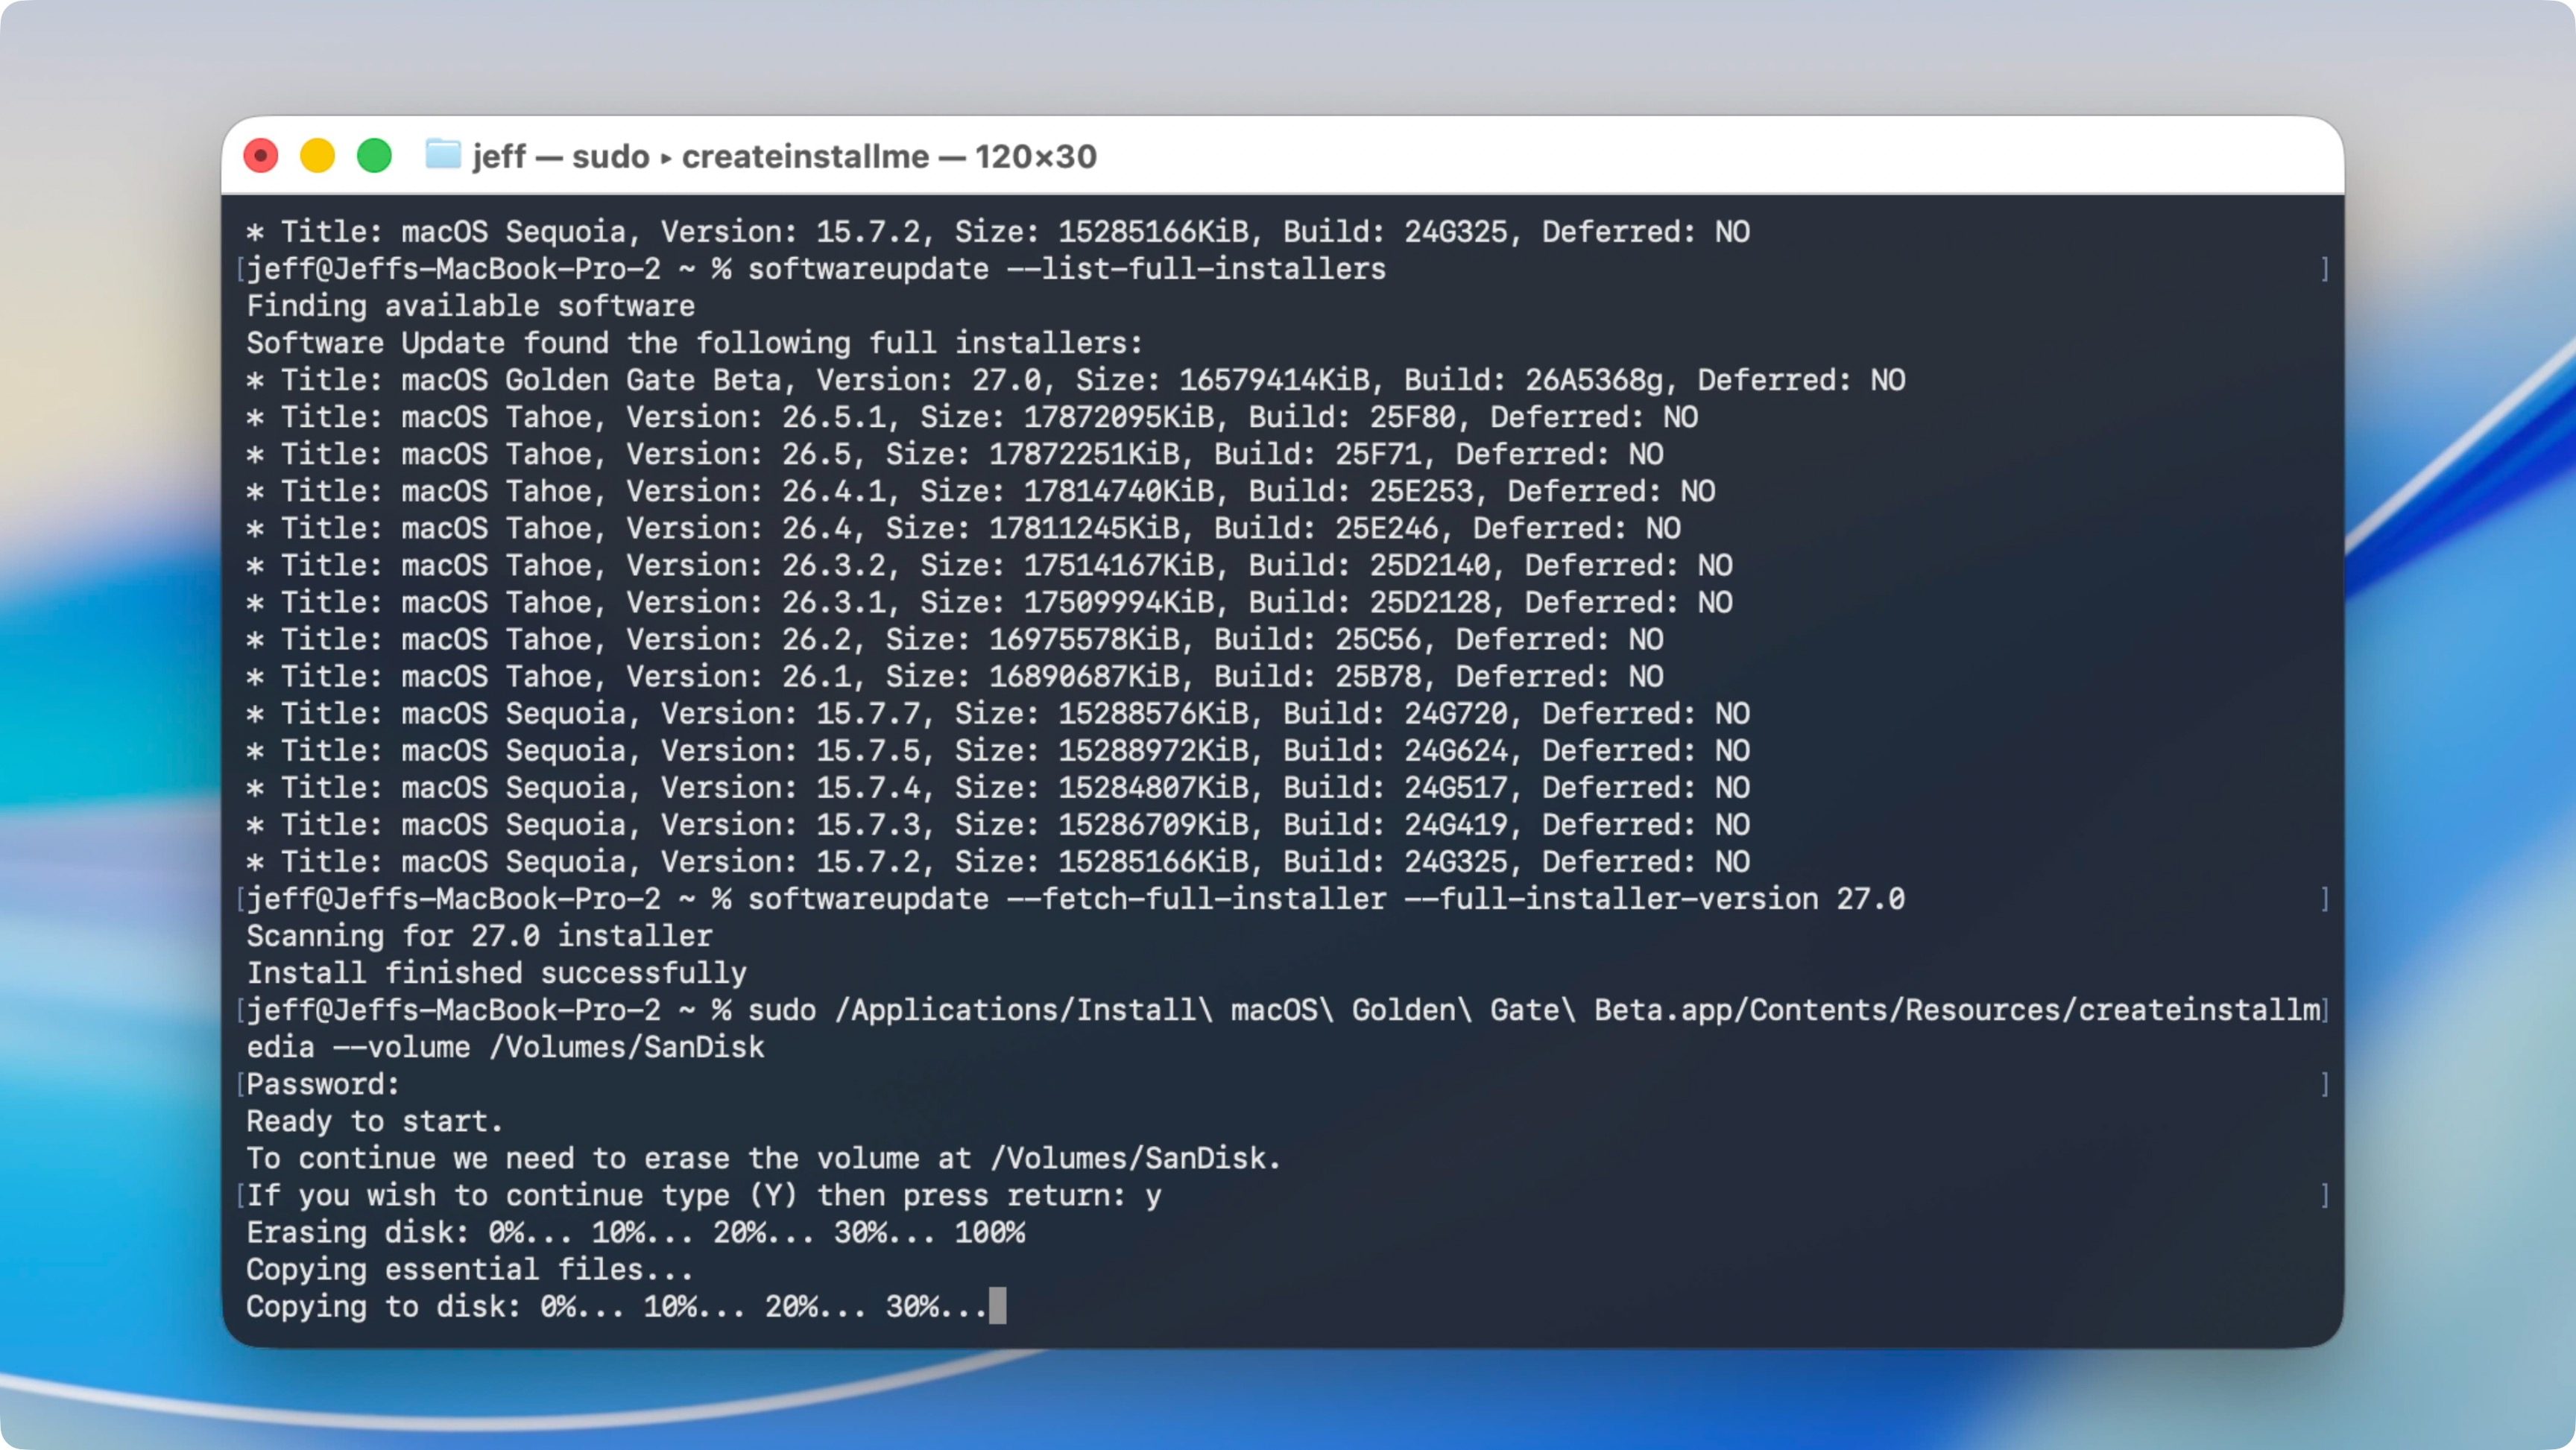
Step 9: Press Return on your Mac’s keyboard to process the Terminal command. When prompted, enter your administrator password, then press Return on your Mac’s keyboard again. When prompted, type a “y,” and press Return on your Mac’s keyboard yet again.
Note: If you haven’t already provided security permission, Terminal may ask for access to files on the removable volume (USB drive). If so, click OK to give Terminal access to the drive.
Step 10: The installation process will begin by purging the contents of the connected USB drive. Thereafter, it will copy the required installer files to it. This process takes a few minutes to complete, so please wait patiently.
After the installation process completes, you may eject the disk and keep it handy for when needed.
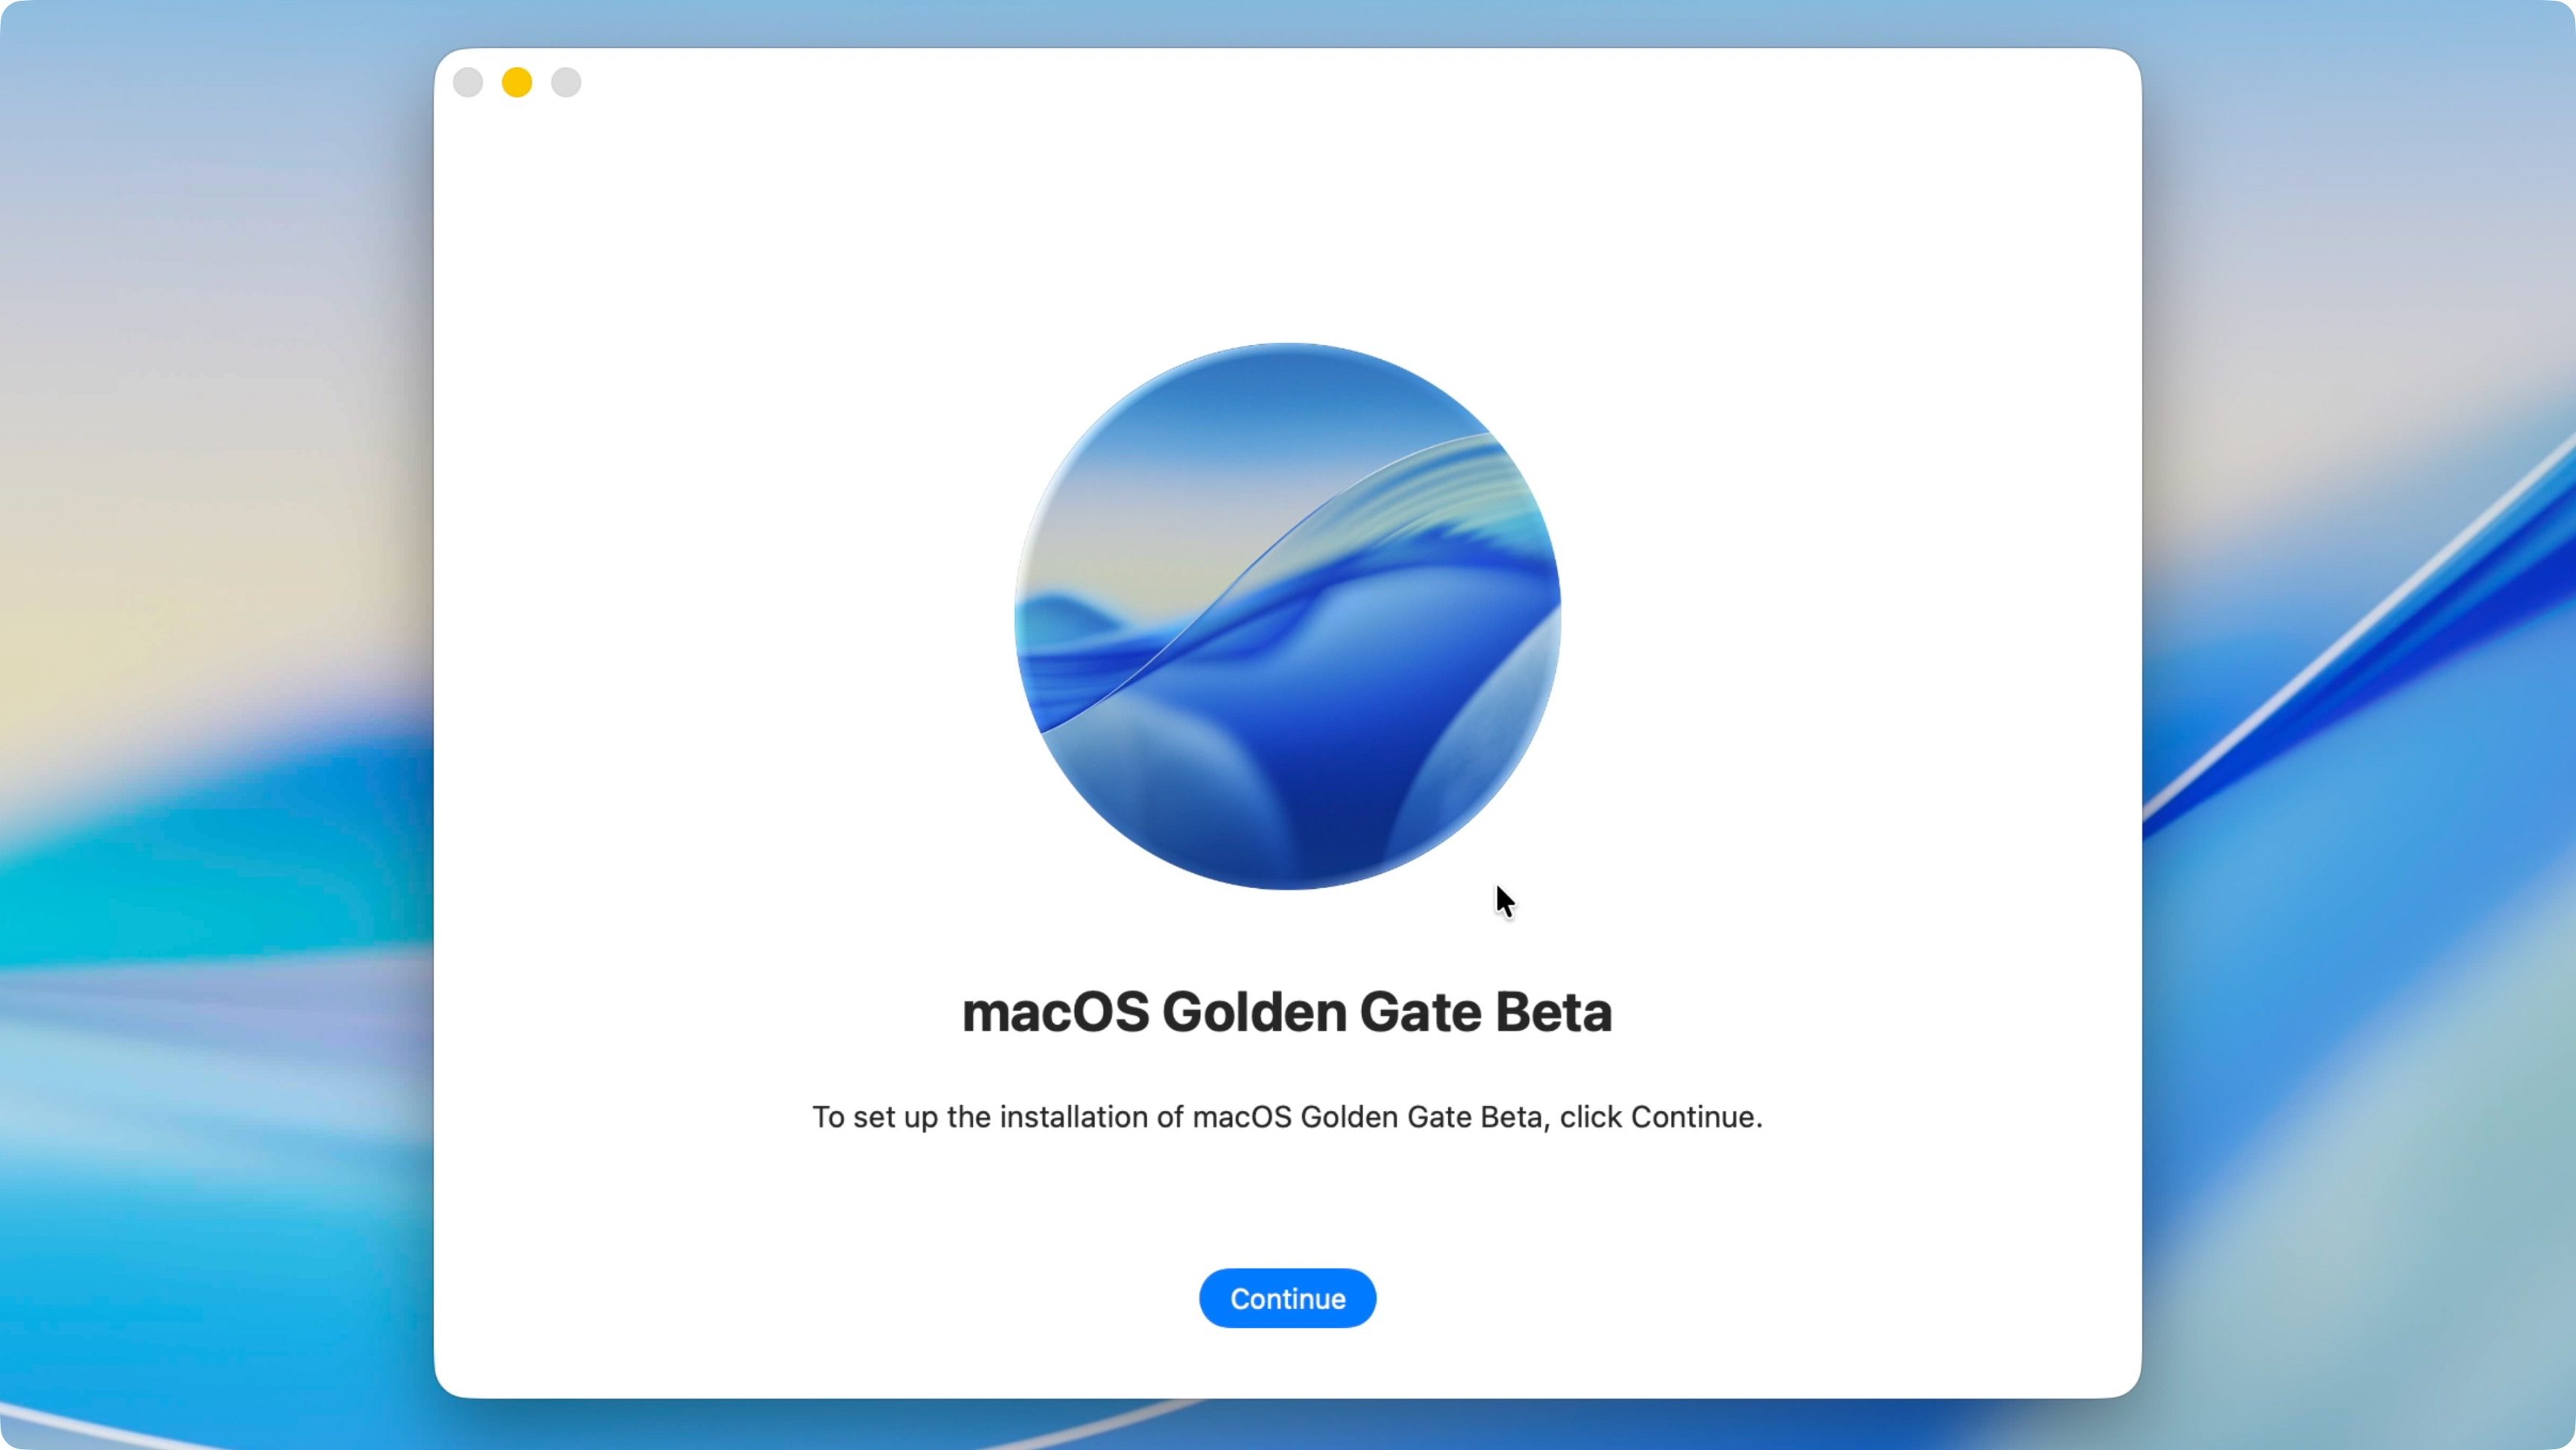
Creating a macOS Golden Gate USB installer disk can save you a lot of time if you ever plan to install macOS Golden Gate across multiple Macs. It also comes in handy when dealing with slower internet connections, so you don’t have to redownload the installer during a fresh install.
This tutorial works for the macOS Golden Gate final version and the macOS Golden Gate beta. If you’re planning on installing the beta version of Golden Gate, I’d recommend installing it on a separate APFS volume and keeping your macOS Tahoe installation. By doing this, you can evaluate the macOS Golden Gate beta without fully committing to a potentially unstable beta release on your main Mac install volume.
What are your thoughts on the macOS Golden Gate beta? Are you planning on installing the beta, or are you waiting for the final release later this year? Sound off in the comments with your thoughts.


FTC: We use income earning auto affiliate links. More.

此内容由惯性聚合(RSS阅读器)自动聚合整理,仅供阅读参考。 原文来自 — 版权归原作者所有。