






A few weeks ago, our friends at OpenAI released their
official Deno SDK on deno.land/x. While it has
been possible for some time to use the OpenAI SDK from npm using
npm: specifiers,
this SDK has a number of Deno-specific advantages:
There’s also never been a better time to jump in and start working with the OpenAI platform. At their recent Developer Day, OpenAI announced the availability of GPT-4 Turbo, the Assistants API, DALL-E 3 and more.
All of these APIs are available right now in the Deno SDK, and thus far have been a pleasure to use. In this post, we’ll explore a few key features of the OpenAI SDK and how you can put them to work in Deno.
Note that the code samples in this post assume that you have access to the latest OpenAI platform features. As of this writing (December 2023), that requires that you have paid at least $1 USD for API credits.
You can use the new SDK from deno.land/x using
HTTPS imports as below.
Make sure you export your OpenAI API key
as an environment variable called OPENAI_API_KEY first!
export OPENAI_API_KEY=sk-XXXXXXXX
import OpenAI from "https://deno.land/x/openai@v4.20.1/mod.ts";
const client = new OpenAI();
While you can include the URL to the SDK directly in your code, you might prefer
to use an import map
to manage this and other HTTPS dependencies. Add the following to deno.jsonc
in the root of your project folder:
{
  "imports": {

    "openai": "https://deno.land/x/openai@v4.20.1/mod.ts",


    "openai/": "https://deno.land/x/openai@v4.20.1/"
  }
}
Then, you’ll be able to import the dependency in multiple files without the whole versioned URL:
import OpenAI from "openai";
const client = new OpenAI();
Now that we know how to initialize the SDK, let’s jump into some examples of key functionality in OpenAI’s API.
The most recent version of the OpenAI SDK supports
text generation
using their newest large language model, GPT-4 Turbo. The code example below
demonstrates basic usage of this API in Deno. In code, the name of the most
recent GPT-4 model is gpt-4-1106-preview, but that is likely to change with
future releases - you can see a
full list of available models here.
Create a TypeScript file called main.ts and include the following code:
import OpenAI from "https://deno.land/x/openai@v4.20.1/mod.ts";

const client = new OpenAI();

const chatCompletion = await client.chat.completions.create({
  messages: [{ role: "user", content: "tell me a joke about dinosaurs" }],
  model: "gpt-4-1106-preview",
});

console.log(chatCompletion);
You can run the code example above in your terminal with the following command:
The response from the API will be a JSON data structure that looks something like this:
{
  id: "chatcmpl-8VQpWz9ZaTBC5cxxKzq3sLaAXlVDq",
  object: "chat.completion",
  created: 1702501994,
  model: "gpt-4-1106-preview",
  choices: [
    {
      index: 0,
      message: {
        role: "assistant",
        content: "Why can't you hear a pterodactyl go to the bathroom?\n\nBecause the \"P\" is silent!"
      },
      finish_reason: "stop"
    }
  ],
  usage: { prompt_tokens: 13, completion_tokens: 24, total_tokens: 37 },
  system_fingerprint: "fp_6aca3b5ce1"
}
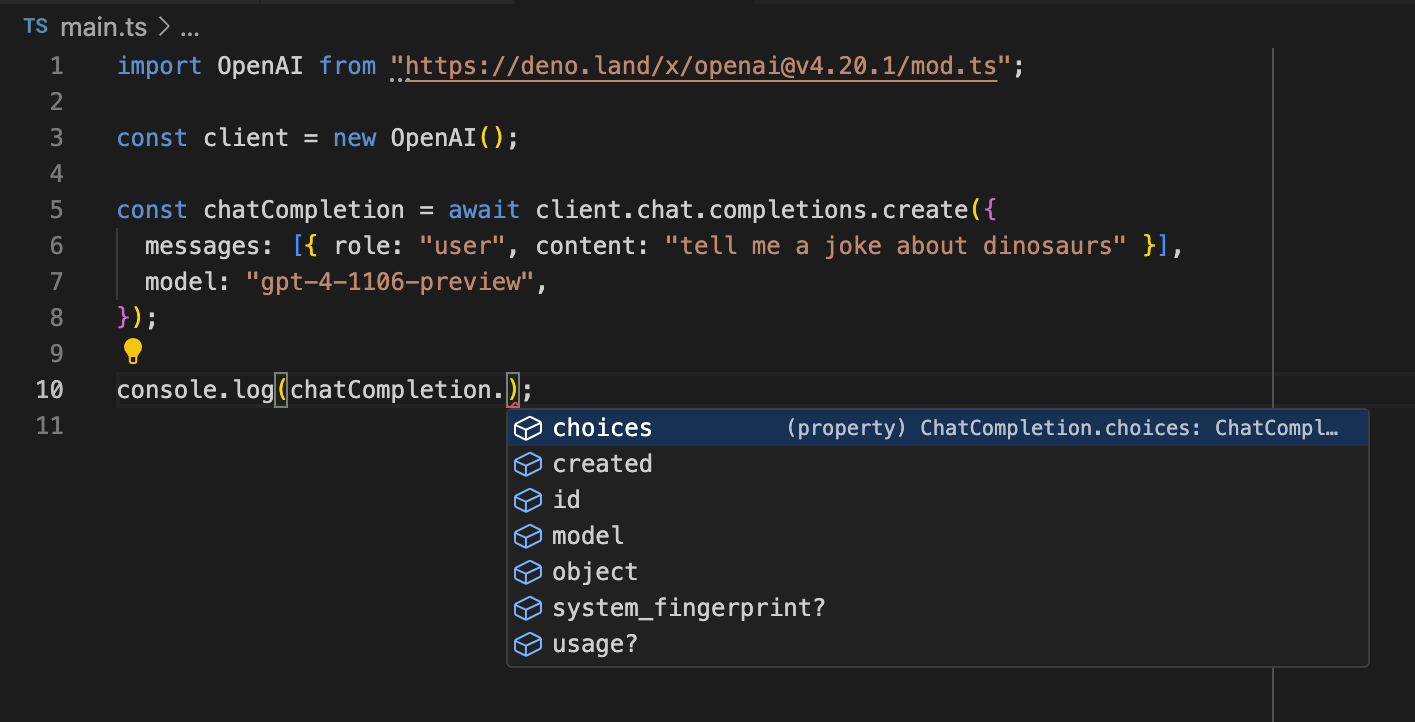
If you’re using the Deno extension for VS Code, you’ll also notice that your editor helpfully recognizes that the return value from this API call is a ChatCompletion TypeScript object, and provides intellisense for the properties of the API response.
You can find more examples of text generation in JavaScript/TypeScript in the OpenAI docs.
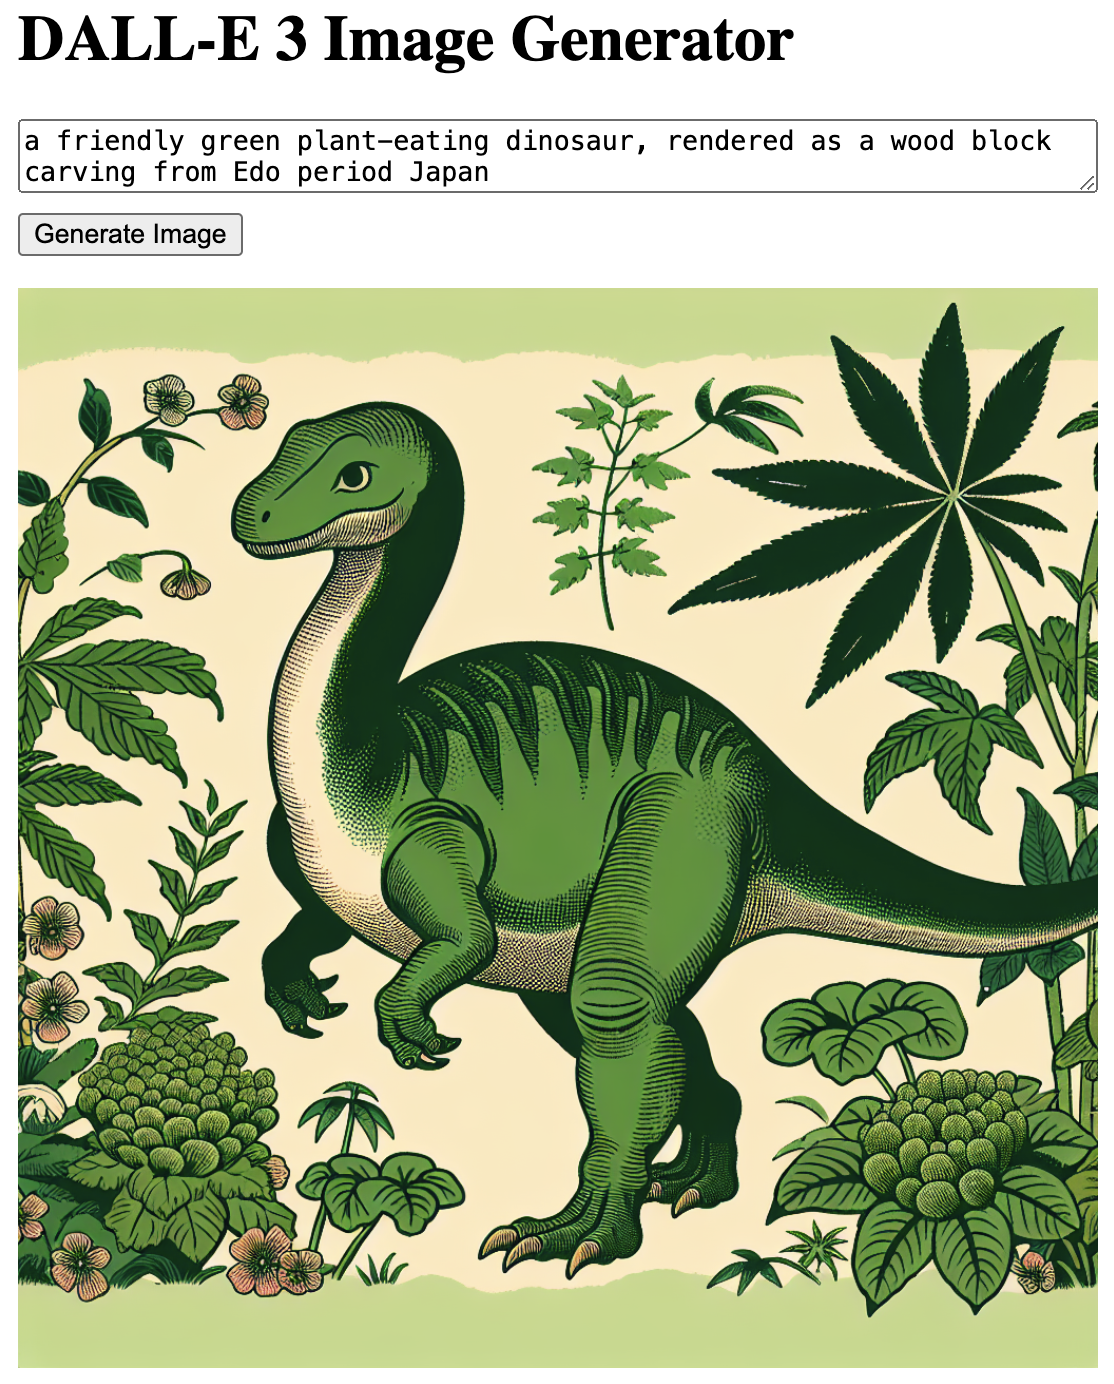
DALL-E 3, the latest image generation tool from OpenAI, is also now available via API. To try it out, let’s build a small Hono application that takes an image prompt as input, and generates an image using DALL-E 3. When finished, our application will look something like this.
To begin, create a new file called server.tsx. Note that no additional
configuration is needed to use both TypeScript and JSX in a Deno application -
we’ll be able to implement this entire application in a single file. The full
source code for the application can be found
in this gist.
At the top of server.tsx, add the necessary dependencies, and create both a
Hono application and an OpenAI client.
import OpenAI from "https://deno.land/x/openai@v4.20.1/mod.ts";
import { Hono } from "https://deno.land/x/hono@v3.11.6/mod.ts";
import {
  getCookie,
  setCookie,
} from "https://deno.land/x/hono@v3.11.6/helper.ts";
import { jsx } from "https://deno.land/x/hono@v3.11.6/jsx/index.ts";


const client = new OpenAI();
const app = new Hono();
Now, we need to create two routes. The code below will render the first of these two routes, the home page. It contains a form for the image generation work, and displays an already-generated image from a URL stored in a cookie (if one has been previously created).
app.get("/", (c) => {
  const imageUrl = getCookie(c, "dalle3_url");
  const lastPrompt = getCookie(c, "dalle3_last_prompt");

  const imgOrPrompt = imageUrl
    ? <img src={imageUrl} width="100%" />
    : <p>Enter a prompt to generate your first image!</p>;


  const script = `
    const b = document.querySelector("button");
    b.disabled = true;
    b.innerHTML = "Generating image, please wait...";
  `;

  return c.html(
    <html>
      <body style={{ maxWidth: "540px", margin: "10px auto" }}>
        <h1>DALL-E 3 Image Generator</h1>
        <form method="POST" action="/generate" onsubmit={script}>
          <textarea
            name="prompt"
            placeholder="Describe an image..."
            style={{ width: "100%", display: "block", marginBottom: "10px" }}
          >
            {lastPrompt}
          </textarea>
          <button type="submit">Generate Image</button>
        </form>
        {imgOrPrompt}
      </body>
    </html>,
  );
});
The second route handles a POST request, where we use OpenAI to generate an image based on the prompt entered in the text field. The line just below the POST handler starts up an HTTP server, and that’s everything we need to have a basic frontend for DALL-E 3!
app.post("/generate", async (c) => {
  const body = await c.req.parseBody();
  const p = String(body.prompt);

  try {
    const imagesResponse = await client.images.generate({
      model: "dall-e-3",
      prompt: p,
      n: 1,
      size: "1024x1024",
    });

    setCookie(c, "dalle3_url", imagesResponse?.data[0]?.url || "");
    setCookie(c, "dalle3_last_prompt", p);
    return c.redirect("/");
  } catch (e) {
    console.error(e);
    return c.text("Error during image creation: " + e.message);
  }
});

Deno.serve(app.fetch);
Once again, you can find the full source for the example here. To run this application locally, use:
deno run -A --watch server.tsx
The --watch flag is optional, but handy if you would like the server to
automatically restart whenever you make changes to your code.
Our final example today (though by no means the final example of what you can do using the OpenAI API) shows how to use GPT-4 with Vision to analyze the contents of an image. From Deno or the REST API, you will actually use the same resource we used earlier for text completions, but with a different model and slightly different parameters.
Let’s see what GPT-4 makes of this image:

Create a new file called vision.ts and include the following code:
import OpenAI from "https://deno.land/x/openai@v4.20.1/mod.ts";

const client = new OpenAI();

const saxroll =
  "https://i1.sndcdn.com/artworks-000025837950-q3jvhm-t240x240.jpg";

const chatCompletion = await client.chat.completions.create({
  model: "gpt-4-vision-preview",
  messages: [
    {
      role: "user",
      content: [
        { type: "text", text: "What’s in this image?" },
        { type: "image_url", image_url: { "url": saxroll } },
      ],
    },
  ],
});

console.log(chatCompletion);
The code above passes an image URL to be analyzed along with the request. If convenient, you could also pass a base64 encoded string containing the image along with the request instead.
For the model parameter, it now uses gpt-4-vision-preview instead of the
GPT-4 Turbo model we used before (again, a full list of available models can be
found here).
When you run your script with:
You should see output that looks something like this:
{
  id: "chatcmpl-8VnP55lzLNB5hdDwhxqvRcDaYrSg0",
  object: "chat.completion",
  created: 1702588767,
  model: "gpt-4-1106-vision-preview",
  usage: { prompt_tokens: 268, completion_tokens: 16, total_tokens: 284 },
  choices: [
    {
      message: {
        role: "assistant",
        content: "The image shows a person playing the saxophone. The person is wearing sunglasses,"
      },
      finish_details: { type: "max_tokens" },
      index: 0
    }
  ]
}
GPT-4 succinctly notes that there is a person with sunglasses playing the saxophone. I don’t believe the model is capable of extracting the cultural meaning behind the iconic saxroll, but I’m sure the OpenAI team has that work prioritized in an upcoming sprint.
These are just a handful of examples of what’s possible using the new OpenAI Deno SDK. In the OpenAI docs, you can find other APIs like the new Assistants API or text to speech, as well as advanced features like functions which let you invoke custom code when a model detects it is needed.
Let us know what you build with the new Deno SDK for OpenAI!
此内容由惯性聚合(RSS阅读器)自动聚合整理,仅供阅读参考。 原文来自 — 版权归原作者所有。