





This series of blog posts will guide you through building a simple browser-based dinosaur runner game using Deno.
- Setup a basic project
- Game loop, canvas, and controls
- Obstacles and collision detection
- Databases and global leaderboards
- Player profiles and customization
- Observability, metrics, and alerting
In Stage 4, we wired Oak, PostgreSQL, and a leaderboard route so every run could
be recorded. The UI was still anonymous though: everyone shared the same dino,
the same desert background, and you had to hard refresh the page each time you
wanted to switch difficulty. In Stage 5, we’ll keep that leaderboard code, but
layer on player identity and customization so the experience matches what ships
in the
game-tutorial-stage-4
repository.
By the end of this stage you will have:
players, player_settings, and high_scores tables plus the
/api/customization endpoints that persist those choices in PostgreSQL.Start by extending the markup in
public/index.html.
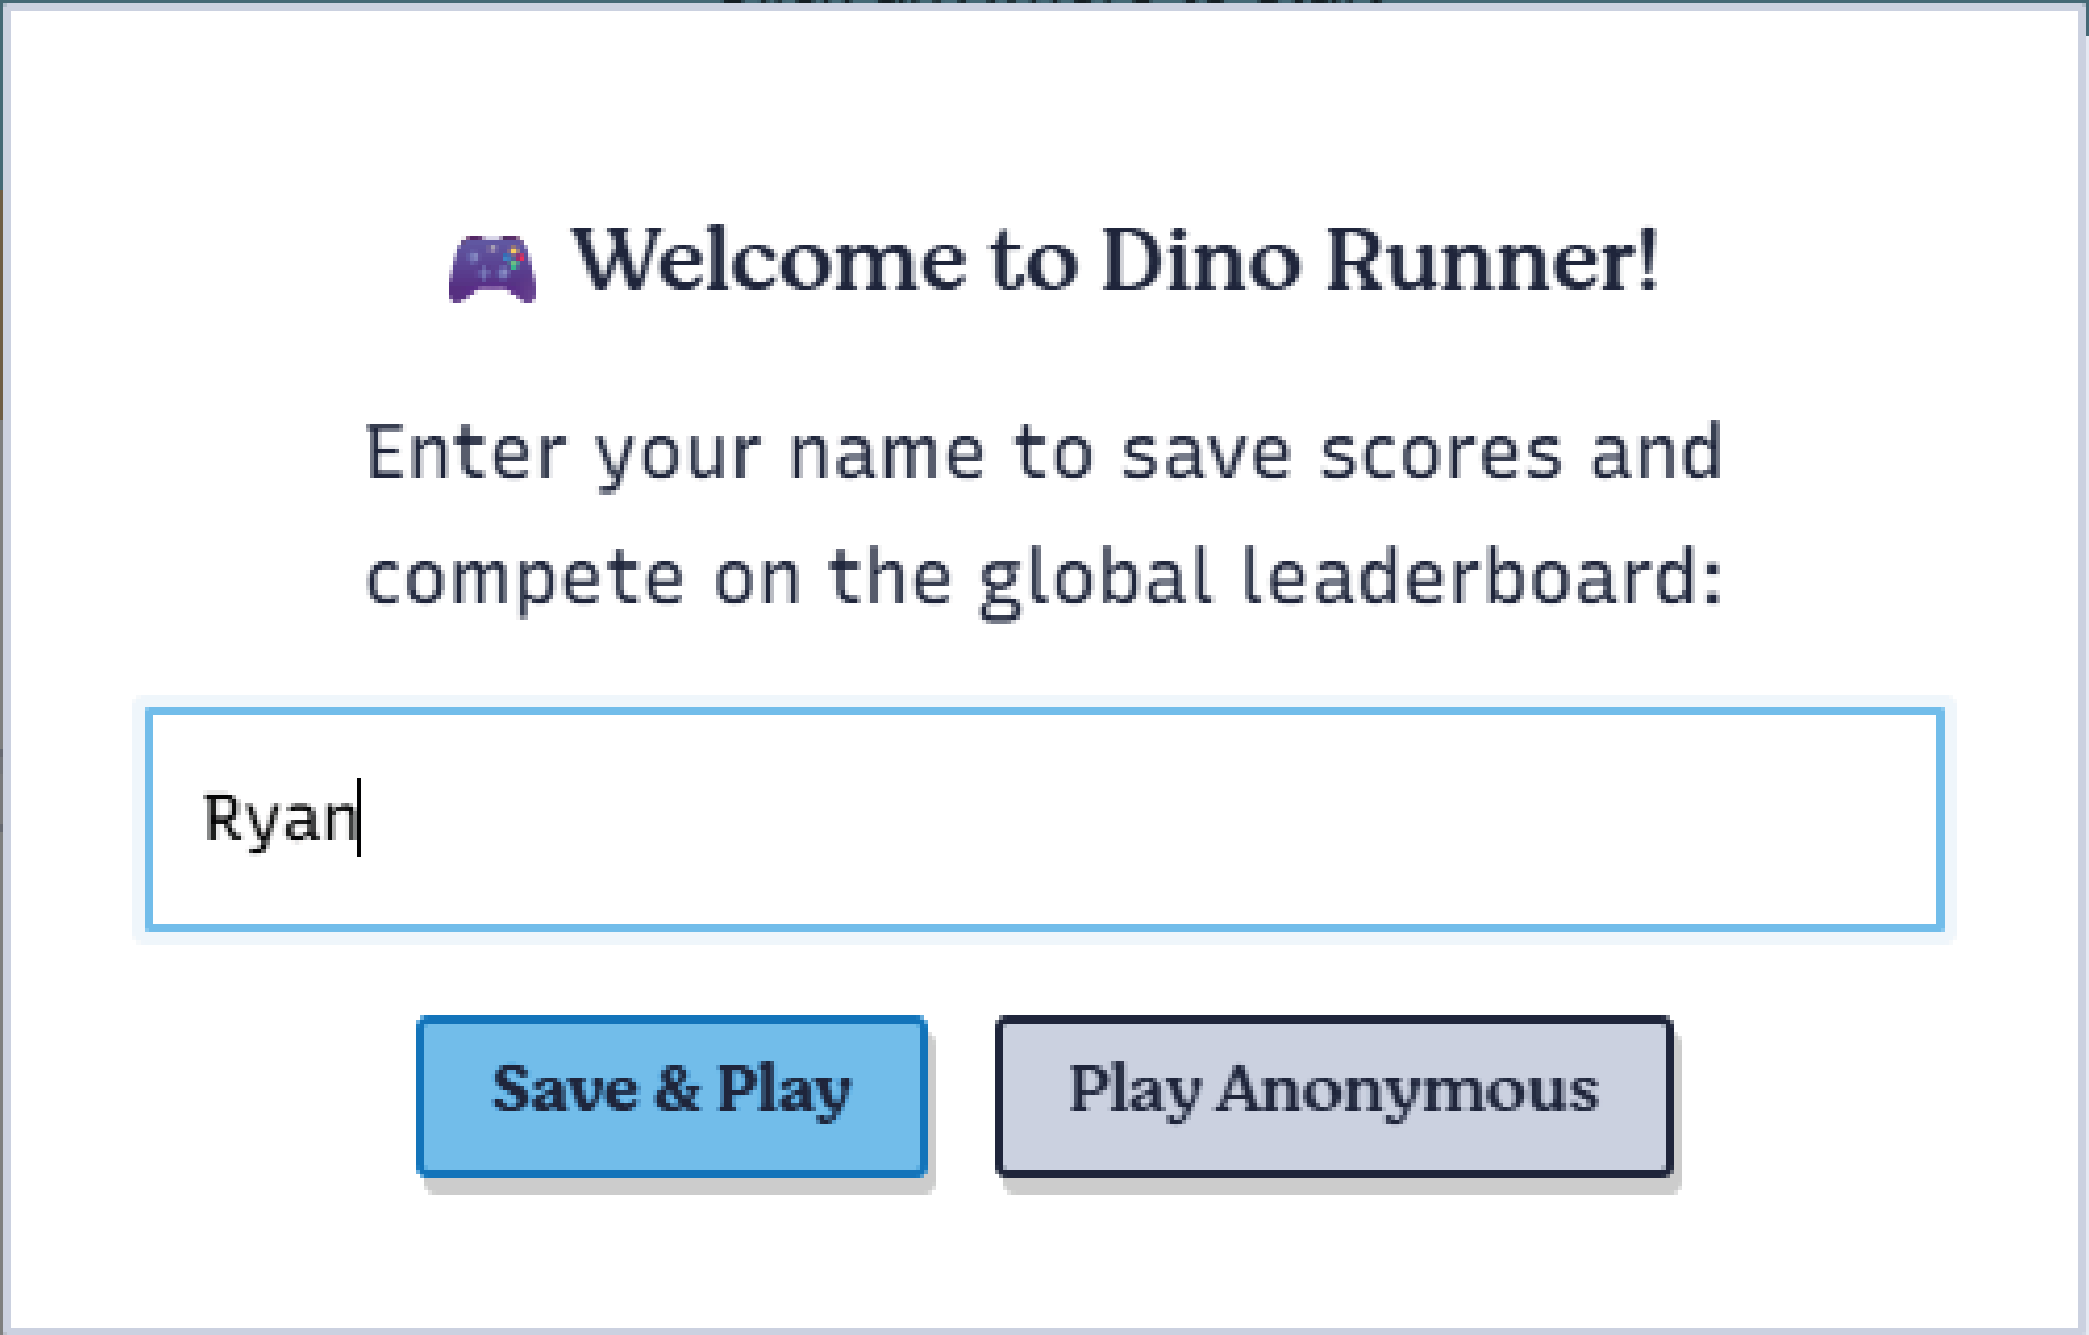
We add three things near the game canvas:
public/index.html
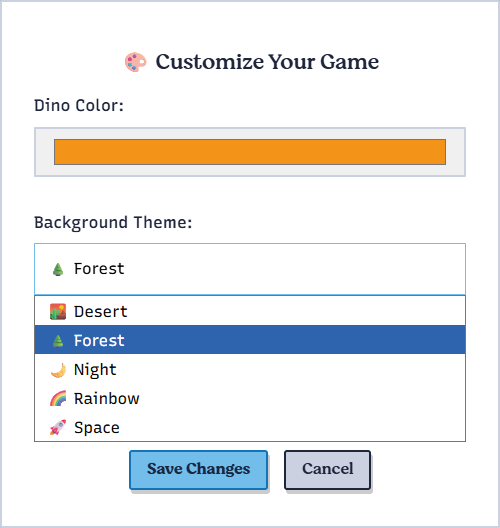
<section class="container canvas-container"> <canvas id="gameCanvas" width="800" height="220"></canvas> <div class="game-ui"> <div class="score">Score: <span id="score">0</span></div> <div class="high-score">High Score: <span id="highScore">0</span></div> <div class="btn btn-primary" id="gameStatus">Click to Start!</div> </div> <button onclick="openCustomization()" class="btn btn-primary btn-block"> Customize Game </button> </section> <div class="modal" id="playerModal"> <div class="modal-content"> <h3>🎮 Welcome to Dino Runner!</h3> <p>Enter your name to save scores and compete on the global leaderboard:</p> <input type="text" id="playerNameInput" placeholder="Your name" maxlength="20" /> <div class="modal-buttons"> <button onclick="savePlayerName()" class="btn btn-primary"> Save & Play </button> <button onclick='closeModal("playerModal")' class="btn btn-secondary"> Play Anonymous </button> </div> </div> </div> <div class="modal" id="customizationModal"> <div class="modal-content"> <h3>🎨 Customize Your Game</h3> <div class="customization-options"> <div class="option-group"> <label for="dinoColorPicker">Dino Color:</label> <input type="color" id="dinoColorPicker" value="#4CAF50" /> </div> <div class="option-group"> <label for="backgroundTheme">Background Theme:</label> <select id="backgroundTheme"> <option value="desert">🏜️ Desert</option> <option value="forest">🌲 Forest</option> <option value="night">🌙 Night</option> <option value="rainbow">🌈 Rainbow</option> <option value="space">🚀 Space</option> </select> </div> <div class="option-group"> <label for="difficultyPreference">Difficulty:</label> <select id="difficultyPreference"> <option value="easy">😊 Easy</option> <option value="normal">😐 Normal</option> <option value="hard">😈 Hard</option> </select> </div> </div> <div class="modal-buttons"> <button onclick="saveCustomization()" class="btn btn-primary"> Save Changes </button> <button onclick='closeModal("customizationModal")' class="btn btn-secondary" > Cancel </button> </div> </div> </div>
The modal triggers call helper functions we’ll add in game.js so there’s no
framework dependency—plain DOM APIs keep things deploy-friendly.
Layer in the modal utility classes inside
public/css/styles.css. They reuse the existing btn
palette from earlier stages, so everything feels cohesive.
public/css/styles.css
.modal {
  display: none;
  position: fixed;
  top: 0;
  left: 0;
  width: 100%;
  height: 100%;
  background: rgba(0, 0, 0, 0.5);
  z-index: 1000;
  animation: fadeIn 0.3s ease;
}

.modal.show {
  display: flex;
  justify-content: center;
  align-items: center;
}

.modal-content {
  background: white;
  border: 2px solid var(--secondary);
  padding: 2rem;
  max-width: 500px;
  width: 90%;
  box-shadow: 4px 8px 0px 0px var(--tertiary);
  animation: slideIn 0.3s ease;
}

.customization-options {
  margin-bottom: 1.5rem;
}

.option-group label {
  display: block;
  margin-bottom: 0.5rem;
  font-weight: 500;
}

.option-group select,
.option-group input[type="color"] {
  width: 100%;
  padding: 0.75rem;
  border: 1px solid var(--secondary);
}
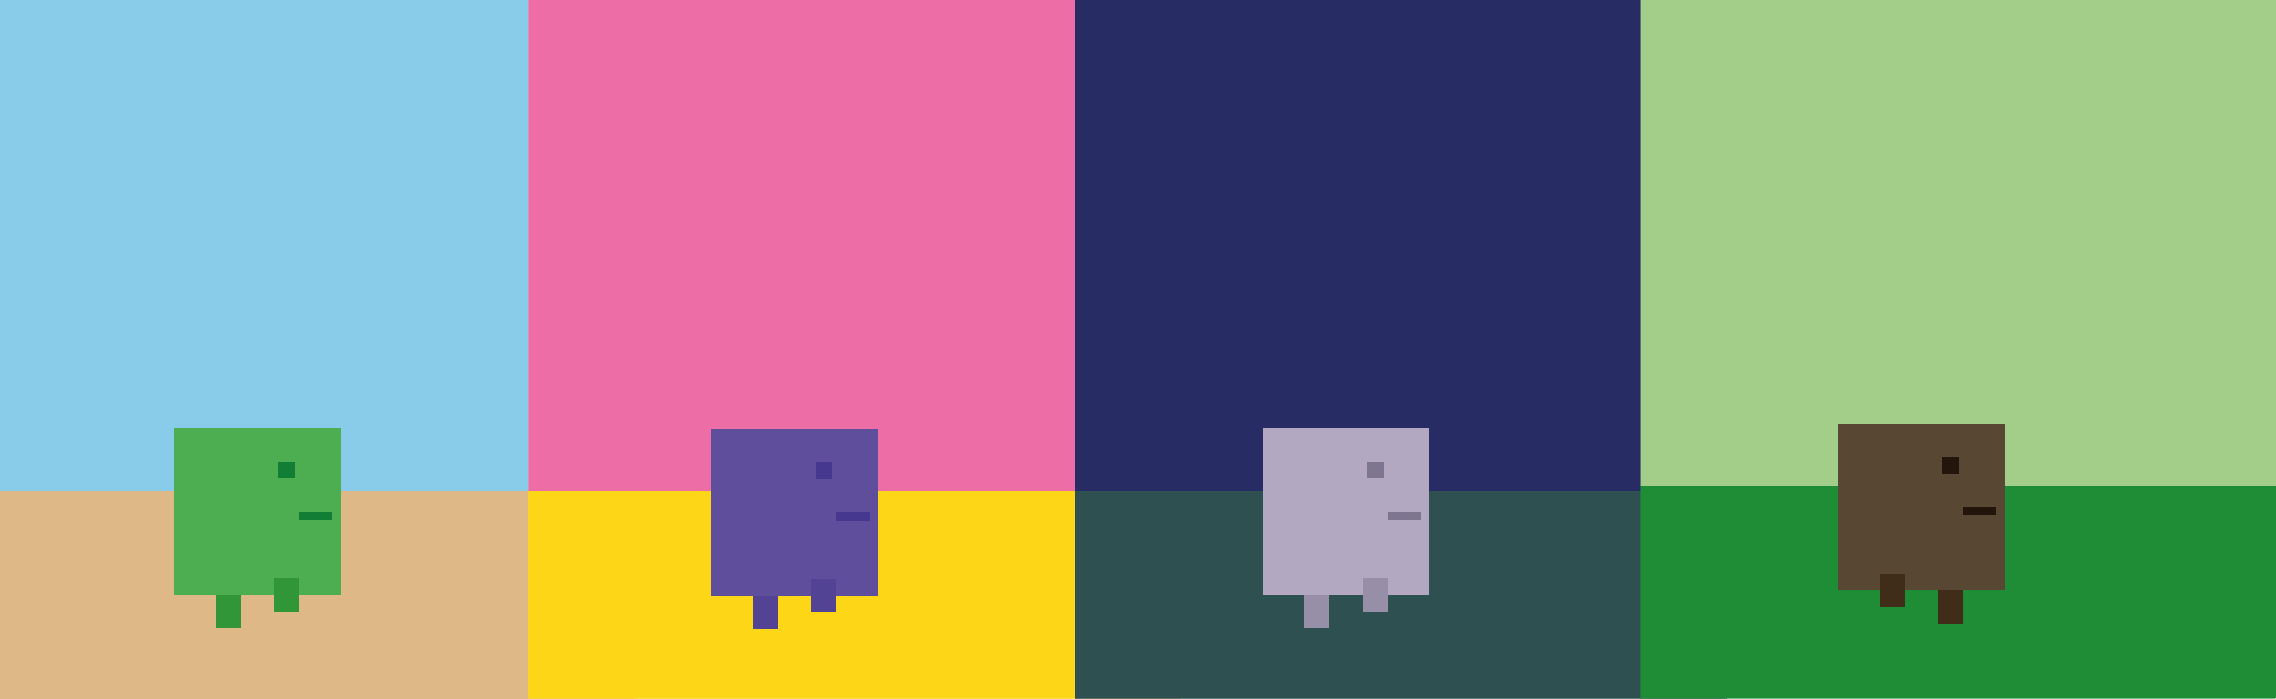
Feel free to tweak the palette! The logic we’ll add next pulls the chosen colors right into the canvas background and dino sprite.
game.js to orchestrate settingsWith the UI in place we can extend the DinoGame class inside
public/js/game.js,
the key additions are:
playerName, settings, and theme definitions.showPlayerNamePrompt, loadPlayerSettings,
applyCustomizations, savePlayerSettings).openModal, closeModal, saveCustomization, etc.) so the
HTML buttons can talk to the class without bundlers.public/js/game.js
class DinoGame {
  constructor() {
    this.canvas = document.getElementById("gameCanvas");
    this.ctx = this.canvas.getContext("2d");
    this.scoreElement = document.getElementById("score");
    this.statusElement = document.getElementById("gameStatus");
    this.highScoreElement = document.getElementById("highScore");

    this.playerName = localStorage.getItem("playerName") || null;
    this.settings = {
      dinoColor: "#4CAF50",
      backgroundTheme: "desert",
      soundEnabled: true,
      difficultyPreference: "normal",
    };

    this.themes = {
      desert: { sky: "#87CEEB", ground: "#DEB887" },
      forest: { sky: "#98FB98", ground: "#228B22" },
      night: { sky: "#191970", ground: "#2F4F4F" },
      rainbow: { sky: "#FF69B4", ground: "#FFD700" },
      space: { sky: "#000000", ground: "#696969" },
    };

    this.init();
  }
showPlayerNamePrompt() looks for saved state; if none is found it opens the
modal and focuses the input.
public/js/game.js
showPlayerNamePrompt() {
  if (!this.playerName || this.playerName === "" || this.playerName === "null") {
    setTimeout(() => {
      const modal = document.getElementById("playerModal");
      if (modal) {
        window.openModal("playerModal");
        const input = document.getElementById("playerNameInput");
        if (input) {
          input.focus();
          input.addEventListener("keypress", this.handlePlayerNameEnter);
        }
      }
    }, 1000);
  }
}
Once a player name exists we look up settings on the server, fall back to
localStorage, and immediately apply the palette + difficulty multipliers.
public/js/game.js
async loadPlayerSettings() {
  try {
    if (this.playerName) {
      const response = await fetch(`/api/customization/${this.playerName}`);
      if (response.ok) {
        const data = await response.json();
        this.settings = data.settings;
        this.applyCustomizations();
      }
    } else {
      const savedSettings = localStorage.getItem("gameSettings");
      if (savedSettings) {
        this.settings = { ...this.settings, ...JSON.parse(savedSettings) };
        this.applyCustomizations();
      }
    }
  } catch (error) {
    console.log("Using default settings:", error);
  }
}

applyCustomizations() {
  const theme = this.themes[this.settings.backgroundTheme] || this.themes.desert;
  this.canvas.style.background = `linear-gradient(to bottom, ${theme.sky} 0%, ${theme.sky} 75%, ${theme.ground} 75%, ${theme.ground} 100%)`;

  const multipliers = { easy: 0.8, normal: 1.0, hard: 1.3 };
  this.initialGameSpeed = 3 * (multipliers[this.settings.difficultyPreference] || 1.0);
  this.gameSpeed = this.initialGameSpeed;

  console.log(`🎨 Applied theme: ${this.settings.backgroundTheme}, difficulty: ${this.settings.difficultyPreference}`);
}

async savePlayerSettings() {
  if (this.playerName) {
    await fetch("/api/customization", {
      method: "POST",
      headers: { "Content-Type": "application/json" },
      body: JSON.stringify({ playerName: this.playerName, ...this.settings }),
    });
  } else {
    localStorage.setItem("gameSettings", JSON.stringify(this.settings));
  }
}
Instead of wiring everything through class instances, game.js exposes a few
functions on window. They open/close modals, persist names, and populate the
customization controls.
public/js/game.js
window.openModal = function (modalId) {
  const modal = document.getElementById(modalId);
  if (modal) {
    modal.classList.add("show");
    modal.style.display = "flex";
  }
};

window.saveCustomization = function () {
  const colorPicker = document.getElementById("dinoColorPicker");
  const themeSelect = document.getElementById("backgroundTheme");
  const difficultySelect = document.getElementById("difficultyPreference");

  if (window.dinoGame) {
    window.dinoGame.settings = {
      ...window.dinoGame.settings,
      dinoColor: colorPicker?.value || window.dinoGame.settings.dinoColor,
      backgroundTheme: themeSelect?.value ||
        window.dinoGame.settings.backgroundTheme,
      difficultyPreference: difficultySelect?.value ||
        window.dinoGame.settings.difficultyPreference,
    };

    window.dinoGame.applyCustomizations();
    window.dinoGame.savePlayerSettings();
  }

  window.closeModal("customizationModal");
};
Hook everything up inside window.addEventListener("load", ...) so the health
check runs, the DinoGame instance is created, and your modals are ready the
moment the DOM finishes loading.
Stage 4 already introduced a database connection pool, migrations runner, and a
high_scores table. To store customization data we add players and
player_settings tables to
src/database/schema.sql:
CREATE TABLE IF NOT EXISTS players (
  id SERIAL PRIMARY KEY,
  username VARCHAR(50) UNIQUE NOT NULL,
  email VARCHAR(100) UNIQUE,
  avatar_url TEXT,
  created_at TIMESTAMP DEFAULT NOW(),
  updated_at TIMESTAMP DEFAULT NOW()
);

CREATE TABLE IF NOT EXISTS player_settings (
  id SERIAL PRIMARY KEY,
  player_id INTEGER REFERENCES players(id) ON DELETE CASCADE,
  dino_color VARCHAR(7) DEFAULT '#4CAF50',
  background_theme VARCHAR(20) DEFAULT 'desert',
  sound_enabled BOOLEAN DEFAULT true,
  difficulty_preference VARCHAR(20) DEFAULT 'normal',
  updated_at TIMESTAMP DEFAULT NOW(),
  UNIQUE(player_id)
);
high_scores still stores anonymous runs (player_name), but if someone has a
registered player_id we can connect their customization + leaderboard data in
one query.
/api/customization routesAll API logic lives in
src/routes/customization.routes.ts. We
reuse the ctx.state.db pool set by middleware, so every handler can grab a
client from the pool, execute queries, and release connections.
src/routes/customization.routes.ts
import { Router } from "@oak/oak";

const router = new Router();

router.get("/api/customization/:playerName", async (ctx) => {
  const pool = ctx.state.db;
  const playerName = ctx.params.playerName;
  let settings = {
    dinoColor: "#4CAF50",
    backgroundTheme: "desert",
    soundEnabled: true,
    difficultyPreference: "normal",
  };

  const client = await pool.connect();
  try {
    const playerResult = await client.query(
      `SELECT id FROM players WHERE username = $1`,
      [playerName],
    );

    if (playerResult.rows.length > 0) {
      const playerId = Number(playerResult.rows[0].id);
      const settingsResult = await client.query(
        `SELECT dino_color, background_theme, sound_enabled, difficulty_preference
         FROM player_settings WHERE player_id = $1`,
        [playerId],
      );

      if (settingsResult.rows.length > 0) {
        const row = settingsResult.rows[0];
        settings = {
          dinoColor: row.dino_color,
          backgroundTheme: row.background_theme,
          soundEnabled: row.sound_enabled,
          difficultyPreference: row.difficulty_preference,
        };
      }
    }
  } finally {
    client.release();
  }

  ctx.response.body = { success: true, playerName, settings };
});

router.post("/api/customization", async (ctx) => {
  const pool = ctx.state.db;
  const body = await ctx.request.body.json();
  const {
    playerName,
    dinoColor,
    backgroundTheme,
    soundEnabled,
    difficultyPreference,
  } = body;

  const client = await pool.connect();
  try {
    const playerResult = await client.query(
      `INSERT INTO players (username) VALUES ($1)
       ON CONFLICT (username) DO UPDATE SET updated_at = NOW()
       RETURNING id`,
      [playerName],
    );

    const playerId = Number(playerResult.rows[0].id);

    await client.query(
      `INSERT INTO player_settings (player_id, dino_color, background_theme, sound_enabled, difficulty_preference)
       VALUES ($1, $2, $3, $4, $5)
       ON CONFLICT (player_id) DO UPDATE SET
         dino_color = $2,
         background_theme = $3,
         sound_enabled = $4,
         difficulty_preference = $5,
         updated_at = NOW()`,
      [
        playerId,
        dinoColor,
        backgroundTheme,
        soundEnabled,
        difficultyPreference,
      ],
    );
  } finally {
    client.release();
  }

  ctx.response.body = {
    success: true,
    message: "Customization settings saved successfully",
  };
});

export { router as customizationRoutes };
There’s also a simple /api/customization/options handler that returns
available themes, colors, and difficulty presets for future UI work.
The rest of the backend is Oak boilerplate. src/middleware/database.ts attaches the pool to every request. src/main.ts initializes the schema, registers middleware, and mounts the routers before falling back to the static file server:
src/main.ts
import { Application } from "@oak/oak/application";
import { apiRouter } from "./routes/api.routes.ts";
import { leaderboardRoutes } from "./routes/leaderboard.routes.ts";
import { customizationRoutes } from "./routes/customization.routes.ts";
import { databaseMiddleware } from "./middleware/database.ts";
import { initializeDatabase } from "./database/migrations.ts";

await initializeDatabase();

const app = new Application();
app.use(databaseMiddleware);

app.use(async (context, next) => {
  try {
    if (context.request.url.pathname === "/leaderboard") {
      await context.send({
        root: `${Deno.cwd()}/public`,
        path: "leaderboard.html",
      });
      return;
    }

    await context.send({ root: `${Deno.cwd()}/public`, index: "index.html" });
  } catch {
    await next();
  }
});

app.use(apiRouter.routes());
app.use(leaderboardRoutes.routes());
app.use(customizationRoutes.routes());

app.listen({ port: PORT });
With those pieces in place the leaderboard API, customization API, and static
assets all share a single Deploy project (or run locally via deno task dev).
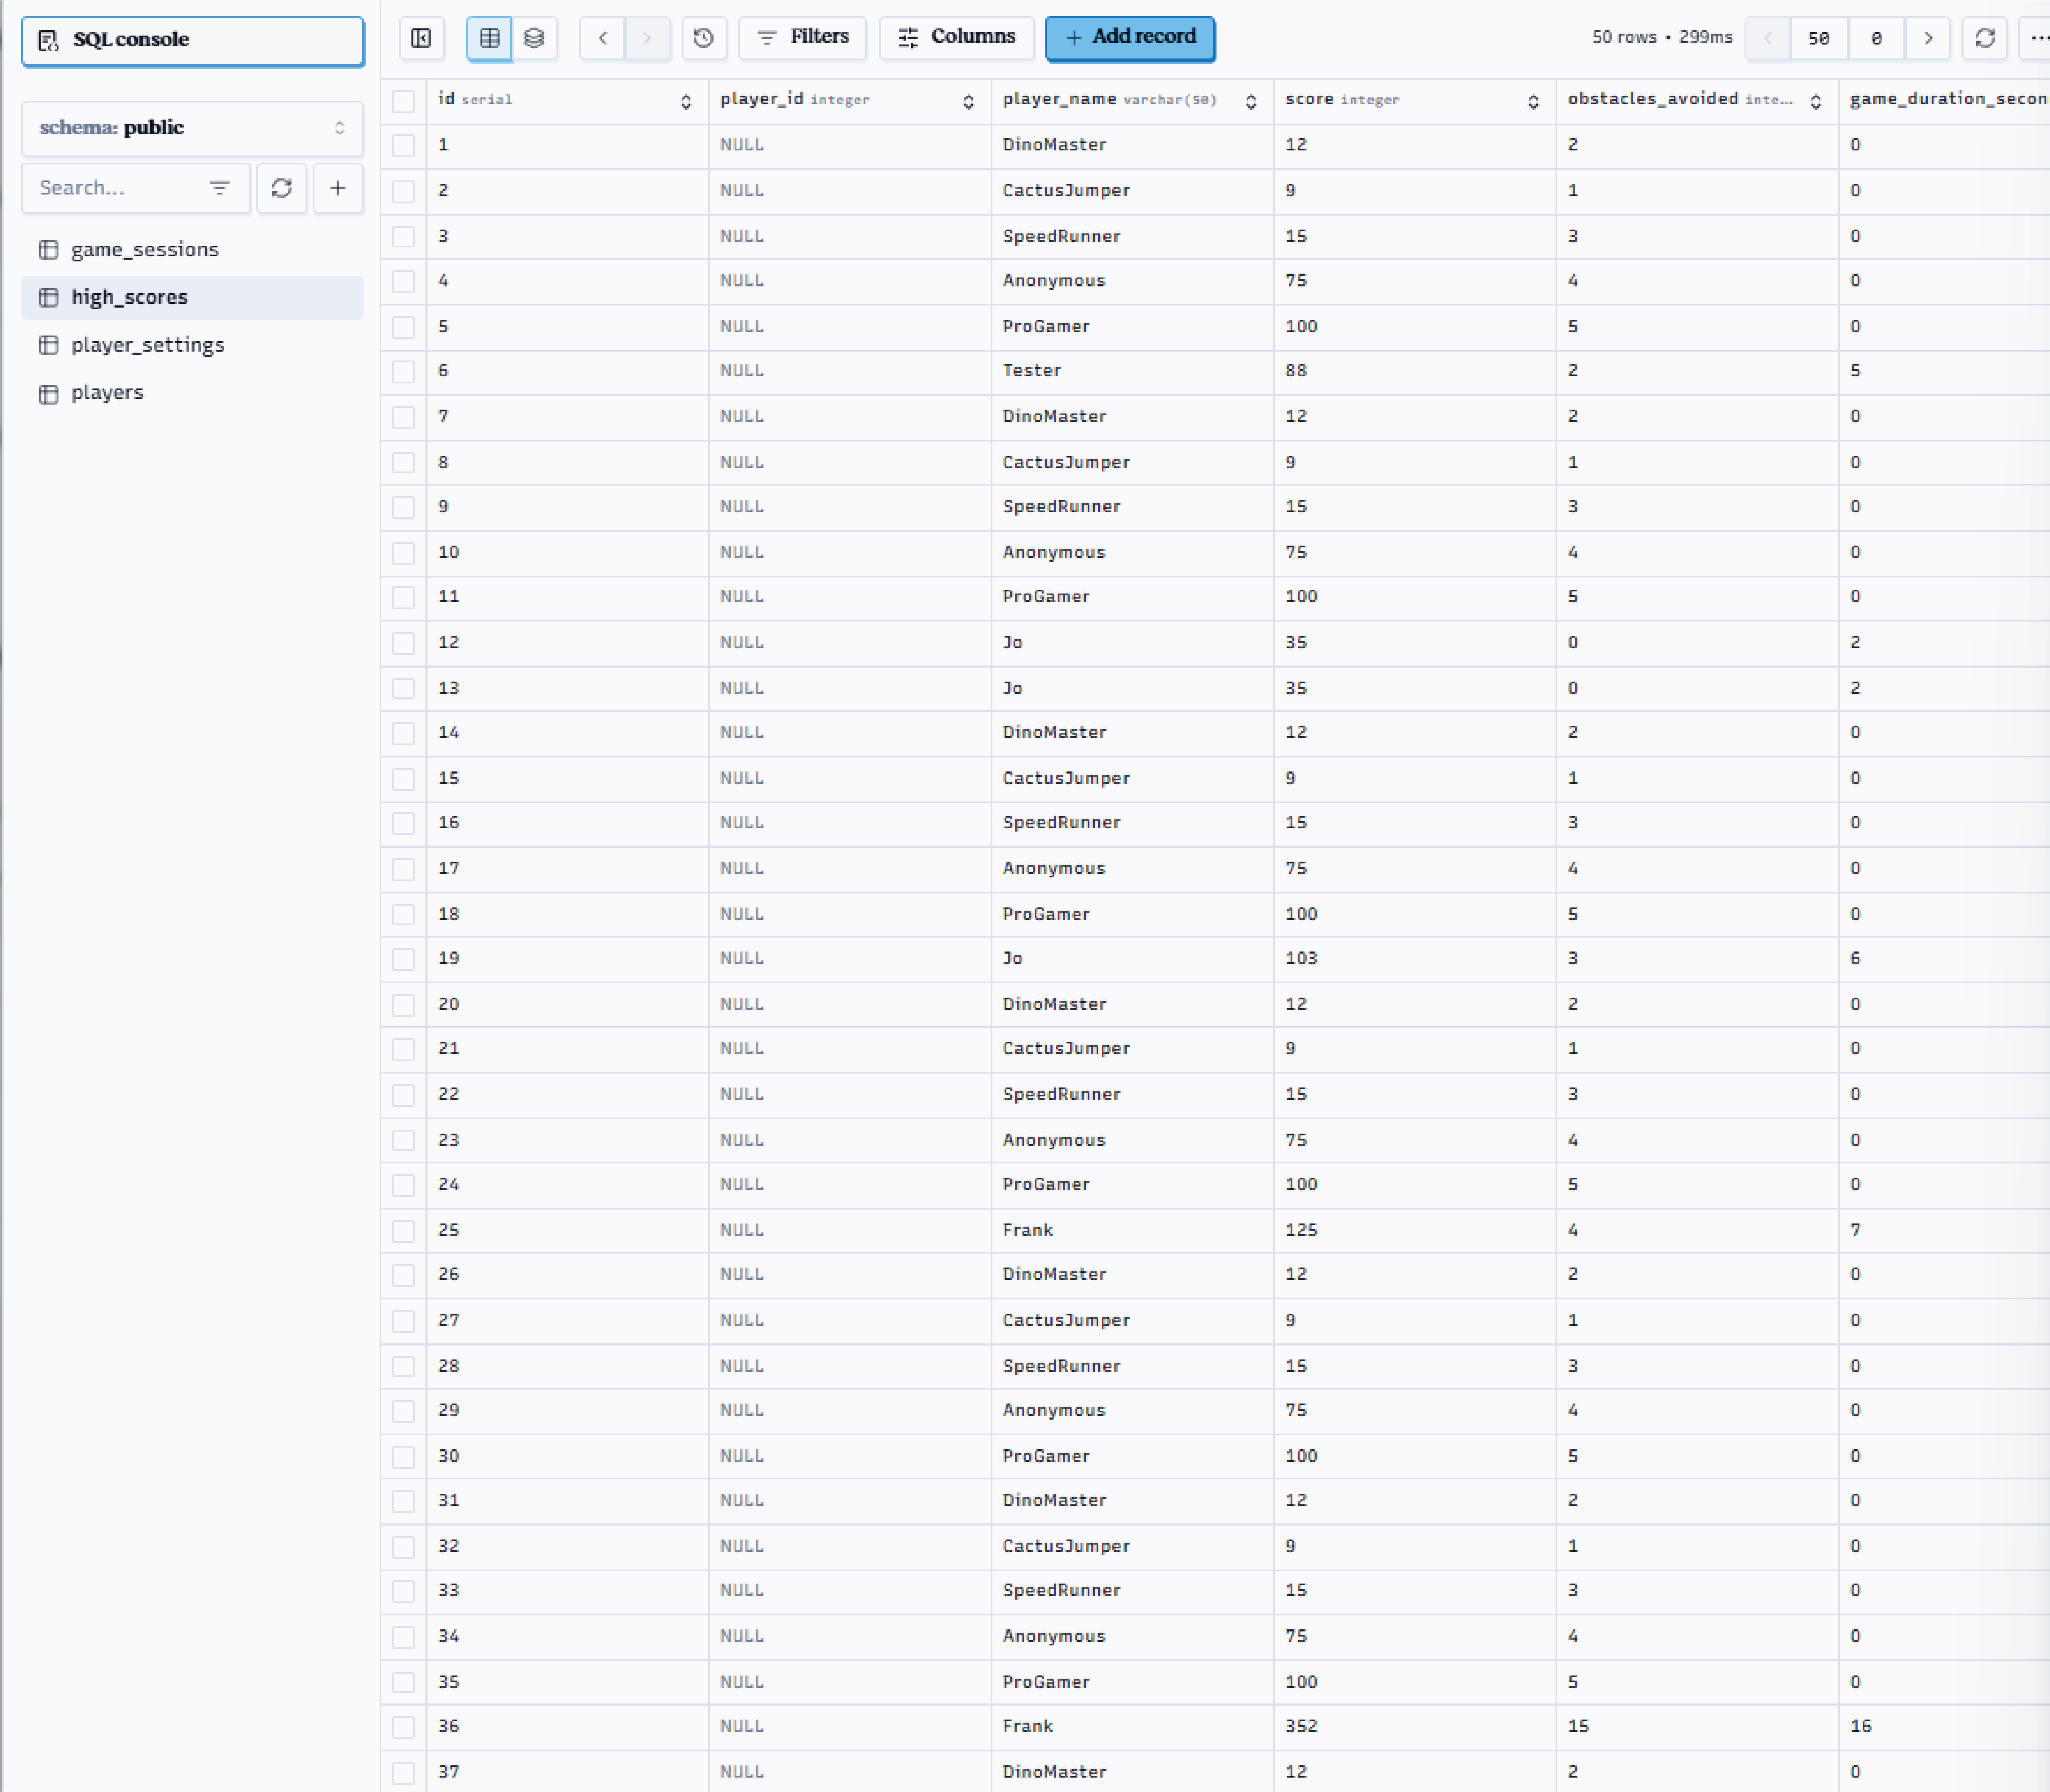
You can view and edit your PostgreSQL databases directly from the Deno Deploy
dashboard. This is especially useful for inspecting the players,
player_settings, and high_scores tables as you test your game. To access the
database:
At this point you should have a fully functional game with player identities, customizable themes, and persistent preferences. To validate everything is wired up correctly:
deno task dev (or
deno run --allow-net --allow-read --allow-env --env-file src/main.ts) inside
game-tutorial-stage-4./api/scores handler records the attempt, while POST
/api/customization persists your palette./leaderboard (served via
public/leaderboard.html) and watch
public/js/leaderboard.js call
/api/leaderboard?limit=50 every 30 seconds./api/customization/:playerName.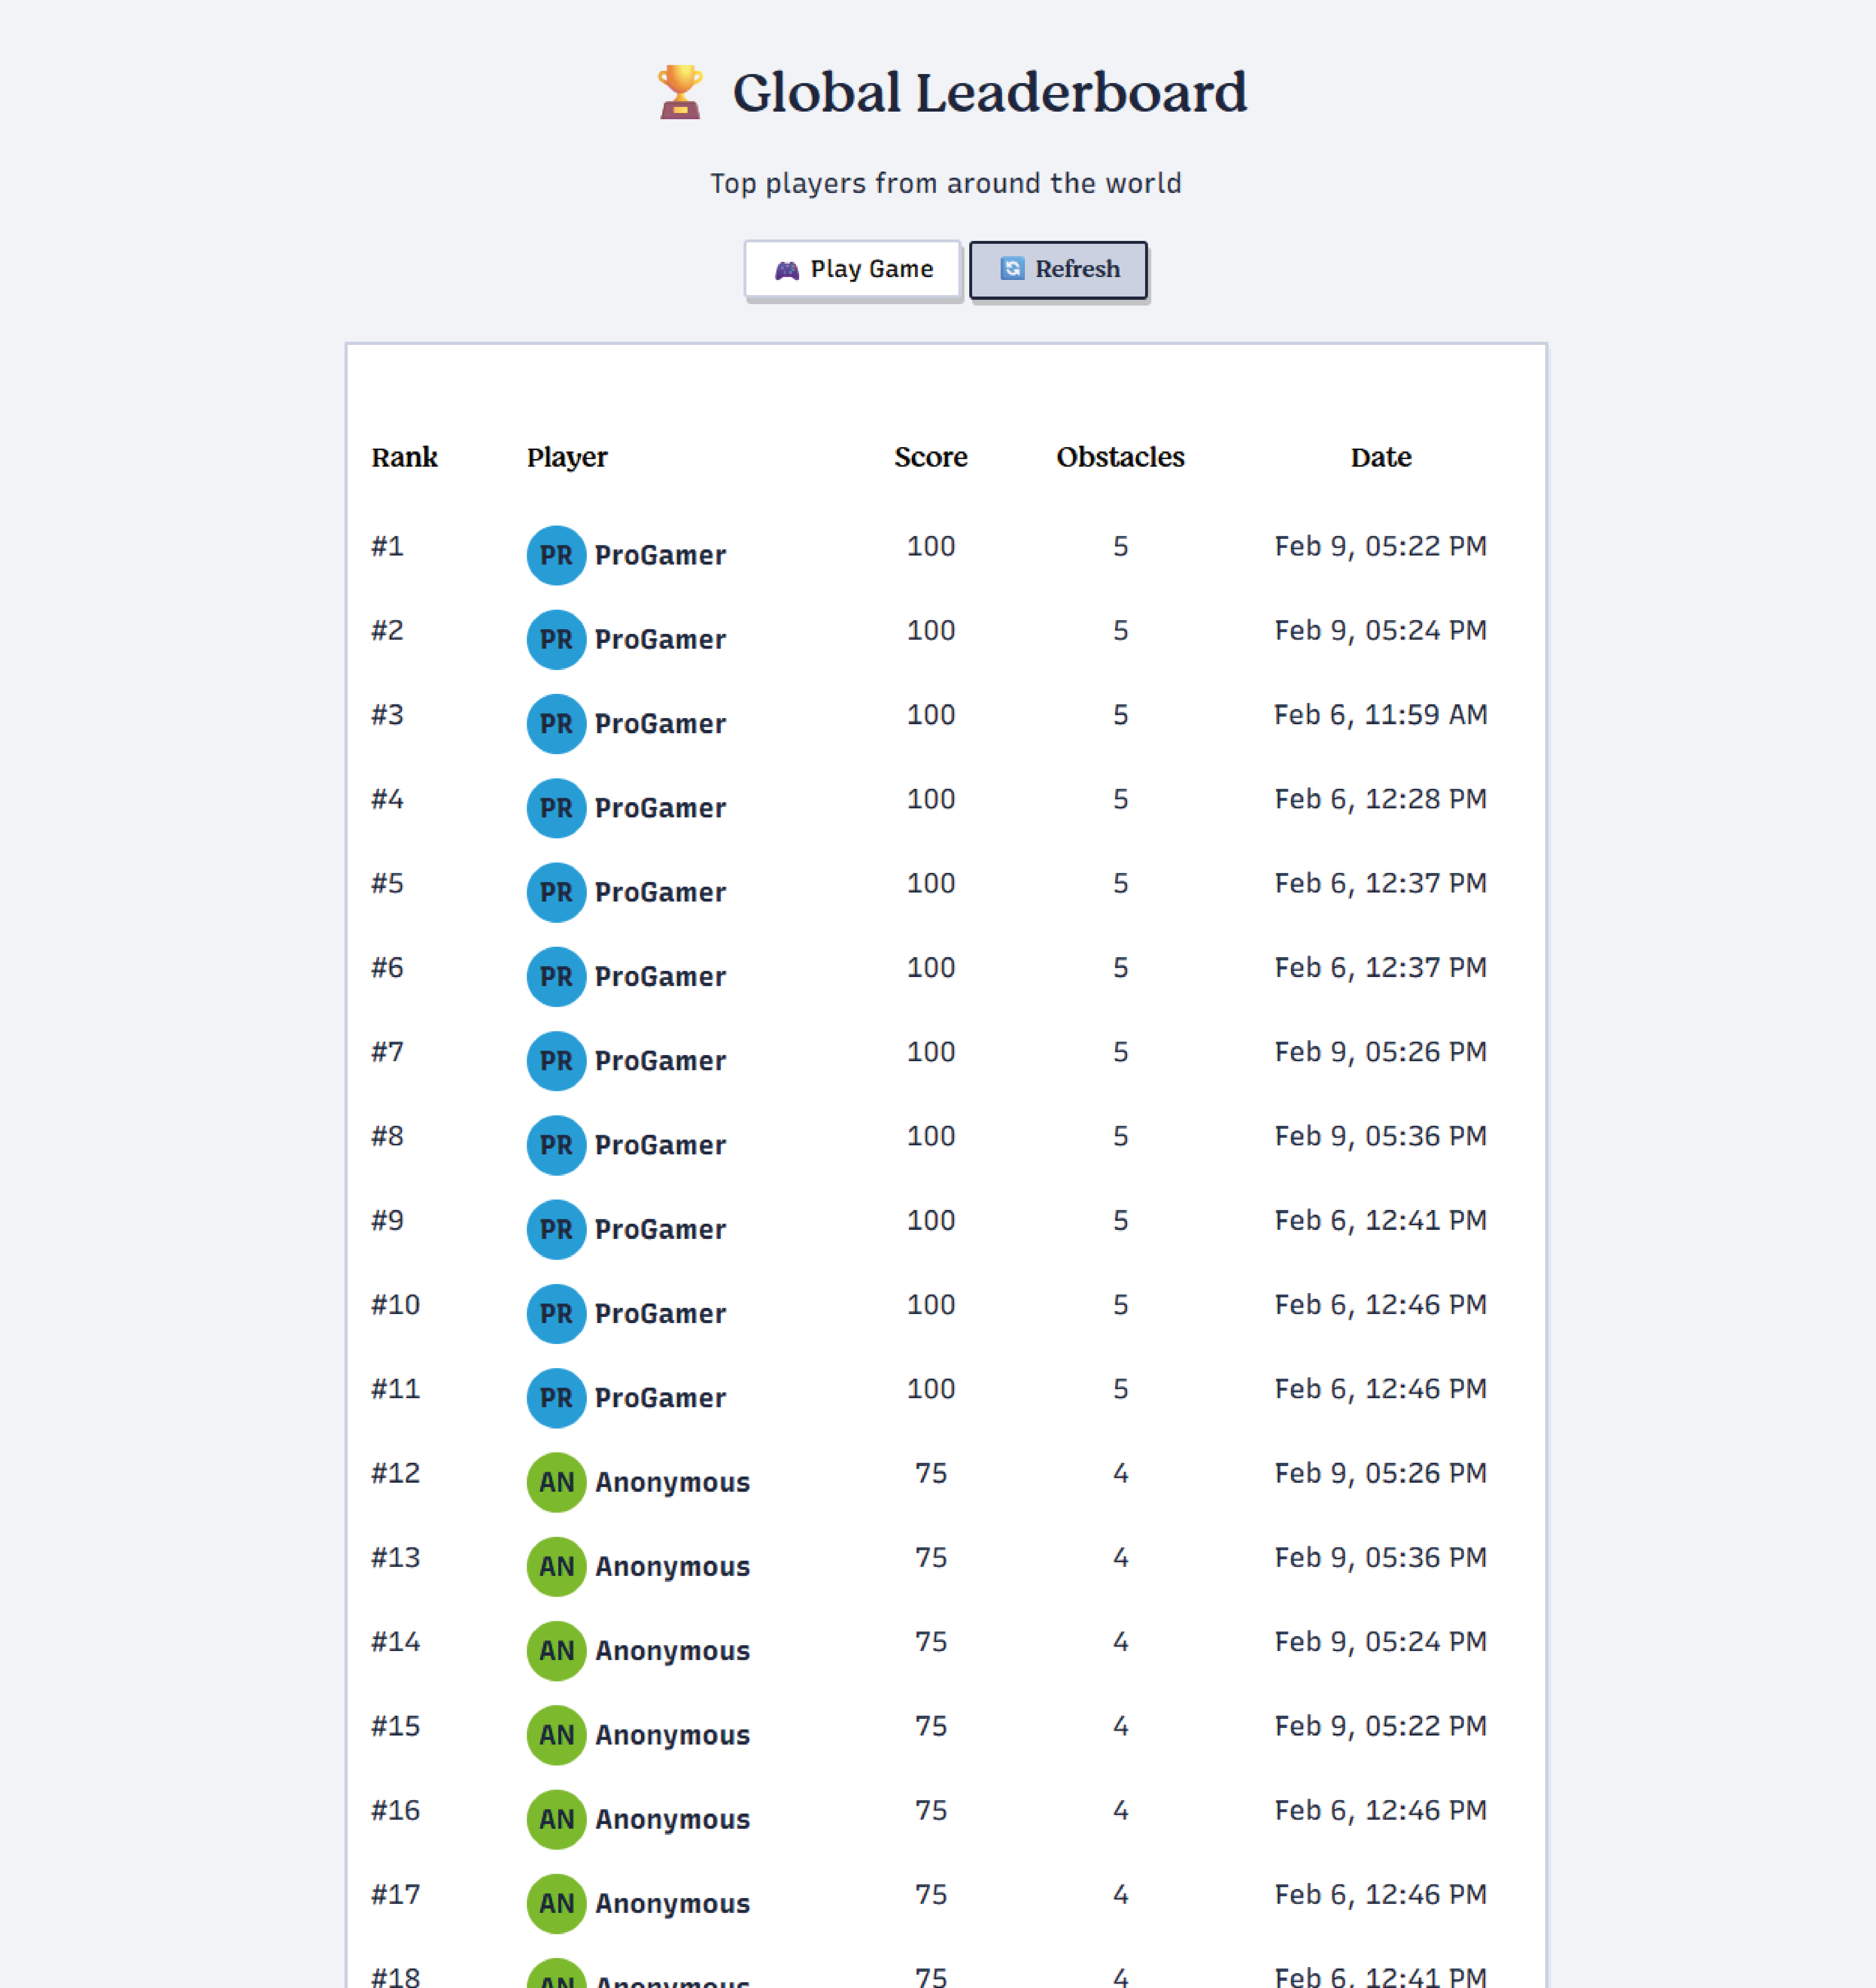
You can explore the full reference implementation and Deploy link here: https://game-tutorial-stage-4.thisisjofrank.deno.net/
game.js settings lifecycle: fetch, apply, persist, and rehydrate themes
plus difficulty multipliers.Stage 6 will concentrate on observability—metrics, logging, and alerting—so you can understand how players behave at scale. We’ll wire up structured logs, shipping analytics events, and dashboards that track leaderboard health and customization adoption. For now, enjoy the custom player experience you just delivered! 🦕✨
What else are you building with Deno? Let us know on Twitter, Bluesky, or Discord.
此内容由惯性聚合(RSS阅读器)自动聚合整理,仅供阅读参考。 原文来自 — 版权归原作者所有。