要配置Apache CXF OSGi的部署其实比较简单,但是我们一般都会在网上找资料,会遇到怎么也发现不了服务的情况,让人都很郁闷。
有了这次的经历,我要看官方的文档,以防上当。
首先下载Apache CXF 的包,下载地址:http://cxf.apache.org/dosgi-releases.html
我们下载下面这两个就可以了,我们这次会用到cxf-dosgi-ri-singlebundle-distribution
Multi-bundle distribution (zip)
cxf-dosgi-ri-multibundle-distribution-1.3.1-dir.zip
Single-bundle distribution
cxf-dosgi-ri-singlebundle-distribution-1.3.1.jar
目前需要3个bundle

注意版本号
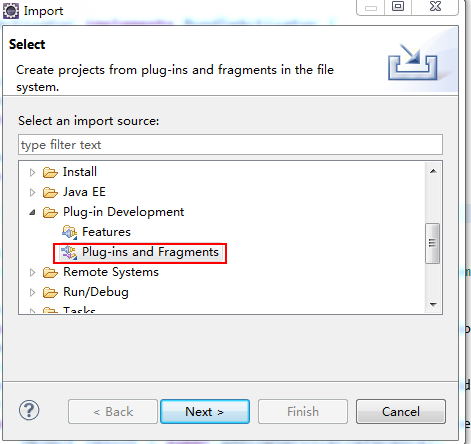
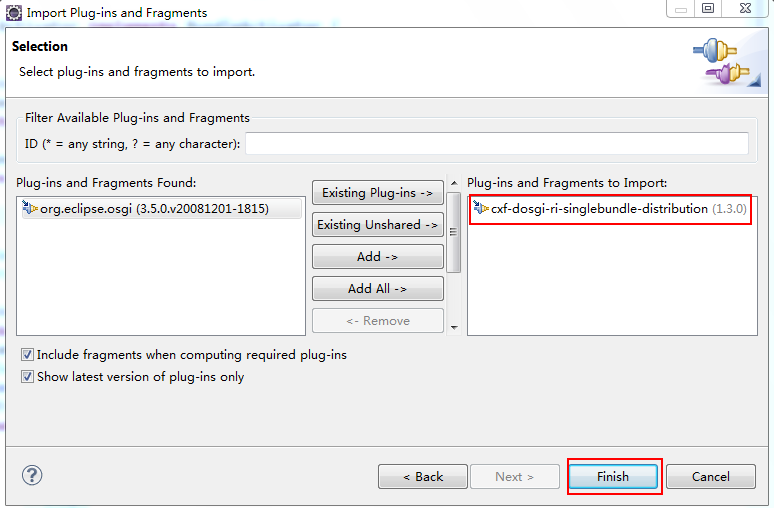
导入cxf-dosgi-ri-singlebundle-distribution-1.3.1.jar 包,在Eclipse中菜单:File->import,选择如下图所示
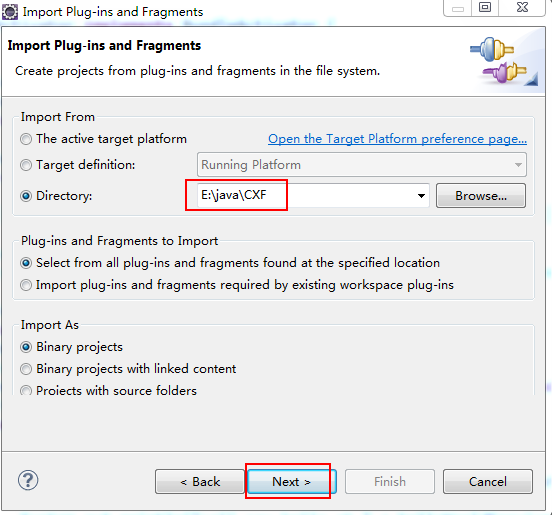
选择文件所在的路径
我们会在Package Explorer视图中看到
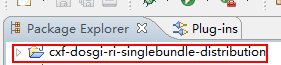
好了,我们的开发环境就配置好了。
创建HelloWorld演示程序
Eclipse->File->new->project-
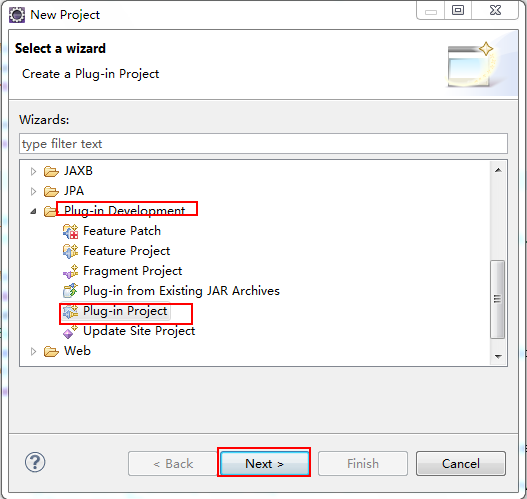
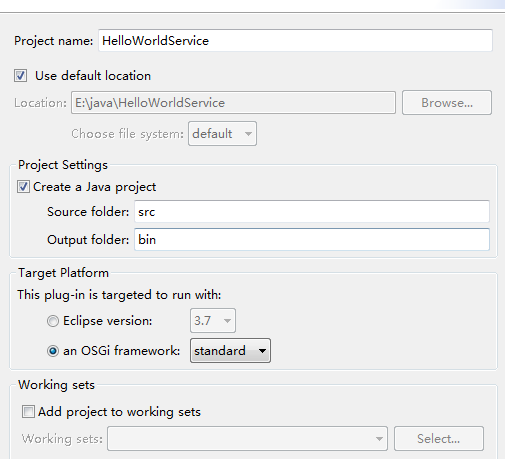
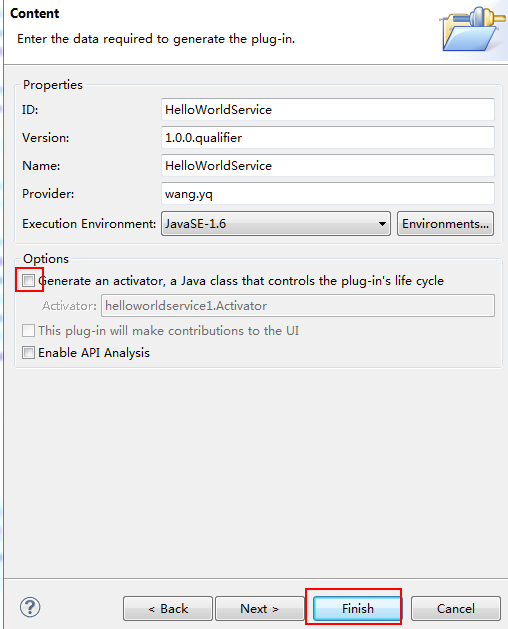
我们就写一个helloworld的接口
代码如下:
public interface HelloWorldService {
	String sayHello();
}
接下来我们用同样的方法来,做一个HelloworldService的实现工程
Eclipse->File->new->project
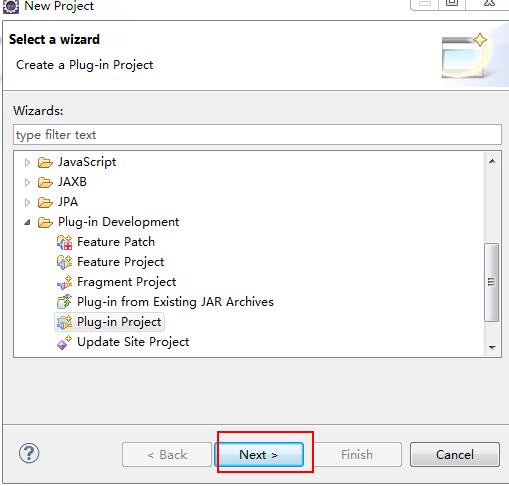
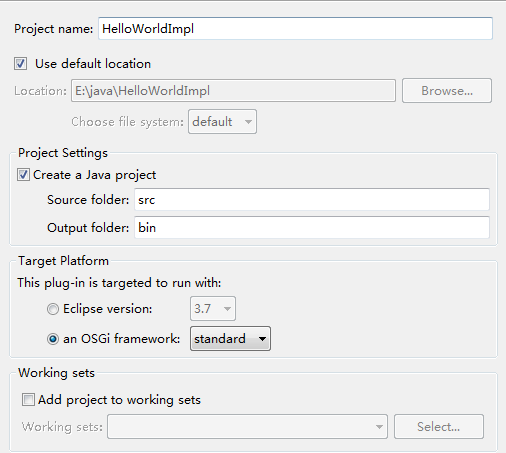
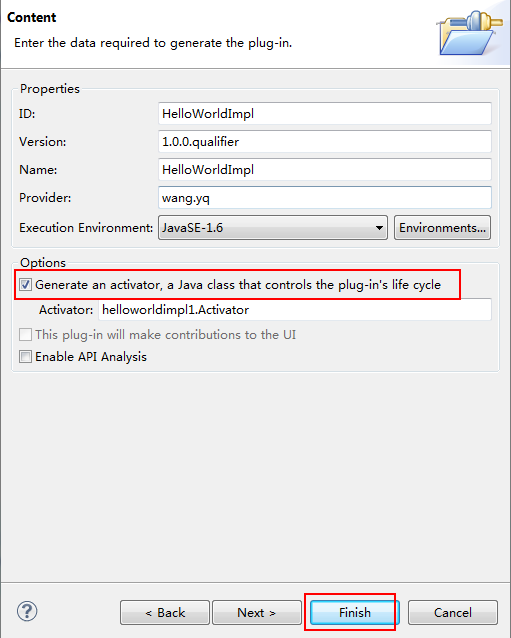
我们来写一个实现类如下,首先添加对接口的依赖
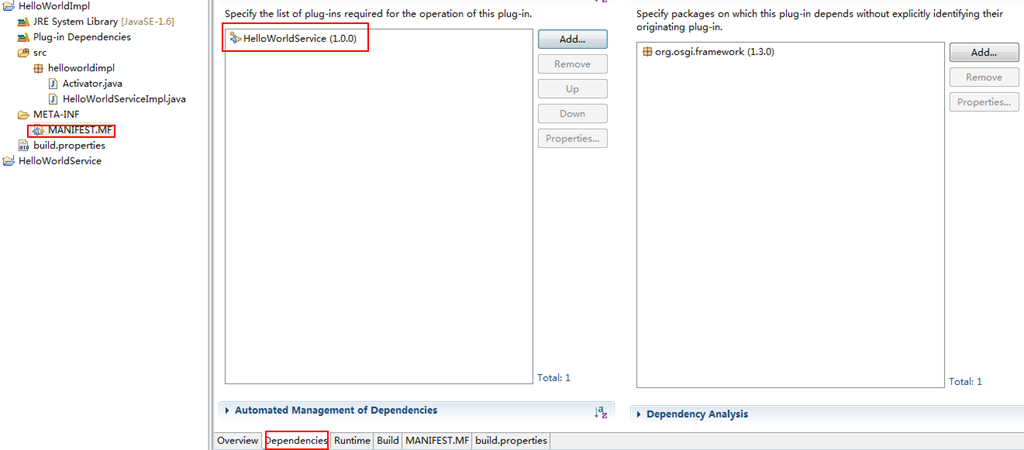
实现类如下:
public class HelloWorldServiceImpl implements HelloWorldService {

	@Override
	public String sayHello() {
		System.out.println("HelloWorld");
		return (new Date()).toString();
	}
}
现在实现类有了,我们现在要注册成web服务,打开实现工程中的Activator类,注册服务代码如下:
public class Activator  implements BundleActivator {

	@SuppressWarnings("rawtypes")
	private ServiceRegistration registration;
	private static BundleContext context;

	static BundleContext getContext() {
		return context;
	}
	@Override
	public void start(BundleContext bundleContext) throws Exception {
		Activator.context = bundleContext;
		//设置服务的属性
    	Dictionary<String, String> props = new Hashtable<String, String>();

	    props.put("service.exported.interfaces","*");
	    props.put("service.exported.intents","SOAP");
	    props.put("service.exported.configs","org.apache.cxf.ws");
	    props.put("org.apache.cxf.ws.address","http://localhost:9000/hello_world");

        //注册服务
        registration = Activator.context.registerService(HelloWorldService.class.getName(), new HelloWorldServiceImpl(), props);
	}

	@Override
	public void stop(BundleContext bundleContext) throws Exception {
		Activator.context = null;
		 registration.unregister();
	}

}
好了,我们的服务已经注册成功了,我们看看在浏览器中是什么样子的,
Eclipse-Run->Run configuration,配置结果如下图所示:
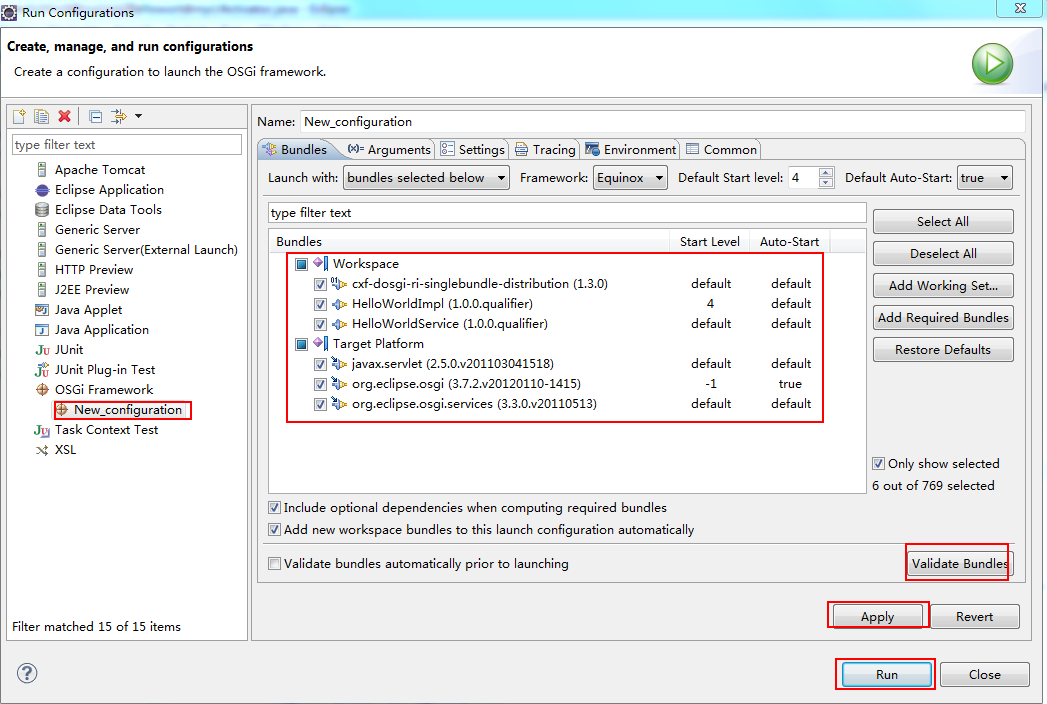
点击run后我们可以看到如下日志:
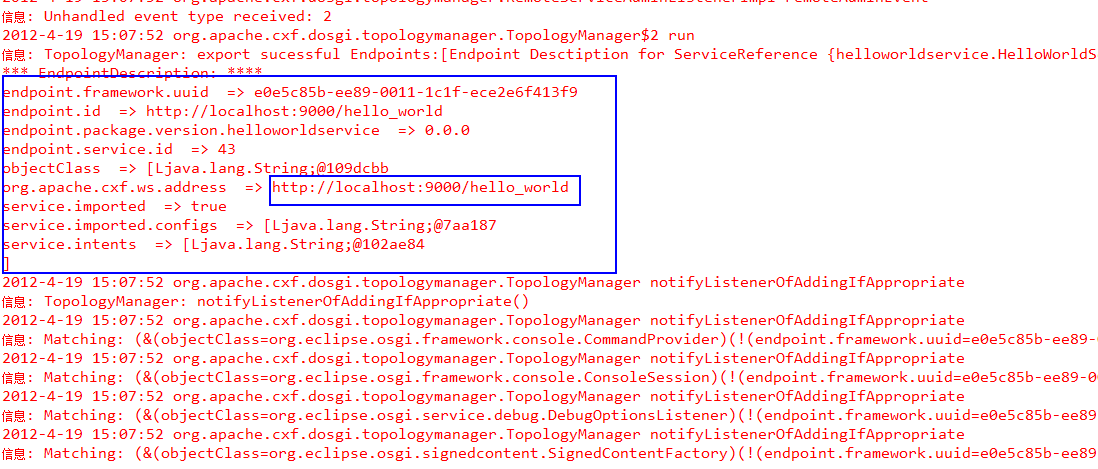
这就说明了我的web服务已经注册成功了,好了,我们在浏览器中看一下结果,在浏览器中输入:http://localhost:9000/hello_world?wsdl,就可以看到如下结果
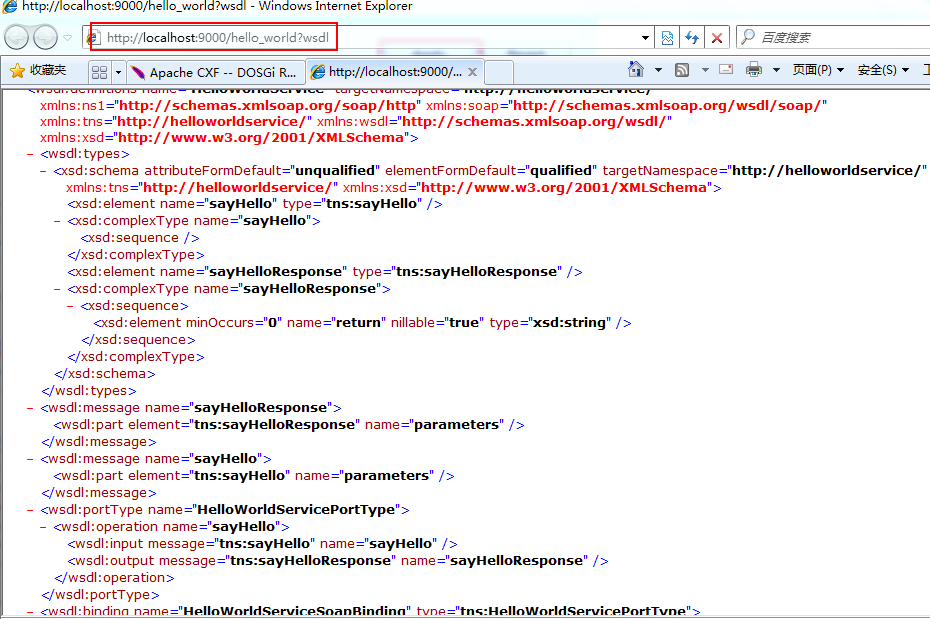
接下来我们会消费服务
我们建一个插件工程,命名为:HelloWorldClient,创建好以后如下:

我们要使用服务就要先引用依赖组件,如下图所示

我们还要配置一下服务的发现,在工程下建立OSGI-INF文件夹,里面新建一个remote-service文件夹,在remote-service新建一个remote-services.xml,该文件内容如下:
<?xml version="1.0" encoding="UTF-8"?>
<service-descriptions xmlns="http://www.osgi.org/xmlns/sd/v1.0.0">
  <!--远程服务描述-->
  <service-description>
    <!--定义远程服务映射到本地的服务的接口 -->
    <provide interface="helloworldservice.HelloWorldService" />
    <!-- 远程服务的接口 -->
    <property name="service.exported.interfaces">*</property>
    <!-- 远程服务的形式 -->
    <property name="service.exported.intents">SOAP</property>
    <!-- 服务的类型-->
    <property name="service.exported.configs">org.apache.cxf.ws</property>
    <!-- 服务的地址-->
    <property name="org.apache.cxf.ws.address">http://localhost:9000/hello_world</property>
  </service-description>
</service-descriptions>
和我们在实现类里面注册服务的代码一样
我们来看一下HelloWorldClient的Activator类的内容,主要的内容就是获取服务,然后调用服务,很简单。
public class Activator implements BundleActivator {
	@SuppressWarnings("rawtypes")
	private ServiceTracker tracker;
	private static BundleContext context;

	static BundleContext getContext() {
		return context;
	}
	/*
	 * (non-Javadoc)
	 * @see org.osgi.framework.BundleActivator#start(org.osgi.framework.BundleContext)
	 */
	@SuppressWarnings({ "unchecked", "rawtypes" })
	public void start(BundleContext bundleContext) throws Exception {
		Activator.context = bundleContext;
		//创建ServiceTracker,捕获HelloWorldService添加到OSGi框架的事件
        tracker = new ServiceTracker(Activator.context, HelloWorldService.class.getName(), null) {
            @Override
        	public Object addingService(ServiceReference reference) {
                Object result = super.addingService(reference);
                //获取服务
                HelloWorldService helloWorldService = (HelloWorldService)Activator.context.getService(reference);
                //使用服务
                System.out.println("call say hello at " + helloWorldService.sayHello());
                return result;
            }
        };
        tracker.open();
	}

	/*
	 * (non-Javadoc)
	 * @see org.osgi.framework.BundleActivator#stop(org.osgi.framework.BundleContext)
	 */
	public void stop(BundleContext bundleContext) throws Exception {
		Activator.context = null;
		System.out.println("hello world client close");
		tracker.close();
	}

}
好了,我们的消费者就创建好了,来看一下运行效果吧
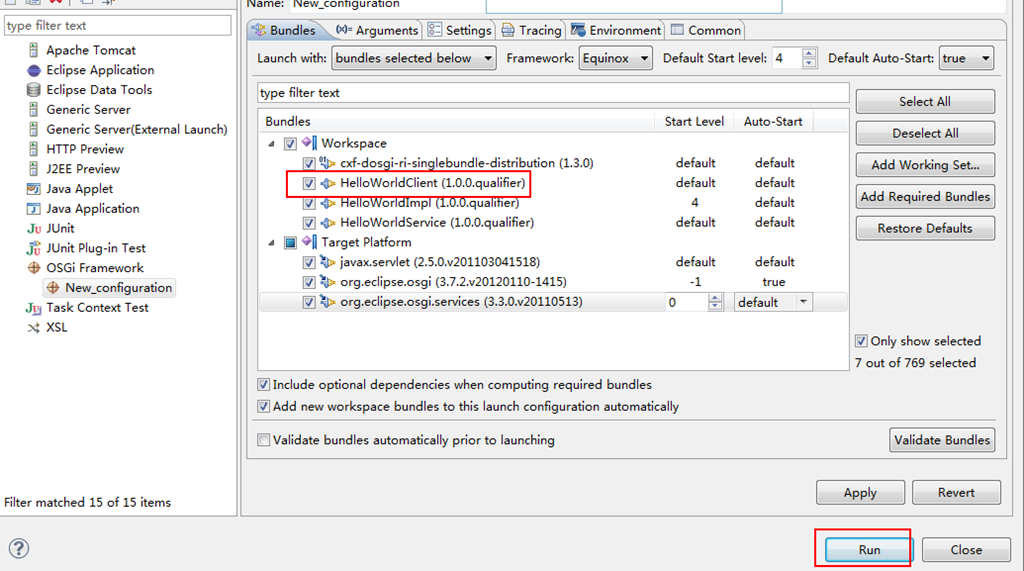
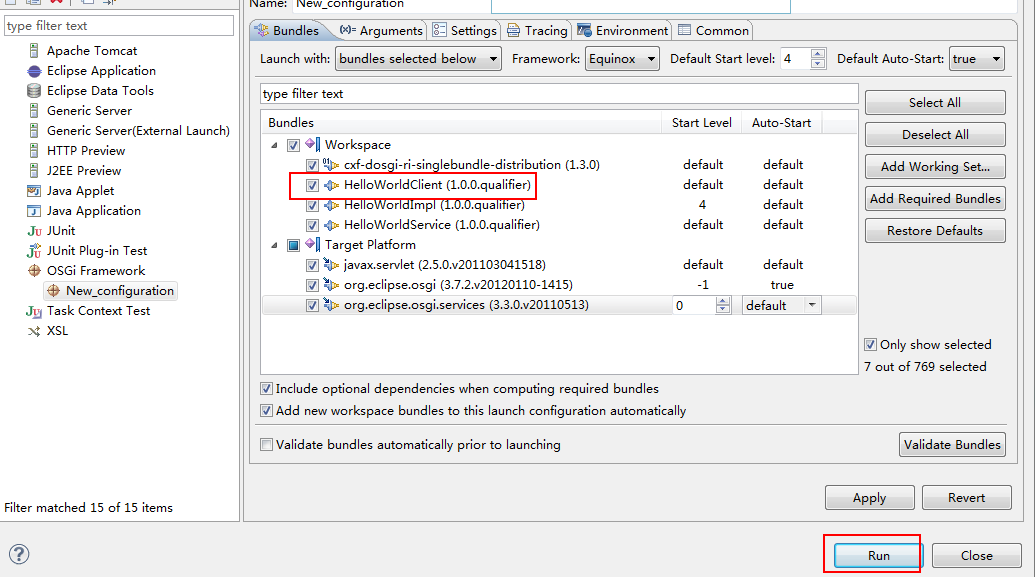
先进行运行 配置,如下图所示
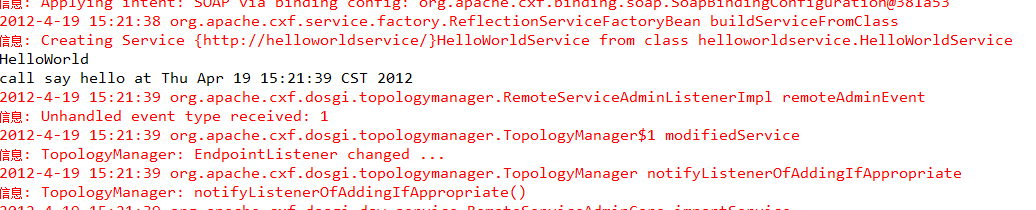
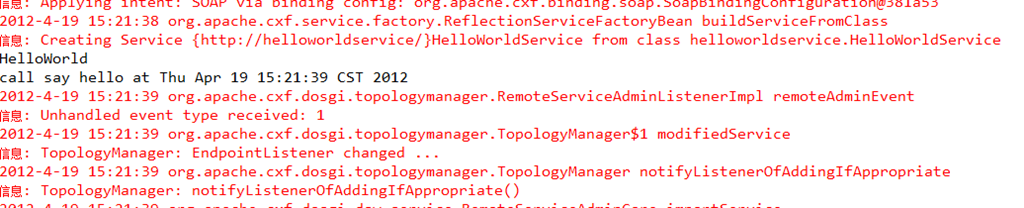
我们在上图中可以看到结果
好了,我们的演示已经结束了,看起来还是比较简单的,但是在做的过程中还是遇到一些问题,比如使用了老的注册服务代码如下:
  props.put("osgi.remote.interfaces", "*");
        props.put("osgi.remote.configuration.type", "pojo");
        props.put("osgi.remote.configuration.pojo.address", "http://localhost:9000/hello_world");
使用这个代码是注册服务不成功的,请大家注意!
源码下载:下载
此内容由惯性聚合(RSS阅读器)自动聚合整理,仅供阅读参考。 原文来自 — 版权归原作者所有。