







本文介绍如何在GO语言中编写单元测试,主要内容包括:标准库中的testing包,第三方框架testify和mockery工具,monkey patching框架gomonkey,以及如何查看覆盖率。
GO标准库中提供了做单元测试的工具:testing包以及go test命令工具。在编写测试代码时,对文件名和函数名有一定的要求,文件名必须遵循*_test.go的形式, 测试函数名则必须以Test开头,并且必须接收一个testing.T类型的参数。通常针对每个被测go文件创建一个对应的_test.go文件,并在其中编写相关的测试代码,测试函数的名字为TestXXX,XXX为被测函数的名字。下面以一个简单的例子说明如何编写,运行测试。
比如,我们有一个code.go文件,其中包含了我们需要测试的代码,具体内容如下:
// code.go file
package ut

func Add(a, b int) int {
	return a + b
}

func Subtract(a, b int) int {
	return a - b
}

func Multiply(a, b int) int {
	return a * b
}

func Divide(a, b int) int {
	return a / b
}
为了给其中的Add函数编写单元测试,我们首先创建一个名为code_test.go的文件,并在其中编写测试代码如下:
// code_test.go file
package ut

import (
	"testing"
)

func TestAdd(t *testing.T) {
	if Add(1, 2) != 3 {
		t.Errorf("Add(1, 2) should return 3, but it returned %d", Add(1, 2))
	}
}
TestAdd函数有一个参数:t,其类型为*testing.T, t提供了一些方法来帮助我们进行测试,如Errorf方法,可以用来输出错误信息,Run方法可以用来运行测试用例,并输出测试结果。
在命令行中,通过go test ./...命令,我们可以运行所有的测试用例,并输出测试结果如下。
$ go test ./...
?       learn_go        [no test files]
?       learn_go/reflect_learn  [no test files]
ok      learn_go/ut     1.510s
如果测试用例中有错误,则会输出如下的错误信息:
$ go test ./...
?       learn_go        [no test files]
?       learn_go/reflect_learn  [no test files]
--- FAIL: TestAdd (0.00s)
    code_test.go:9: Add(1, 2) should return 3, but it returned 4
FAIL
FAIL    learn_go/ut     1.539s
FAIL
如果想要获取详细的输出信息,可以加上-v参数,即:go test -v ./...
如果只想运行某个包下面的测试用例,可以加上包名,如:go test learn_go/ut,其中learn_go/ut是包的完整名字。
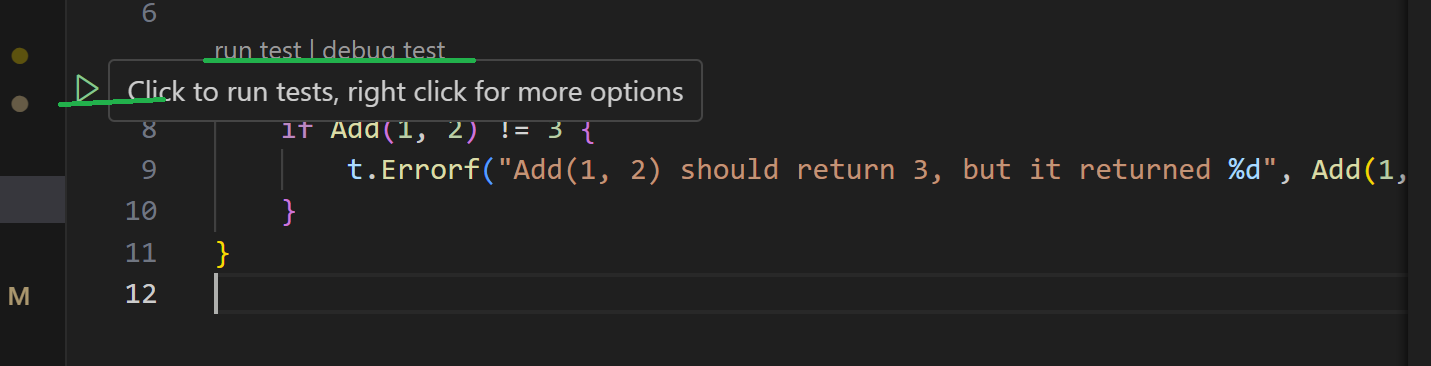
此外,在VS Code中,可以通过直接点击测试函数名字上面的运行按钮来运行测试用例,请参考下图。
大部分情况下,GO标准库提供的测试工具已经够用了,但有些时候,我们需要更加灵活的测试工具,比如:
这时候,我们可以选择第三方的mock框架,比如testify, 其github地址为: https://github.com/stretchr/testify
go get github.com/stretchr/testify
下面的测试函数TestSubtract使用assert.Equal方法来判断Subtract函数的返回值是否正确,更加方面。testify还提供了其他的断言方法,比如assert.Error, assert.Errorf, assert.Contains, assert.Nil等。
// code_test.go file
package ut

import (
	"testing"

	"github.com/stretchr/testify/assert"
)

func TestSubtract(t *testing.T) {
	assert.Equal(t, -1, Subtract(1, 2))
}
通过添加 -run ^TestSubtract$参数,我们可以只运行TestSubtract函数,如下:
$ go test -run ^TestSubtract$ learn_go/ut
ok      learn_go/ut     0.614s
在编写测试的过程中,我们可能需要mock一些接口,比如数据库操作,网络请求等,从而消除副作用(side effect),提高测试的可靠性。testify中的mock包可以帮助我们生成mock对象。下面举例说明。
// code.go file
type Stock interface {
	GetPrice(t time.Time) float64
}

type ShangHaiStock struct {
}

func (s ShangHaiStock) GetPrice(t time.Time) float64 {
	if t.IsZero() {
		t = time.Now()
	}

	return getPriceFromStockExchangeServer(t, "shanghai")
}

func BuyStock(s Stock, amount int) float64 {
	price := s.GetPrice(time.Now())
	return float64(amount) * price
}
在上面这段代码中,我们首先声明了一个Stock接口,接口中的GetPrice函数会根据时间获取股票价格,结构体ShangHaiStock实现了该Stock接口。
ShangHaiStock的GetPrice函数会通过网络请求从上交所获取股票价格,具体请求操作在getPriceFromStockExchangeServer函数中实现。
BuyStock函数会根据传入的Stock接口,获取当前的股票价格,并计算出购买股票的总价。
下面,我们为BuyStock函数编写测试代码,为了隔离对外部网络请求的依赖,我们需要先创建一个MockStock结构体,并让它实现Stock接口,然后在测试中使用MockStock的对象。具体代码如下:
// code_test.go file
package ut

import (
	"testing"
	"time"

	"github.com/stretchr/testify/assert"
	"github.com/stretchr/testify/mock"
)

type MockStock struct {
	mock.Mock
}

func (m *MockStock) GetPrice(t time.Time) float64 {
	args := m.Called(t)
	return args.Get(0).(float64)
}

func TestBuyStock(t *testing.T) {
	stockPrice := 20.2
	stockCount := 100

	stock := &MockStock{}
	stock.On("GetPrice", time.Now()).Return(stockPrice)
	paidAmount := BuyStock(stock, stockCount)

	assert.Equal(t, stockPrice*float64(stockCount), paidAmount)
}
MockStock结构体继承了mock.Mock,在其GetPrice函数中,我们使用m.Called方法获取调用参数,并返回预期的值。
在测试函数TestBuyStock中,我们先创建一个MockStock对象,并使用On方法指定GetPrice函数的调用参数和返回值,然后调用BuyStock函数,并断言其返回值是否正确,这里需要注意,语句stock.On("GetPrice", time.Now()).Return(stockPrice)中的Return方法将股票的价格固定为stockPrice,即20.2。
下面是运行测试的结果:
$ go test -v -run ^TestBuyStock$ learn_go/ut
=== RUN   TestBuyStock
--- PASS: TestBuyStock (0.01s)
PASS
ok      learn_go/ut     0.656s
在使用testify的mock功能时,我们需要先定义一个继承自mock.Mock的结构体,并让该结构体实现依赖的接口,如果接口中的方法不是很多,我们尚可手工实现,但是如果接口的方法很多,我们就需要使用mockery工具来自动生成mock对象。
mockery是一个开源的工具,可以根据接口定义文件生成mock对象,其github地址为:https://github.com/vektra/mockery
具体安装方法请参考 https://vektra.github.io/mockery/latest/installation/
安装完成之后,使用 mockery --version, 确认安装是否成功。

执行如下命令,为Stock接口生成mock对象:
mockery --dir=ut --name=Stock
如果命令执行成功,会在当前目录下生成一个mocks目录,其中包含了Stock接口的mock对象,内容如下图:

我们可以看到,mockery帮我们自动创建了Stock结构体,并实现了GetPrice方法,我们只需要在测试代码中使用该对象,即可隔离对外部网络请求的依赖。
使用mockery,我们可以很方便地为自定义的接口创建mock结构体,但是对于外部的接口,如第三方库,该怎么办呢?一个比较取巧的办法是:重新创建一个接口继承该接口,比如对于标准库里的context.Context接口,我们可以如下创建一个MockedContext接口,然后使用mockery针对MockedContext生成mock结构体。
type MockedContext interface {
	context.Context
}
通过testify和mockery,我们可以很方便地mock接口,那我们如何mock结构方法和普通函数(如json.Marshal)呢?gomonkey库可以帮助我们做到这一点。
gomonkey是一个开源的库,可以帮助我们mock结构方法和普通函数,其github地址为:https://github.com/agiledragon/gomonkey ,下面我们来看看如何使用。
具体安装方法请参考 https://github.com/agiledragon/gomonkey#installation
$ go get github.com/agiledragon/gomonkey/v2@v2.13.0
func TestGomonkeyPatchingForJsonMarshal(t *testing.T) {
	marshedBytes := []byte(`{"name": "Alice", "age": 25}`)
	patches := gomonkey.ApplyFunc(json.Marshal, func(v any) ([]byte, error) {
		t.Log("Mocked json.Marshal called with args:", v)
		return marshedBytes, nil
	}) // replace json.Marshal with a mock function
	defer patches.Reset() // reset the mock function after test

	result, err := json.Marshal("")
	assert.Nil(t, err)
	assert.Equal(t, marshedBytes, result)
}
在测试函数TestGomonkeyPatchingForJsonMarshal中,我们使用gomonkey.ApplyFunc方法,将json.Marshal函数替换为一个mock函数,该函数会打印日志,并返回固定的字节数组:marshedBytes。
在defer语句中,我们使用patches.Reset方法,恢复json.Marshal的原始功能。
最后使用assert.Nil和assert.Equal方法,验证mock函数是否生效,即json.Marshal("")的返回值是否等于marshedBytes。
func TestGomonkeyPatchingForStructMethod(t *testing.T) {
	numberList := list.New()
	numberList.PushBack(1)
	numberList.PushBack(2)
	assert.Equal(t, 2, numberList.Len())
	patches := gomonkey.ApplyMethod(reflect.TypeOf(numberList), "Len", func(list *list.List) int {
		return 0
	}) // replace numberList.Len with a mock function
	defer patches.Reset() // reset the mock function after test

	assert.Equal(t, 0, numberList.Len())
}
在测试函数TestGomonkeyPatchingForStructMethod中,我们使用gomonkey.ApplyMethod方法,将numberList.Len方法替换为一个mock函数,该mock函数会返回0。
在defer语句中,我们使用patches.Reset方法,恢复numberList.Len的原始功能。
最后,使用assert.Equal方法,验证numberList.Len方法是否返回0,即使它实际包含两个元素。
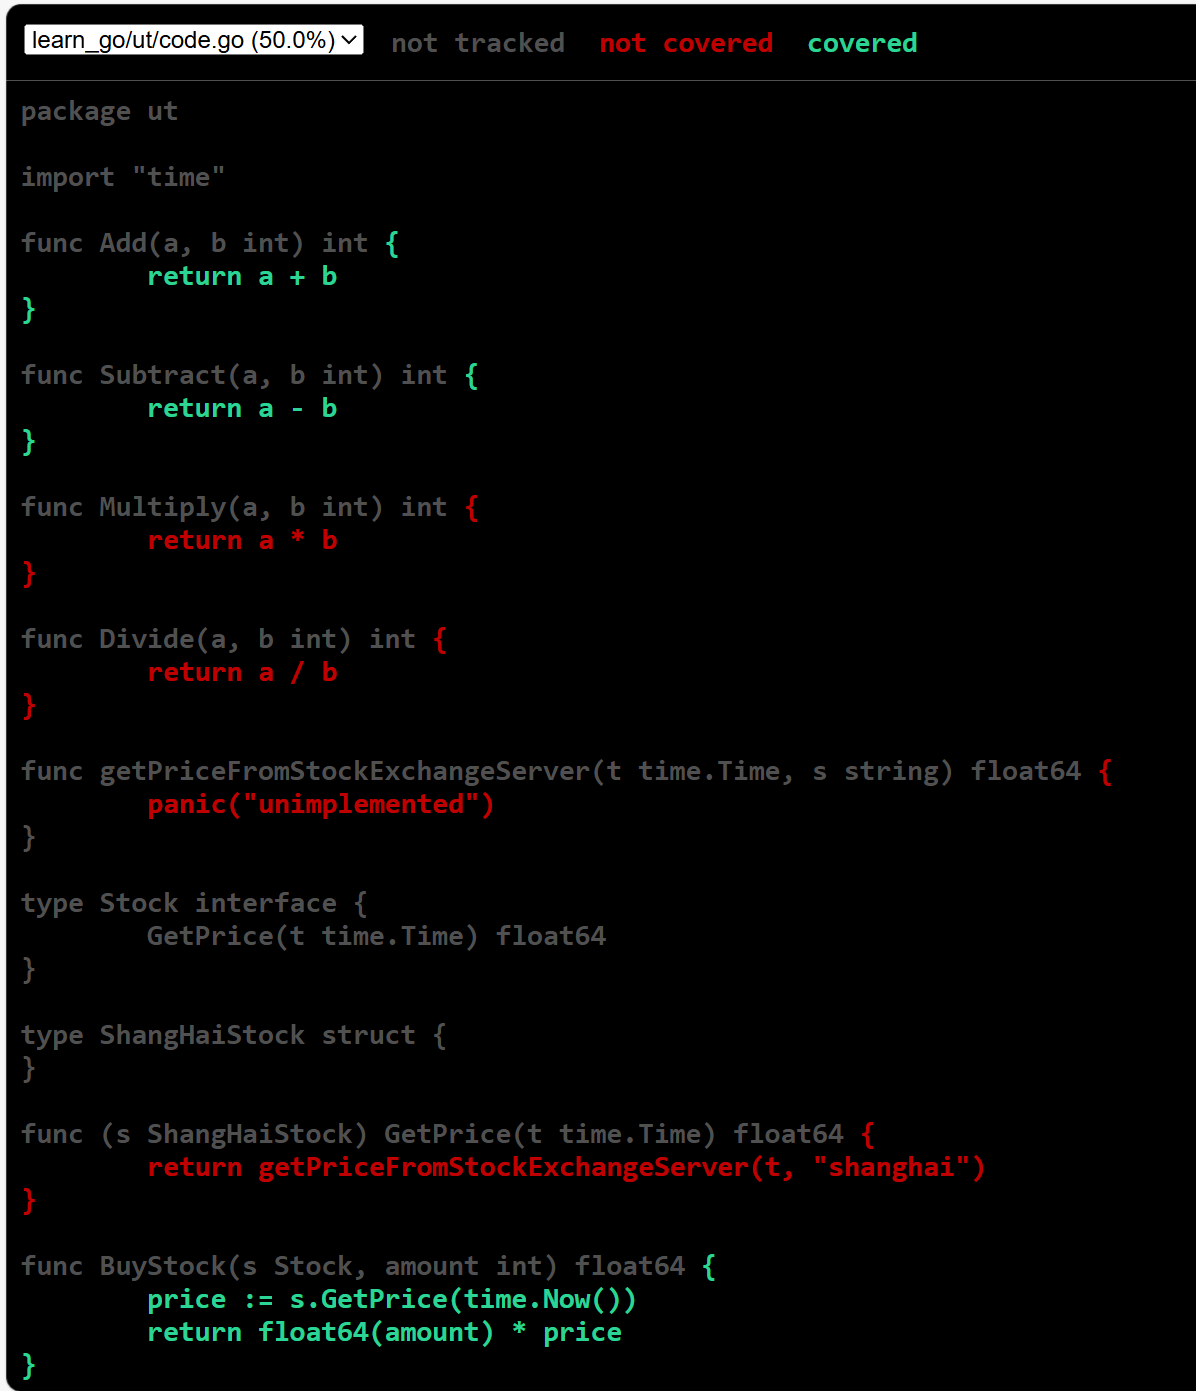
在编写测试代码时,我们需要尽量保证较多的代码被测试到,代码测试覆盖率就是衡量多少代码被覆盖到的指标。下面看下如何生成测试覆盖率报告。
通过go test命令加上-coverprofile参数,可以生成测试覆盖率数据。下面的命令会生成一个cover.out文件,里面包含了测试覆盖率数据。
$ go test ./... -coverprofile cover.out
我们可以使用go tool cover 根据cover.out文件生成测试覆盖率报告,下面的命令会生成一个cover.html文件,里面包含了测试覆盖率报告。
$ go tool cover -html cover.out -o cover.html
打开cover.html文件,内容如下图:
有时,我们可能需要忽略一些测试文件,比如一些测试文件中的代码没有被测试到,或者一些测试文件中的代码没有达到测试覆盖率要求。
我们可以在go test命令中使用-coverpkg参数,指定测试覆盖率数据中包含哪些包。
$ go test ./... -coverprofile cover.out -coverpkg=./...
-coverpkg参数的值为./...,表示包含当前目录及其子目录下的所有包。
本文介绍了GO语言中编写单元测试的基本方法,包括标准库中的testing包,第三方框架testify和mockery工具,以及Monkey patching框架gomonkey。希望能对你有所帮助。
此内容由惯性聚合(RSS阅读器)自动聚合整理,仅供阅读参考。 原文来自 — 版权归原作者所有。