







Hydrogen is a framework designed specifically for developing customized, modern, performant e-commerce sites. Read this guide to find out how to use Netlify Edge Functions to serve pages close to your customers.
Typically, you’ve had to choose between a traditional monolithic Shopify storefront—where your frontend is locked into Shopify as a hosting provider and customization is limited by Shopify’s templating system—and a full-stack, in-house e-commerce implementation, which involves reinventing not just the wheel but the axle, the road, and the freeway interchange.
Hydrogen is a headless e-commerce storefront framework. By building your own frontend with a batteries-included stack on top of the Shopify platform, you can get the best of both worlds:
You can deploy a Hydrogen site to Netlify and get all the benefits of our global CDN network, Edge Functions, deploy previews, and more.
The fastest way to get started is to create and deploy a site from our template with just a few clicks. Use the button below to dive right in.

To create a new project, click the “Deploy to Netlify” button above.
Your project is now bootstrapped in a repository that we’ve set up for you (on your account on the provider you chose, e.g. GitHub) and linked to a Netlify site.
At the top of the site page in the Netlify app, you should see something like this:
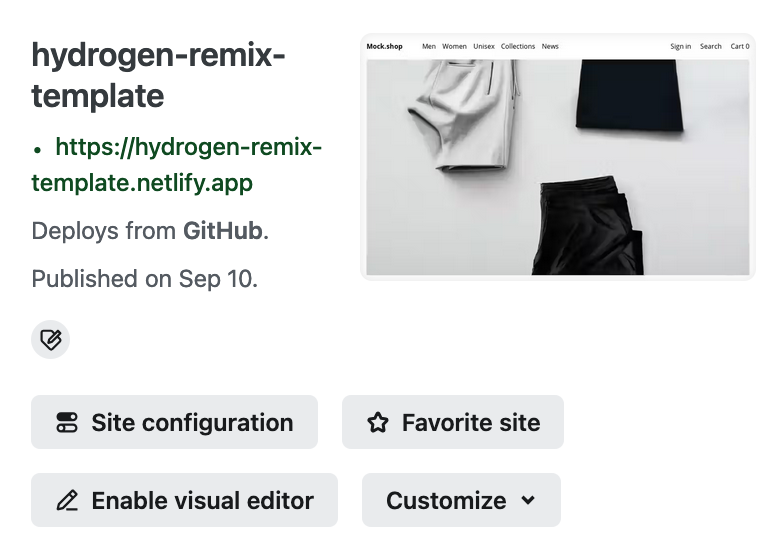
The .netlify.app link is your site’s production URL. Navigate to it and you should see a simple
clothing storefront. It’s using data from a mock Shopify store. (We’ll set up a real store later.)
Your site is deployed and you’re all set up for continuous deployment: pushes to pull
requests will result in deploy previews and pushes to your default branch (usually main) will
deploy to your site automatically.
That’s it. When a potential customer visits any page on your site, the page is rendered on demand by an edge function running on a CDN node closest to that customer, keeping latency low. Hydrogen’s Storefront API data cache is backed by the Netlify Cache API, and the included Netlify Vite plugin gives your local dev server full Netlify platform emulation.
Below your site’s URL is a link to your new repository (e.g. “Deploys from GitHub” in the screenshot above). Copy that link to your clipboard and run:
npx netlify clone <link from your clipboard>
cd <path where your project was cloned>
npm install
cp .env.example .env
npm run dev
You should see the same clothing store open in your browser.
You can make changes and see them immediately reflected in your browser without refreshing. For
example, try changing the heading “Recommended Products” in app/routes/_index.tsx to “Just For
You”:
<div className="recommended-products">
<h2>Recommended Products</h2>
<h2>Just For You</h2>
You should see the heading change immediately in your browser without reloading.
That’s really all you need to know to start developing your site. The Hydrogen docs will take it from here - here’s a good starting point. Just keep in mind that your site is deployed to Netlify, so you can skip any steps related to Oxygen (Shopify’s hosting platform).
Keep in mind that you can customize pretty much anything in your project. Pull in Tailwind, DaisyUI, swap out npm for pnpm or yarn, add CMS integrations, etc. This is a React site with React Router 7 and Vite under the hood.
Once you’re done with the mock shop, it’s time to link your frontend to a real Shopify store. Run the following command:
Then follow these steps to configure access to the Storefront API and these steps to configure access to the Customer Account API.
React Router 7 calls your route loaders with a context
parameter. The template sets up Hydrogen
context fields via createHydrogenRouterContext in app/lib/context.ts. These include:
{
env: Env;
cart: HydrogenCart;
storefront: Storefront;
customerAccount: CustomerAccount;
session: AppSession;
}
These are documented in the Hydrogen API docs.
To attach additional custom fields to the context, add them to the additionalContext object in
app/lib/context.ts:
const additionalContext = {
// Additional context for custom properties, CMS clients, 3P SDKs, etc.
featureFlags: { bigPhotos: true, blinkTagEverywhere: false },
// Other custom context here
} as const;
If you run into any snags, check the Hydrogen on Netlify documentation and the FAQ and Troubleshooting section in the template.
If you have an existing Hydrogen site (on Oxygen or elsewhere), porting it to Netlify requires a few steps. Our template does the heavy lifting for new sites, so you’ll need to mimic what it’s doing.
Before following the steps below, consider following the steps above for creating a new site, and then copying your
site’s contents (app/routes, app/components, app/styles, app/graphql) into it. It may be simpler! Just keep in
mind that the template uses Hydrogen 2026.1.0 and React Router 7.
These steps assume your site is already on Hydrogen 2025.1.0 or later (React Router 7-based). If your site is still on an older Remix-based version of Hydrogen, follow Shopify’s migration guide first.
Follow these steps:
Install Netlify dependencies:
npm install @netlify/vite-plugin-react-router @netlify/vite-plugin @netlify/edge-functions
In your Vite config file (vite.config.ts), replace the Oxygen plugin with the Netlify
plugins:
import { defineConfig } from "vite";
import { hydrogen } from "@shopify/hydrogen/vite";
import { oxygen } from "@shopify/mini-oxygen/vite";
import netlifyReactRouter from "@netlify/vite-plugin-react-router";
import netlify from "@netlify/vite-plugin";
import { reactRouter } from "@react-router/dev/vite";
import tsconfigPaths from "vite-tsconfig-paths";
export default defineConfig({
plugins: [
hydrogen(),
oxygen(),
netlifyReactRouter({ edge: true }),
netlify(),
reactRouter(),
tsconfigPaths(),
],
});
Replace the contents of server.ts with the template’s
version
Replace app/entry.server.tsx with the template’s
version. This
switches from react-dom/server (Node.js) to react-dom/server.browser (edge-compatible) and
adds a workaround for Deno’s ReadableByteStreamController abort behavior.
Add
react-dom-server-browser.d.ts
to your project root. This provides type declarations for the react-dom/server.browser subpath
that @types/react-dom doesn’t include.
Remove Oxygen type references. In env.d.ts, replace the Oxygen workers types reference with a
local ExecutionContext declaration:
/// <reference types="@shopify/oxygen-workers-types" />
// Hydrogen expects a global ExecutionContext (normally provided by
// @shopify/oxygen-workers-types). We only need `waitUntil`.
declare global {
interface ExecutionContext {
waitUntil(promise: Promise<unknown>): void;
}
}
In tsconfig.json, remove @shopify/oxygen-workers-types from compilerOptions.types:
"types": [
"@shopify/oxygen-workers-types",
"react-router",
Uninstall Oxygen packages:
npm uninstall @shopify/mini-oxygen @shopify/oxygen-workers-types
Update package.json scripts:
"scripts": {
"build": "shopify hydrogen build --codegen",
"preview": "shopify hydrogen preview --build",
"build": "shopify hydrogen codegen && react-router build",
"preview": "npx netlify@latest serve",
Add a netlify.toml file to your project root. Copy the one from the
template.
此内容由惯性聚合(RSS阅读器)自动聚合整理,仅供阅读参考。 原文来自 — 版权归原作者所有。