惯性聚合 高效追踪和阅读你感兴趣的博客、新闻、科技资讯
阅读原文 在惯性聚合中打开

推荐订阅源

T
Tailwind CSS Blog
C
CERT Recently Published Vulnerability Notes
P
Proofpoint News Feed
Vercel News
Vercel News
博客园 - 三生石上(FineUI控件)
IT之家
IT之家
Help Net Security
Help Net Security
月光博客
月光博客
N
News and Events Feed by Topic
Cloudbric
Cloudbric
博客园 - 司徒正美
L
LangChain Blog
Recent Commits to openclaw:main
freeCodeCamp Programming Tutorials: Python, JavaScript, Git & More
T
Tenable Blog
The Register - Security
The Hacker News
The Hacker News
I
InfoQ
The Last Watchdog
The Last Watchdog
MyScale Blog
MyScale Blog
Schneier on Security
WordPress大学
WordPress大学
小众软件
小众软件
Threat Intelligence Blog | Flashpoint
宝玉的分享
宝玉的分享
CTFtime.org: upcoming CTF events
K
Kaspersky official blog
L
LINUX DO - 热门话题
N
News | PayPal Newsroom
F
Fortinet All Blogs
Exploit-DB.com RSS Feed
S
Security @ Cisco Blogs
Recorded Future
Recorded Future
大猫的无限游戏
大猫的无限游戏
H
Help Net Security
Google Online Security Blog
S
Schneier on Security
C
Cisco Blogs
N
News and Events Feed by Topic
V2EX - 技术
V2EX - 技术
Latest news
Latest news
PCI Perspectives
PCI Perspectives
T
The Blog of Author Tim Ferriss
P
Palo Alto Networks Blog
T
Tor Project blog
Project Zero
Project Zero
云风的 BLOG
云风的 BLOG
Webroot Blog
Webroot Blog
Attack and Defense Labs
cs.CL updates on arXiv.org

十月指南

使用AI开发一个应用最好的时间是现在 Kimi K2 发布并开源,实测效果确实很强! Vibe Coding实战:从翻车到上线,我开发了一款提前还贷计算器小程序 告别熬夜写代码!AI编程让我用Vibe Coding轻松上线 10 + 工具 用Vibe Coding方式打造 AI 内容创作平台 我连代码都没写,却做出JSON格式化工具—Vibe Coding了解一下 GPT 4.1、DeepSeek R1、Claude 3.7 代码生成横评,谁才是设计稿还原之王? AI 时代程序员生存指南 Cursor+Figma MCP 设计稿还原如此简单 MCP(模型上下文协议)是什么?它如何简化与API的AI集成 号外!我用Trae+Claude3.7开发的小程序上线啦 30分钟开发完成!Trae+Claude 3.7 打造小程序全流程揭秘! 5 分钟打造超酷小程序设计稿,Trae+Claude 3.7 太神了! 一句话生成设计稿,Trae+Claude 3.7 Sonnet,设计师也要被AI取代了 一句话生成应用!程序员效率翻倍的AI代码生成工具大盘点 我用AI创作了一首歌:Suno、海绵音乐、天工AI音乐生成效果测评 从哪吒2热潮到AI短片创作:AI视频实战测评 shadcn_ui:2024年最受欢迎的前端项目 技术篇:构建与部署 技术篇:Google 统计服务 技术篇:Next.js 多环境配置 技术篇:数据库-Prisma 技术篇:身份验证-NextAuth 技术篇:CSR、SSR、SSG、ISR 与客户端、服务端组件 技术篇:Next.js 路由与页面管理 技术篇:Next.js 项目结构 技术篇:Next.js 简介与概览 技术篇:从零开始掌握 Tailwind CSS 设计篇:独立开发设计入门 开篇:走上独立开发之路 Ollama:本地大模型运行指南 TooTool.net 理解 CSS 中的 Containing Block(包含块) 独立开发者工具大全(持续更新) TimeFlow 如何快速拥有一个技术博客 一个人从零开发上线一款App需要多少钱?终于有答案了! 深入理解HTTPS Nginx实战 Flutter Platform Channel 使用与源码分析 Android SDK类产品开发总结 360插件化框架 RePlugin 之 ClassLoader Hook Mac下Charles抓包配置 十一大西北体验 利用ContentProvider实现同步Binder macOS修改Android模拟器Hosts 走过 登山记 期待成长 小雨 静夜思 关于
实战:基于 Next.js+MoonShot API 开发一个 Github Trending 总结助手
十月 · 2025-02-10 · via 十月指南

目标 #

  • 自动抓取 GitHub Trending 仓库列表。
  • 使用 MoonShot API 总结每个仓库的简介。
  • 展示一个用户友好的界面,列出描述和简介。

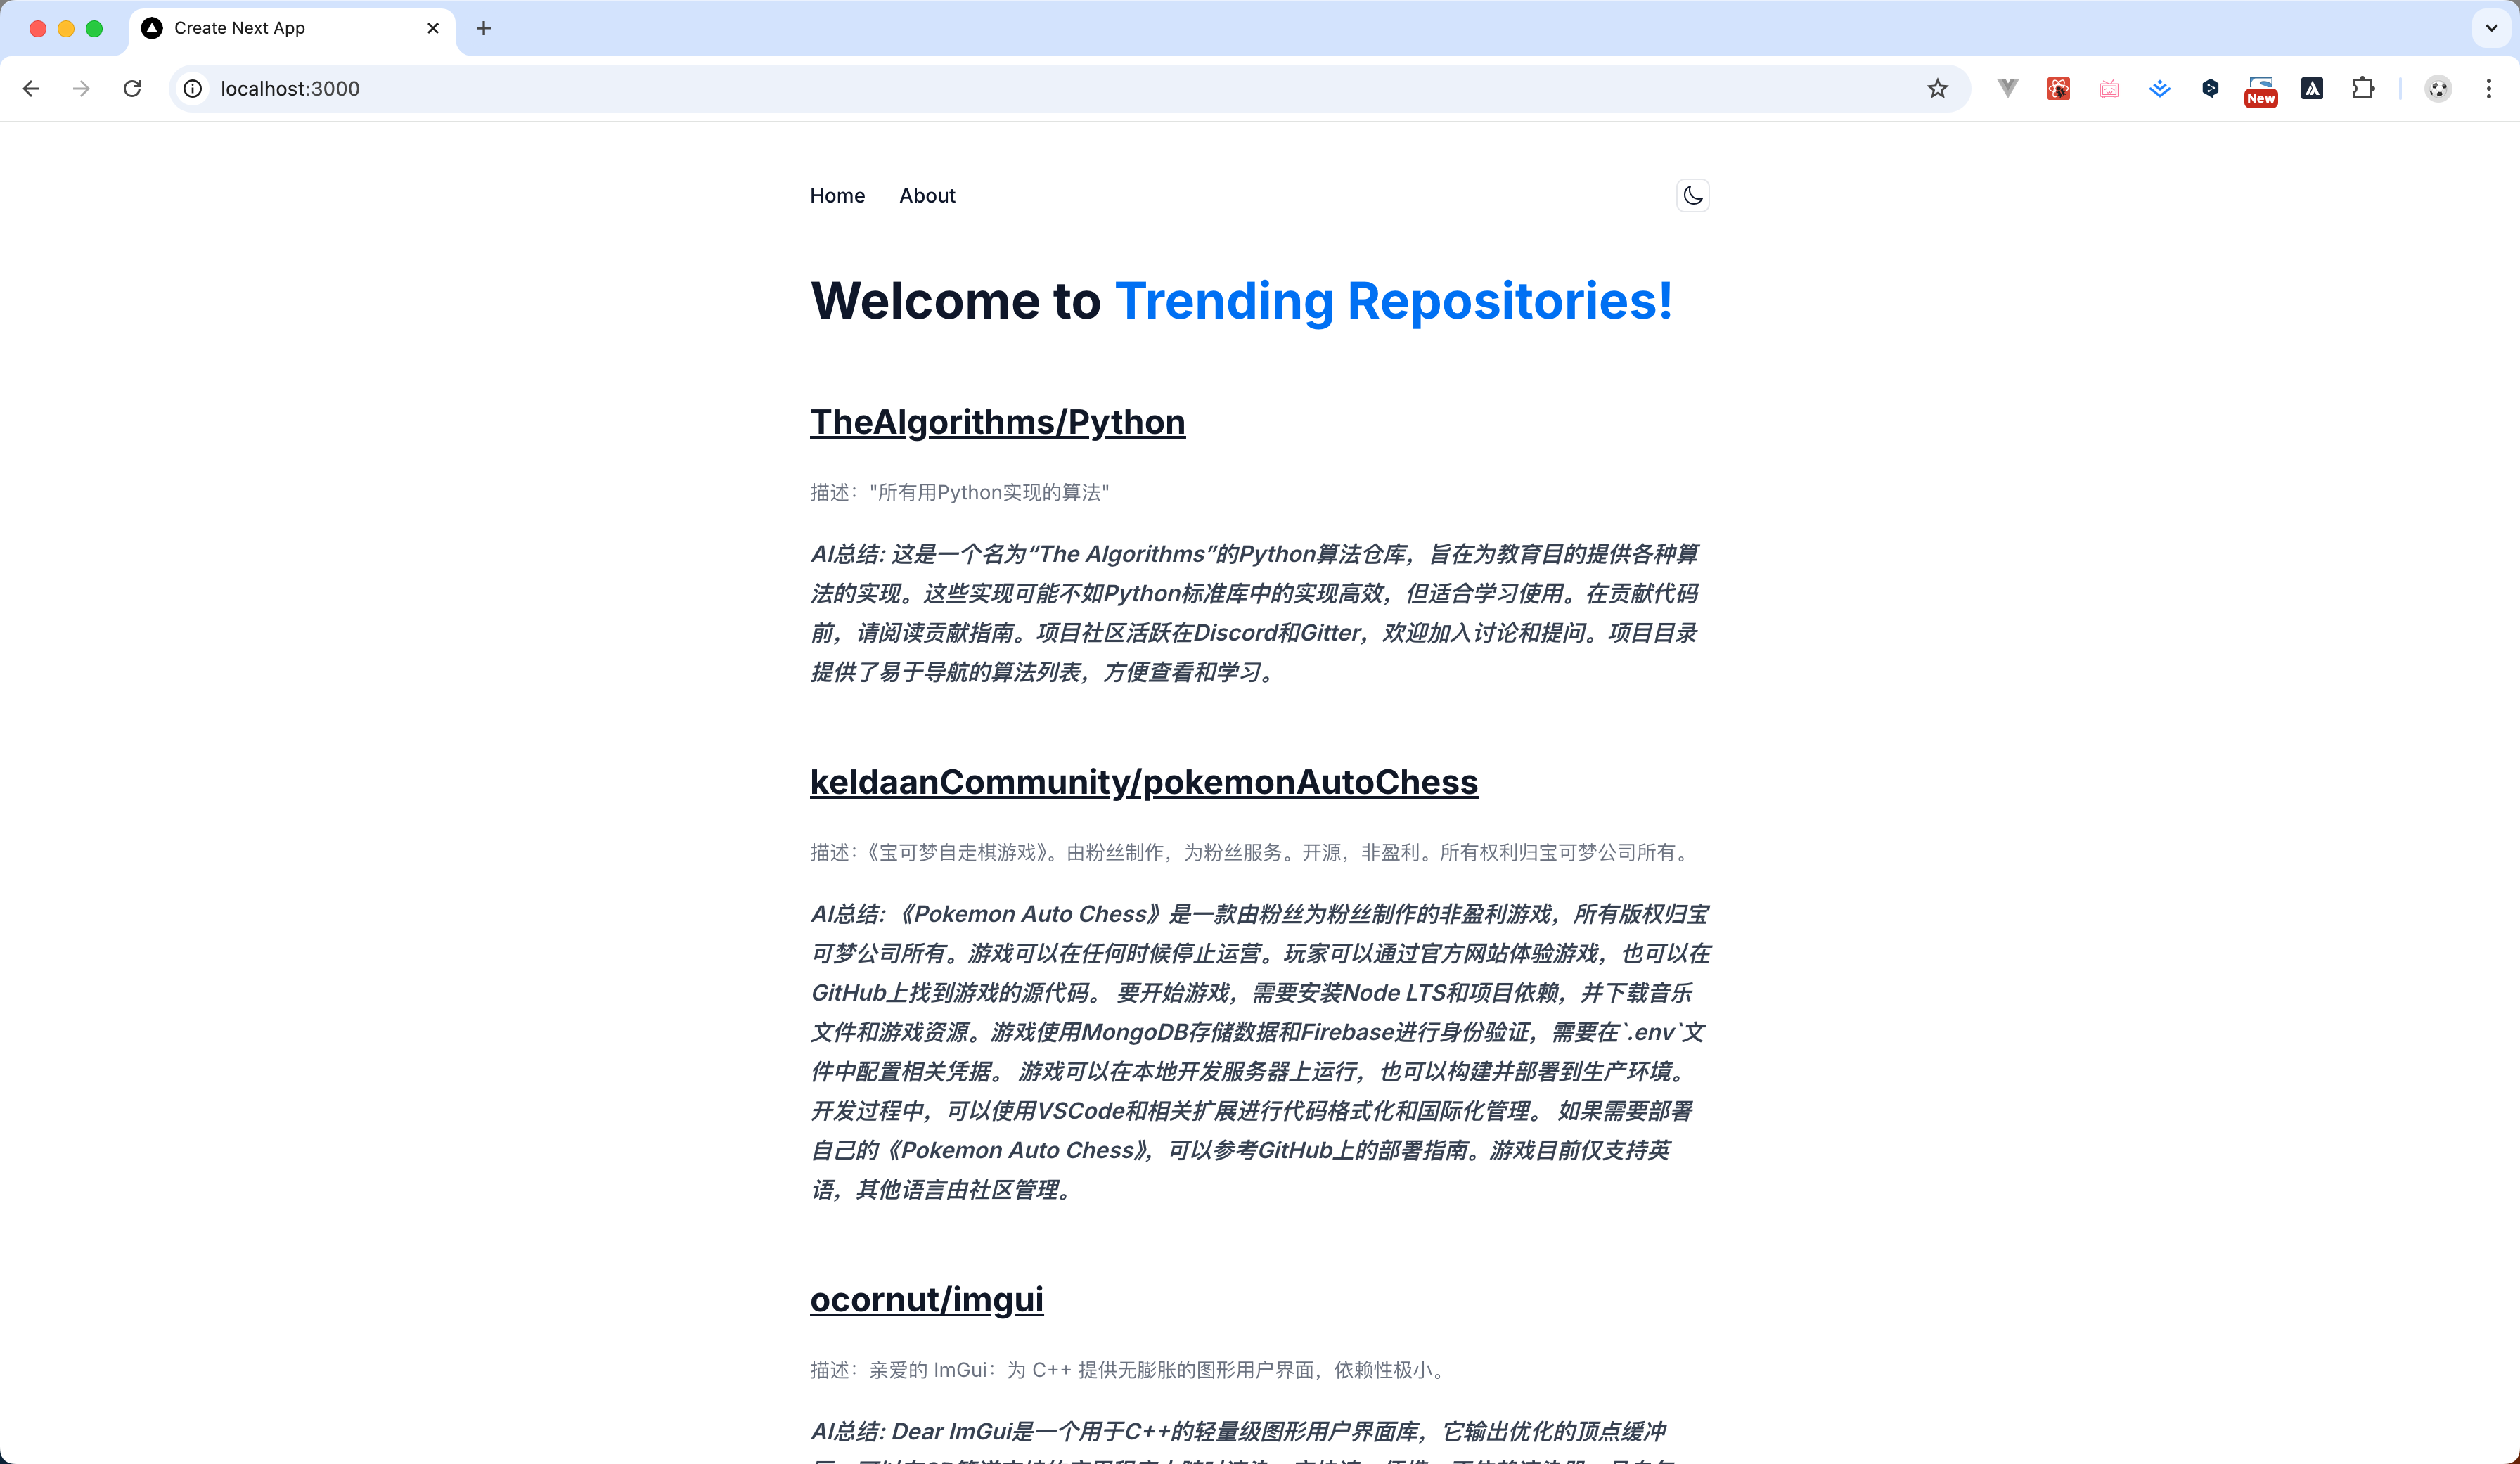
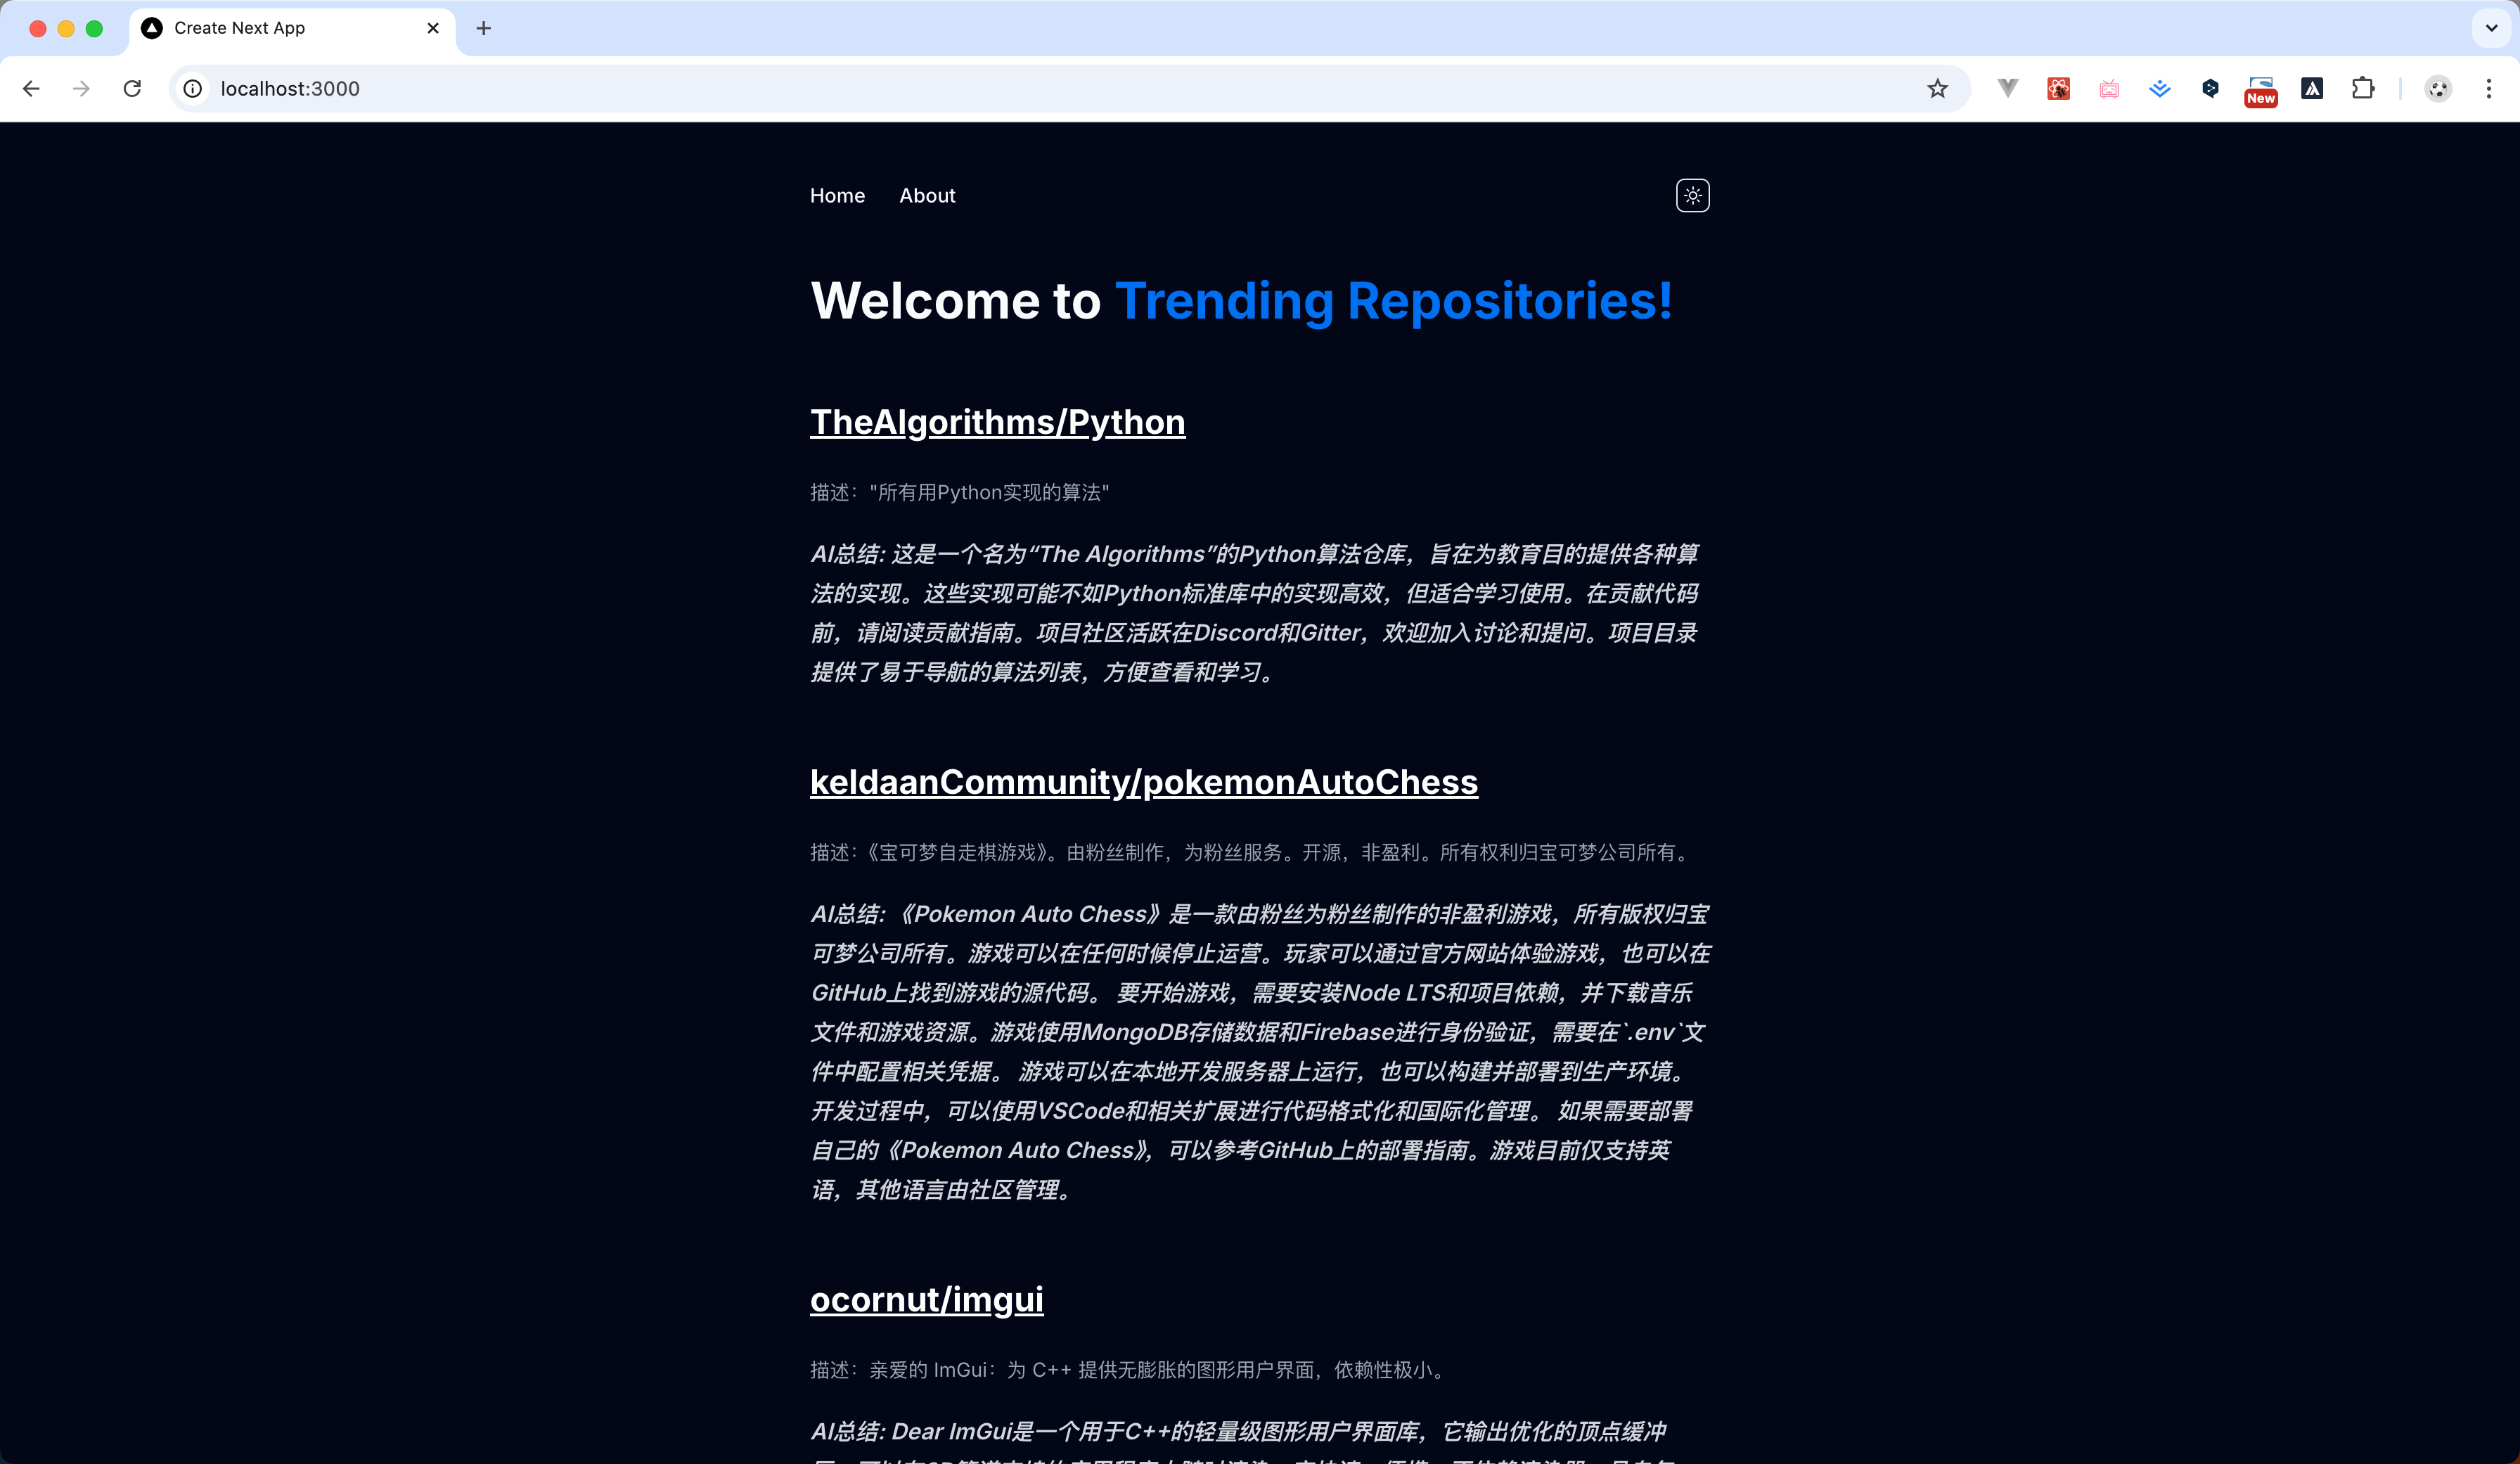
下面这个页面即最终的运行效果,小编还贴心的加上了暗黑模式。

image.png
image <em>1</em>.png

功能需求:

  • 获取 GitHub Trending 数据。
  • 利用 OpenAI API 生成自然语言总结。

技术选型:

  • 前端框架:Next.js、Tailwind CSS
  • API 服务:GitHub API, MoonShot API

为什么选择 MoonShot API?因为 MoonShot API 对于新注册用户有一定的免费额度,且和 OpenAI 兼容,如果想迁移到 OpenAI 也非常方便。

技术实现 #

初始化 Next.js 项目 #

首先,我们使用以下命令创建一个 Next.js 项目:

npx create-next-app@latest
✔ What is your project named? … github-trending
✔ Would you like to use TypeScript? … No / Yes
✔ Would you like to use ESLint? … No / Yes
✔ Would you like to use Tailwind CSS? … No / Yes
✔ Would you like to use `src/` directory? … No / Yes
✔ Would you like to use App Router? (recommended) … No / Yes
✔ Would you like to customize the default import alias (@/*)? … No / Yes

初始化完项目并安装依赖后,yarn dev 启动项目。

获取 GitHub Trending 数据 #

由于 GitHub API 没有专门的 Trending API,我们需要通过 GitHub Trending 页面获取数据,可以使用 Puppeteer 或 Cheerio 进行页面抓取,这里我们选择 Cheerio。

Cheerio 是一个快速、灵活、轻量级的 JavaScript 库,专门用于在 Node.js 环境中操作和解析 HTML。它提供了一种类似于 jQuery 的 API,使得开发者可以方便地对 HTML 结构进行查询、修改等操作。

抓取 GitHub Trending 的代码可以如下实现:

// app/page.js
import { load } from "cheerio";

const fetchTrendingRepos = async () => {
  try {
    const res = await fetch("https://github.com/trending?since=daily");
    const htmlText = await res.text();
    const $ = load(htmlText);
    const repos = [];
    const elements = $("h2.h3.lh-condensed");

    for (const element of elements) {
       // 从 html 里解析出 repoName
      const repoName = $(element).find("a").attr("href").trim().substring(1);
      console.log("repoName", repoName);
      const repoDetail = await fetchRepoDetail(repoName);
      if (!repoDetail) continue;

      const translatedDescription = await translateDescription(
        repoDetail.description || "无描述"
      );

      await delay(70 * 1000);

      const summary = await summarizeReadme(repoName);

      await delay(70 * 1000);

      repos.push({
        name: repoName,
        desc: translatedDescription,
        summary,
      });
    }

    return repos;
  } catch (error) {
    console.error("Error fetching trending repositories:", error);
    return [];
  }
};

获取仓库详情 #

上面的代码解析出仓库名,接下来我们就可以调 GitHub API 来获取仓库详情了:

const fetchRepoDetail = async (repoName) => {
  try {
    const response = await fetch(`https://api.github.com/repos/${repoName}`);
    if (!response.ok) throw new Error("Failed to fetch repo details");
    return await response.json();
  } catch (error) {
    console.error(`Error fetching repo details for ${repoName}:`, error);
    return null;
  }
};

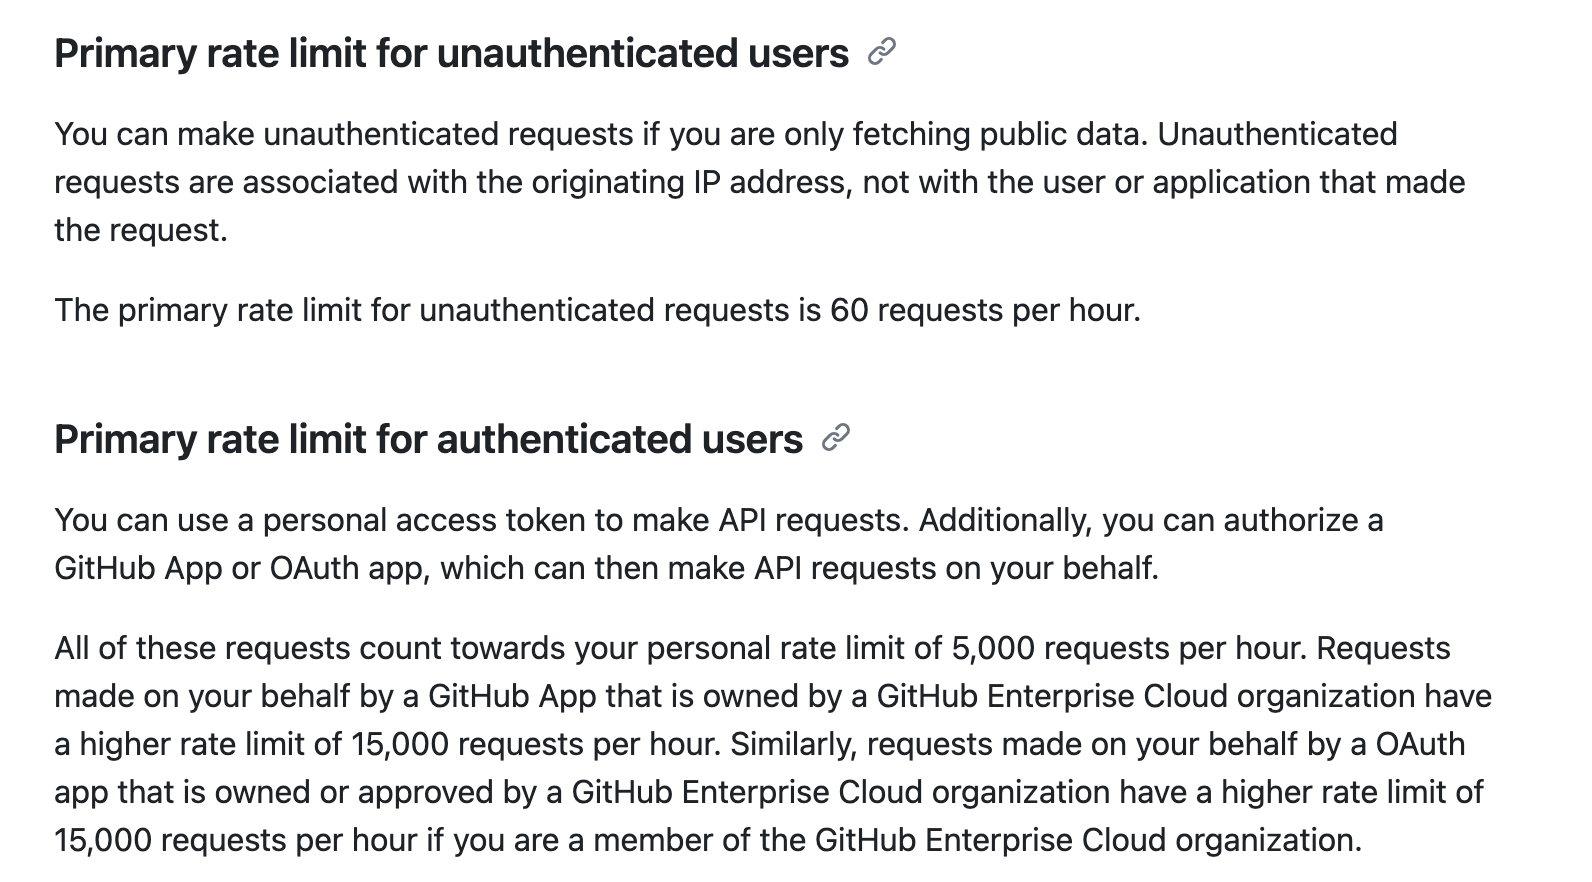
GitHub API 也有访问限制,对于未认证的请求:每小时的请求限额:60 次。对于认证的请求:每小时的请求限额:5000 次。

image <em>2</em>.png

翻译 description 成中文 #

拿到详情,我们用大模型把 description 翻译成中文。因为 MoonShot 兼容 OpenAI SDK,因此我们先添加 OpenAI SDK 依赖。

然后引入并添加配置:

import OpenAI from "openai";

const client = new OpenAI({
  apiKey: process.env.MOONSHOT_API_KEY, //需要注册后申请
  baseURL: "https://api.moonshot.cn/v1",
});

最后调用 chat 来进行翻译:


const translatedDescription = await translateDescription(
  repoDetail.description || "无描述"
);

const fetchMoonShotResponse = async (content, role) => {
  try {
    const completion = await client.chat.completions.create({
      model: "moonshot-v1-8k",
      messages: [
        {
          role: "system",
          content: role,
        },
        {
          role: "user",
          content,
        },
      ],
      temperature: 0.3,
    });
    return completion.choices[0].message.content;
  } catch (error) {
    console.error("Error in request:", error);
    return "";
  }
};

const translateDescription = async (description) => {
  return await fetchMoonShotResponse(
    `${description} 翻译成中文`,
    "你是翻译专家,擅长各种语言翻译"
  );
};

总结 Readme #


const summarizeReadme = async (repoName) => {
  try {
    const response = await fetch(
      `https://api.github.com/repos/${repoName}/readme`
    );
    if (!response.ok) throw new Error("Failed to fetch readme");

    const readmeData = await response.json();
    const readmeStr = atob(readmeData.content);

    return await fetchMoonShotResponse(
      `${readmeStr} 总结成200字的中文`,
      "你是翻译专家,擅长各种语言翻译和总结"
    );
  } catch (error) {
    console.error(`Error summarizing README for ${repoName}:`, error);
    return "";
  }
};

注意,对于免费用户 MoonShot 也有请求限制,因此,每次调用 MoonShot 后,需要增加 delay 避免频繁请求接口。参见: https://platform.moonshot.cn/docs/pricing/limits

用户等级 累计充值金额 并发 RPM TPM TPD
Free ¥ 0 1 3 32,000 1,500,000
Tier1 ¥ 50 50 200 128,000 10,000,000
Tier2 ¥ 100 100 500 128,000 20,000,000
Tier3 ¥ 500 200 5,000 384,000 Unlimited
Tier4 ¥ 5,000 400 5,000 768,000 Unlimited
Tier5 ¥ 20,000 1,000 10,000 2,000,000 Unlimited

以上我们就有了要展示在前端的所有数据:

  • repoName
  • description
  • summary

前端展示 #

前端展示我们使用 Tailwind CSS 官方插件typography,它简化了为文章、博客等长内容应用默认样式的过程,使文本更具可读性和美感。通过 prose 类来为内容块提供一组经过精心设计的排版样式。以下是详细用法和常见场景:

安装

首先,你需要在你的 Tailwind CSS 项目中安装 @tailwindcss/typography 插件:

yarn add @tailwindcss/typography

然后,在 tailwind.config.js 中引入该插件:

module.exports = {
  plugins: [
    require('@tailwindcss/typography'),   
  ],
}

基本用法

使用 prose 类可以让一整块内容的排版看起来更统一。例如:

<div class="prose">
  <h1>Tailwind CSS Typography</h1>
  <p>这是一个段落,包含了默认的 <code>prose</code> 样式。这些样式会自动应用到标题、段落、列表、引用等元素上。</p>
  <blockquote>这是一个引言。</blockquote>
  <ul>
    <li>第一项</li>
    <li>第二项</li>
    <li>第三项</li>
  </ul>
</div>

此时,prose 类会对其中的 h1pblockquoteul 等 HTML 元素应用默认的样式。

修改字体颜色和尺寸

也可以结合其他 Tailwind 的工具类对排版样式进行进一步自定义,例如改变字体颜色或尺寸:

<div class="prose prose-lg text-gray-700">
  <h1>较大字体的文章标题</h1>
  <p>段落文字将应用灰色字体。</p>
</div>
  • prose-lg 会增加内容的整体字体大小。
  • text-gray-700 将文本颜色设置为深灰色。

我们最终展示的代码如下:

export default async function Home() {
  const repos = await fetchTrendingRepos();
  return (
    <div>
      <h1 className="mt-10 text-4xl font-bold leading-tight">
        Welcome to{" "}
        <a
          href="https://github.com/trending"
          className="text-[#0070f3] hover:underline focus:underline active:underline"
        >
          Trending Repositories!
        </a>
      </h1>

      <div className="prose dark:prose-invert">
        {repos.map((repo, index) => (
          <article key={index}>
            <Link href={`https://github.com/${repo.name}`}>
              <h2>{repo.name}</h2>
            </Link>
            {repo.desc && (
              <p className="text-sm text-gray-500 dark:text-gray-400">
                描述{repo.desc}
              </p>
            )}
            {repo.summary && (
              <p className="font-semibold italic">AI总结: {repo.summary}</p>
            )}
          </article>
        ))}
      </div>
    </div>
  );
}

总结 #

通过本教程,我们已经实现了一个基于 Next.js 和 MoonShot API 的 GitHub Trending 总结工具。它不仅展示了 Next.js 的强大特性,还结合了 MoonShot 大模型的能力。可以帮助小编快速掌握热门趋势并更高效地获取信息。当然目前本项目停留在自用阶段,仍有较大的优化空间。例如将定时更新数据并存到数据库等,后续小编会逐步完善次项目。

源码地址 #

参考 #

https://docs.github.com/en/rest

https://github.com/tailwindlabs/tailwindcss-typography

https://docs.github.com/en/rest/using-the-rest-api/rate-limits-for-the-rest-api?apiVersion=2022-11-28