在 Docker 学习系列17 镜像和容器的导入导出 我讲过docker镜像是由一层层组成的 比如如下dockerfile文件
bash
FROM node:10.8.0-alpine
MAINTAINER www.mafeifan.com
# 设置工作目录,下面的RUN命令会在工作目录执行
WORKDIR /app
# 先拷贝本地的 package.json 和 package-lock 到容器内
# 这样是利用docker的镜像分层机制
COPY package*.json ./
# 安装项目依赖包
# 生产环境可以运行 RUN npm install --only=production 只按照 package.json 中dependencies定义的模块
RUN npm install
# 将根目录下的文件都copy到container(运行此镜像的容器)文件系统的app文件夹下
ADD . /app/
# 暴露容器内的3000端口
EXPOSE 3000
# 容器启动时执行的命令,类似npm run start
CMD ["npm", "start"]
当我们执行docker build 生成镜像的时候,实际上每行命令产生的文件会存到一个目录中,即一层,Dockerfile 最佳实践 也建议我们
镜像层数尽可能少
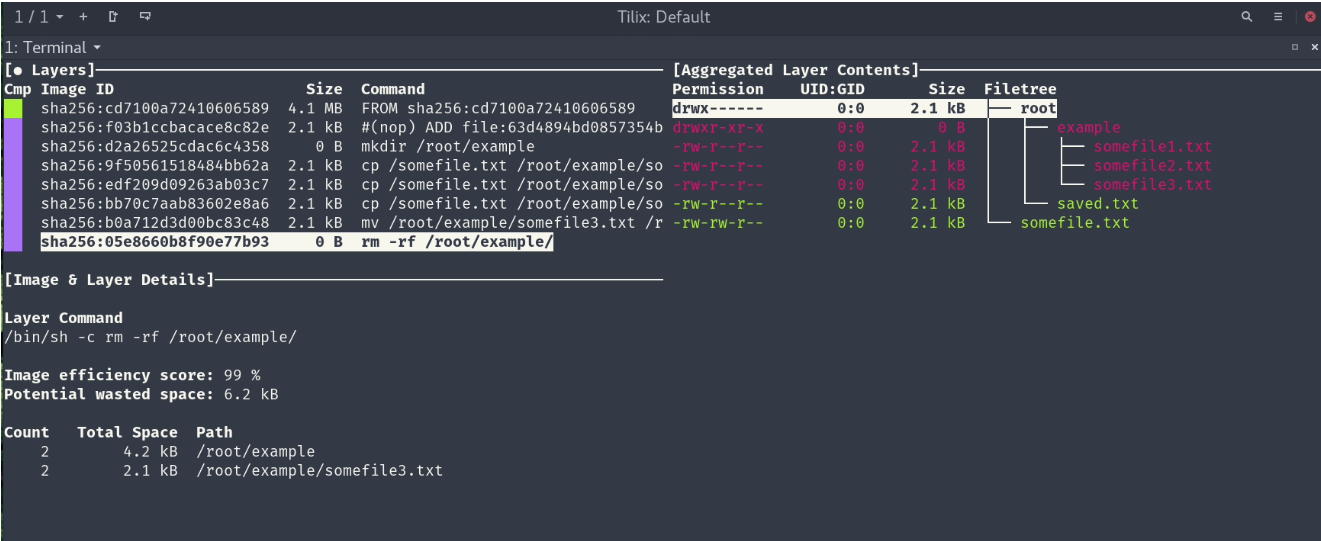
这里推荐一款工具 dive 可以方便的查看镜像层详情,评估镜像的质量,如浪费了多少空间
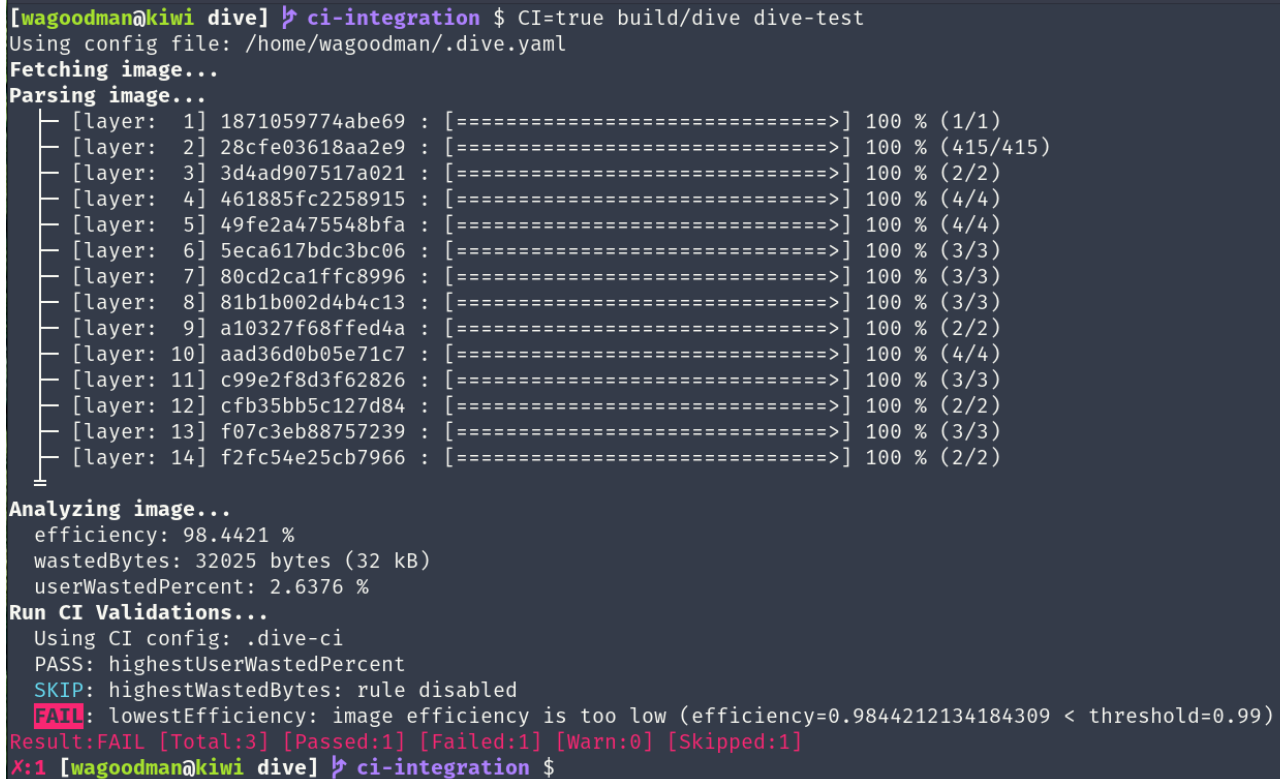
如果作为镜像审查之后,可以进行如下命令操作:
$: CI=true dive <image-id>
Fetching image... (this can take a while with large images)
Parsing image...
Analyzing image...
  efficiency: 95.0863 %
  wastedBytes: 671109 bytes (671 kB)
  userWastedPercent: 8.2274 %
Run CI Validations...
  Using default CI config
  PASS: highestUserWastedPercent
  SKIP: highestWastedBytes: rule disabled
  PASS: lowestEfficiency
从输出信息可以得到很多有用的信息,集成到CI过程也就非常容易了。 dive本身支持添加.dive-ci 配置文件作为项目的CI配置,具体配置规则见文档。
yaml
rules:
  # If the efficiency is measured below X%, mark as failed.
  # Expressed as a percentage between 0-1.
  lowestEfficiency: 0.95

  # If the amount of wasted space is at least X or larger than X, mark as failed.
  # Expressed in B, KB, MB, and GB.
  highestWastedBytes: 20MB

  # If the amount of wasted space makes up for X% or more of the image, mark as failed.
  # Note: the base image layer is NOT included in the total image size.
  # Expressed as a percentage between 0-1; fails if the threshold is met or crossed.
  highestUserWastedPercent: 0.20
集成到CI中,增加以下命令即可: $: CI=true dive <image-id>
镜像审查和代码审查类似,是一件开始抵制,开始后就欲罢不能的事。这件事宜早不宜迟,对于企业与个人而言均百利而无一害。
随着容器化的普及,个人觉得这个工具很有前途
另外推荐一个容器的静态分析工具 clair
此内容由惯性聚合(RSS阅读器)自动聚合整理,仅供阅读参考。 原文来自 — 版权归原作者所有。