惯性聚合 高效追踪和阅读你感兴趣的博客、新闻、科技资讯
阅读原文 在惯性聚合中打开

推荐订阅源

GbyAI
GbyAI
Cyberwarzone
Cyberwarzone
cs.AI updates on arXiv.org
Threat Intelligence Blog | Flashpoint
W
WeLiveSecurity
博客园 - 叶小钗
Hugging Face - Blog
Hugging Face - Blog
Security Latest
Security Latest
Scott Helme
Scott Helme
TaoSecurity Blog
TaoSecurity Blog
N
Netflix TechBlog - Medium
爱范儿
爱范儿
Application and Cybersecurity Blog
G
Google Developers Blog
F
Fortinet All Blogs
N
News and Events Feed by Topic
V2EX - 技术
V2EX - 技术
Google Online Security Blog
L
LINUX DO - 热门话题
NISL@THU
NISL@THU
The GitHub Blog
The GitHub Blog
Spread Privacy
Spread Privacy
S
Secure Thoughts
T
Tailwind CSS Blog
Google DeepMind News
Recorded Future
Recorded Future
N
News and Events Feed by Topic
SecWiki News
SecWiki News
S
Security @ Cisco Blogs
A
About on SuperTechFans
云风的 BLOG
云风的 BLOG
L
Lohrmann on Cybersecurity
P
Palo Alto Networks Blog
Know Your Adversary
Know Your Adversary
IT之家
IT之家
人人都是产品经理
人人都是产品经理
Attack and Defense Labs
Hacker News - Newest:
Hacker News - Newest: "LLM"
MyScale Blog
MyScale Blog
宝玉的分享
宝玉的分享
T
The Blog of Author Tim Ferriss
H
Hacker News: Front Page
T
Tenable Blog
C
CERT Recently Published Vulnerability Notes
D
DataBreaches.Net
阮一峰的网络日志
阮一峰的网络日志
Help Net Security
Help Net Security
博客园_首页
S
Securelist
罗磊的独立博客

Xiaobin's Notes

Electron的原理 如何让大语言模型输出JSON格式 webstorm 的 cpu 占用高 修改Joplin主题样式 ECMAScript 历代版本 新一代包管理器 PNPM React useEffect() Hook Vue 2.x 使用高德地图JS API 2.0加载起点终点路径轨迹 家庭用电插座 MacOS 14.4 引发Java 应用崩溃 重定向广告 Pyenv工具 ElasticSearch集群原理 ElasticSearch集群节点 Elasticsearch Mapping 参数 Elasticsearch元数据 Elasticsearch的数据类型 Go语言的向后兼容和toolchain规则 Go 1.21 新增特性
Mac本地快速部署DeepSeek
xbl · 2025-03-09 · via Xiaobin's Notes
  • 一、下载Ollama并安装运行DeepSeek
  • 二、下载Chatbox并配置为本地DeepSeek

总体步骤

1.下载Ollama并安装运行DeepSeek
2.下载Chatbox并配置为本地DeepSeek
3.开启DeepSeek本地交互(无需联网)

一、下载Ollama并安装运行DeepSeek

1、从Ollama官方网站下载Ollama:

进入Ollama官方网站后,可以看到Ollama已经支持DeepSeek-R1的部署:
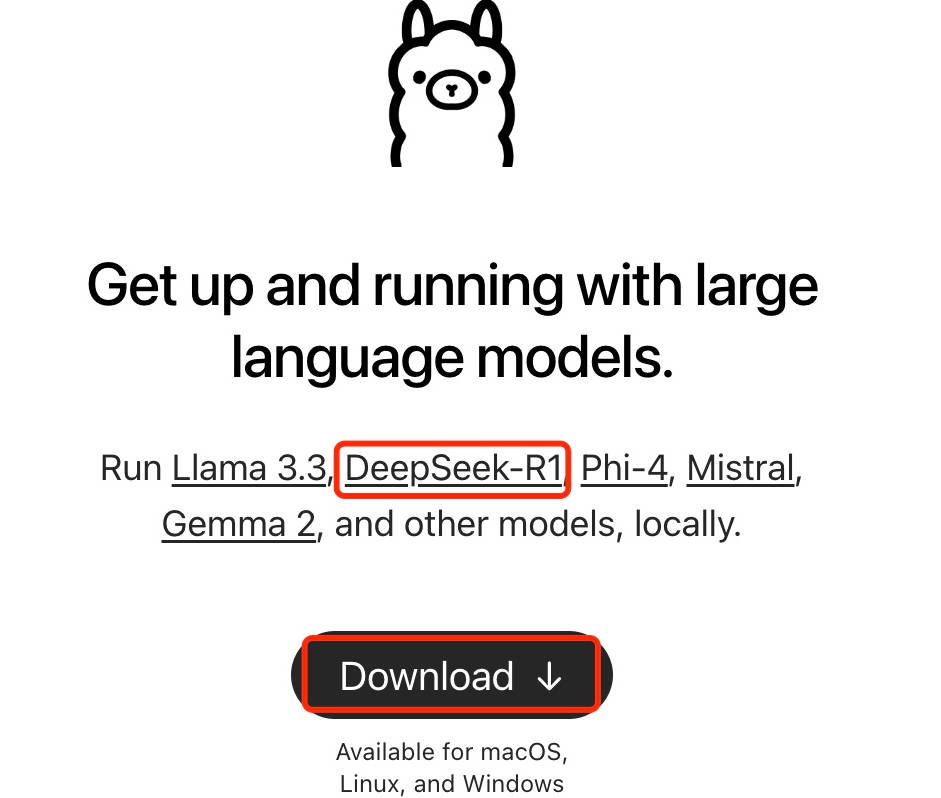
2、点击DeepSeek-R1的链接可以看到有关deepseek-r1的详细介绍:

目前deepseek-r1模型大小提供了7个选择:1.5b、7b、8b、14b、32b、70b、671b。

如果你的Mac内存配置较低(8G内存),建议选择最小的1.5b模型,如果是16G内存,建议选择7B或8B模型,模型选择原则:内存>模型标号

通常模型大小(参数量)越大,模型的理解和生成能力越强,但也会消耗更多的计算资源。至于671B的完全体就不要想了,mac没那么大内存可以跑起来

3、点击Download按钮下载符合自己平台的Ollama:
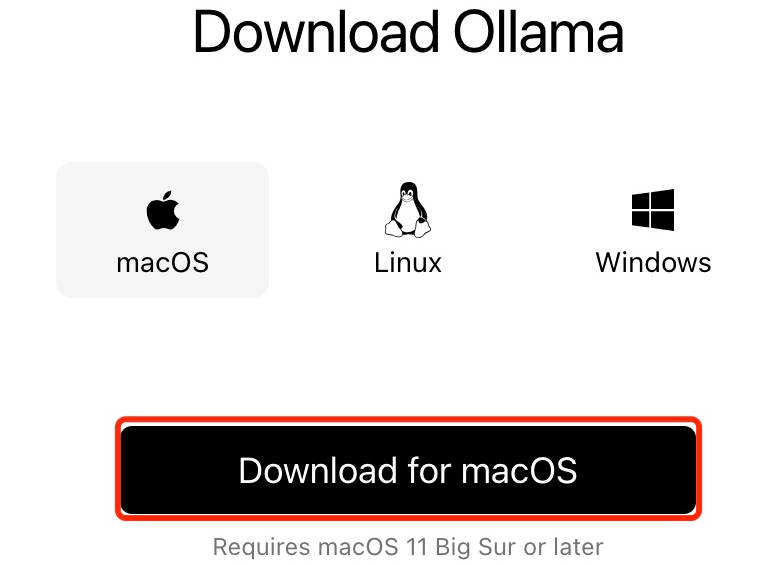
这里选择macOS,点击下载。
下载文件大小不到200M,文件名为:Ollama-darwin.zip

4、解压后打开Ollama应用程序,点击next,点击Install 安装ollama。

5、按照提示,打开终端,使用 Command + Space 快捷键调用 terminal

在终端窗口运行下面命令:

1
ollama run deepseek-r1:8b

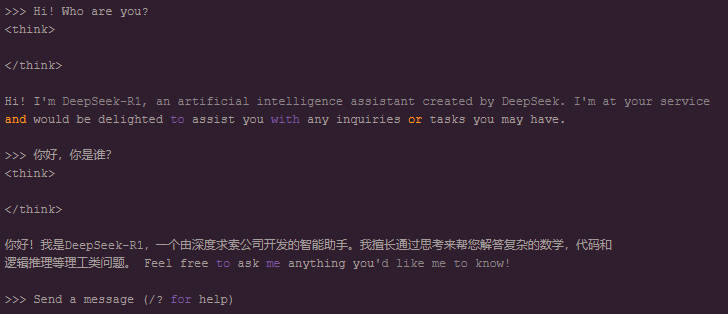
6、下载完毕的话,在终端中就直接可以和DeepSeek对话了:

二、下载Chatbox并配置为本地DeepSeek

1、打开Chatbox官方网站:https://chatboxai.app/en

2、下载的Chatbox-1.9.7.dmg,大小100M多点,点击安装,启动:
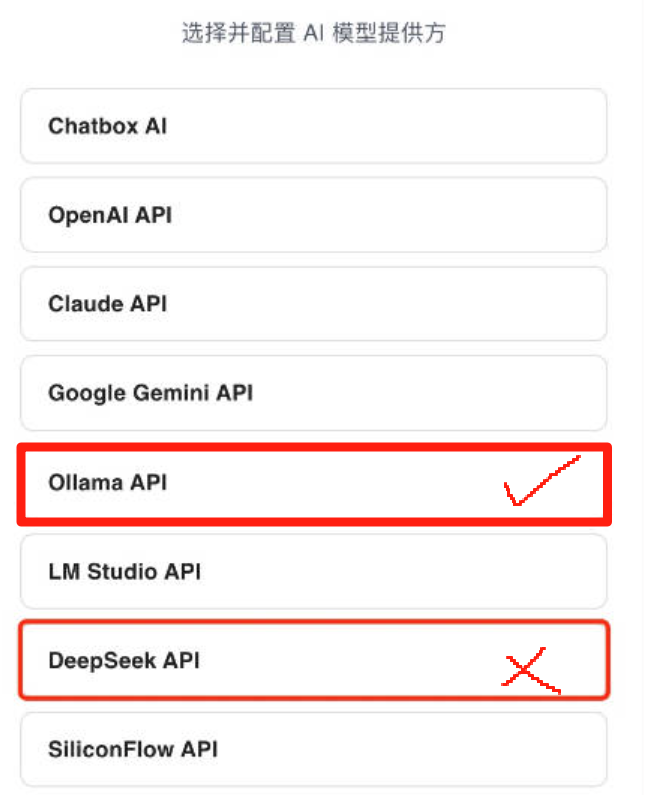
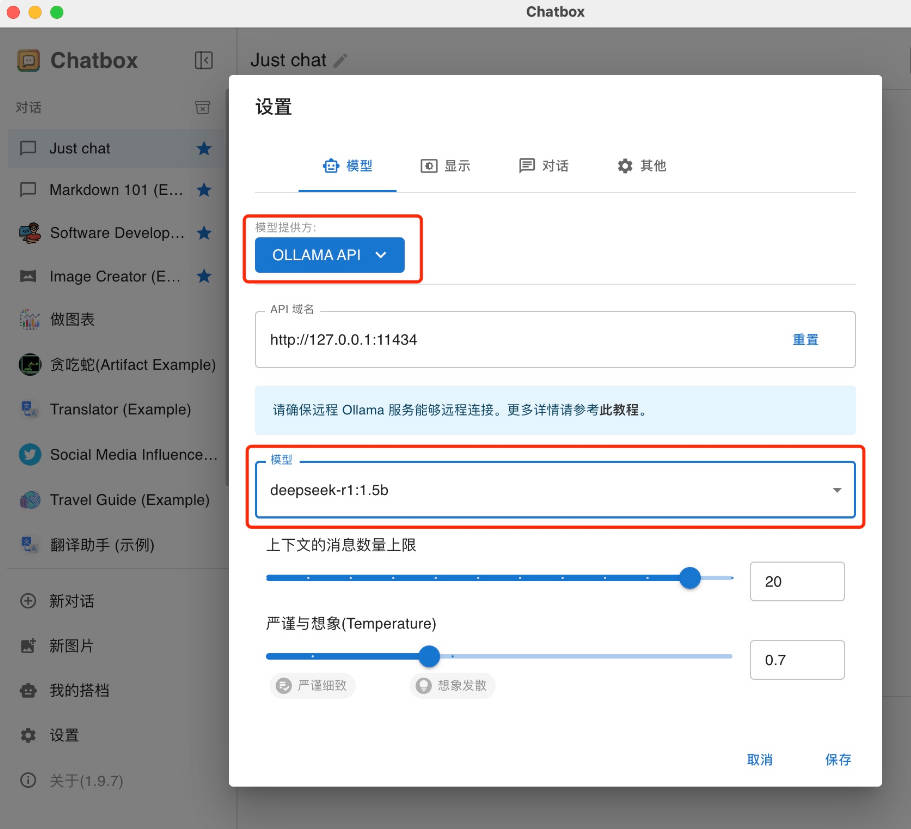
3、这里不能选择DeepSeek API,若选择这个你就找不到你本地的DeepSeek模型。

正确的应该选择OLLAMA API,然后就可以看到我们上一步安装好的deepseek-r1:8b或其他参数的模型