







Posted on onsdag, juni 17, 2015 in Hal9k, Planet Ubuntu-DK, Planets
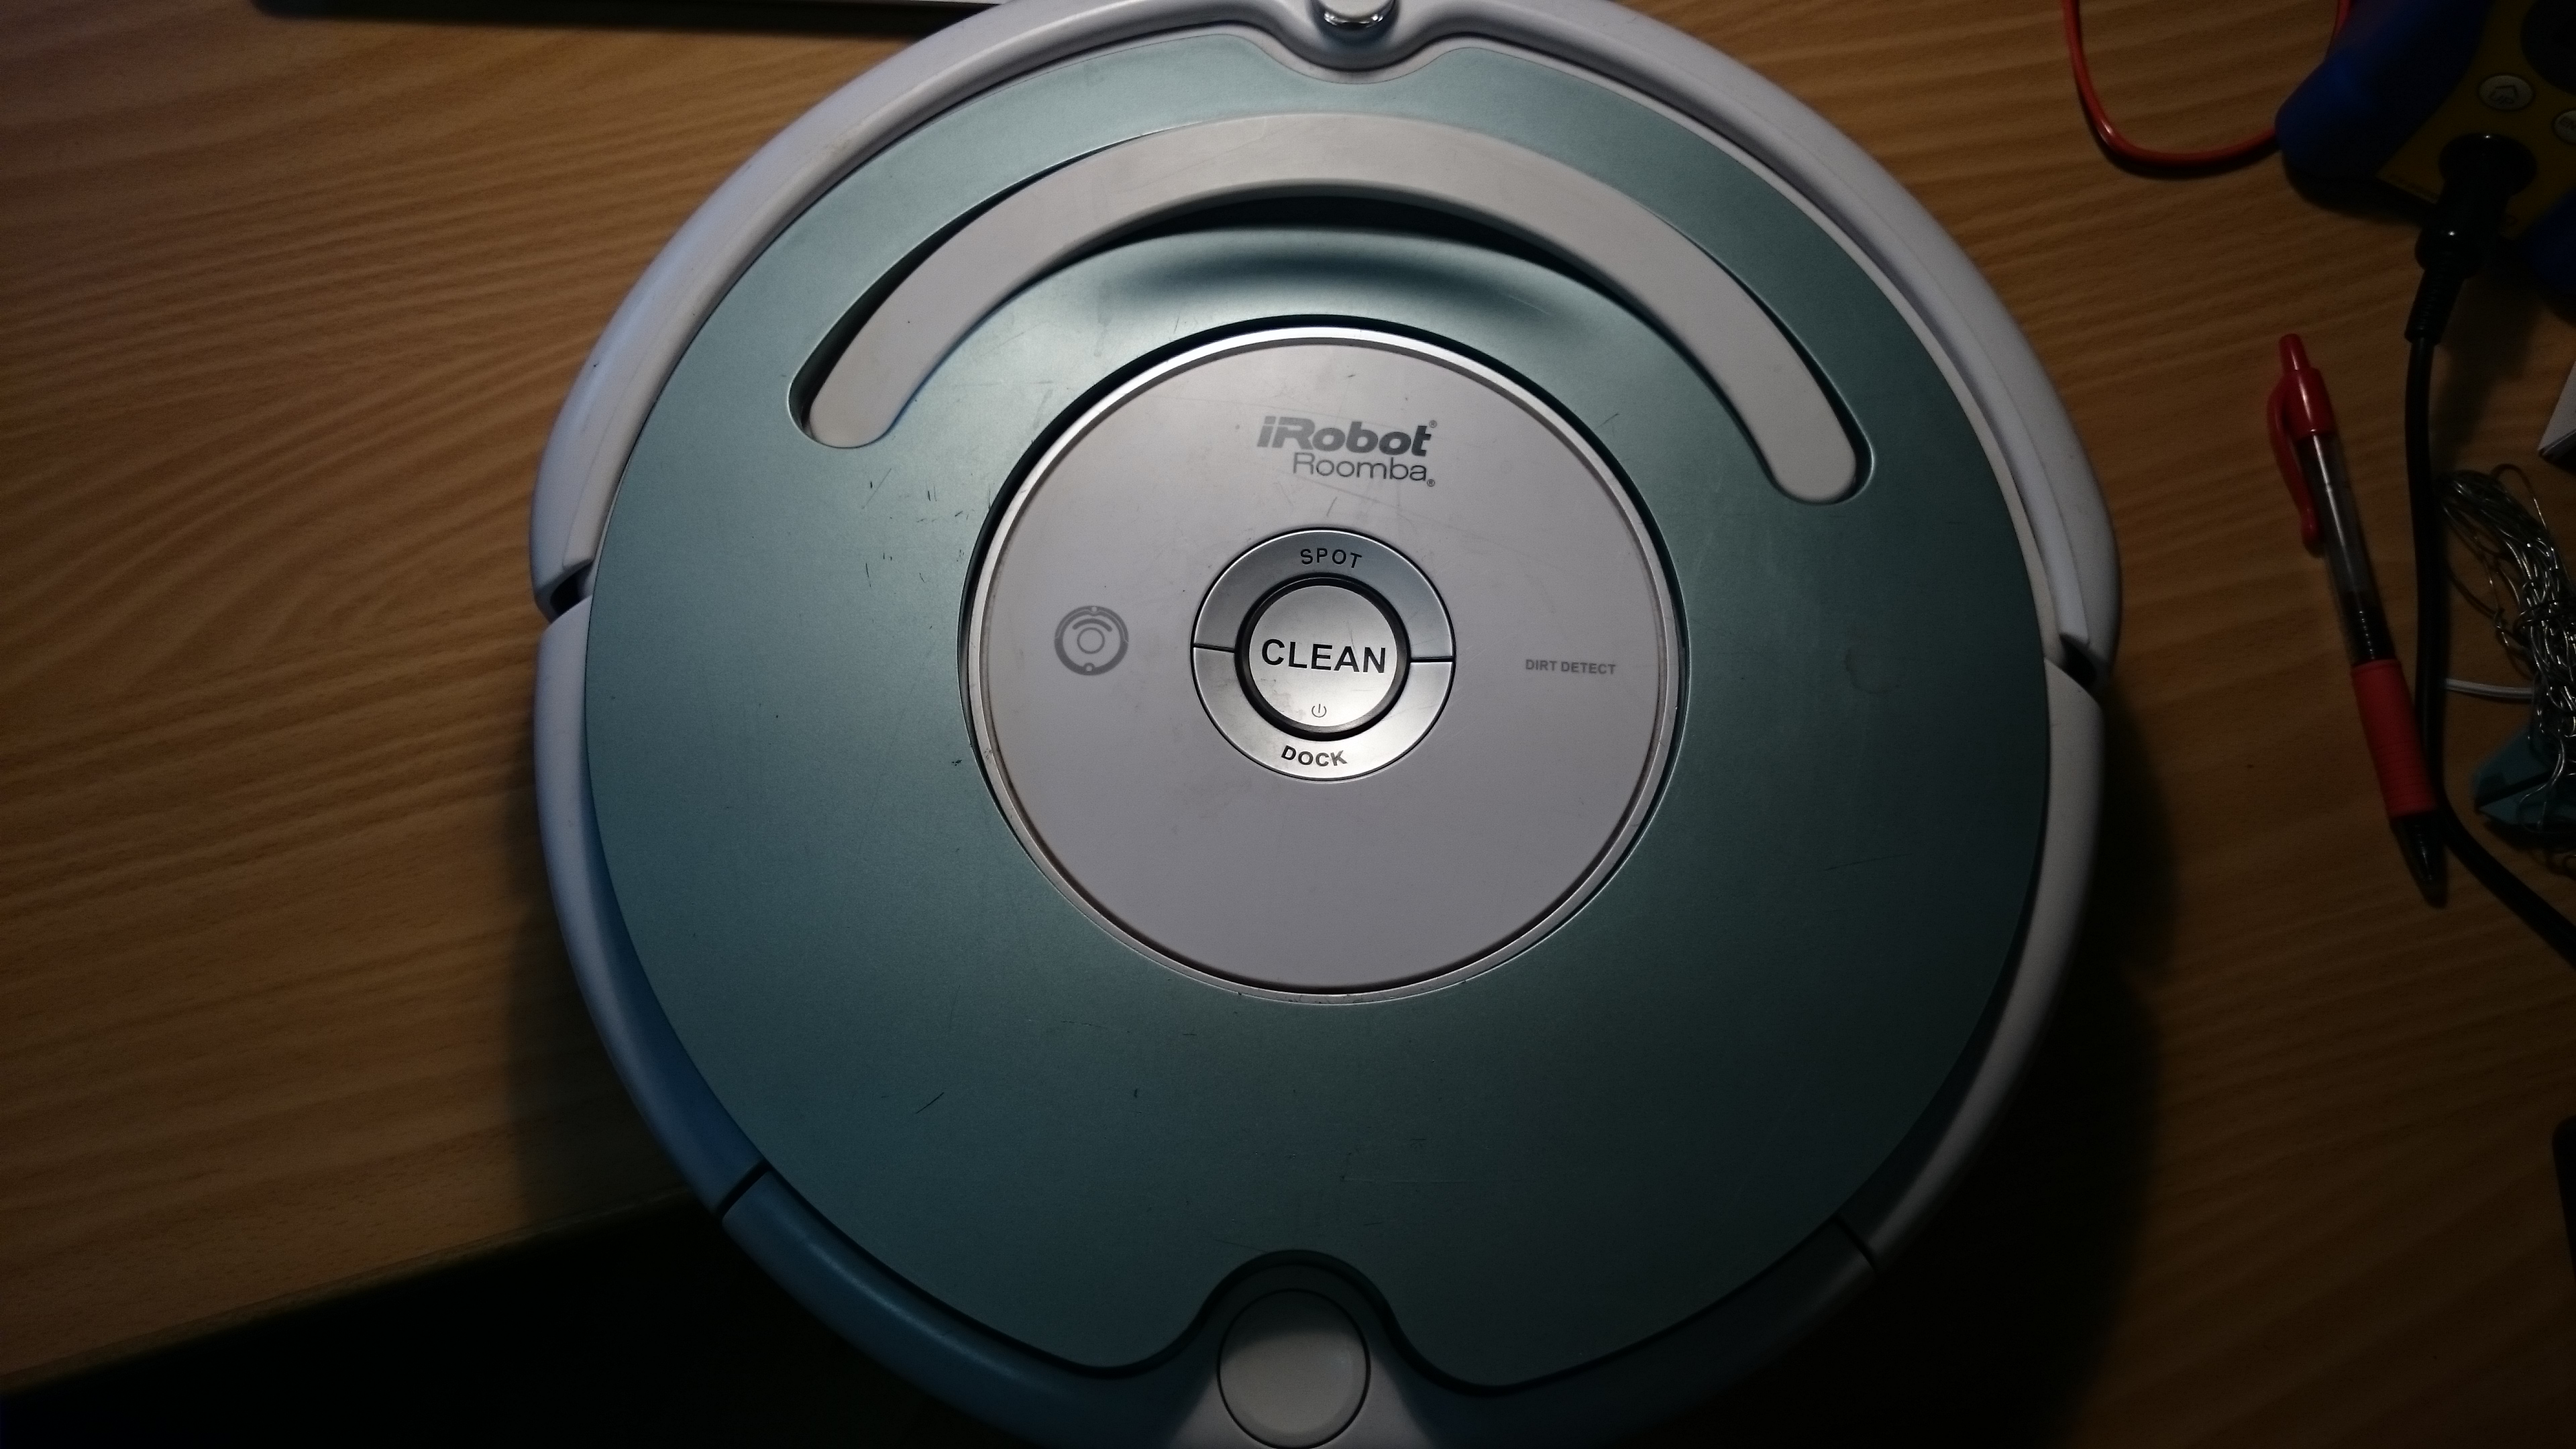
I have a iRobot Roomba 500-series vacuum cleaner robot, but without any remote, or command center or anything; alas, I have to push a button everytime I want the cleaning revolution to start 🙁
But no more! It turns out the Roomba can be programmed, quite easily, to schedule automatically, and all you need is:
The Roomba actually supports a serial protocol, the iRobot Roomba 500 Open Interface Specification, that allows remote control, driving, sensoring, and scheduling.
Remove the plastic cover. It is easiest to remove the vacuum bin, and carefully pry it off with a screwdriver.
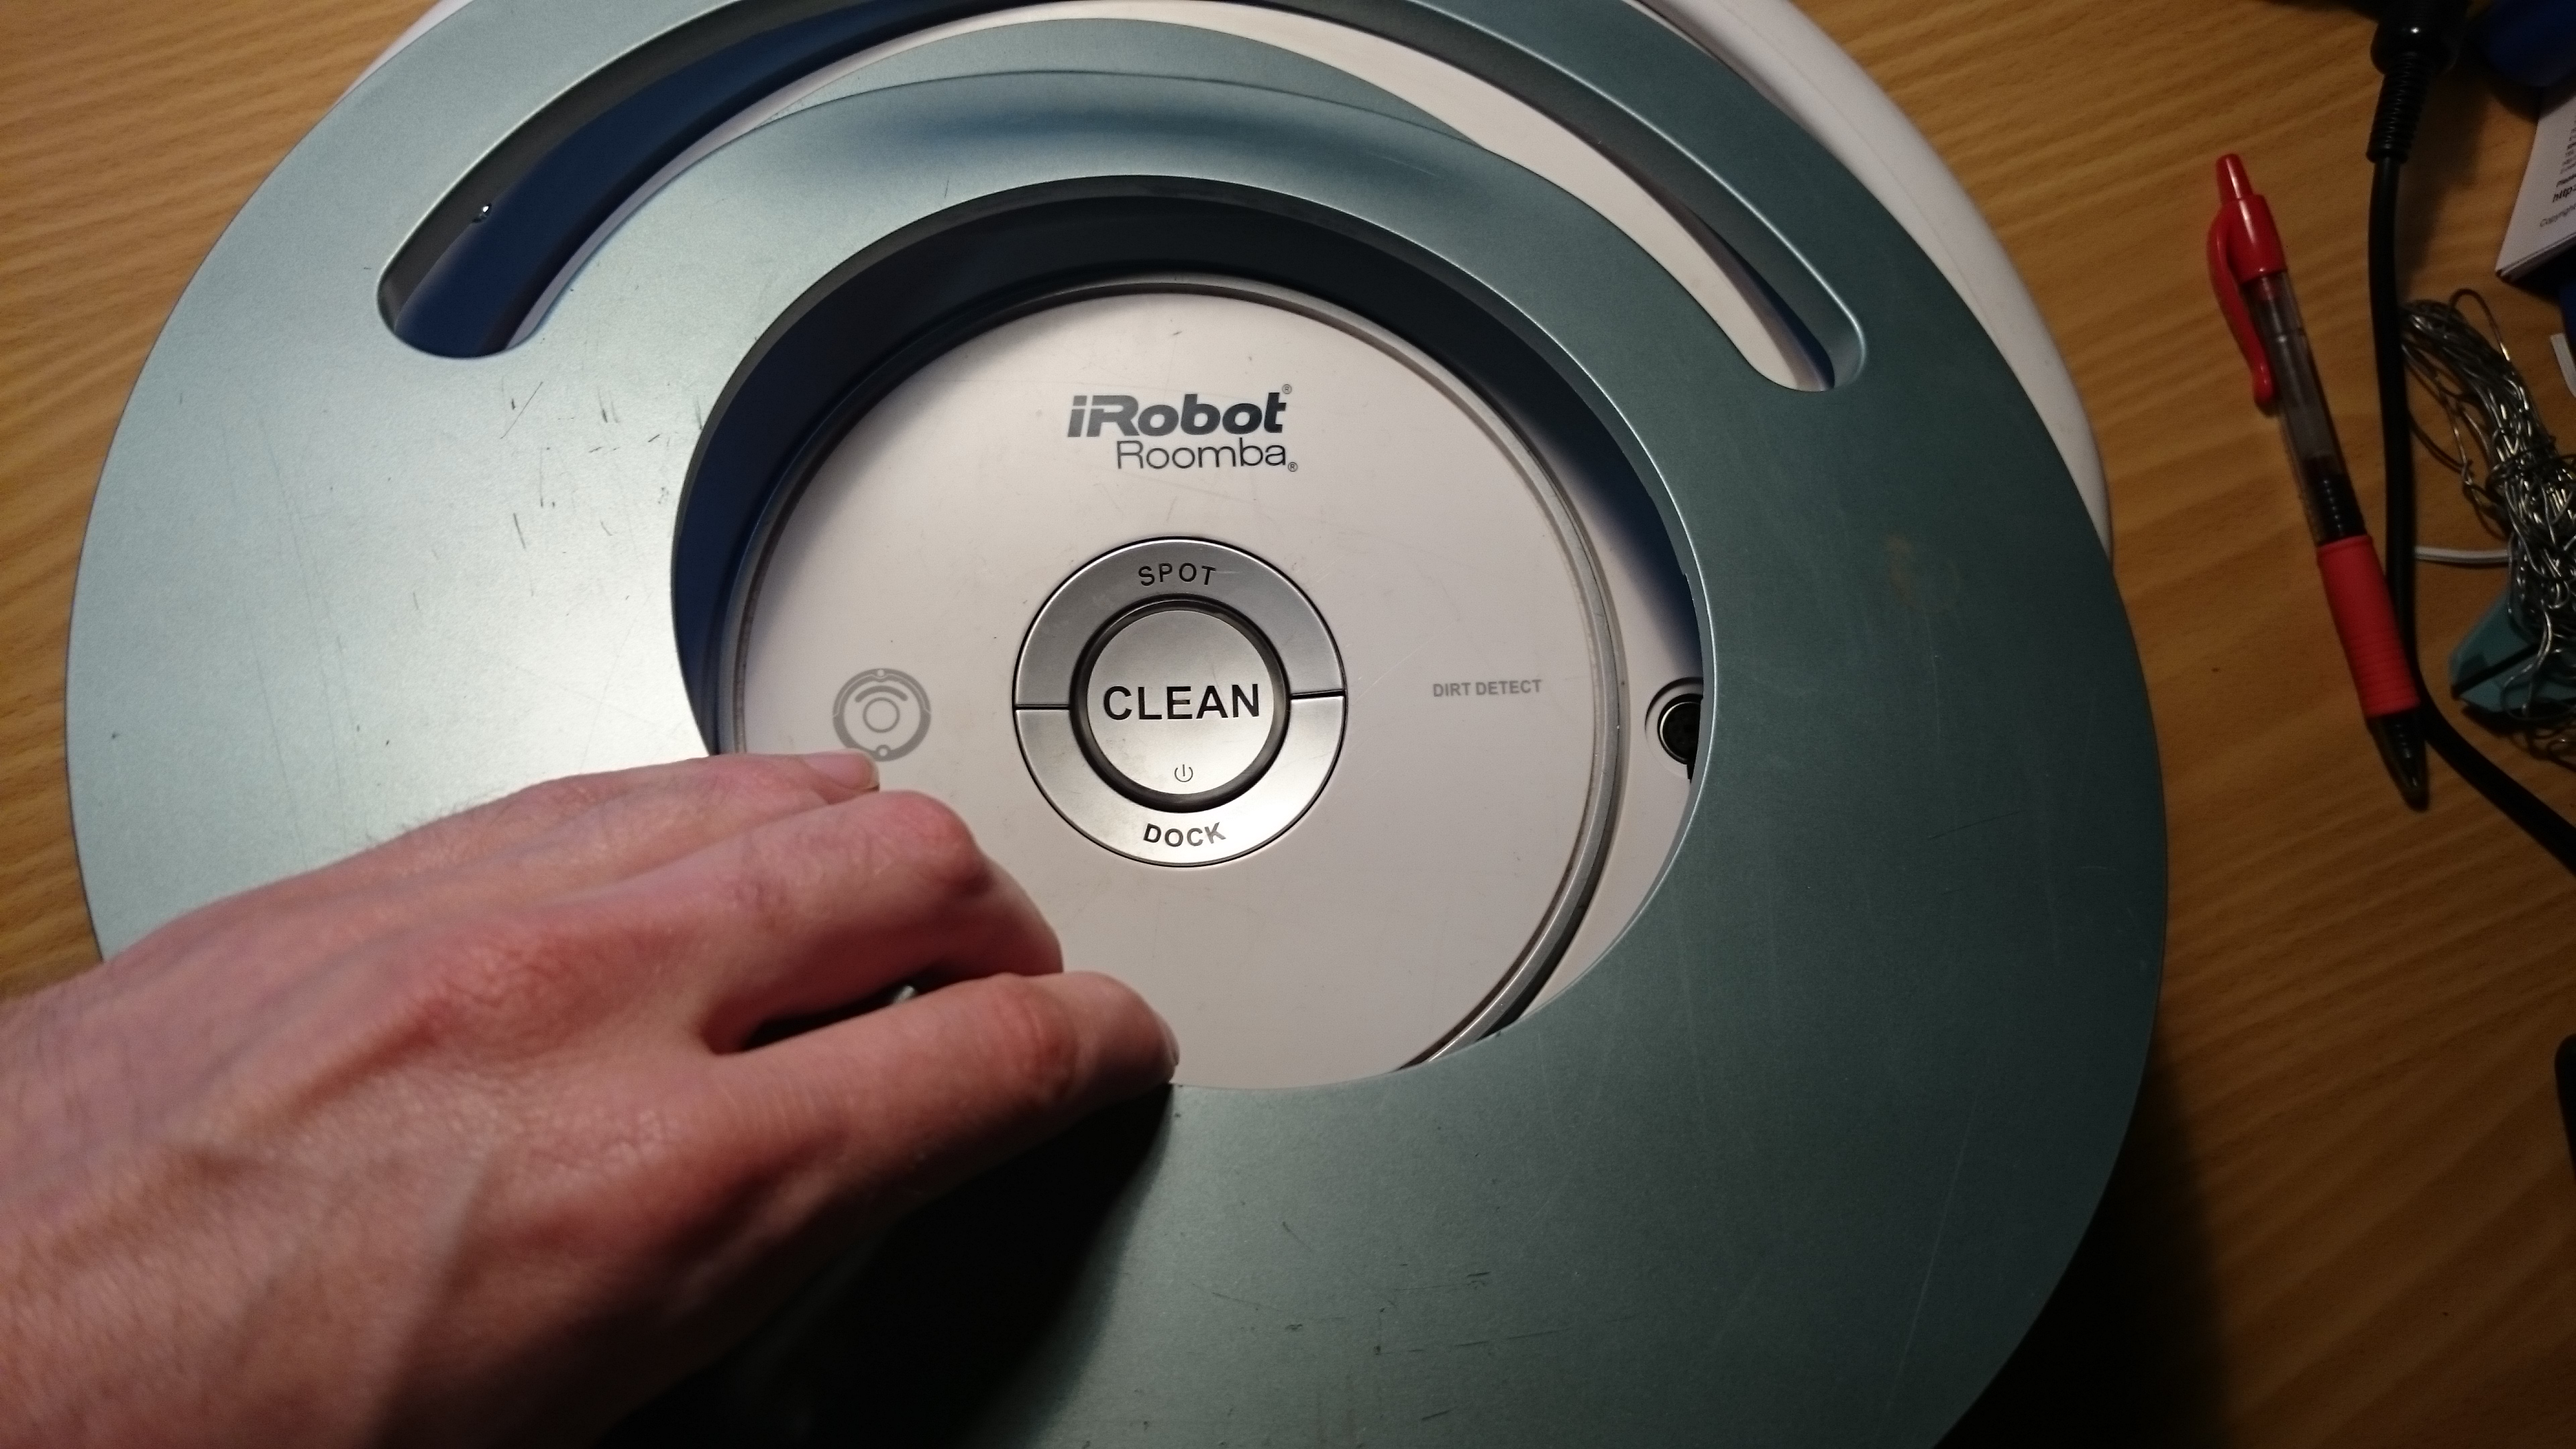

There should be a 7-pin plug, on the right side. It has the following pinout:
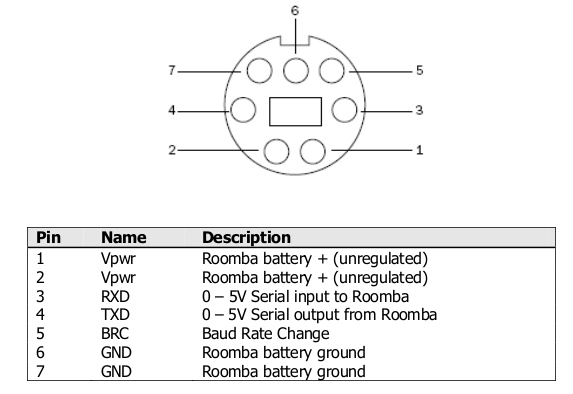
Roomba serial pinout
Use this sketch (download: roombaschedule.ino):
/*

Set a schedule on an iRobot Roomba 500 series, using just an Arduino.

Mads Chr. Olesen, 2015.

*/
const byte currentDay = 3;
// 0: Sunday, 1: Monday, 2: Tuesday, 3: Wednesday, 4: Thursday, 5: Friday, 6: Saturday
const byte currentHour = 2;
const byte currentMinute = 58;
// Schedule
const byte SUNDAY = 0x01, MONDAY = 0x02, TUESDAY = 0x04, WEDNESDAY = 0x08, THURSDAY = 0x10, FRIDAY = 0x20, SATURDAY = 0x40;
const byte daystorun = SUNDAY | MONDAY | WEDNESDAY | FRIDAY;
const byte times[14] = {
3, 0, // Sunday time
3, 0, // Monday time
3, 0, // Tuesday time
3, 0, // Wednesday time
3, 0, // Thursday time
3, 0, // Friday time
3, 0, // Saturday time
};
const int ledPin = 13;
void setup() {
Serial.begin(115200);
pinMode(ledPin, OUTPUT);
digitalWrite(ledPin, 0);
Serial.write(128); //Start
delay(1000);
Serial.write(131); //Safe mode, turns off Roomba light
delay(1000);
Serial.write(128); //Start, back to passive mode
delay(500);
//Set day time
Serial.write(168);
Serial.write(currentDay);
Serial.write(currentHour);
Serial.write(currentMinute);
delay(500);
//Set schedule
Serial.write(167);
Serial.write(daystorun);
for (int i = 0; i < 14; i++) {
Serial.write(times[i]);
}
}
void loop() {
digitalWrite(ledPin, 1);
delay(1000);
digitalWrite(ledPin, 0);
delay(1000);
}
You need to modify the variables at the top: set currentDay, currentHour, currentMinute according to the present time.
The pre-programmed schedule is to clean at 03:00 on Sunday, Monday, Wednesday and Friday. You can change this if you wish, by altering the daystorun and times variables.
If you don’t modify the schedule, the Roomba should start automatically after 2 minutes.
You should now have a partially undressed Roomba, and a programmed Arduino. Now it is time to connect them. With both unpowered, connect the following:
It should look like this:
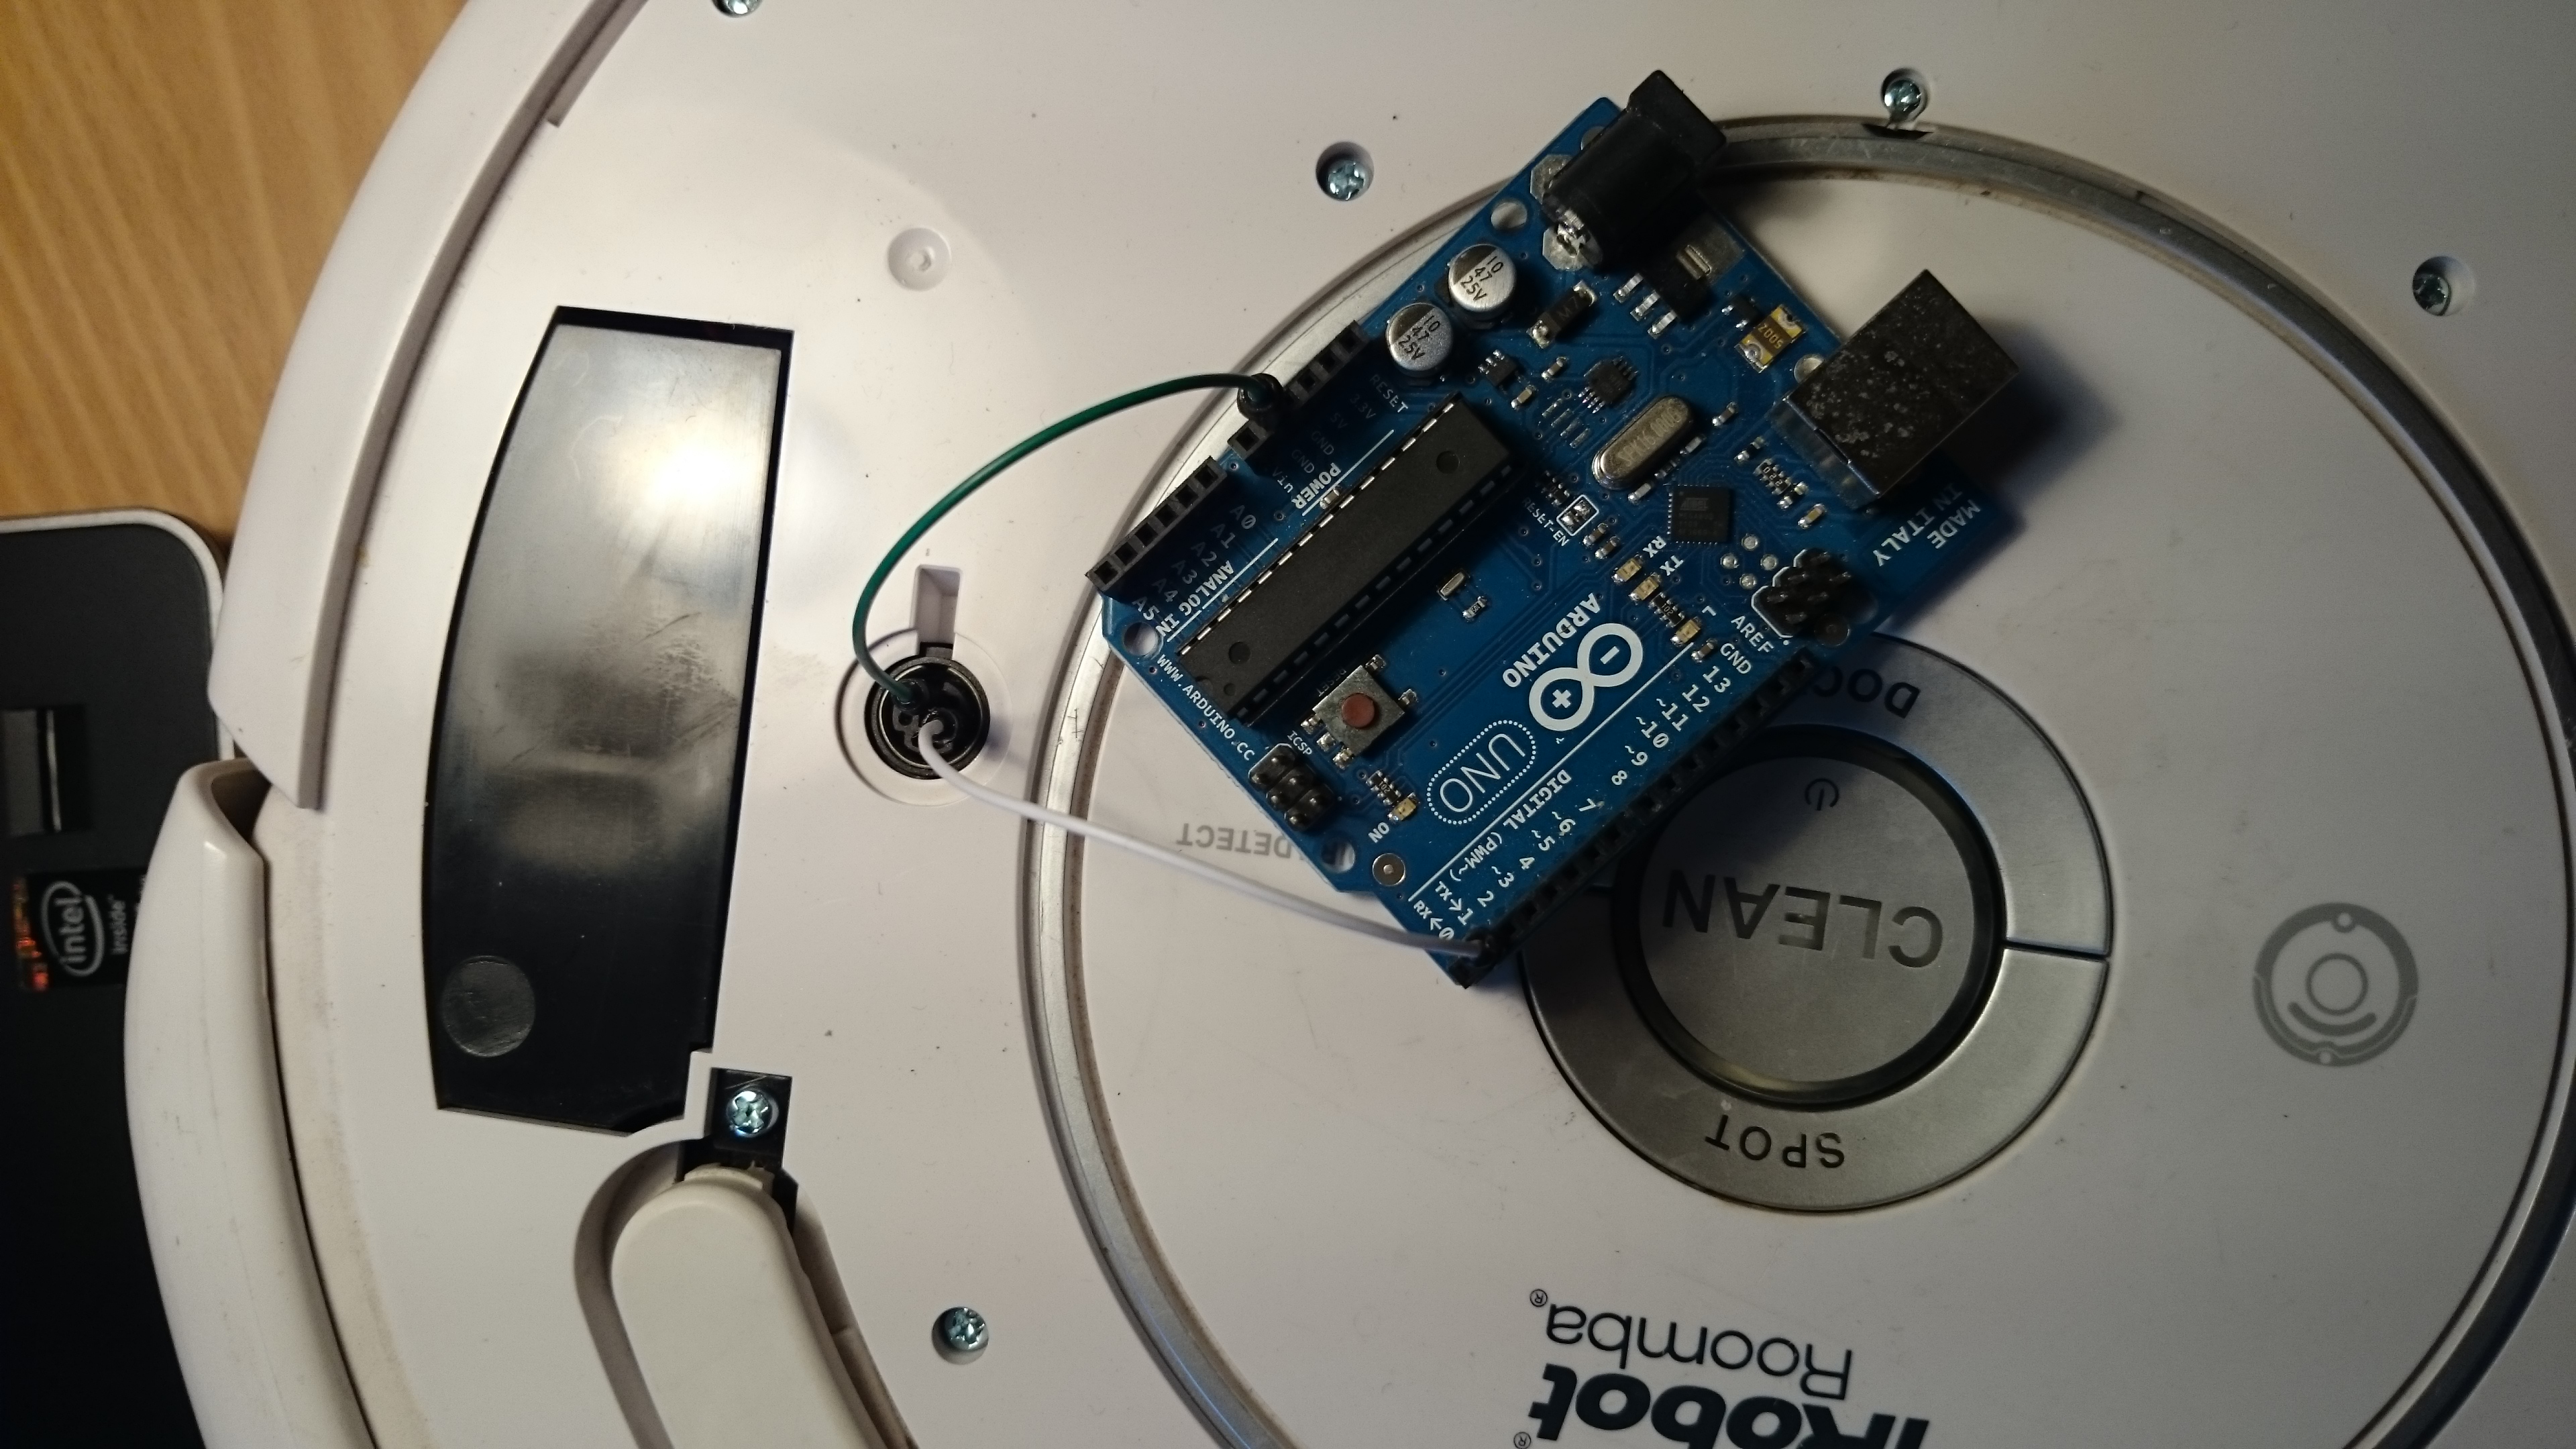
Now, the moment of truth. Press the “CLEAN” button on the Roomba, the light should go on. Plug in the USB for the Arduino. The Roomba light should turn off briefly, and after a few seconds the Arduino should blink it’s LED. The schedule is now programmed, all done!
此内容由惯性聚合(RSS阅读器)自动聚合整理,仅供阅读参考。 原文来自 — 版权归原作者所有。