Introduction

This demo will show a user list with avatar, username and description, which is the data fetched from the backend.
At first, the client page made by vue3 will send a request to the server, then the server respond and transfer a JSON typed data.
Then the clinet page accepts this data, and render a page.
Backend
There’s a HTTP service powered by FastAPI, which is a high performance web framework for Python.

When started, it will read the json file user_list.json into the RAM as a variable.


When received a HTTP request by the URL /userdata/list from any clinet, it will read the JSON data in RAM and send to the client.
Here is the JSON file.
 1
 2
 3
 4
 5
 6
 7
 8
 9
10
11
12
13
14
15
16
17
18
19
20
21
22
23
24
25
26
27
28
29
30
31
32
33
34
35
36
37
38
39
40
41
42
43
44
|
[
  {
    "id": 1,
    "name": "WeepingDogel",
    "type": "dog",
    "age": 20,
    "avatar": "/static/WeepingDogel.jpg"
  },
  {
    "id": 2,
    "name": "kira-pgr",
    "type": "cat",
    "age": 18,
    "avatar": "/static/kira-pgr.png"
  },
  {
    "id": 3,
    "name": "kara",
    "type": "cat",
    "age": 19,
    "avatar": "/static/kara.jpg"
  },
  {
    "id": 4,
    "name": "Felix Yan",
    "type": "fox(?)",
    "age": 30,
    "avatar": "/static/felix.jpg"
  },
  {
    "id": 5,
    "name": "Old Herl",
    "type": "cat",
    "age": 400,
    "avatar": "/static/old_herl.jpg"
  },
  {
    "id": 6,
    "name": "Episode 33",
    "type": "-/@”~、",
    "age": 17,
    "avatar": "/static/episode-33.jpg"
  }
]
|
Let’s start to code. Firstly, we need to create a virtual environment of Python and import the fastapi package.
Install the fastapi libraries by pip and establish a root API URL to run a web server.
1
|
$ pip install "fastapi[all]"
|
 1
 2
 3
 4
 5
 6
 7
 8
 9
10
|
# encoding=UTF-8
# filename=main.py
from fastapi import FastAPI

app = FastAPI()


@app.get('/')
async def root():
    return {"message": "Hello"}
|
While the client recevied the data to render the page, it will still access the server to get the static files.
So let’s mount the staitc directory.
1
2
3
4
5
6
7
8
|
$ ls src/static/ -lh
总计 396K
-rw-r--r-- 1 weepingdogel weepingdogel 89K  3月 3日 18:51 episode-33.jpg
-rw-r--r-- 1 weepingdogel weepingdogel 87K  3月 3日 18:35 felix.jpg
-rw-r--r-- 1 weepingdogel weepingdogel 45K  3月 3日 15:52 kara.jpg
-rw-r--r-- 1 weepingdogel weepingdogel 93K 12月18日 11:34 kira-pgr.png
-rw-r--r-- 1 weepingdogel weepingdogel 36K  3月 3日 18:37 old_herl.jpg
-rw-r--r-- 1 weepingdogel weepingdogel 34K  1月 6日 16:20 WeepingDogel.jpg
|
Add these to main.py.
1
2
3
|
from fastapi.staticfiles import StaticFiles

app.mount('/static', StaticFiles(directory="src/static"), name="static")
|
Then we need to create a router /userdata by create a new file router_userdata.py in other direcotries or just in the same directory.
 1
 2
 3
 4
 5
 6
 7
 8
 9
10
11
|
# encoding=UTF-8
# filename=router_resources.py

from fastapi import APIRouter
import json

userdata_router = APIRouter(
    prefix='/userdata',
    tags=['userdata'],
    responses={404: {"Description": "Not Found"}}
)
|
Now we need to open the json file and store the content into the memory as a variable.
1
|
user_list: list = json.loads(open('src/data/user_list.json').read())
|
Finally we create a URL router to provide the API to get the data.
 1
 2
 3
 4
 5
 6
 7
 8
 9
10
11
12
13
14
15
16
17
18
19
20
21
22
23
24
|
# encoding=UTF-8
# filename=router_resources.py

from fastapi import APIRouter
import json

userdata_router = APIRouter(
    prefix='/userdata',
    tags=['userdata'],
    responses={404: {"Description": "Not Found"}}
)


user_list: list = json.loads(open('src/data/user_list.json').read())


@userdata_router.get('/list')
def read_user_list():
    """
    Read a user list from a json file.
    :return: A user list.
    """

    return user_list
|
Now start the server by uvicorn.
1
|
uvicorn src.main:app --reload
|
FrontEnd
Now it’s the work that frontend must be responsible. Let’s create a vue3 project by yarn at first.
Then delete the components before, we don’t need them in this demo.
Just rewrite the code of the App.vue.
Before we send a request to fetch the data, we need to define two types to contain the data if Typescript is enabled.
1
2
3
4
5
6
7
8
9
|
type User = {
  id: Number;
  name: string;
  user_type: string;
  age: Number;
  avatar: string;
};

type UserList = User[];
|
According to the lifecycle of Vue3, a method need to be create and used in the mount lifecycle.
We have to define a global variable in data() state and a synchronous function in methods state.
 1
 2
 3
 4
 5
 6
 7
 8
 9
10
|
export default {
  data() {
    return {
      user_list: [] as UserList
      };
    },
    methods: {
      async GetUserList() {},
  },
};
|
Now we need to send a request by axios.
1
|
import axios from "axios";
|
1
2
3
4
5
6
7
8
|
async GetUserList() {
  try {
    const response = await axios.get<UserList>("/userdata/list");
    this.user_list = response.data;
    } catch (error) {
      console.log(error);
  }
},
|
Then we need to run this function in mount lifecycle.
1
2
3
|
mounted() {
  this.GetUserList();
},
|
Here’s the completed code in <script> tag:
 1
 2
 3
 4
 5
 6
 7
 8
 9
10
11
12
13
14
15
16
17
18
19
20
21
22
23
24
25
26
27
28
29
30
31
32
|
import axios from "axios";

type User = {
  id: Number;
  name: string;
  user_type: string;
  age: Number;
  avatar: string;
};

type UserList = User[];

export default {
  data() {
    return {
      user_list: [] as UserList,
    };
  },
  methods: {
    async GetUserList() {
      try {
        const response = await axios.get<UserList>("/userdata/list");
        this.user_list = response.data;
      } catch (error) {
        console.log(error);
      }
    },
  },
  mounted() {
    this.GetUserList();
  },
};
|
Render the data in Template by ‘v-for’ property.
 1
 2
 3
 4
 5
 6
 7
 8
 9
10
11
12
13
14
15
16
17
|
<template>
  <div class="bg">
    <div class="user-list">
      <div class="user-card" v-for="items of user_list">
        <div class="user-image">
          <img :src="items.avatar" />
        </div>
        <div class="user-info">
          <p class="user-name">{{ items.name }}</p>
          <p class="description">
            A {{ items.user_type }}, {{ items.age }} years old.
          </p>
        </div>
      </div>
    </div>
  </div>
</template>
|
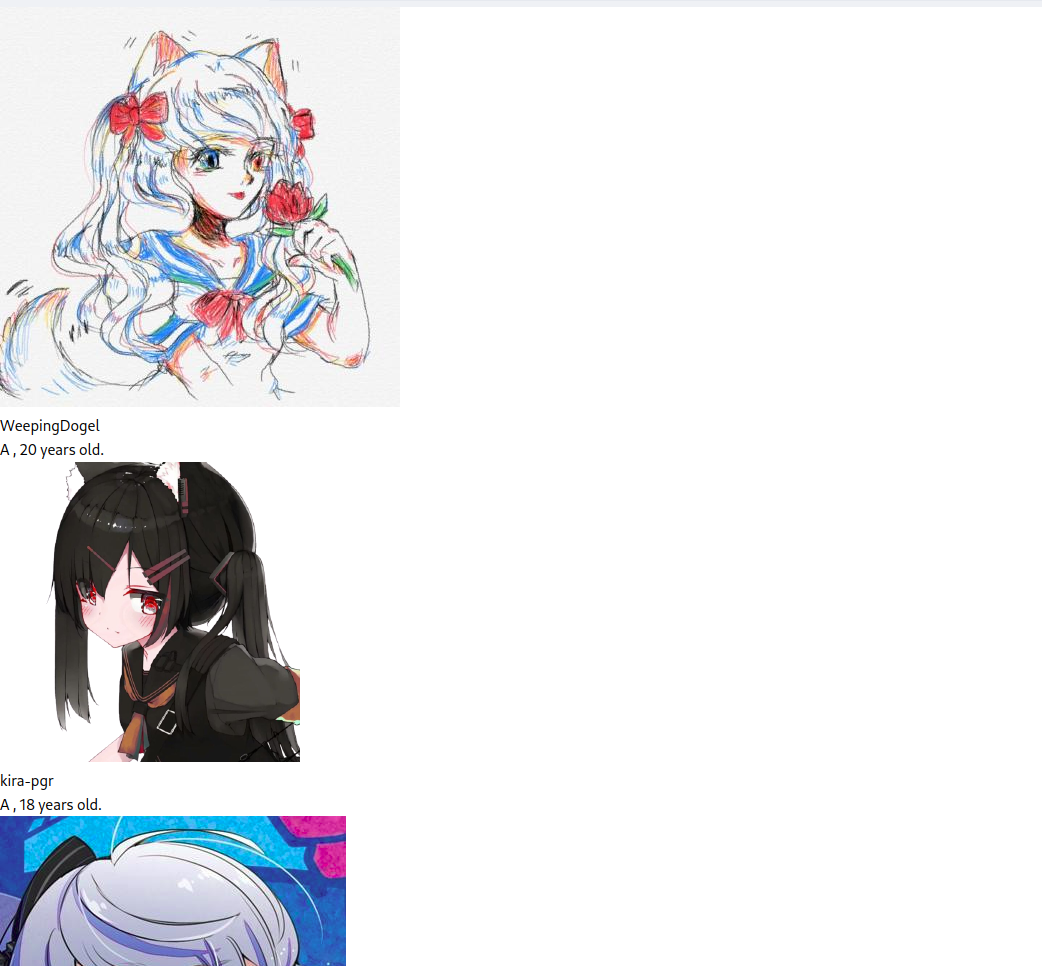
Start the developerment server, you will see the page like this:
Finally we just finish the CSS inside the <style scoped> tag to beautify the style.
 1
 2
 3
 4
 5
 6
 7
 8
 9
10
11
12
13
14
15
16
17
18
19
20
21
22
23
24
25
26
27
28
29
30
31
32
33
34
35
36
37
38
39
40
41
42
43
44
45
46
47
48
49
50
51
52
53
54
55
56
57
58
59
60
61
62
63
64
65
66
67
68
69
70
71
72
73
74
75
76
77
78
79
80
81
82
83
|
@keyframes FadeIn {
  from {
    scale: 0.75;
    opacity: 0;
  }
  to {
    scale: 1;
    opacity: 1;
  }
}

@keyframes BackgroundColor {
  from {
    background-color: #f1f1f1;
  }
  to {
    background-color: #dfaed4;
  }
}

.bg {
  width: 100vw;
  height: 100vh;
  display: flex;
  flex-direction: column;
  justify-content: center;
  align-items: center;
  background-color: #dfaed4;
  animation: BackgroundColor 5s;
}

.user-list {
  width: 450px;
  height: 800px;
  overflow-y: scroll;
  overflow-x: hidden;
  scrollbar-width: none;
  scroll-behavior: smooth;
  display: flex;
  flex-direction: column;
  background-color: #ffffff;
  border-radius: 20px;
  animation: FadeIn 1.5s;
}

.user-card {
  width: 100%;
  height: auto;
  display: flex;
  padding: 20px;
  flex-direction: row;
  border-bottom: solid 1px #ebebeb;
}

.user-image {
  width: 120px;
  height: 120px;
  border-radius: 100%;
}

.user-image img {
  width: 100%;
  height: 100%;
  border-radius: 100%;
}

.user-info {
  position: relative;
  left: 40px;
  display: flex;
  flex-direction: column;
  justify-content: flex-start;
}

.user-name {
  line-height: 60px;
  font-size: 32px;
}

.description {
  font-size: 22px;
  line-height: 30px;
}
|
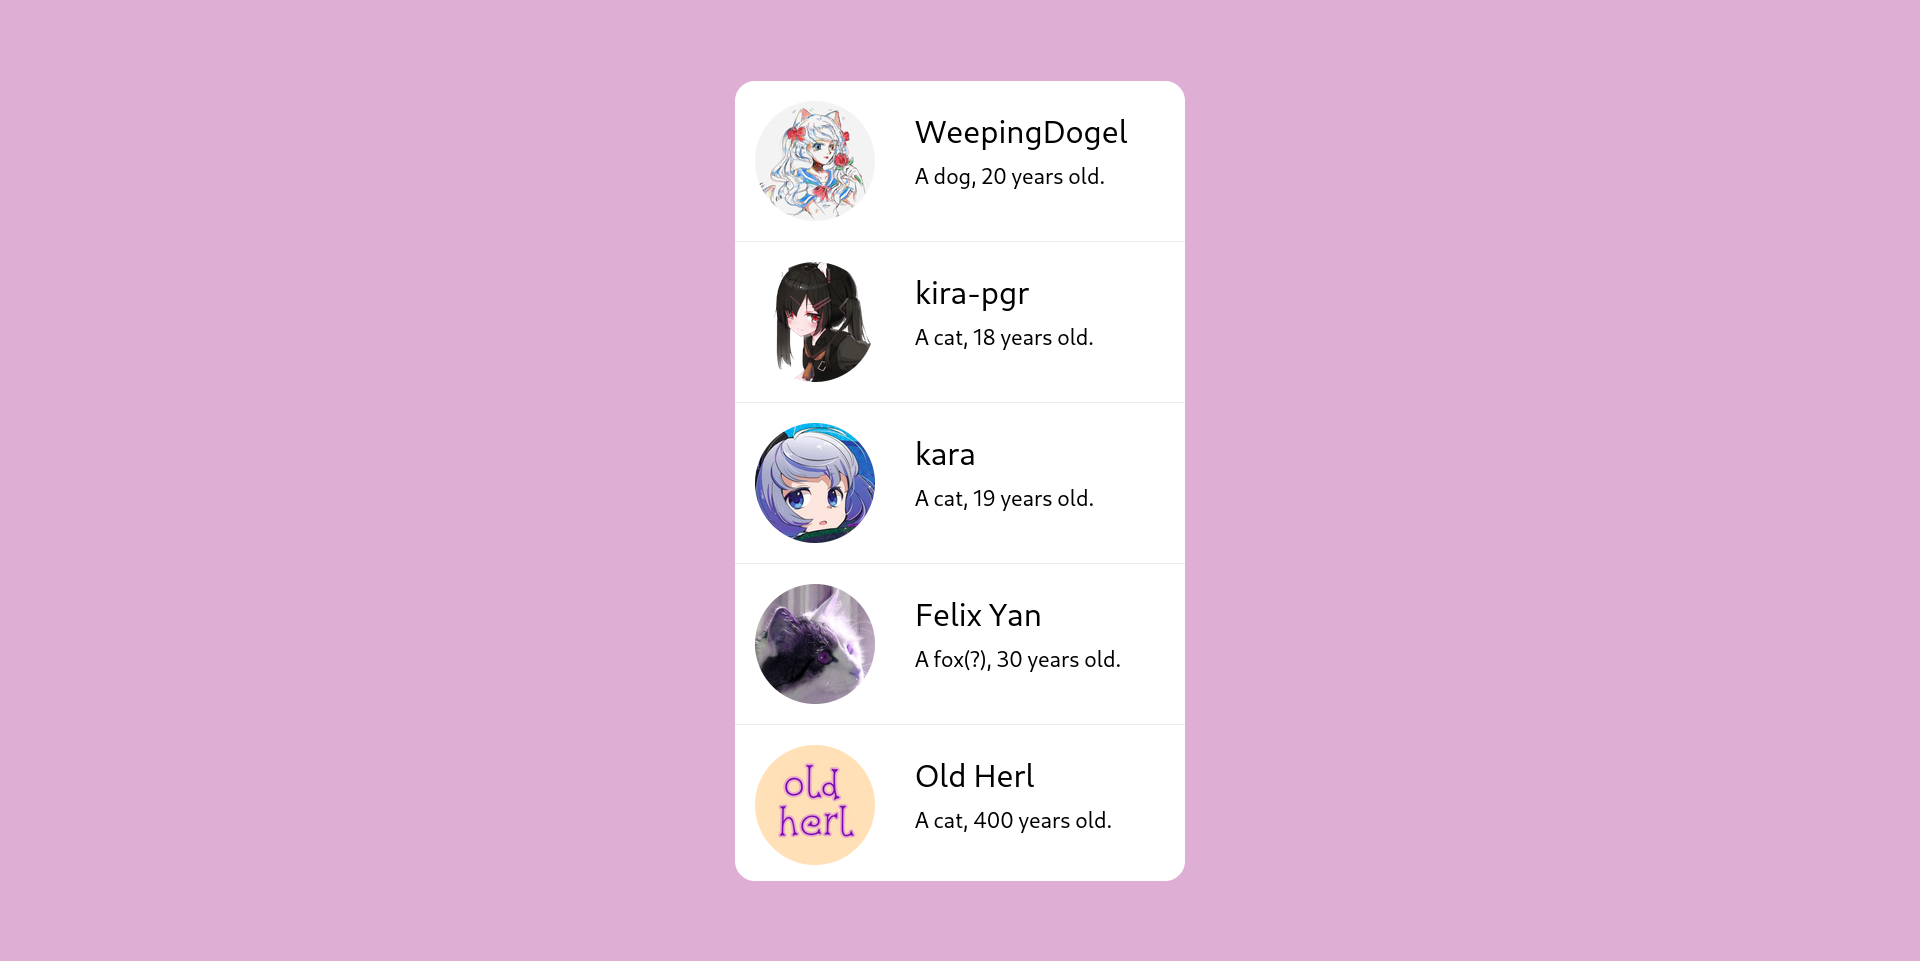
You will see a elegant page with user list in your browser.
Conclusion
In this project, we’ve successfully demonstrated the interaction between a frontend client made using Vue3 and a backend server powered by FastAPI. By establishing a connection where the client requests user data from the server, receives a JSON response, and renders it on the webpage, we’ve showcased a basic full-stack web application flow.
The backend server, built with FastAPI, functions as the intermediary between the data storage file (user_list.json) and the client. Upon receiving a request for user data at the endpoint /userdata/list, it reads the JSON data stored in memory, responds with the user list, and sends it back to the client for display.
The frontend, developed using Vue3, sends requests to the backend server using Axios, retrieves the user data, and dynamically updates the webpage to showcase user avatars, names, and descriptions. This seamless data flow between the client and server illustrates the principles of front-end and back-end separation in web development.
By combining technologies like Vue3, FastAPI, Python, and Axios, we’ve exemplified a simple yet effective approach to building web applications with modern tools and best practices in mind. This project serves as a foundation for creating more complex and feature-rich applications, highlighting the importance of efficient data fetching, processing, and rendering in web development.






