










今天找到關於Silverlight DataGrid 的一些技巧,記錄下來,以備後用.
Using The Silverlight DataGrid
If you have ever worked on an application that displayed large amounts of data, one of the cornerstones of your application was probably a DataGrid control. We have provided four .NET DataGrids over the years, two for ASP.NET and two for Windows Forms, but until now Silverlight and WPF were left out of the party.
At MIX 2008 we shipped the first preview of the Silverlight DataGrid and a preview of it in WPF was also shown. Now that it is out there people want to know how to use it. If you are one of those people, then you have come to the right place. Here's a quick guide on how to get up and running with a Silverlight DataGrid.
Step 0: Create A Silverlight Project
Start a new Silverlight Application as outlined in my previous post. When given the option, choose the default "Add a new Web" option.
Step 1: Add a DataGrid
If everything went smoothly in the previous step, your project should be loaded and opened to Page.xaml. Now just find the DataGrid on the Toolbox and drag it into the root layout Grid named "LayoutRoot".

This does a few things behind the scenes:
If you are the type of the person who likes to see things working after each step, feel free to F5 (choose the option to allow debugging in the popup) and take in the awesome sight that is an empty DataGrid.
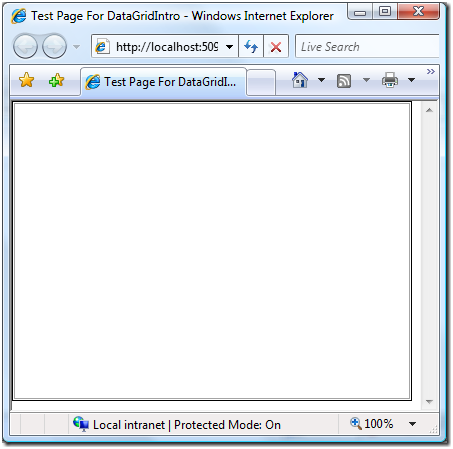
Not much here, so lets fill it with something.
Step 2: Set the ItemsSource and AutoGenerateColumns
The way to make a DataGrid interesting is by giving it some data. This is done through the DataGrid's ItemsSource property. This is same property that other controls in WPF and Silverlight, such as ListBox, use to specify where they will get their data. The one difference here is that you cannot place arbitrary content in it and have it create a collection for you.
Instead you need to provide it a collection of anything that implements IEnumerable such as a List or ObservableCollection.
The ItemsSource can be specified inline in XAML such as:
<my:DataGrid x:Name="dg" AutoGenerateColumns="True">
<my:DataGrid.ItemsSource>
<!--Something that implements IEnumerable -->
</my:DataGrid.ItemsSource>
</my:DataGrid>
However, it is more commonly set in code behind, which is what we will do in this example.
Step 2 A: Name the Grid and Set AutoGenerateColumns to True
Before we go to the code behind there are two things that we will want to do while we are still in XAML:
<my:DataGrid x:Name="dg" AutoGenerateColumns="True"></my:DataGrid>
Step 2 B: Create and Set the Items Source
Now that the DataGrid is ready to have its ItemsSource set, go to the Page's constructor located in the code behind file for Page.xaml (A handy shortcut to do this from within Page.xaml is F7) and add the following line below InitializeComponent:
C#
public Page()
{
InitializeComponent();
dg.ItemsSource = "H e l l o W o r l d !".Split();
}
VB
Public Sub New()
InitializeComponent()
dg.ItemsSource = "H e l l o W o r l d !".Split()
End Sub
(If you get the build error: "The name 'dg' does not exist in the current context" with the code above be sure to build a second time so that the name has a chance to propigate)
One of the easiest ways to generate an IEnumerable collection is String.Split. When the resulting array is set as the ItemsSource of the DataGrid a column will be automatically generated since AutoGenerateColumns is true. When you run the application, it will look like this:

This is a little better, but so far this could be done with a ListBox. Lets add some more complicated data so that we actually need to use a DataGrid.
Add a new class to your Silverlight project (not the Web project) and name it "Data".
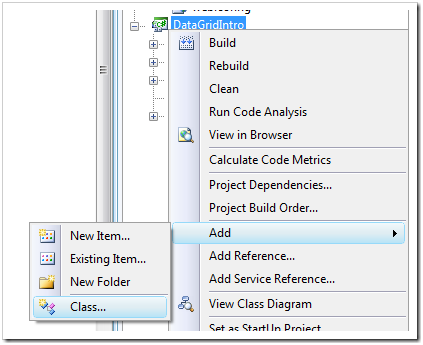
Then add a few properties to bind to.
C#
If you are using C#, you can use the great 3.0 Automatic Properties feature.
public class Data
{
public string FirstName { get; set; }
public string LastName { get; set; }
public int Age { get; set; }
public bool Available { get; set; }
}
VB
Public Class Data
Private _firstName As String
Private _lastName As String
Private _age As Integer
Private _available As Boolean
Property
FirstName() As StringProperty
LastName() As StringProperty
Age() As IntegerProperty
Available() As BooleanOnce the Data class is defined, it can now be used to provide data for the DataGrid. Go back to the code behind file for Page.xaml and replace the previous ItemsSource assignment with the following. A useful trick here is to use the C# and VB 3.0 Object Initializer feature to initialize the Data objects as we add them to the List.
C#
public Page()
{
InitializeComponent();
//dg.ItemsSource = "H e l l o W o r l d !".Split();List<Data> source = new List<Data>();
int itemsCount = 100;
for (int i = 0; i < itemsCount; i++)
{
source.Add(new Data()
{
FirstName = "First",
LastName = "Last",
Age = i,
Available = (i % 2 == 0)
});
}
dg.ItemsSource = source;
}
VB
Public Sub New()
InitializeComponent()
'dg.ItemsSource = "H e l l o W o r l d !".Split()Dim Source As List(Of Data) = New List(Of Data)
Dim ItemsCount As Integer = 100
For index As Integer = 1 To ItemsCount
Source.Add(New Data() With _
{ _
.FirstName = "First", _
.LastName = "Last", _
.Age = index, _ .Available = (index Mod 2 = 0) _
})
Nextdg.ItemsSource = Source
End Sub
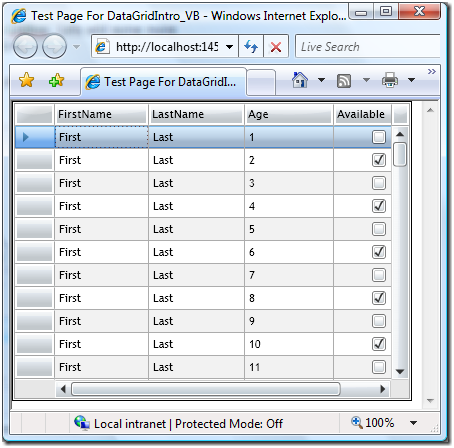
When you run this auto generation takes over using reflection to create a column for each property in Data setting the column header to the name of the property and choosing default column types based on the property type. For instance the Available column is a DataGridCheckBoxColumn.
Step 3: Simple Customization of the DataGrid
The easiest way to customize the DataGrid is through a variety of properties. The other two ways are through Styles and Templates which will be covered in future posts. Some of the most useful properties for customization are:
GridlinesVisibility & HeadersVisibility
These properties are enumerations that control what gridlines and headers are displayed.
RowBackground & AlternatingRowBackground
These properties are shortcuts to setting the background color for both rows and alternating rows.
ColumnWidth & RowHeight
These properties set the default column width and default row height.
IsReadOnly & CanUserResizeColumns
These properties control if the end user can edit the data in the grid and if the columns can be resized.
For instance if you set the following properties to the following values:
<my:DataGrid x:Name="dg" AutoGenerateColumns="True"
GridlinesVisibility="Horizontal" HeadersVisibility="Column"
RowBackground="Cornsilk" AlternatingRowBackground="LemonChiffon"
ColumnWidth="85" RowHeight="30"
IsReadOnly="True" CanUserResizeColumns="False"
>
</my:DataGrid>
You would get this:

Step 4: Enjoy
Now that you have the basics, enjoy using the DataGrid. Next time I'll go into how to explicitly define and customize columns instead of using auto generation.
源文档 <http://blogs.msdn.com/scmorris/archive/2008/03/21/using-the-silverlight-datagrid.aspx>
此内容由惯性聚合(RSS阅读器)自动聚合整理,仅供阅读参考。 原文来自 — 版权归原作者所有。