








我这里用到一个很方便的工具-phpstudy
首先需要去官网下载phpstudy工具https://m.xp.cn/phpstudy
一、首页-->nginx启动

二、网站-->创建域名admin端口8081和域名web端口8082
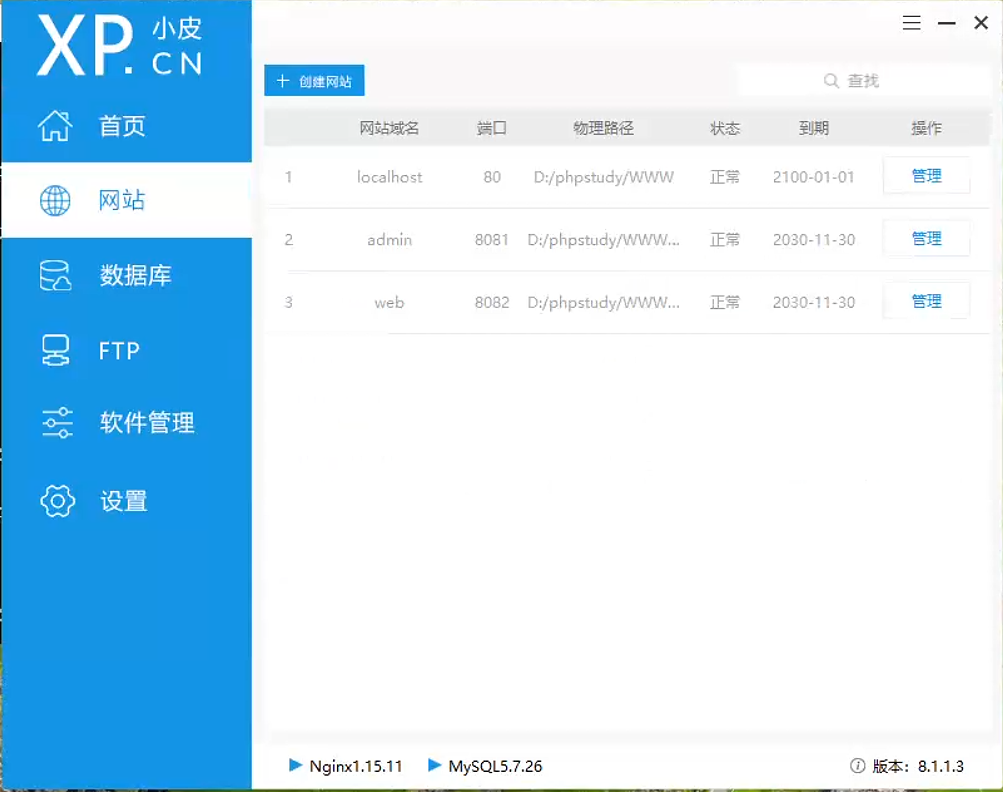
三、每个域名和端口配置对应的根目录
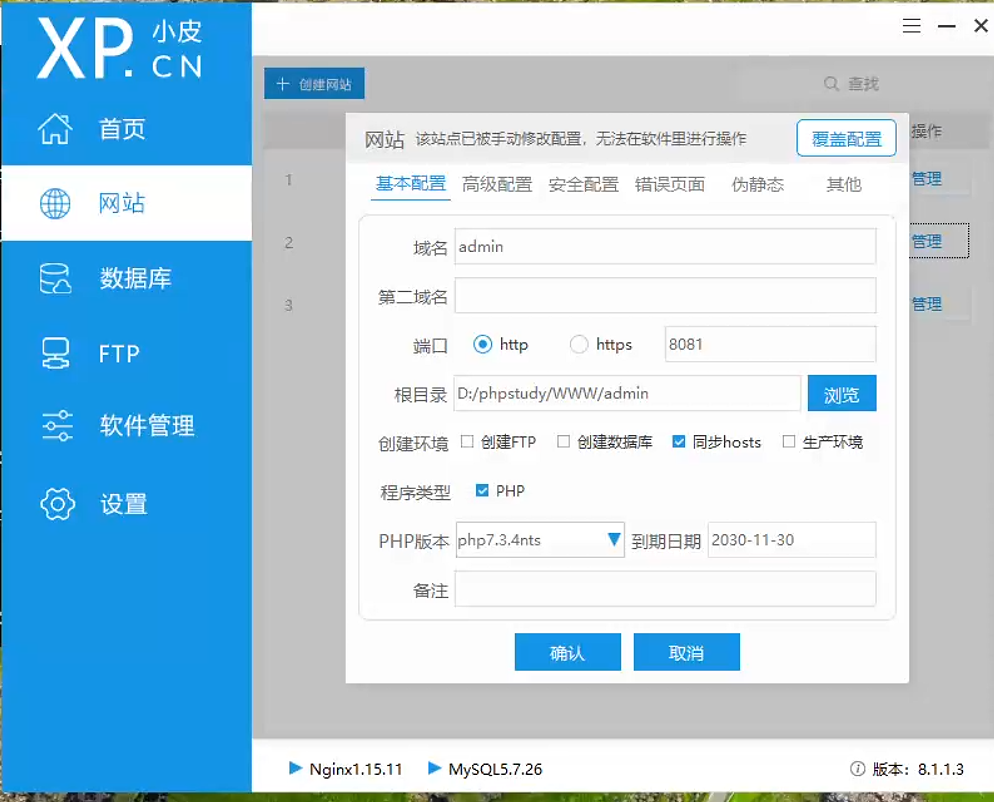
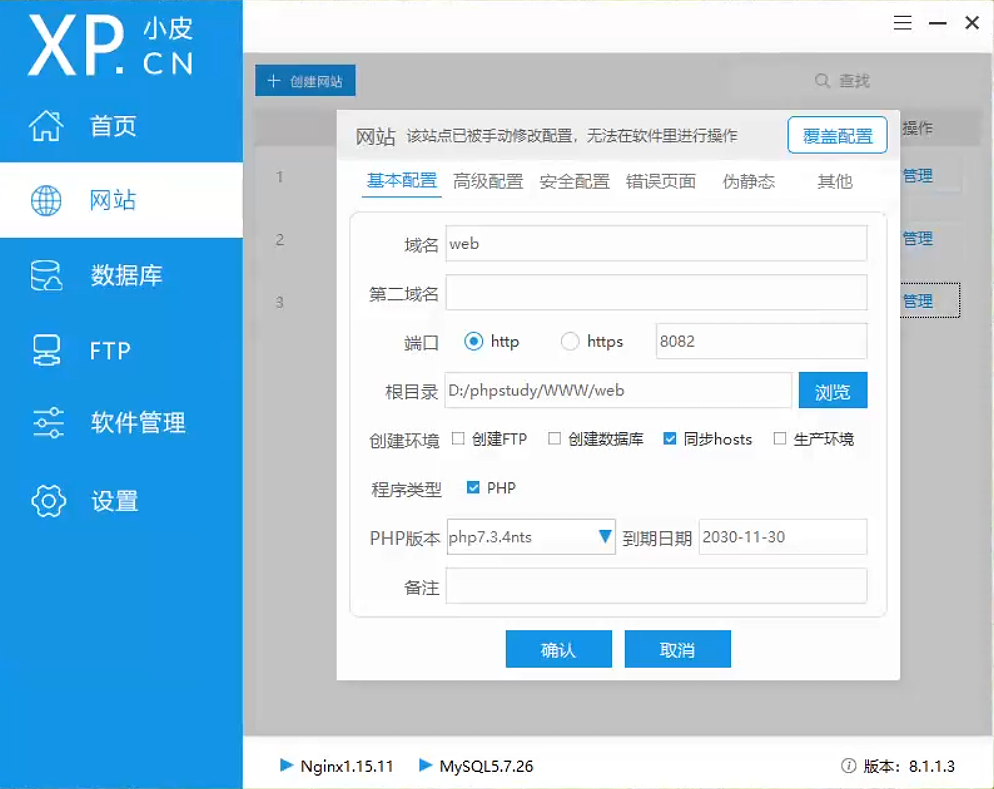
四、然后把前端项目打包,放到nginx根目录下

五、两个前端的nginx配置
当网站创建好后,会在设置-->配置文件-->vhosts.conf有两个配置文件需要修改这两个配置文件
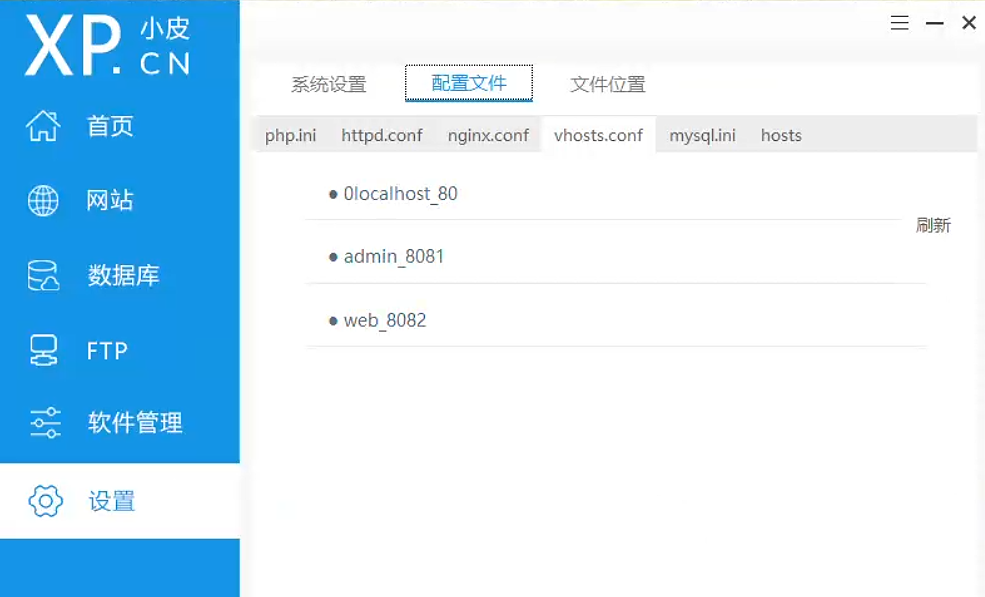
六、点开这两个配置文件进行修改
1.admin的nginx配置
server {
        listen        8081;
        server_name  admin;
        root   "D:/phpstudy/WWW/admin";

   location /prod-api/{
        proxy_pass http://127.0.0.1:6039/;
        proxy_ssl_server_name on;
        proxy_set_header Host $http_host;
    }

    location / {
        try_files $uri $uri/ @router;
        index index.html;
    }
    location @router {
        rewrite ^.*$ /index.html last;
    }
}
2.web的nginx配置
server {
        listen        8082;
        server_name  web;
        root   "D:/phpstudy/WWW/web";
        location / {
            index index.php index.html error/index.html;
            error_page 400 /error/400.html;
            error_page 403 /error/403.html;
            error_page 404 /error/404.html;
            error_page 500 /error/500.html;
            error_page 501 /error/501.html;
            error_page 502 /error/502.html;
            error_page 503 /error/503.html;
            error_page 504 /error/504.html;
            error_page 505 /error/505.html;
            error_page 506 /error/506.html;
            error_page 507 /error/507.html;
            error_page 509 /error/509.html;
            error_page 510 /error/510.html;
            include D:/phpstudy/WWW/web/nginx.htaccess;
            autoindex  off;
        }
    location /api/{
        proxy_pass http://127.0.0.1:6039/;
        proxy_ssl_server_name on;
        proxy_buffering off;
        proxy_set_header Host $http_host;
    }
        location ~ \.php(.*)$ {
            fastcgi_pass   127.0.0.1:9000;
            fastcgi_index  index.php;
            fastcgi_split_path_info  ^((?U).+\.php)(/?.+)$;
            fastcgi_param  SCRIPT_FILENAME  $document_root$fastcgi_script_name;
            fastcgi_param  PATH_INFO  $fastcgi_path_info;
            fastcgi_param  PATH_TRANSLATED  $document_root$fastcgi_path_info;
            include        fastcgi_params;
        }
}
七、启动重启nginx
此内容由惯性聚合(RSS阅读器)自动聚合整理,仅供阅读参考。 原文来自 — 版权归原作者所有。