













This article is also available in Chinese 简体中文.
Dreambooth is a technique to teach new concepts to Stable Diffusion using a specialized form of fine-tuning. Some people have been using it with a few of their photos to place themselves in fantastic situations, while others are using it to incorporate new styles. 🧨 Diffusers provides a Dreambooth training script. It doesn't take long to train, but it's hard to select the right set of hyperparameters and it's easy to overfit.
We conducted a lot of experiments to analyze the effect of different settings in Dreambooth. This post presents our findings and some tips to improve your results when fine-tuning Stable Diffusion with Dreambooth.
Before we start, please be aware that this method should never be used for malicious purposes, to generate harm in any way, or to impersonate people without their knowledge. Models trained with it are still bound by the CreativeML Open RAIL-M license that governs distribution of Stable Diffusion models.
Note: a previous version of this post was published as a W&B report.
fp16 training or gradient accumulation, it is possible to train on 16 GB GPUs like the ones provided by Google Colab or Kaggle.sks word to train Dreambooth. One of the first implementations used it because it was a rare token in the vocabulary, but it's actually a kind of rifle. Our experiments, and those by for example @nitrosocke show that it's ok to select terms that you'd naturally use to describe your target.Dreambooth overfits very quickly. To get good results, tune the learning rate and the number of training steps in a way that makes sense for your dataset. In our experiments (detailed below), we fine-tuned on four different datasets with high and low learning rates. In all cases, we got better results with a low learning rate.
All our experiments were conducted using the train_dreambooth.py script with the AdamW optimizer on 2x 40GB A100s. We used the same seed and kept all hyperparameters equal across runs, except LR, number of training steps and the use of prior preservation.
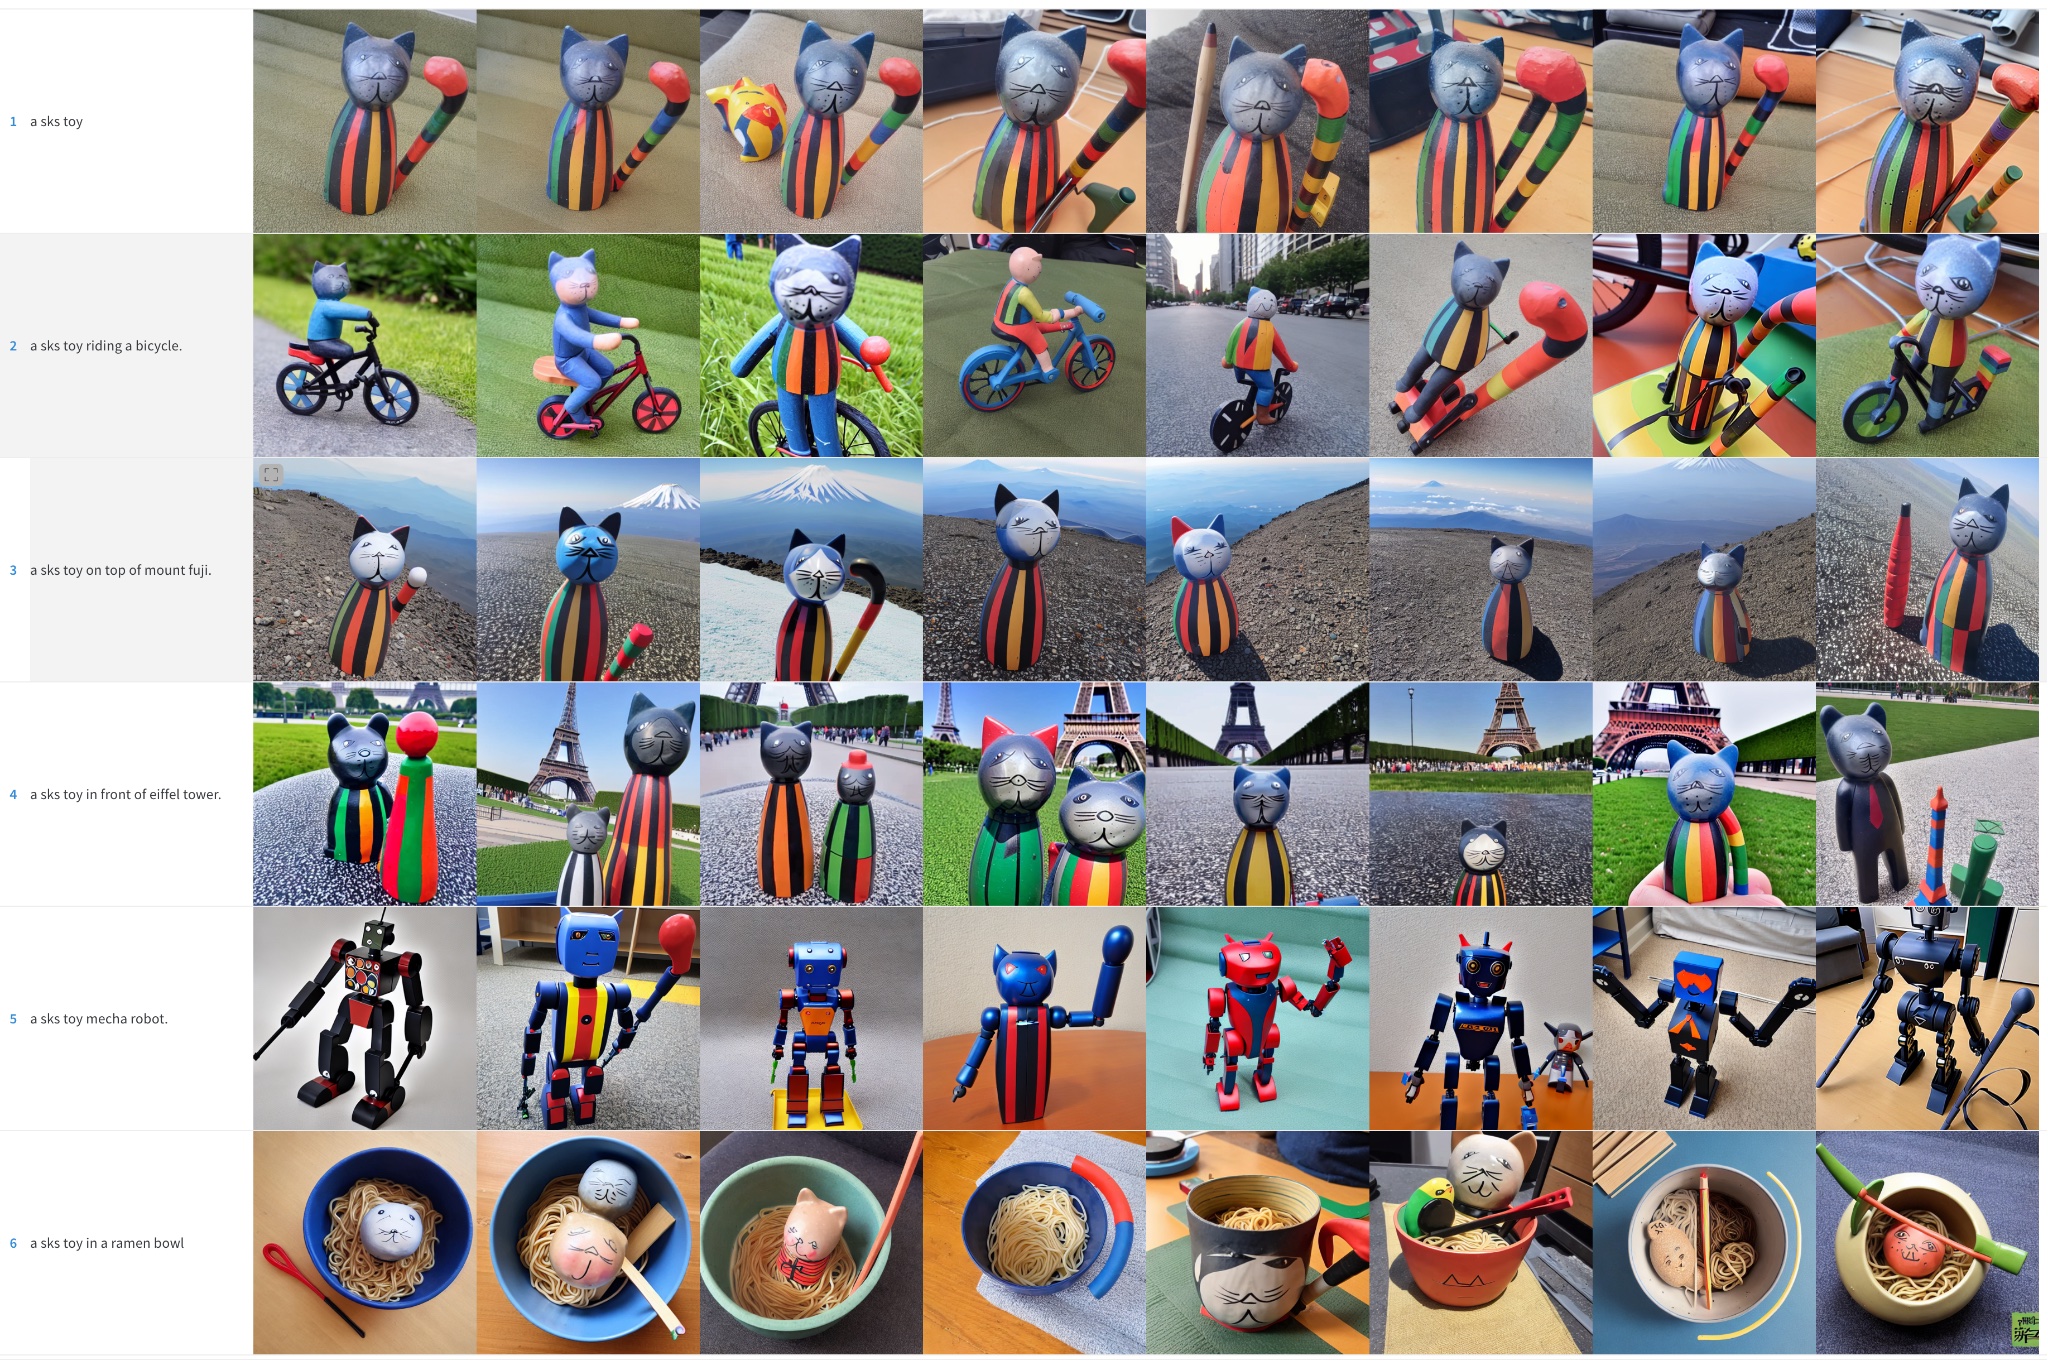
For the first 3 examples (various objects), we fine-tuned the model with a batch size of 4 (2 per GPU) for 400 steps. We used a high learning rate of 5e-6 and a low learning rate of 2e-6. No prior preservation was used.
The last experiment attempts to add a human subject to the model. We used prior preservation with a batch size of 2 (1 per GPU), 800 and 1200 steps in this case. We used a high learning rate of 5e-6 and a low learning rate of 2e-6.
Note that you can use 8-bit Adam, fp16 training or gradient accumulation to reduce memory requirements and run similar experiments on GPUs with 16 GB of memory.
High Learning Rate (5e-6)
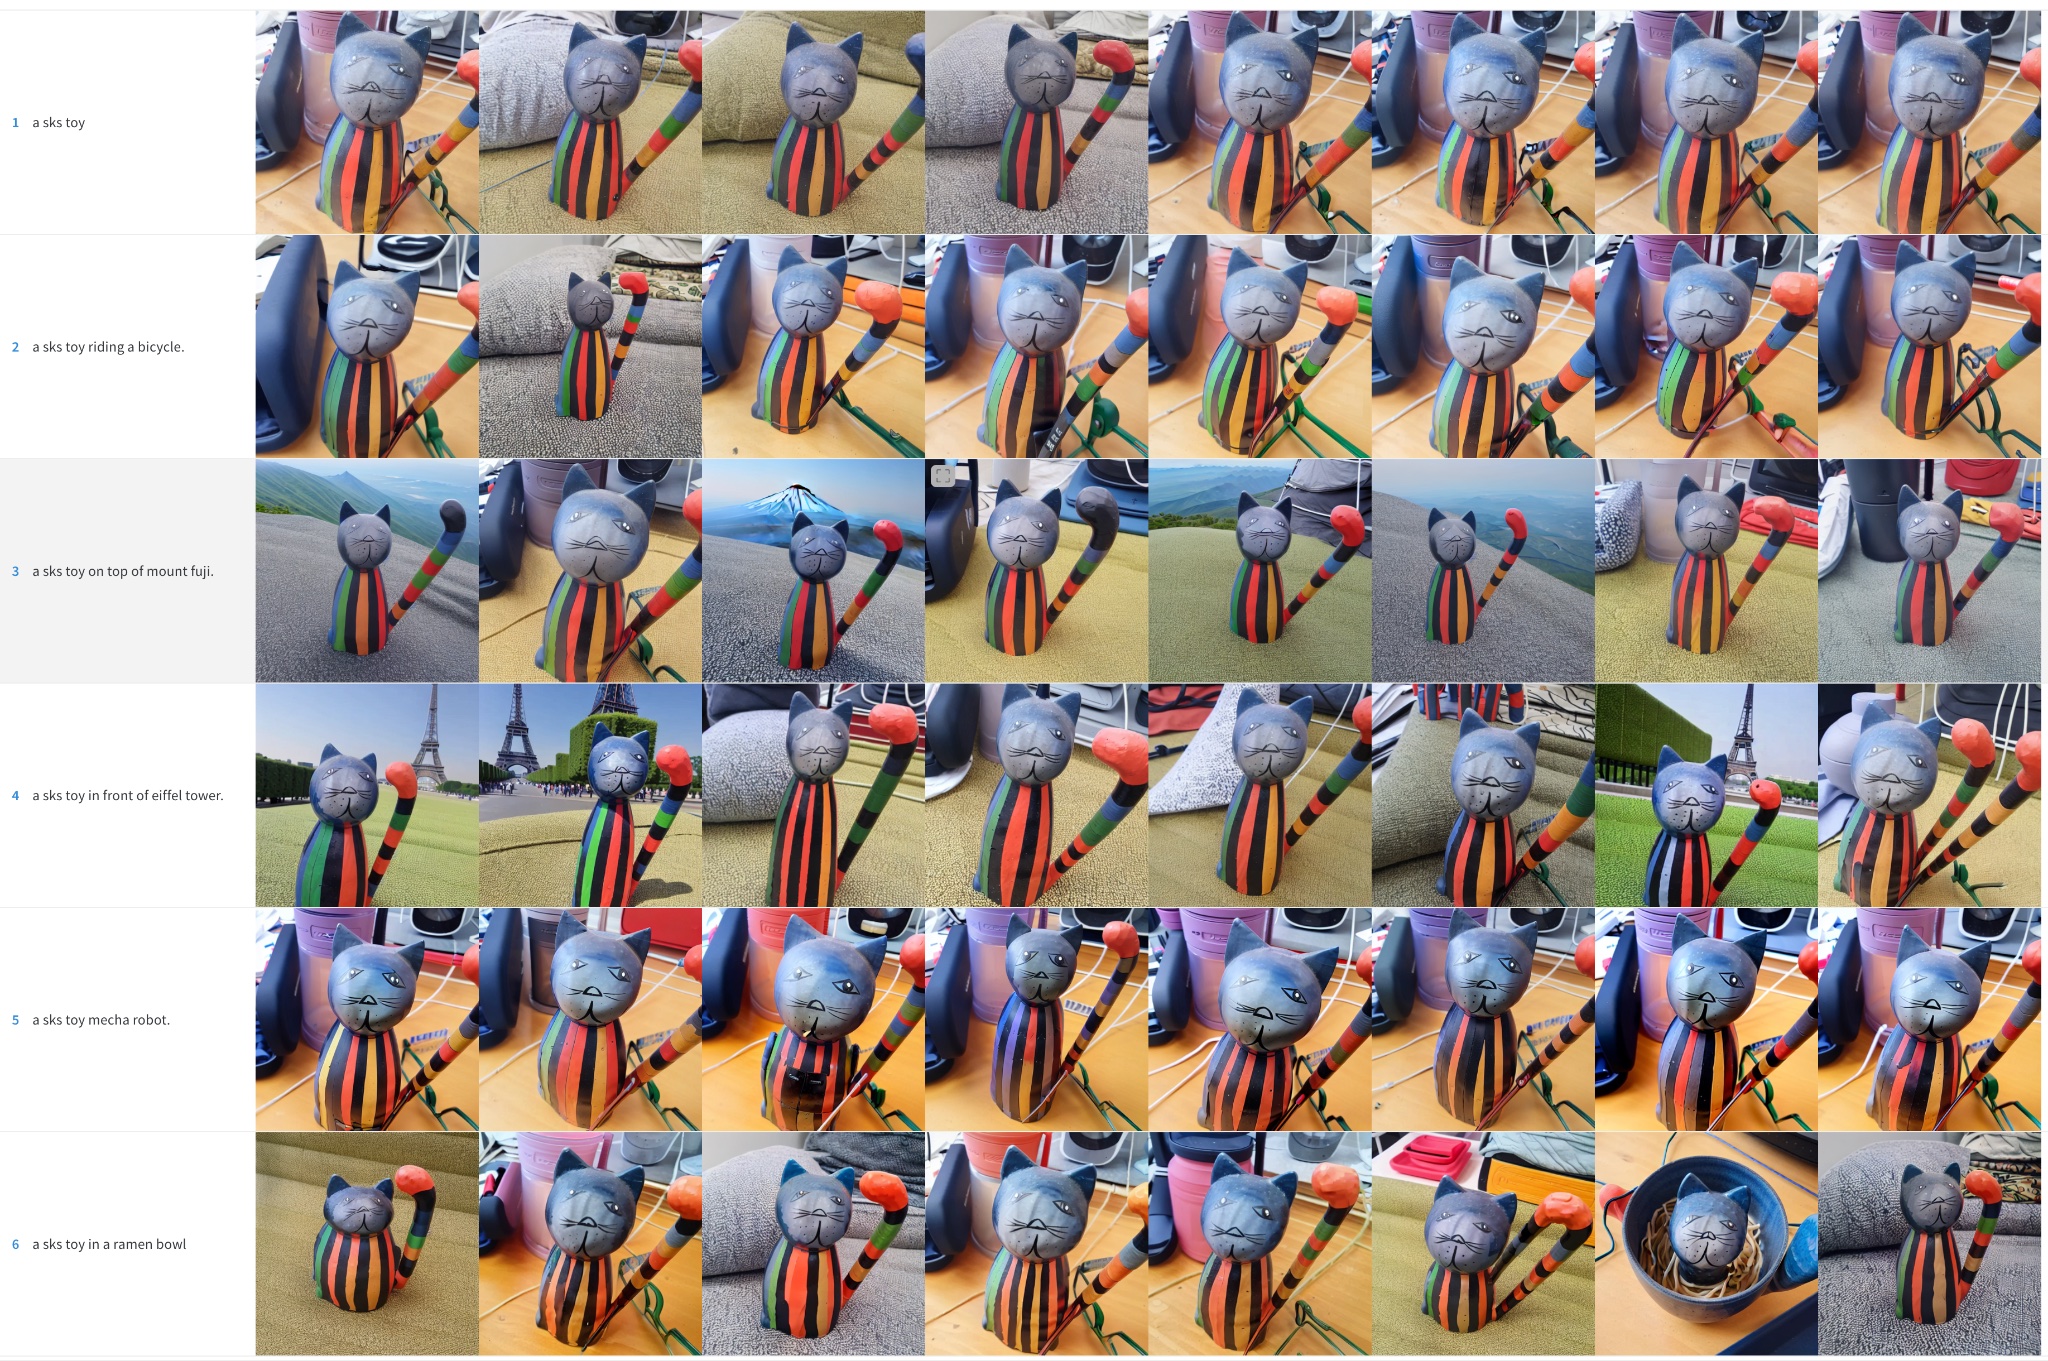
Low Learning Rate (2e-6)
High Learning Rate (5e-6). Note that the color artifacts are noise remnants – running more inference steps could help resolve some of those details.
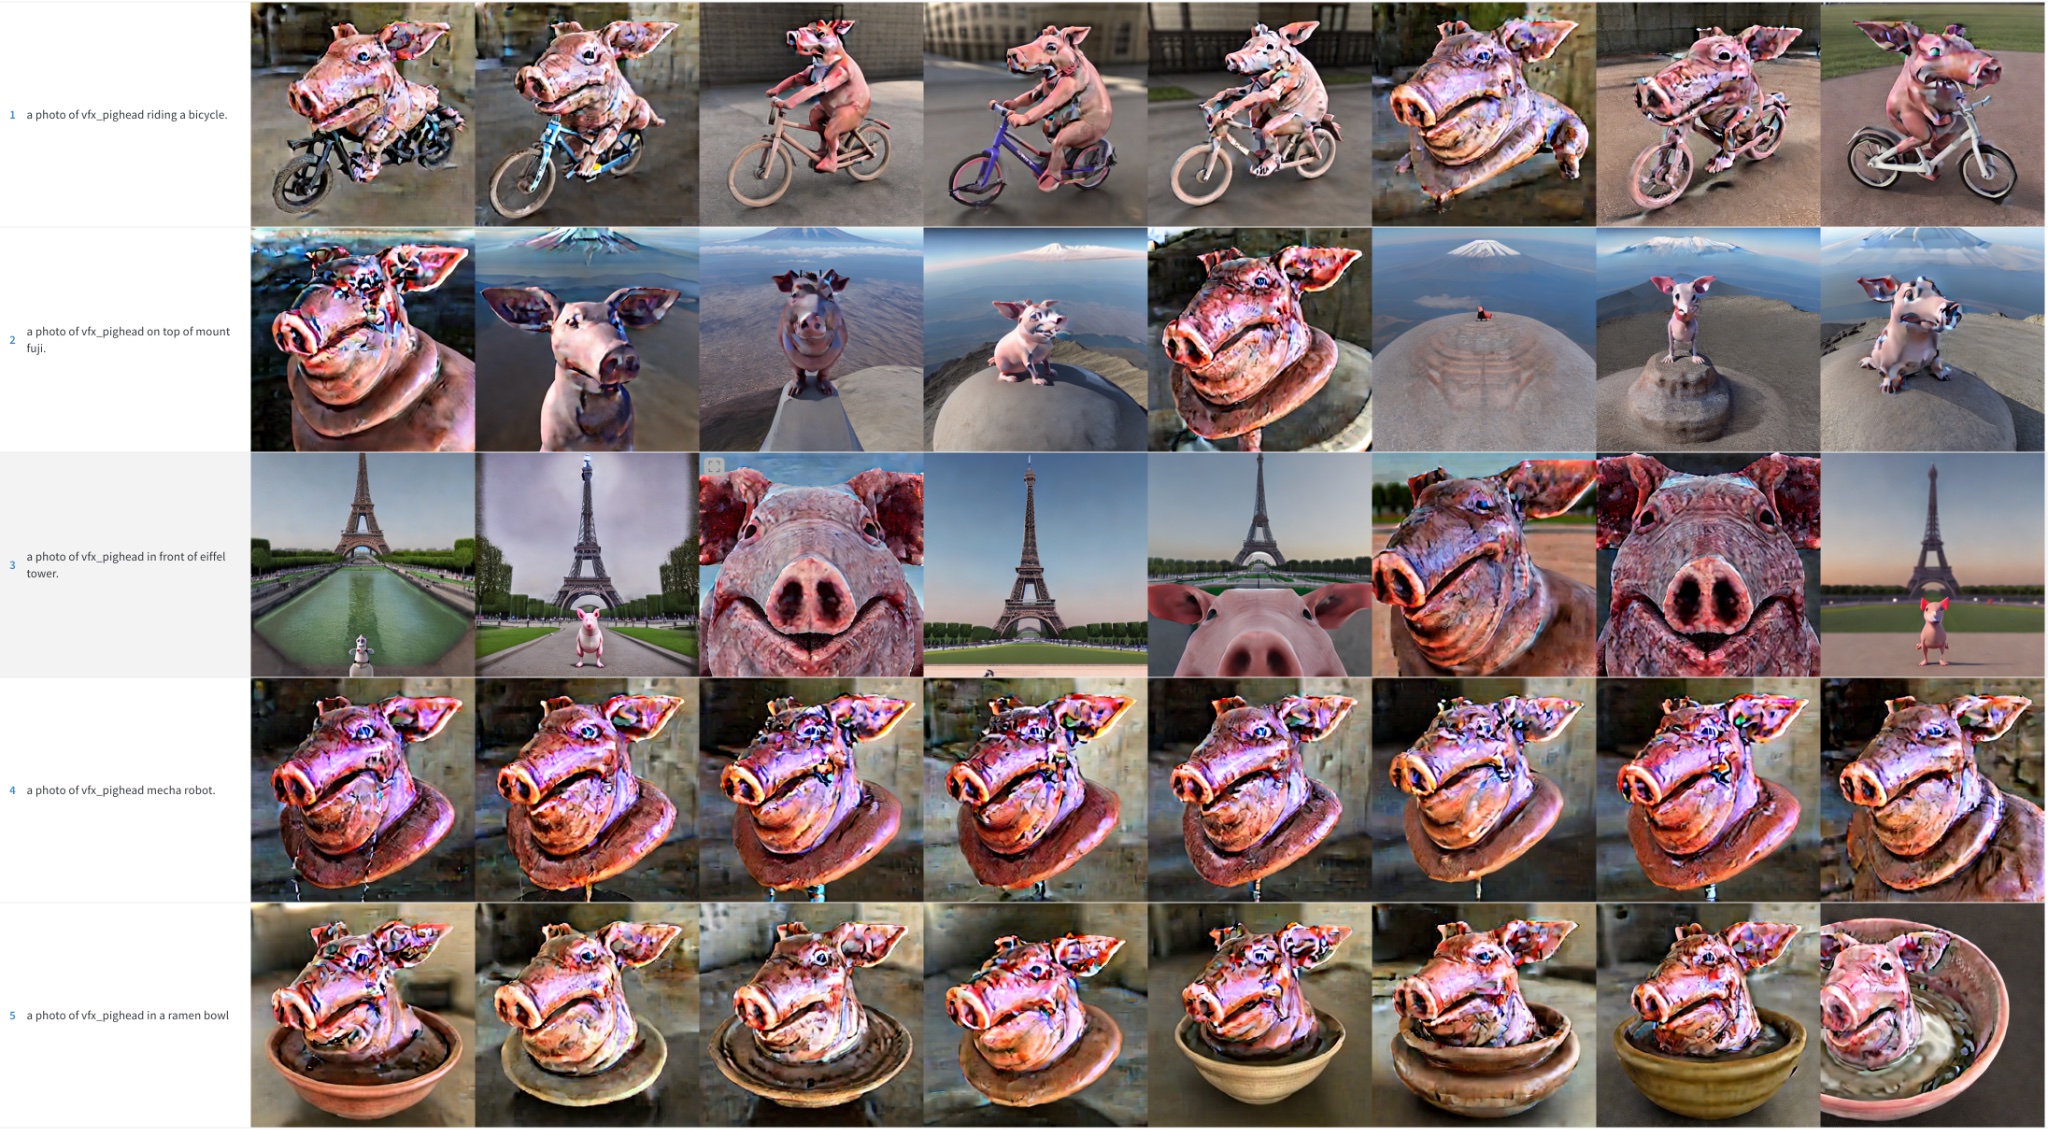
Low Learning Rate (2e-6)
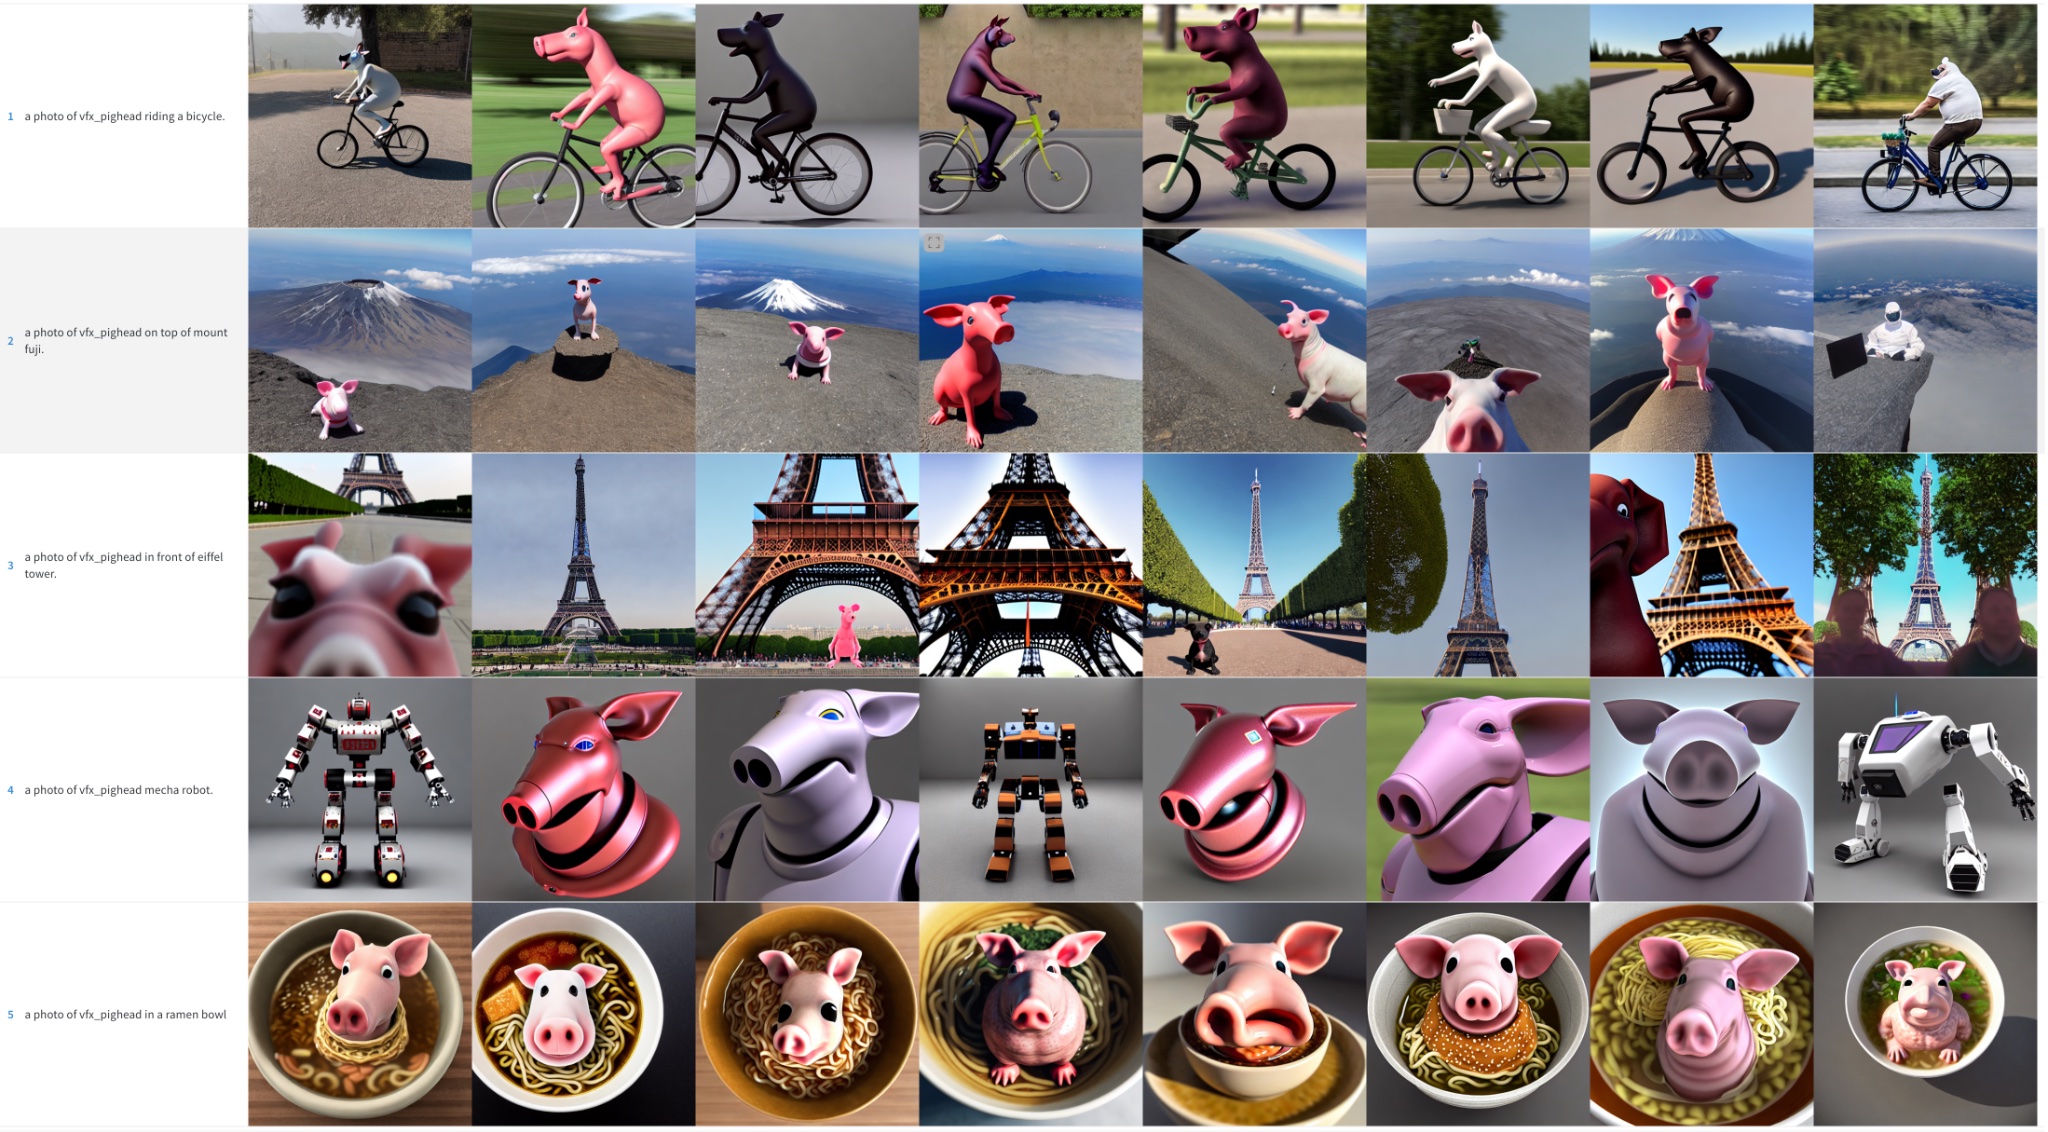
High Learning Rate (5e-6). Note that the color artifacts are noise remnants – running more inference steps could help resolve some of those details.
Low Learning Rate (2e-6)
We tried to incorporate the Kramer character from Seinfeld into Stable Diffusion. As previously mentioned, we trained for more steps with a smaller batch size. Even so, the results were not stellar. For the sake of brevity, we have omitted these sample images and defer the reader to the next sections, where face training became the focus of our efforts.
To get good results training Stable Diffusion with Dreambooth, it's important to tune the learning rate and training steps for your dataset.
Faces are harder to train. In our experiments, a learning rate of 2e-6 with 400 training steps works well for objects but faces required 1e-6 (or 2e-6) with ~1200 steps.
Image quality degrades a lot if the model overfits, and this happens if:
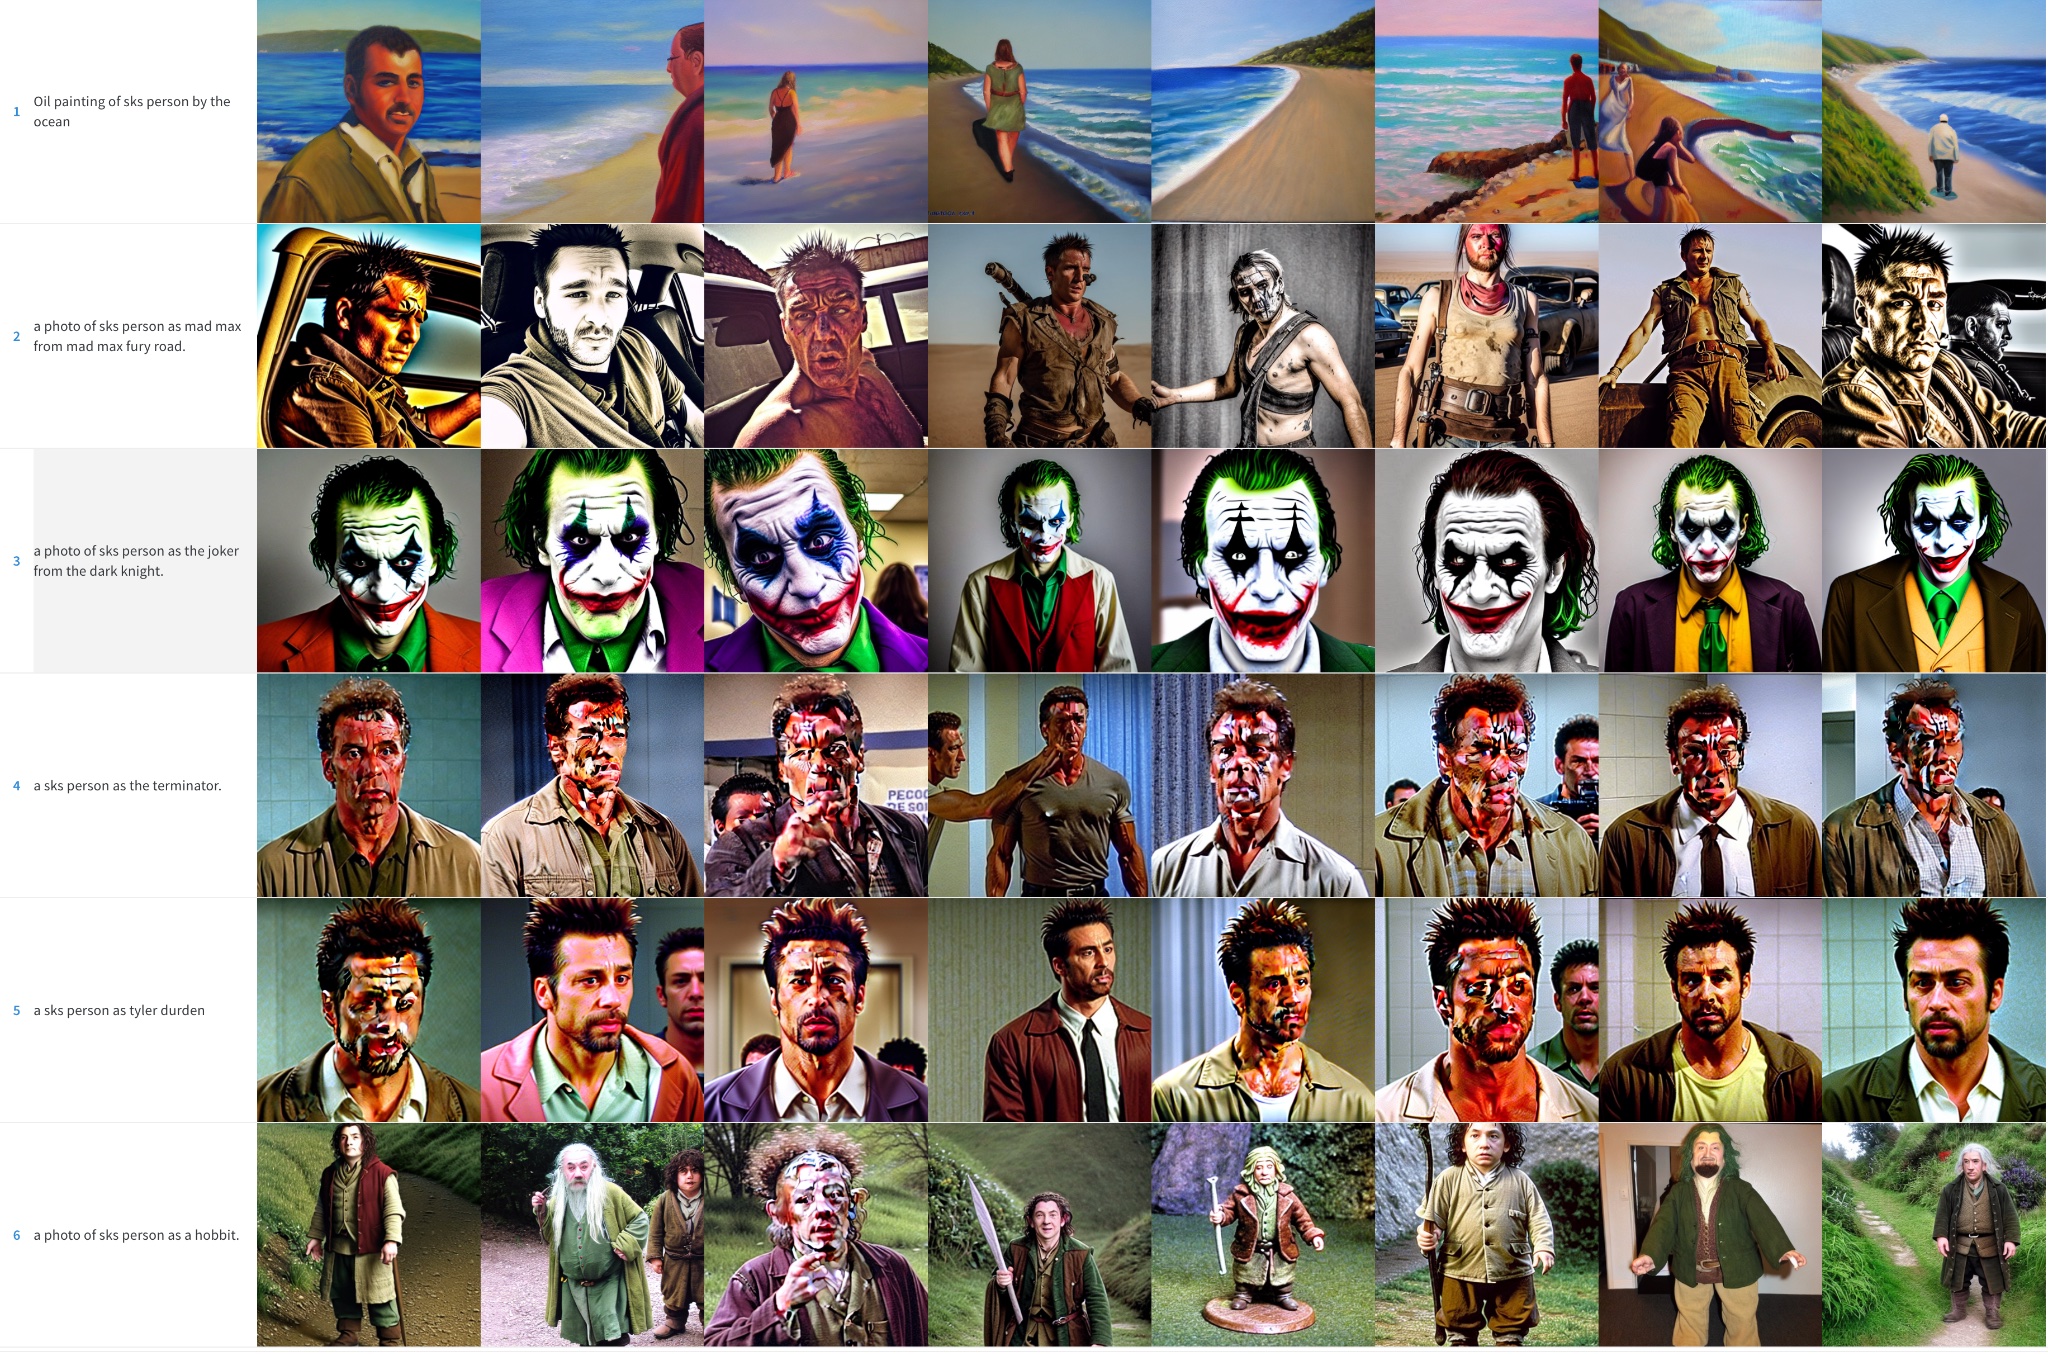
Prior preservation is a technique that uses additional images of the same class we are trying to train as part of the fine-tuning process. For example, if we try to incorporate a new person into the model, the class we'd want to preserve could be person. Prior preservation tries to reduce overfitting by using photos of the new person combined with photos of other people. The nice thing is that we can generate those additional class images using the Stable Diffusion model itself! The training script takes care of that automatically if you want, but you can also provide a folder with your own prior preservation images.
Prior preservation, 1200 steps, lr=2e-6.
No prior preservation, 1200 steps, lr=2e-6.
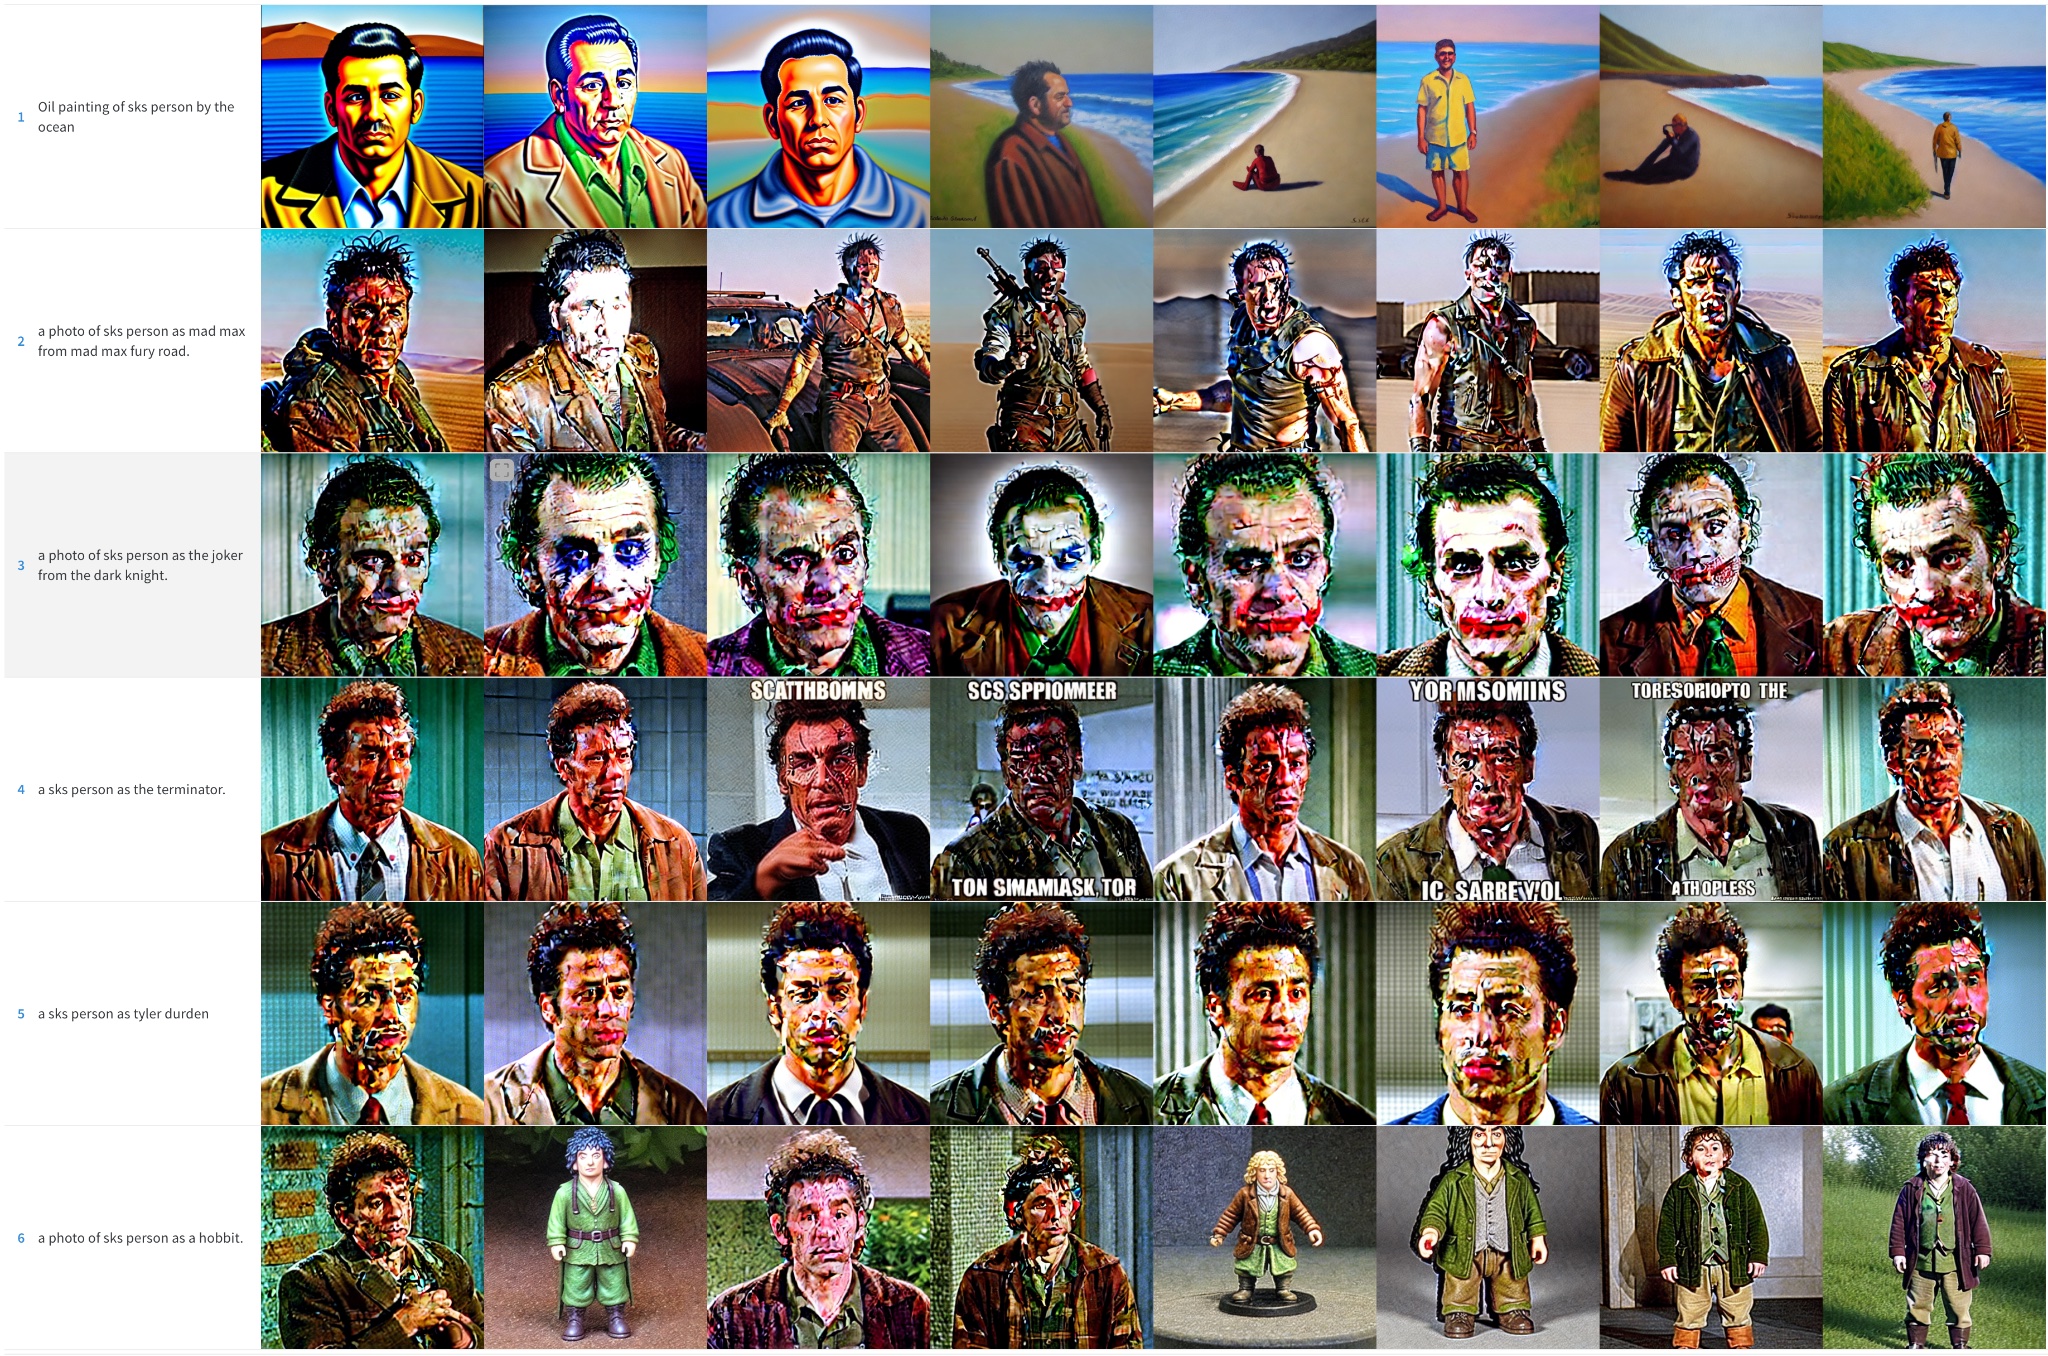
As you can see, results are better when prior preservation is used, but there are still noisy blotches. It's time for some additional tricks!
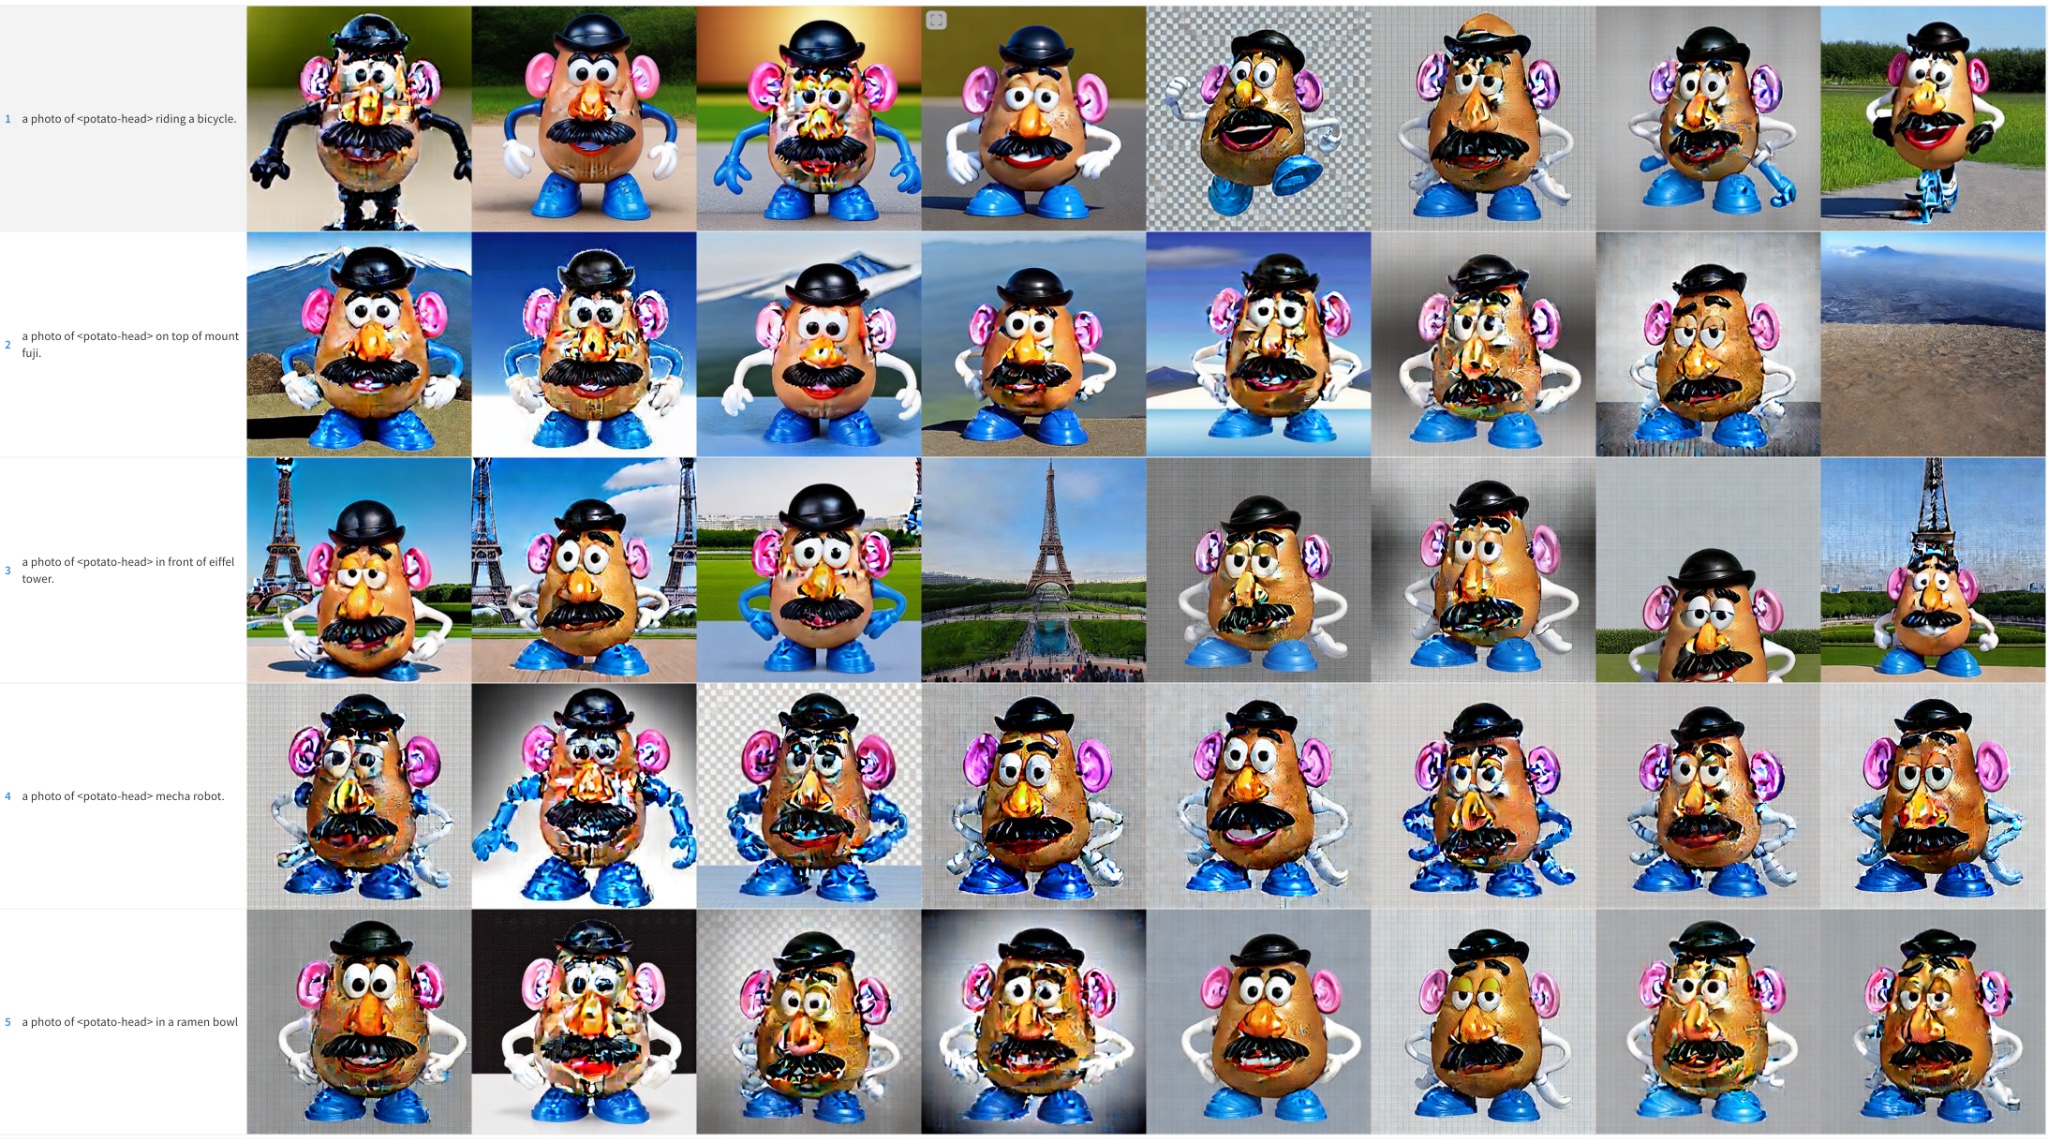
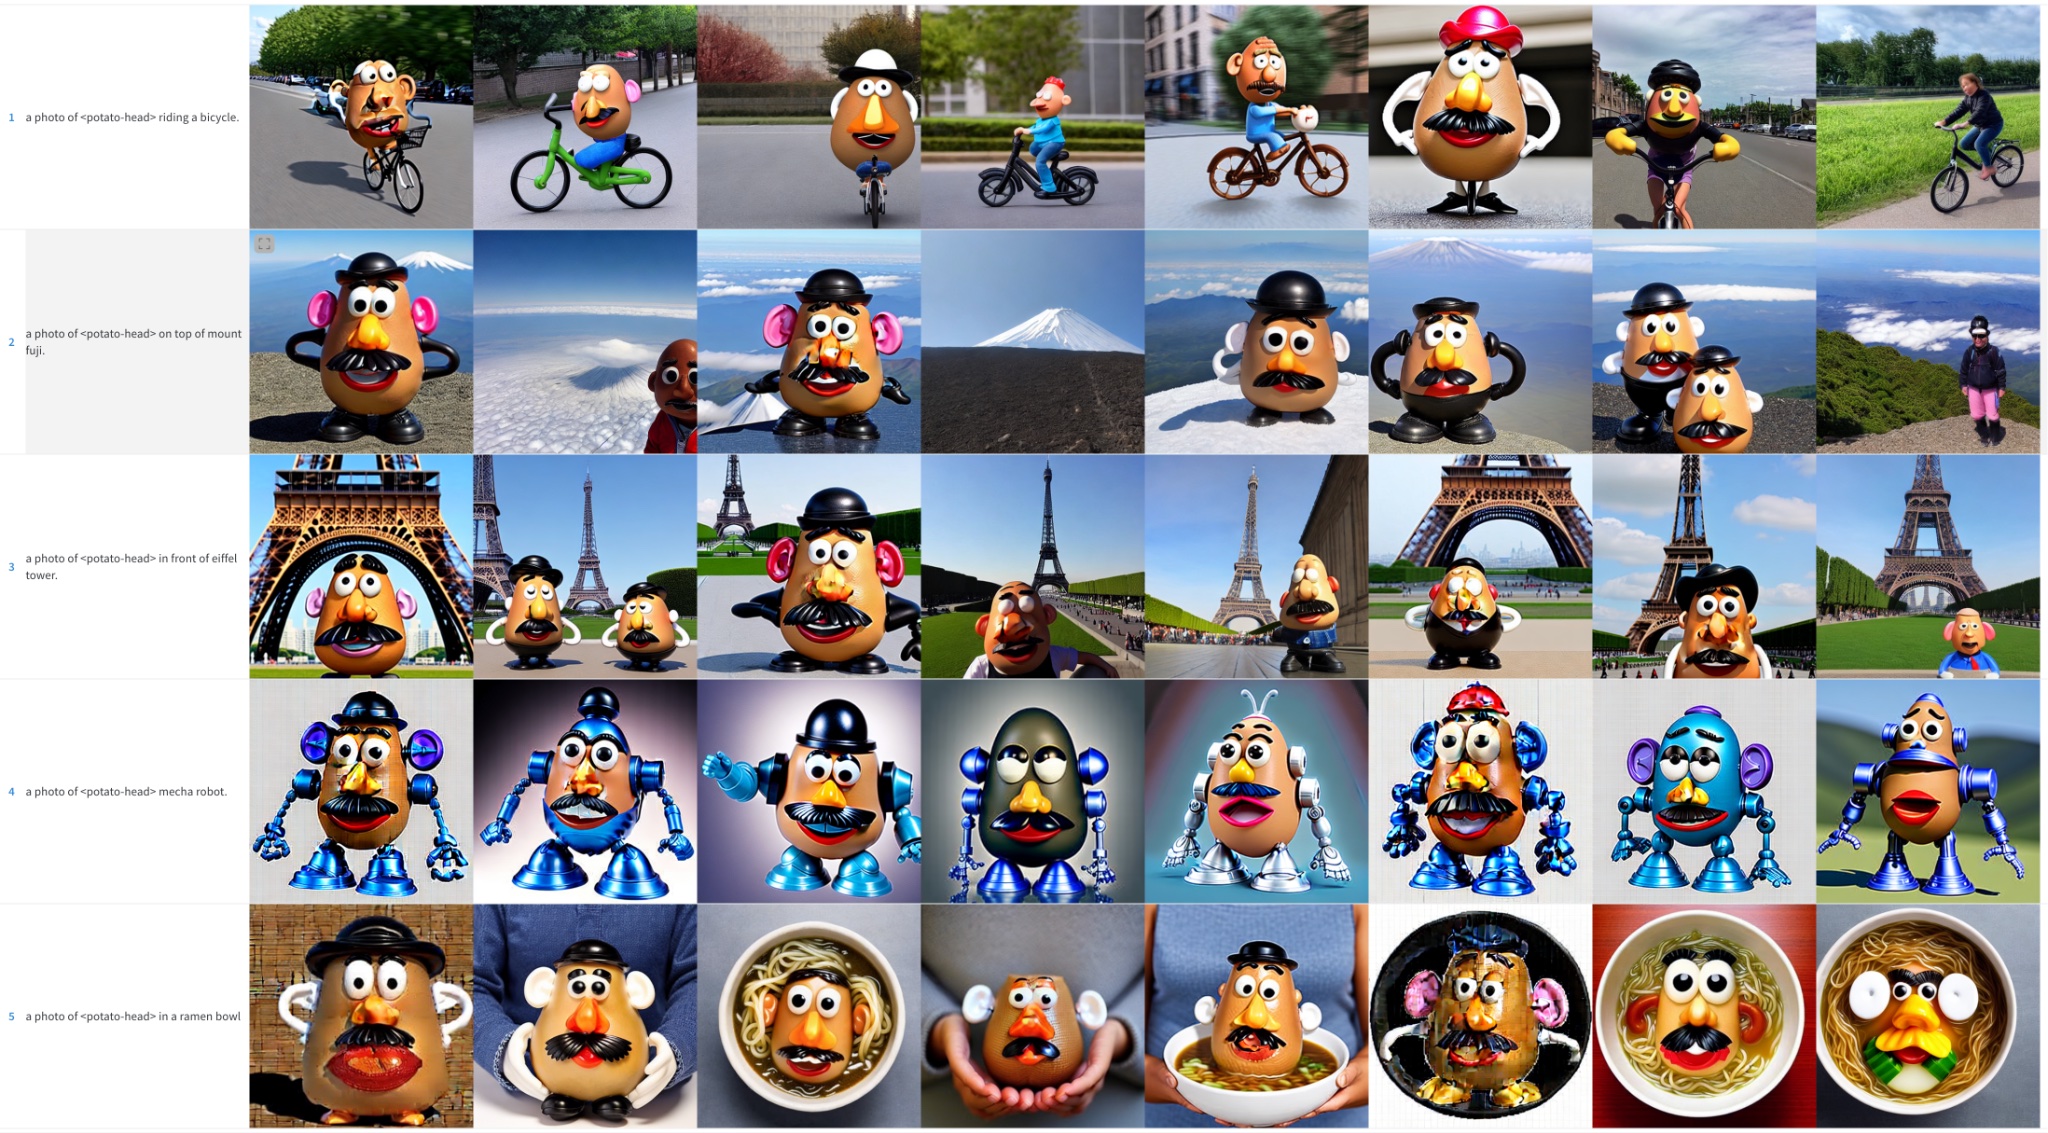
In the previous examples, we used the PNDM scheduler to sample images during the inference process. We observed that when the model overfits, DDIM usually works much better than PNDM and LMSDiscrete. In addition, quality can be improved by running inference for more steps: 100 seems to be a good choice. The additional steps help resolve some of the noise patches into image details.
PNDM, Kramer face
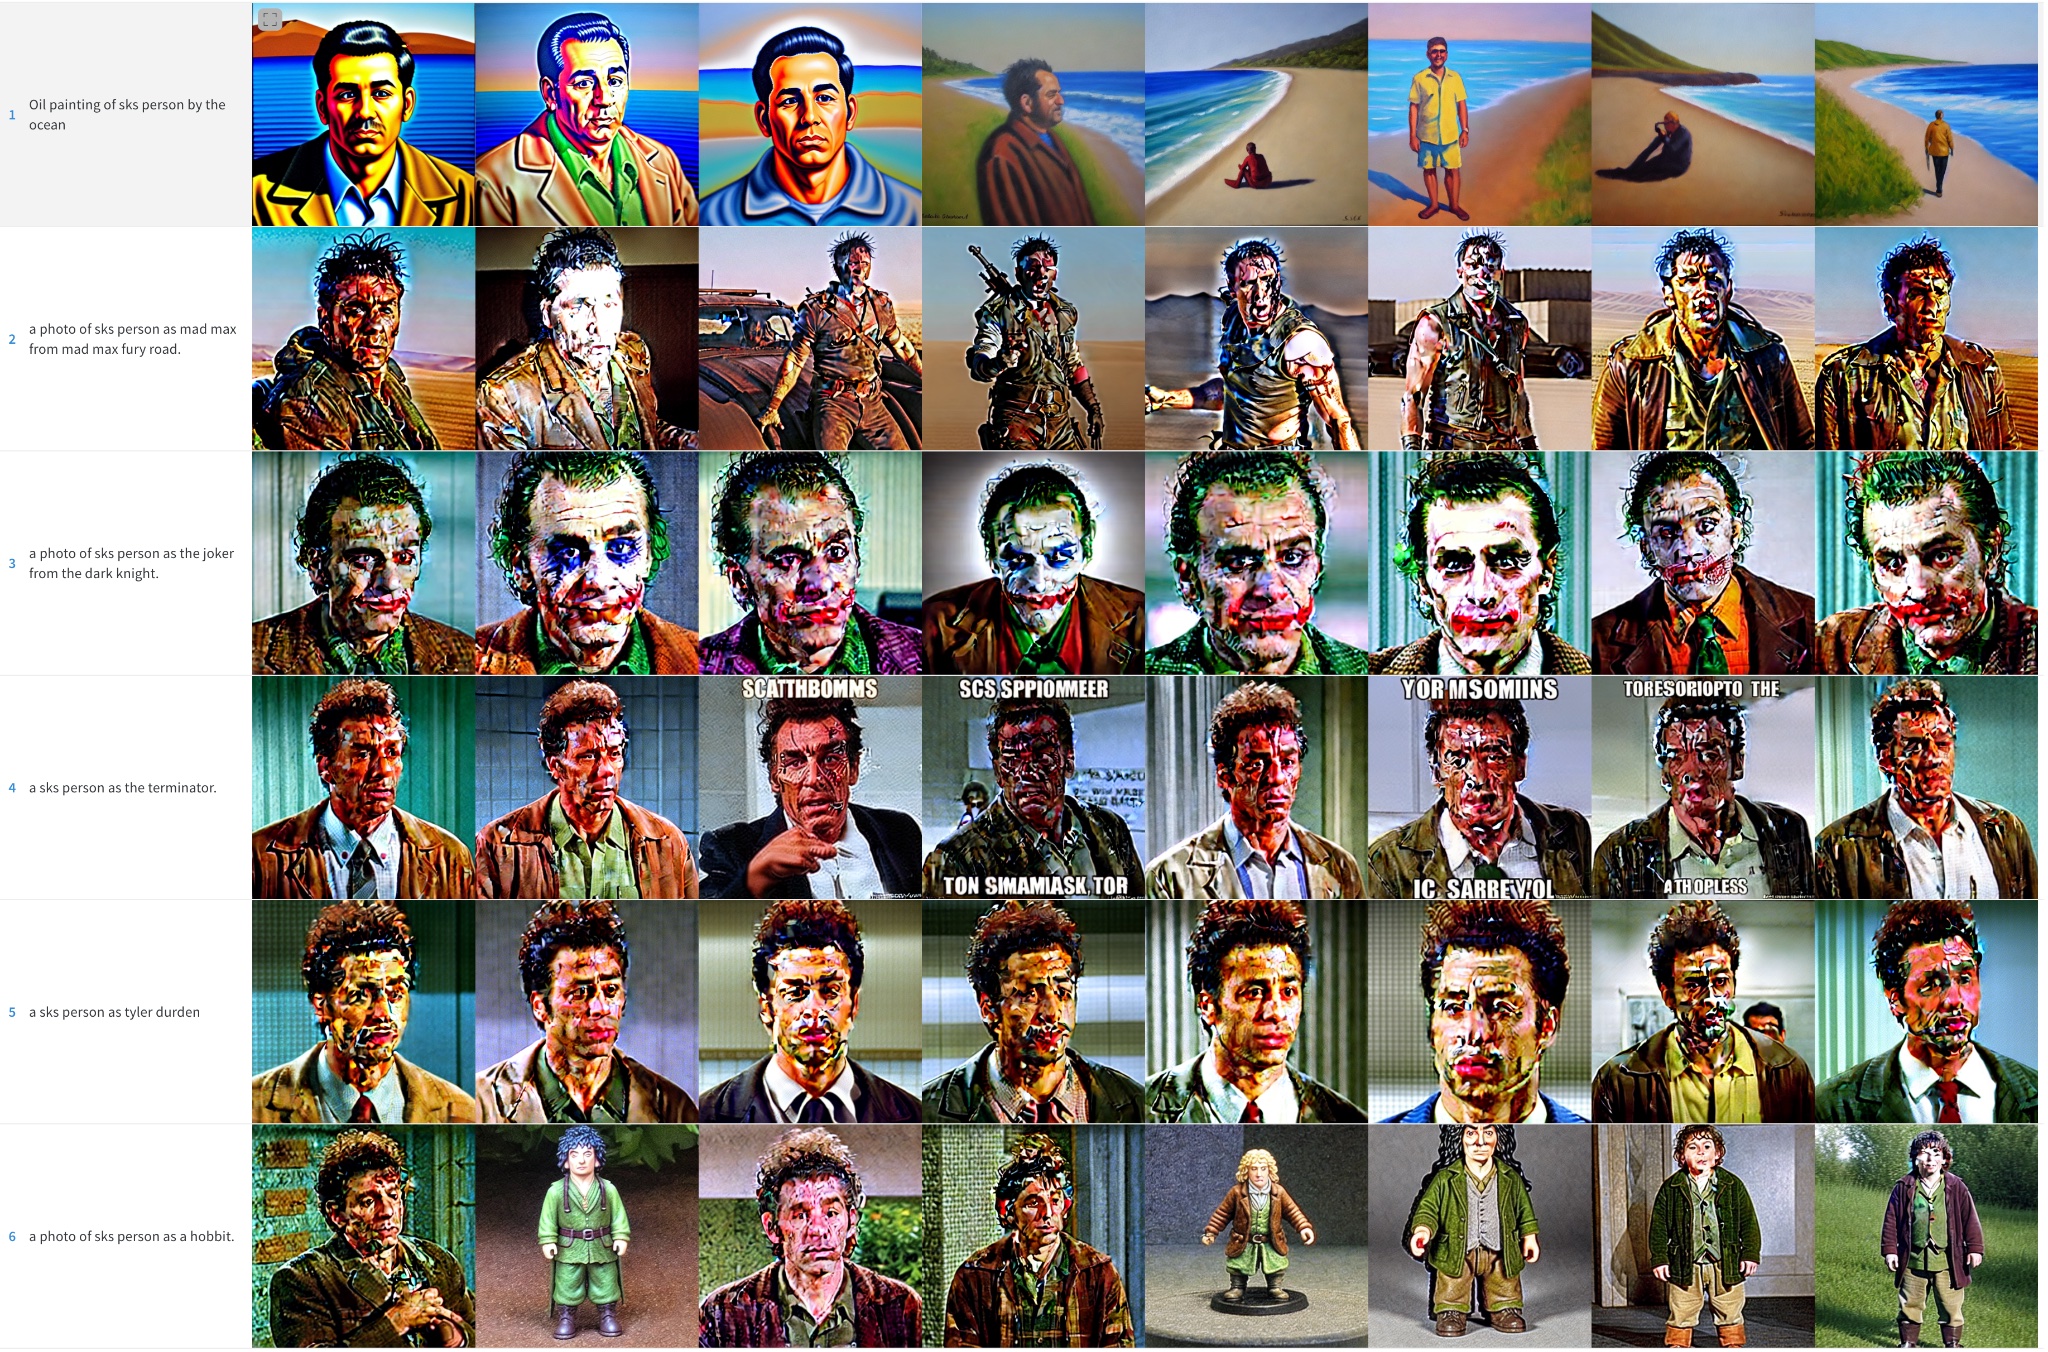
LMSDiscrete, Kramer face. Results are terrible!

DDIM, Kramer face. Much better

A similar behaviour can be observed for other subjects, although to a lesser extent.
PNDM, Potato Head
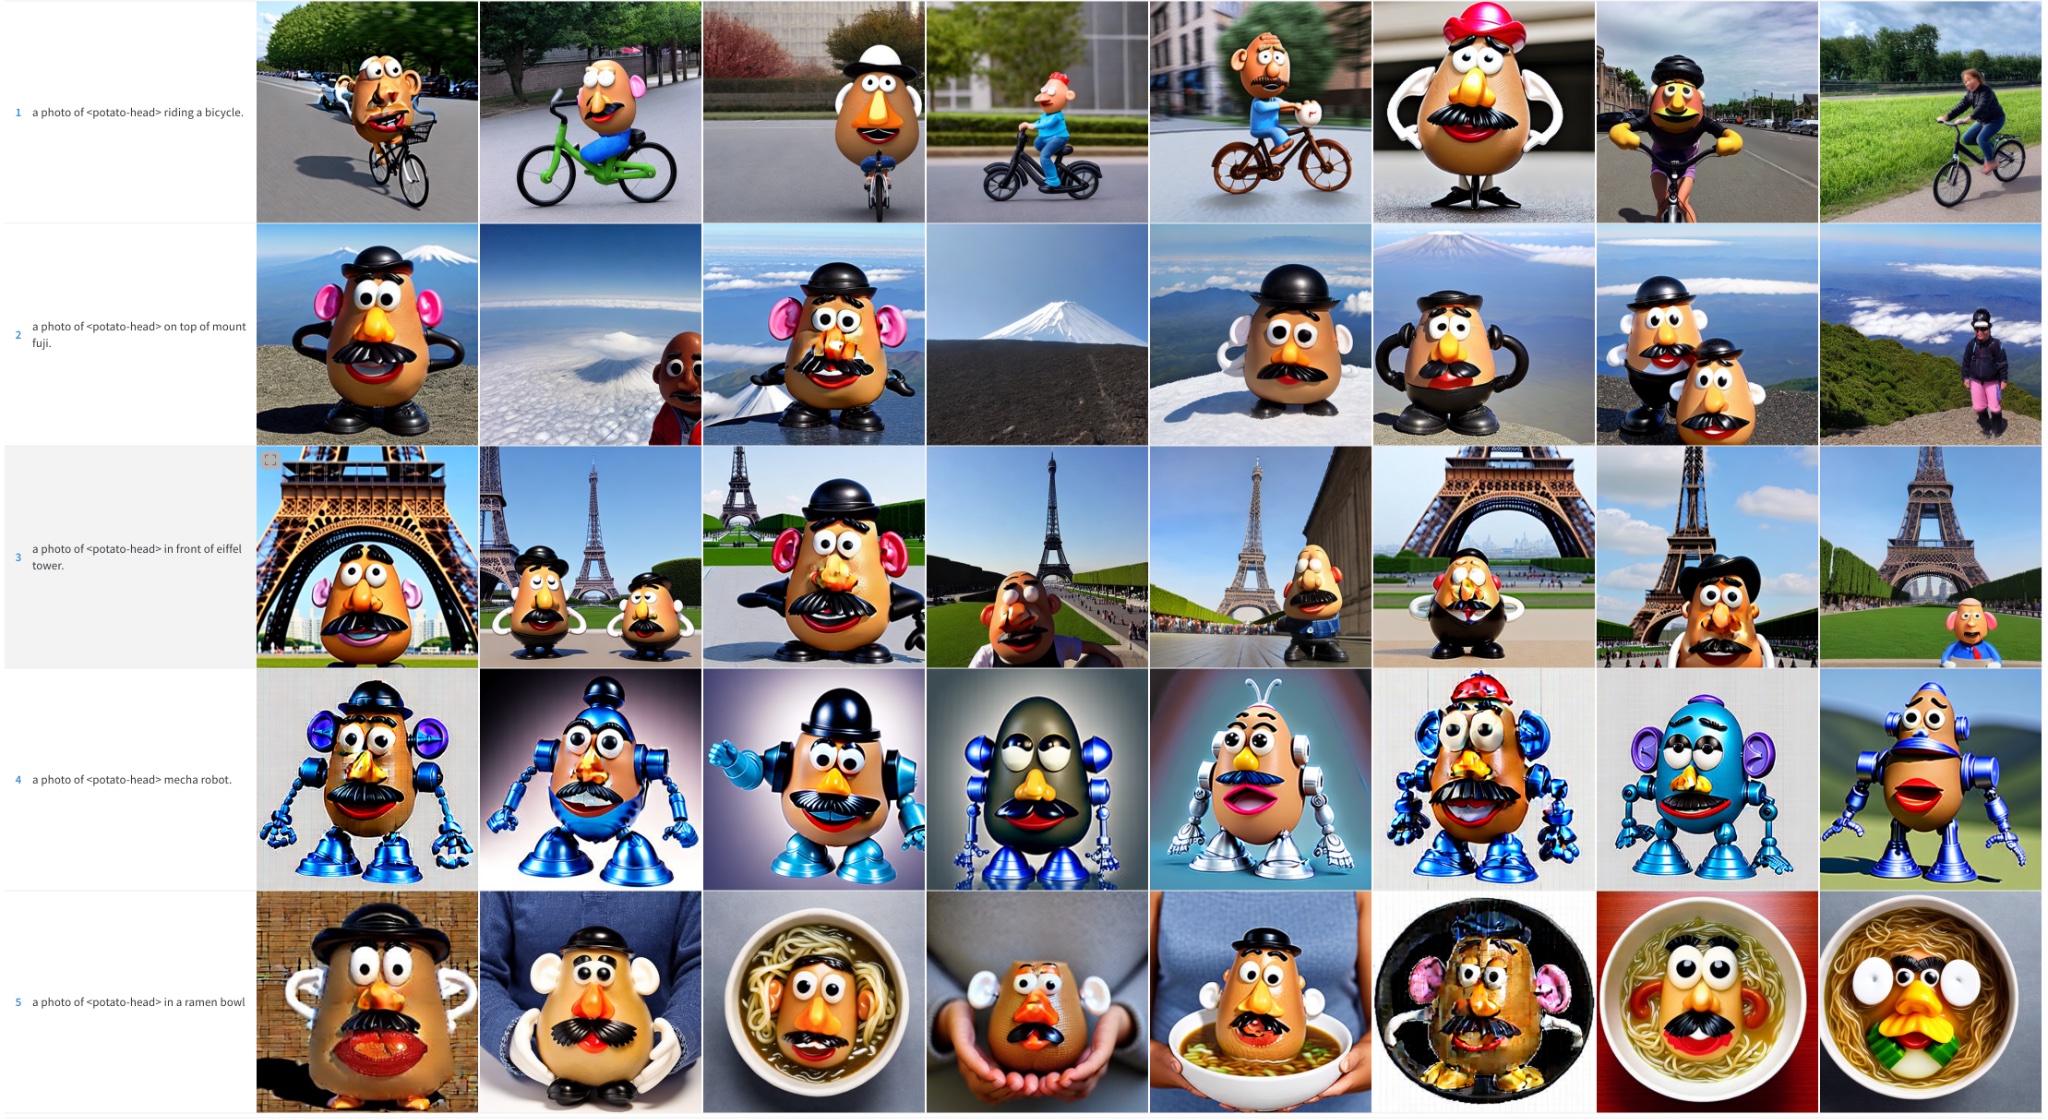
LMSDiscrete, Potato Head
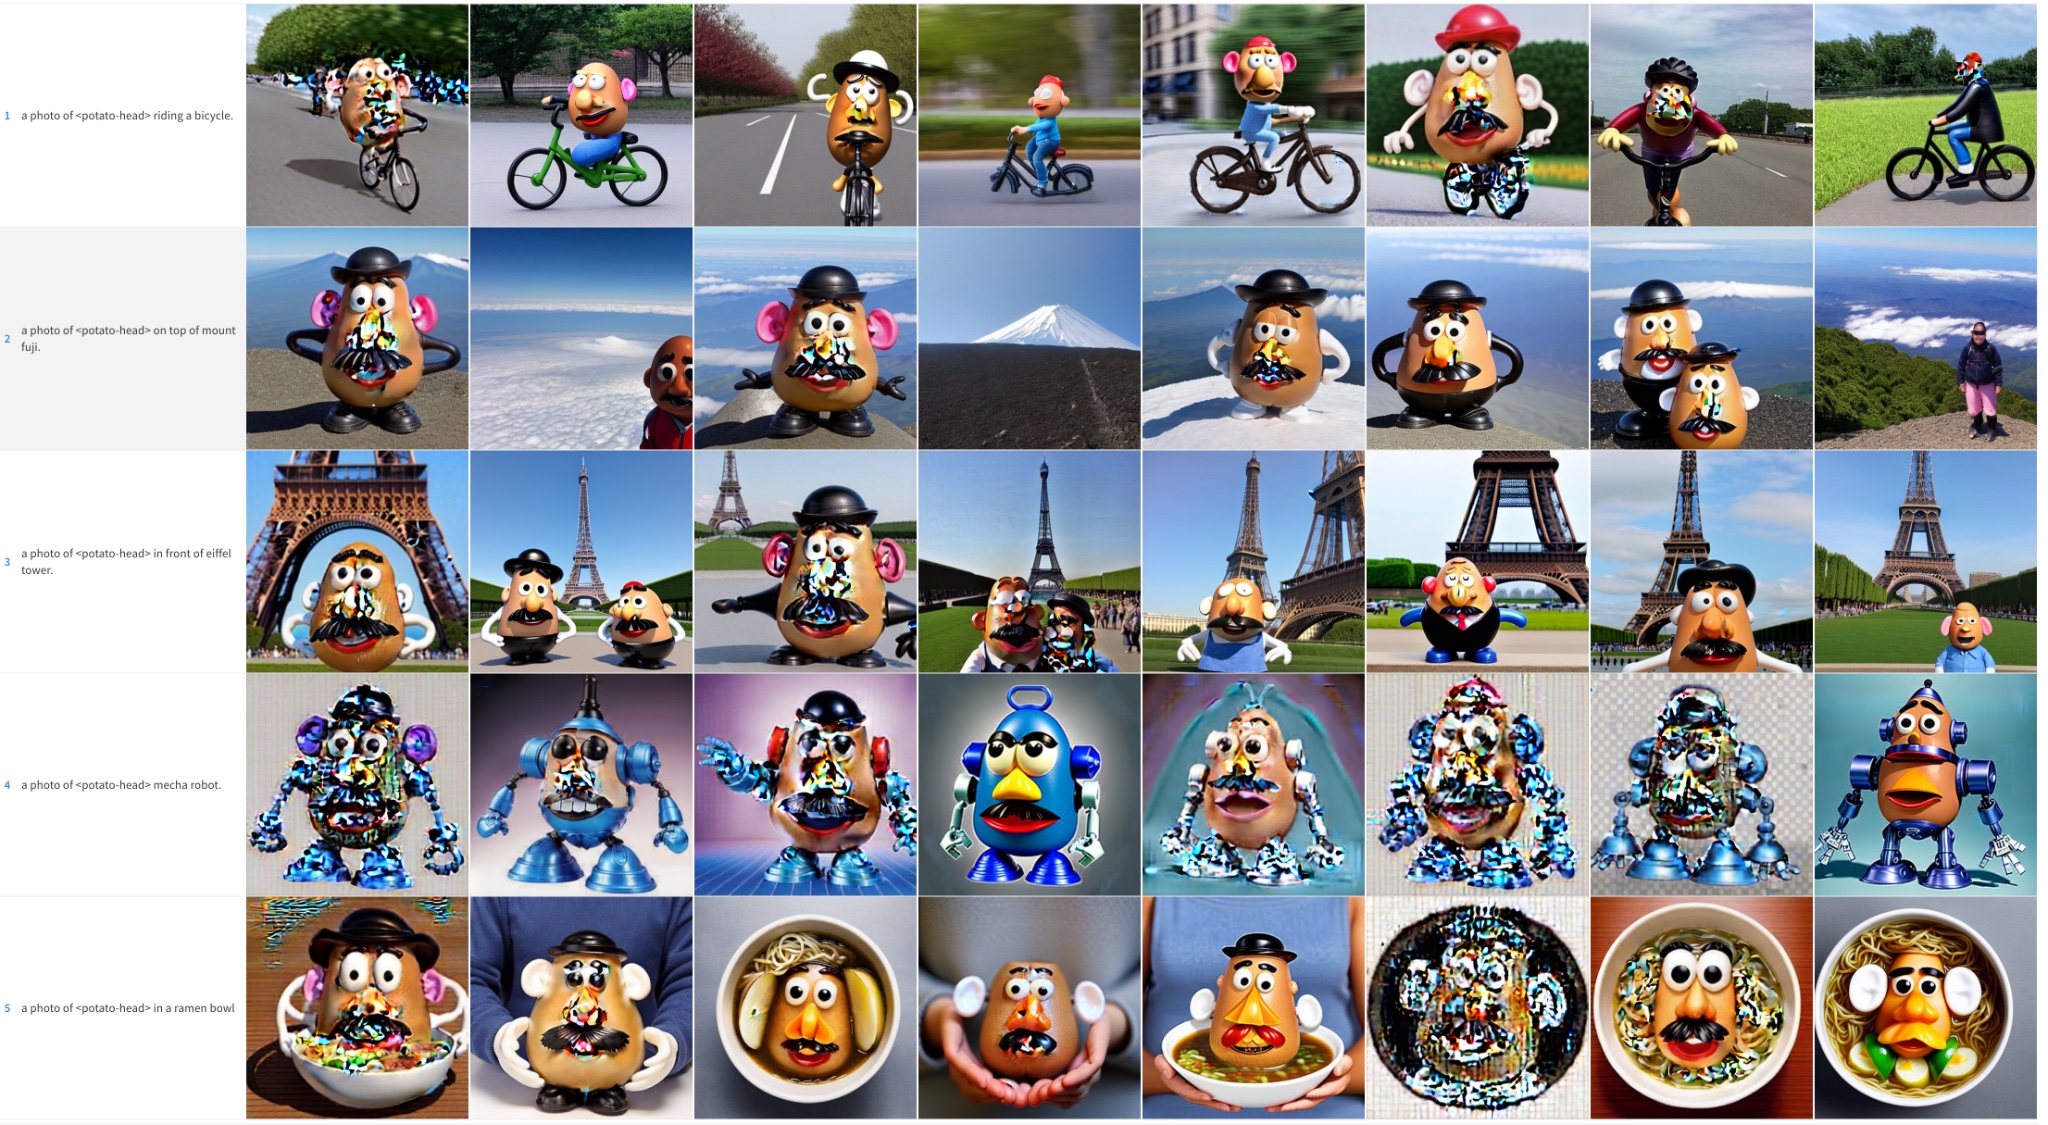
DDIM, Potato Head

The original Dreambooth paper describes a method to fine-tune the UNet component of the model but keeps the text encoder frozen. However, we observed that fine-tuning the encoder produces better results. We experimented with this approach after seeing it used in other Dreambooth implementations, and the results are striking!
Frozen text encoder

Fine-tuned text encoder
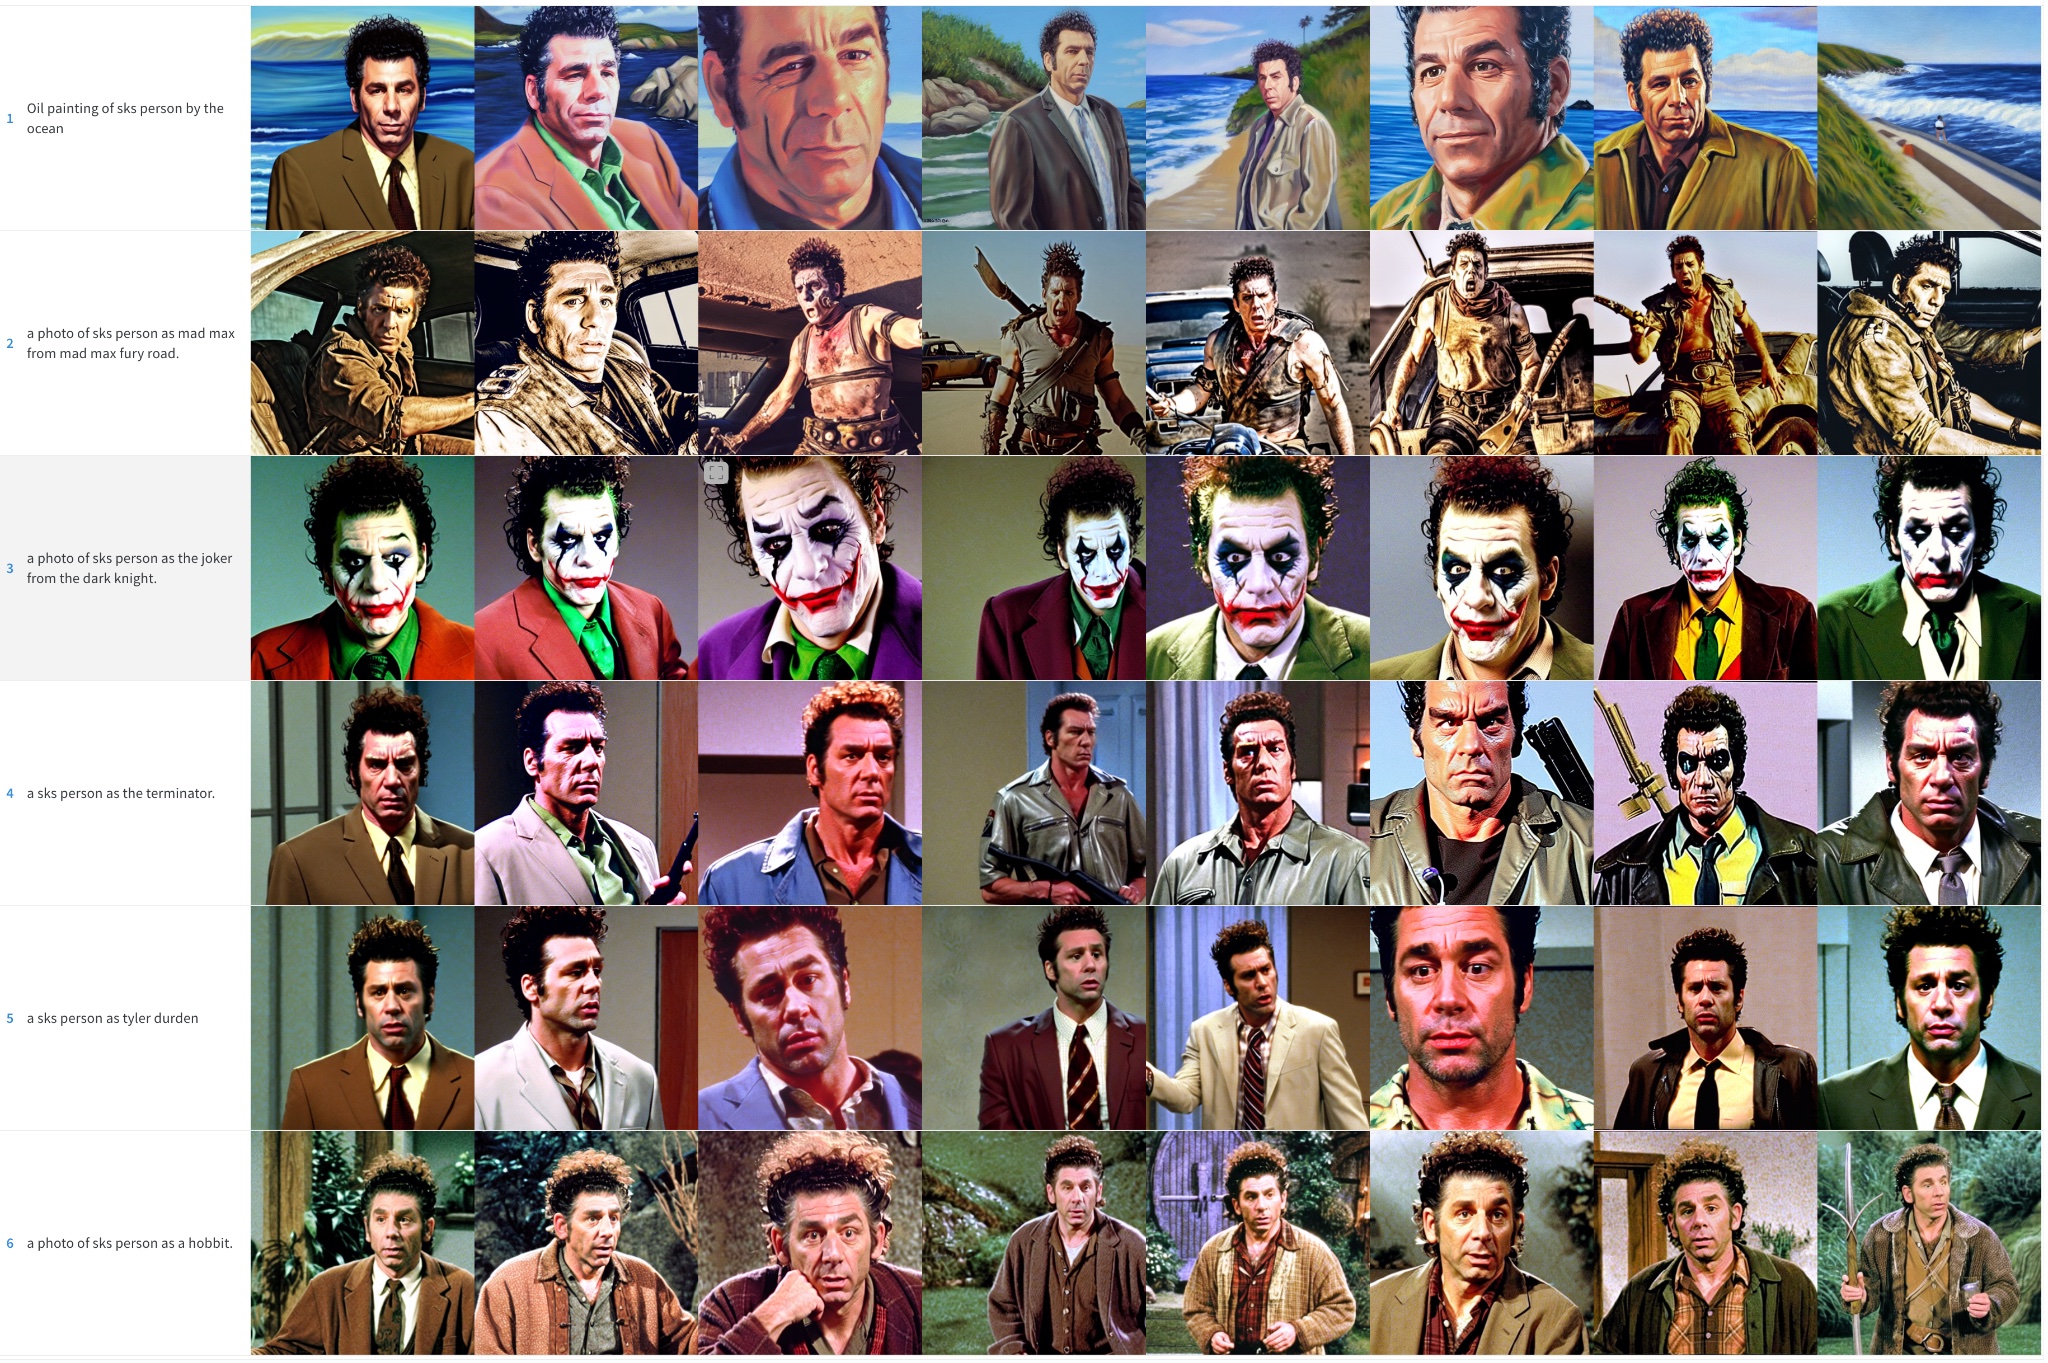
Fine-tuning the text encoder produces the best results, especially with faces. It generates more realistic images, it's less prone to overfitting and it also achieves better prompt interpretability, being able to handle more complex prompts.
We also ran a final experiment where we combined Textual Inversion with Dreambooth. Both techniques have a similar goal, but their approaches are different.
In this experiment we first ran textual inversion for 2000 steps. From that model, we then ran Dreambooth for an additional 500 steps using a learning rate of 1e-6. These are the results:

We think the results are much better than doing plain Dreambooth but not as good as when we fine-tune the whole text encoder. It seems to copy the style of the training images a bit more, so it could be overfitting to them. We didn't explore this combination further, but it could be an interesting alternative to improve Dreambooth and still fit the process in a 16GB GPU. Feel free to explore and tell us about your results!
此内容由惯性聚合(RSS阅读器)自动聚合整理,仅供阅读参考。 原文来自 — 版权归原作者所有。