






This article is also available in Chinese 简体中文.
Generative AI has become an instrumental part of artistic workflows for game development. However, as detailed in my earlier post, text-to-3D lags behind 2D in terms of practical applicability. This is beginning to change. Today, we'll be revisiting practical workflows for 3D Asset Generation and taking a step-by-step look at how to integrate Generative AI in a PS1-style 3D workflow.
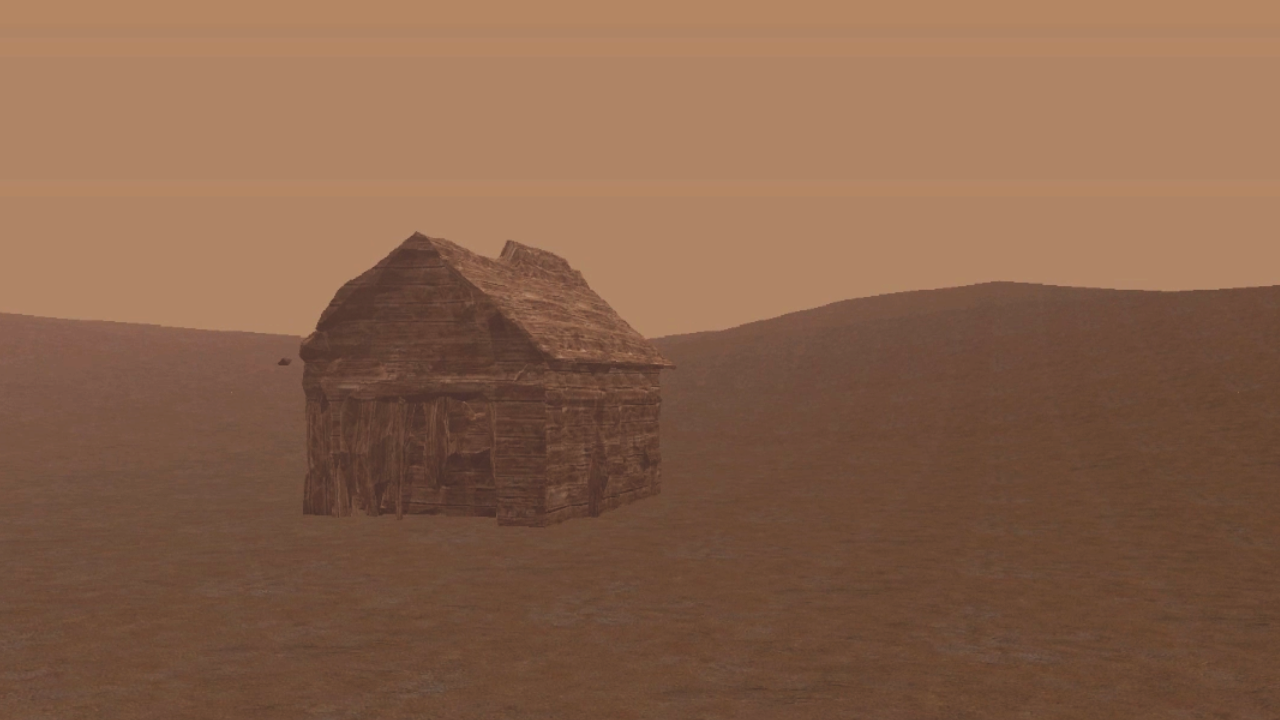
Why the PS1 style? Because it's much more forgiving to the low fidelity of current text-to-3D models, and allows us to go from text to usable 3D asset with as little effort as possible.
This tutorial assumes some basic knowledge of Blender and 3D concepts such as materials and UV mapping.
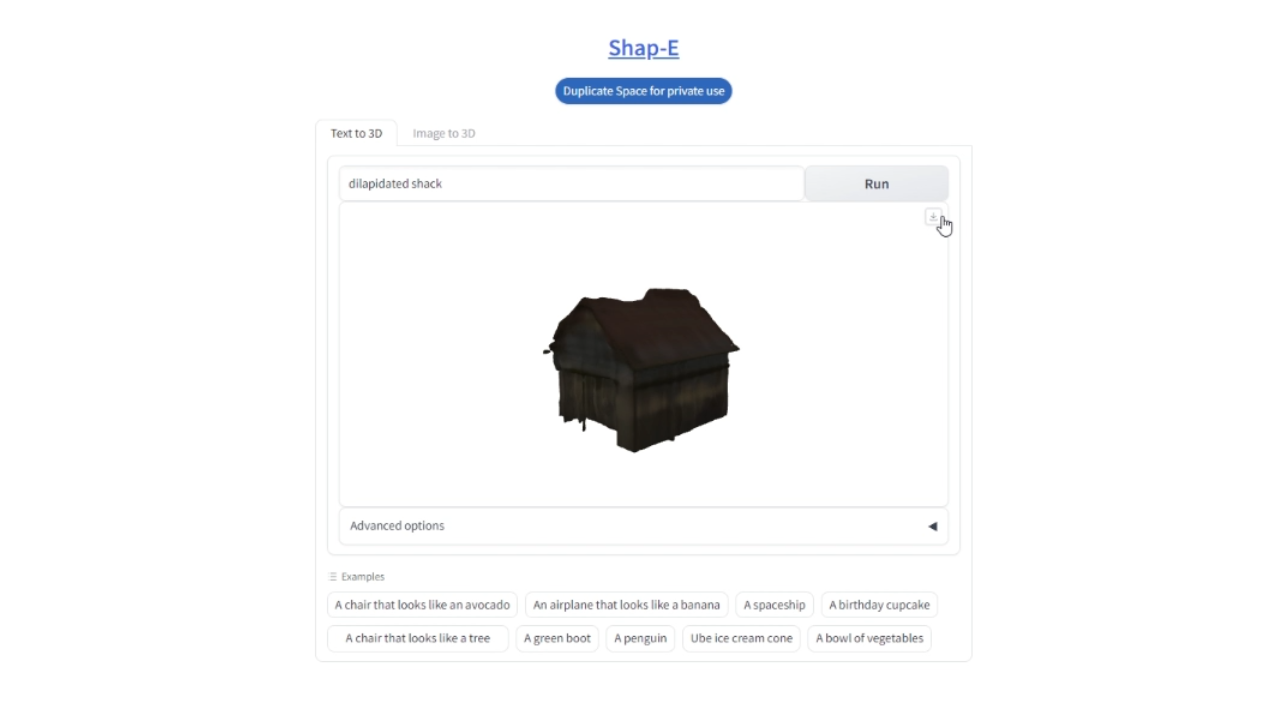
Start by visiting the Shap-E Hugging Face Space here or down below. This space uses the open-source Shap-E model, a recent diffusion model from OpenAI to generate 3D models from text.
Enter "Dilapidated Shack" as your prompt and click 'Generate'. When you're happy with the model, download it for the next step.
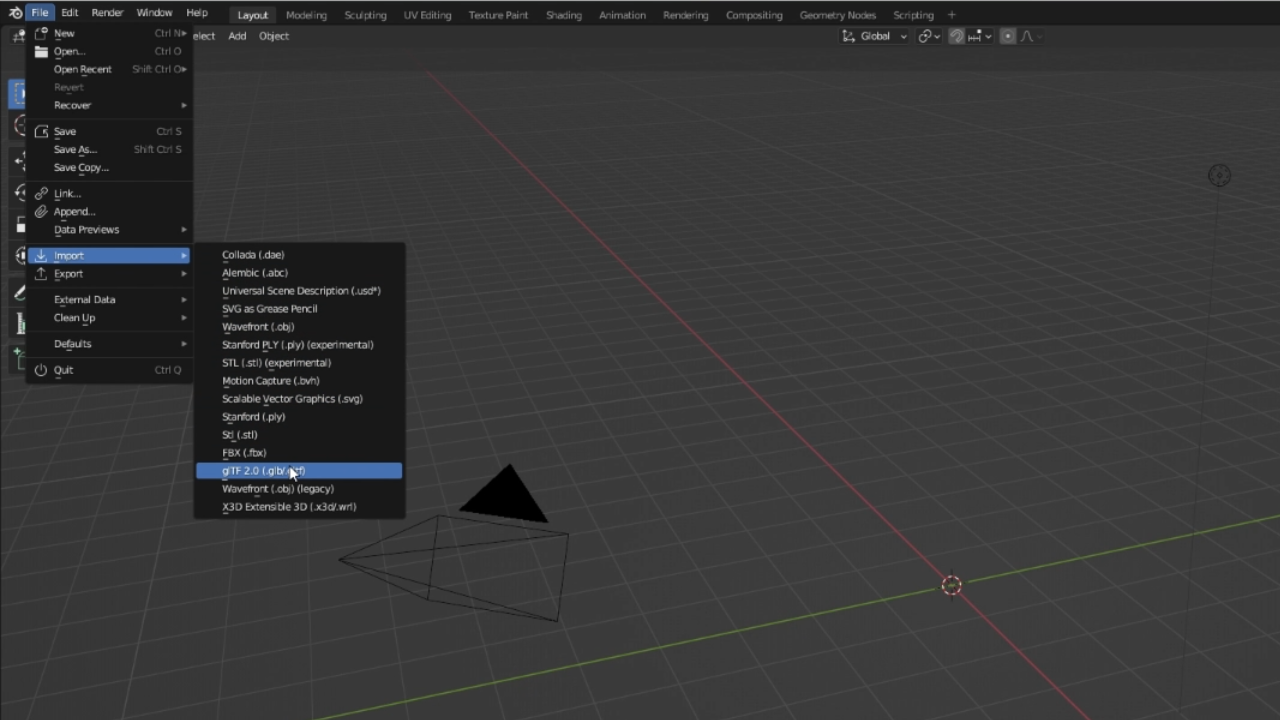
Next, open Blender (version 3.1 or higher). Go to File -> Import -> GLTF 2.0, and import your downloaded file. You may notice that the model has way more polygons than recommended for many practical applications, like games.
To reduce the polygon count, select your model, navigate to Modifiers, and choose the "Decimate" modifier. Adjust the ratio to a low number (i.e. 0.02). This is probably not going to look very good. However, in this tutorial, we're going to embrace the low fidelity.
To add textures to our model, we'll be using Dream Textures, a stable diffusion texture generator for Blender. Follow the instructions on the official repository to download and install the addon.
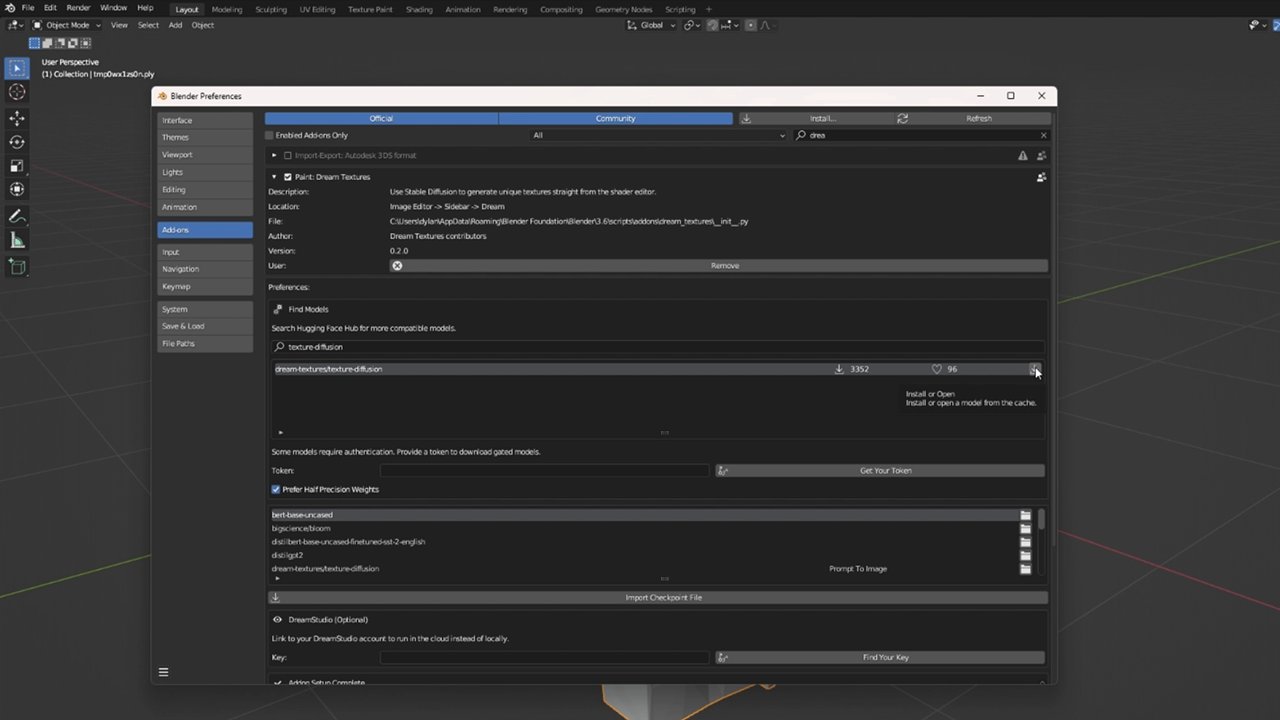
Once installed and enabled, open the addon preferences. Search for and download the texture-diffusion model.
Let's generate a custom texture. Open the UV Editor in Blender and press 'N' to open the properties menu. Click the 'Dream' tab and select the texture-diffusion model. Set the prompt to 'texture' and seamless to 'both'. This will ensure the generated image is a seamless texture.
Under 'subject', type the texture you want, like 'Wood Wall', and click 'Generate'. When you're happy with the result, name it and save it.
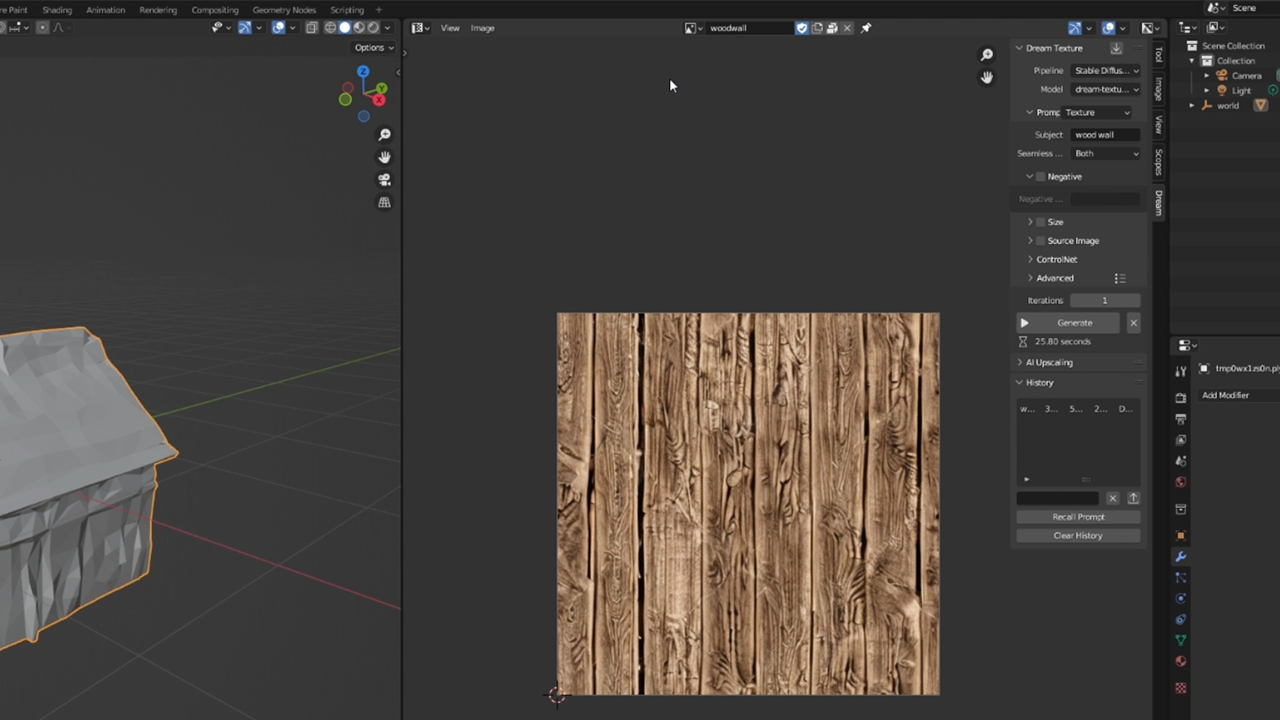
To apply the texture, select your model and navigate to 'Material'. Add a new material, and under 'base color', click the dot and choose 'Image Texture'. Finally, select your newly generated texture.
Time for UV mapping, which wraps our 2D texture around the 3D model. Select your model and press 'Tab' to enter Edit Mode. Then, press 'U' to unwrap the model and choose 'Smart UV Project'.
To preview your textured model, switch to rendered view (hold 'Z' and select 'Rendered'). You can scale up the UV map to have it tile seamlessly over the model. Remember that we're aiming for a retro PS1 style, so don't make it too nice.
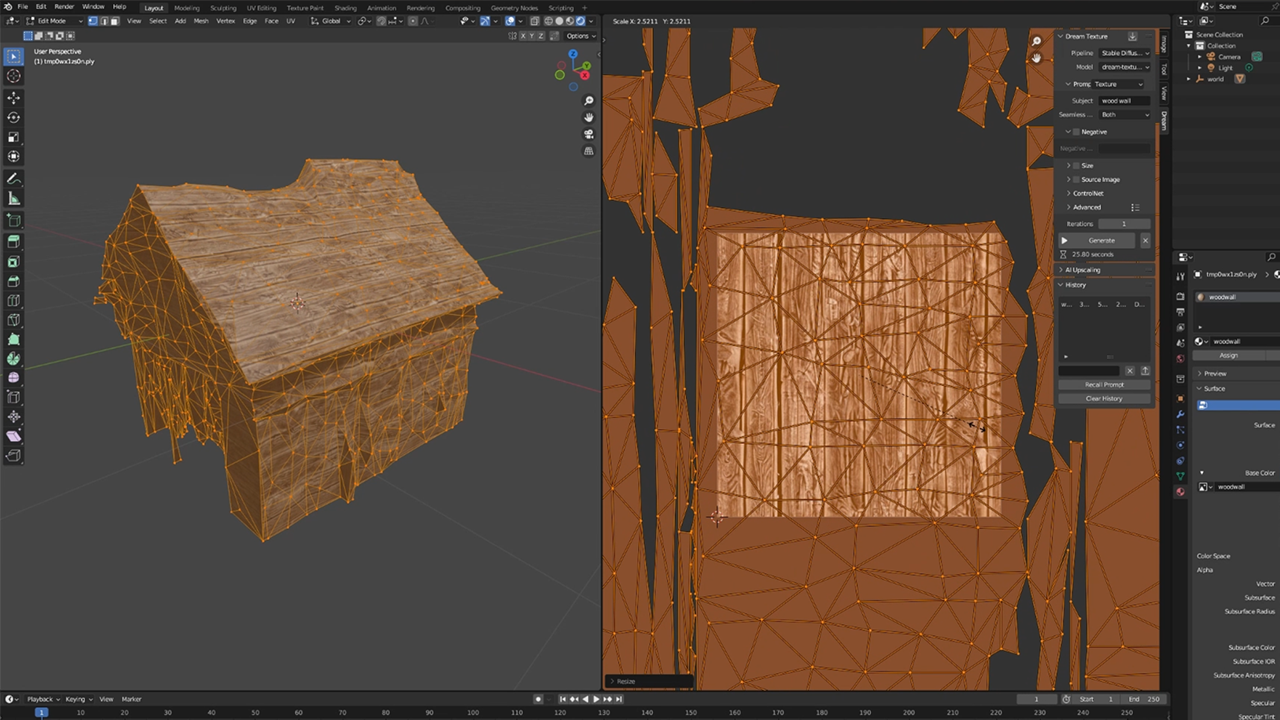
When you're happy with your model, it's time to export it. Navigate to File -> Export -> FBX, and voila! You have a usable 3D Asset.
Finally, let's see our model in action. Import it in Unity or your game engine of choice. To recreate a nostalgic PS1 aesthetic, I've customized it with custom vertex-lit shading, no shadows, lots of fog, and glitchy post-processing. You can read more about recreating the PS1 aesthetic here.
And there we have it - our low-fi, textured, 3D model in a virtual environment!
That's a wrap on how to create practical 3D assets using a Generative AI workflow. While the results are low-fidelity, the potential is enormous: with sufficient effort, this method could be used to generate an infinite world in a low-fi style. And as these models improve, it may become feasible to transfer these techniques to high fidelity or realistic styles.
If you've followed along and created your own 3D assets, I'd love to see them. To share them, or if you have questions or want to get involved in our community, join the Hugging Face Discord!
此内容由惯性聚合(RSS阅读器)自动聚合整理,仅供阅读参考。 原文来自 — 版权归原作者所有。