惯性聚合 高效追踪和阅读你感兴趣的博客、新闻、科技资讯
阅读原文 在惯性聚合中打开

推荐订阅源

博客园 - 三生石上(FineUI控件)
S
SegmentFault 最新的问题
Jina AI
Jina AI
OSCHINA 社区最新新闻
OSCHINA 社区最新新闻
IT之家
IT之家
美团技术团队
V
Visual Studio Blog
人人都是产品经理
人人都是产品经理
博客园 - 叶小钗
有赞技术团队
有赞技术团队
GbyAI
GbyAI
宝玉的分享
宝玉的分享
腾讯CDC
M
MIT News - Artificial intelligence
博客园 - 【当耐特】
Google DeepMind News
月光博客
月光博客
MyScale Blog
MyScale Blog
Last Week in AI
Last Week in AI
freeCodeCamp Programming Tutorials: Python, JavaScript, Git & More
钛媒体:引领未来商业与生活新知
钛媒体:引领未来商业与生活新知
博客园 - 司徒正美
Recent Announcements
MongoDB | Blog
MongoDB | Blog

Infotech News, How To Guide News | The HinduBusinessLine

Today’s Stock Recommendation: April 04, 2025 RBI’s UDGAM portal: How to register, check unclaimed deposits PMFBY: Farmers Can Calculate Crop Insurance for Crop Loss How to get crop insurance under Pradhan Mantri Fasal Bima Yojna How can you apply for learner licence in Parivahan Sewa? Union Home Minister Launches Online Portal for Sahara Depositors to Claim Refunds Google Chrome Update: Add Website Tabs to Home Screen on iOS and iPadOS Devices How to Deactivate Your Threads Account: Step-by-Step Guide Shazam Update Enables Integration with YouTube, TikTok, and Instagram for Music Recognition Never Miss a Payment Deadline with Google Pay Payment Reminders Amazon joins its peers to introduce travel ticket booking Kotak Mahindra Bank Introduces WhatsApp Banking for Instant and Convenient Services: How to Access? Paytm Introduces ‘Pin Recent Payments’ Feature for Quick and Smooth Transactions PAN-Aadhaar linking: Know how to pay penalty How to unload ₹2,000 notes through Amazon Pay? Xpression Camera: A Virtual App That Transforms Faces into Anything or Anyone with Real-Time Facial Expressions iOS 17 introduces screen distance feature to protect users’ eyesight Instagram Introduces 30-Second Music Option for Notes Feature, Allowing Users to Add Songs of Their Choice Know how to check IPO allotment status How to Create Chat Folders on Telegram: A Step-by-Step Guide Google Pay Enables RuPay Credit Card UPI Transactions: A Step-by-Step Guide Customize Apple iPhone App Icons Using Shortcuts App: A Step-by-Step Guide How to check Aadhaar update history? How to lock a WhatsApp chat on iOS? Aadhaar update: How to update address on your Aadhaar card for free Google Search Labs: How to join waitlist Reliance Jio: How to switch from Jio prepaid to JioPlus postpaid on the same number Gmail: How to unsend an email Google Street View in India: How to access Paytm: How to open a fixed deposit (FD)
iPhone: How to set screen time limit, improve focus
By TM Amrita · 2023-05-02 · via Infotech News, How To Guide News | The HinduBusinessLine
FILE PHOTO: A women uses an iPhone mobile device as she passes a lighted Apple logo

FILE PHOTO: A women uses an iPhone mobile device as she passes a lighted Apple logo | Photo Credit: Mike Segar

Apple’s iPhone users can manually set a screen time limit. This can be used to improve focus, manage app use, or schedule time away from devices.  Setting a screen time limit blocks apps and notifications for custom periods.

These steps can be followed for iPhones with the latest version, iOS 16.

Schedule time away

  • Step 1: Open ‘Settings’
  • Step 2: Tap ‘Screen Time’. Turn on screen time if it is not on

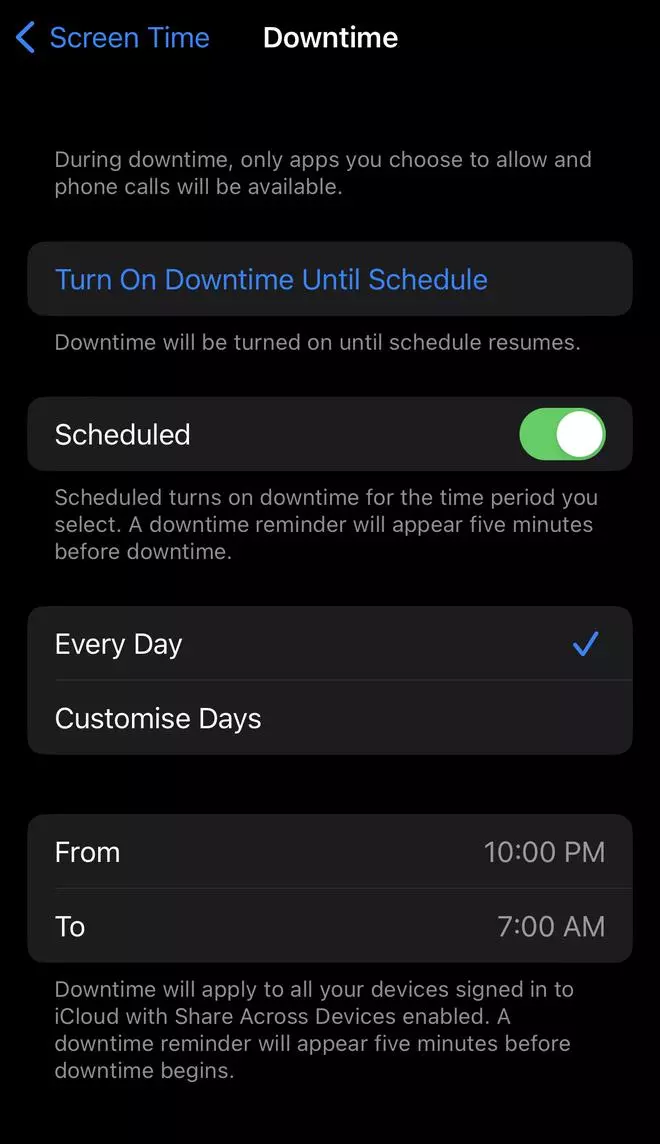
  • Step 3: Click ‘Downtime’, then turn on ‘Scheduled’
  • Step 4: Select ‘Every Day’ or ‘Customise Days’, then set the start and end times.

Also read: Apple iOS 17: Top 5 expected updates at Apple WWDC 2023

Turn on downtime on demand

  • Step 1: Go to ‘Settings’, tap ‘Screen Time’, then click ‘Downtime’
  • Step 2: Then, tap ‘Turn On Downtime Until Tomorrow’, or ‘Turn On Downtime Until Schedule’

Set limits for specific apps

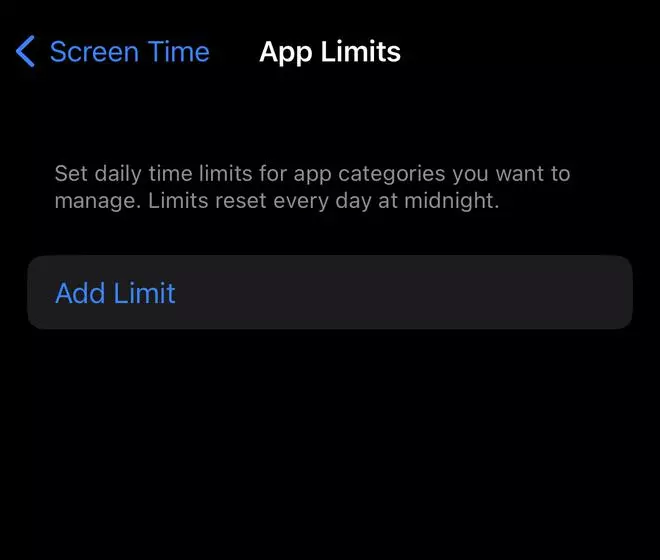
  • Step 1: Go to ‘Screen time’ in Settings, then tap ‘App Limits’
  • Step 2: Select ‘App Limits’
  • Step 3: Tap ‘Add limit’

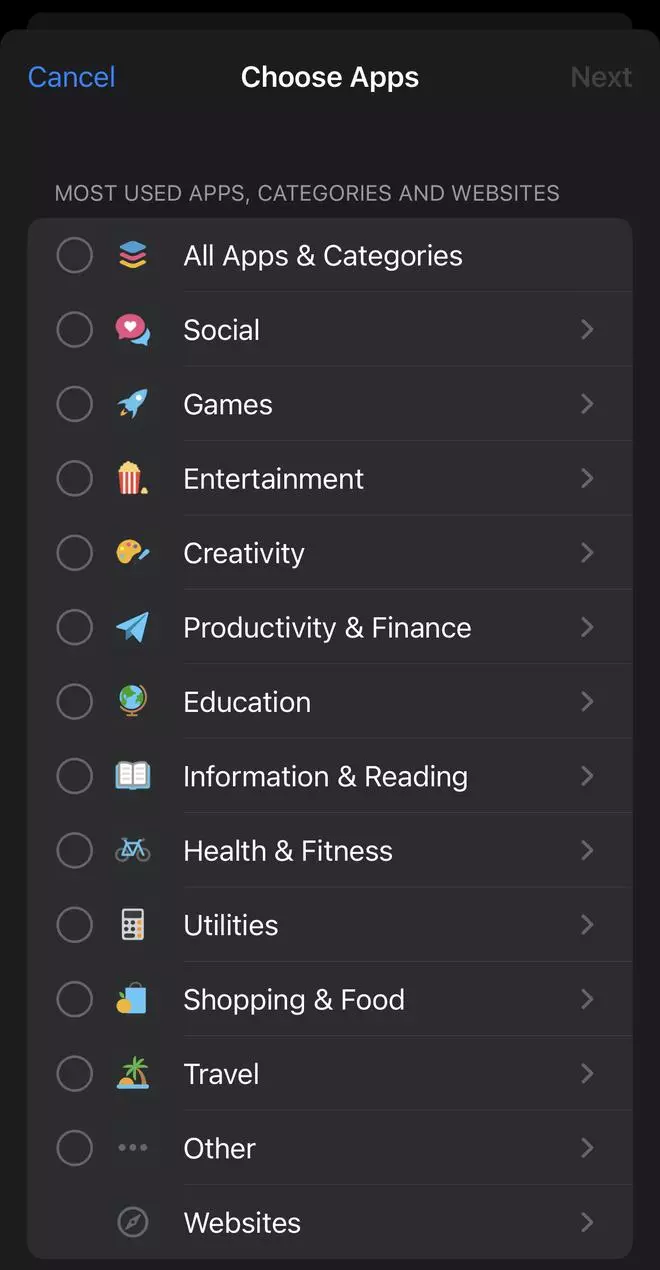
  • Step 4: Then, choose app categories shown. To set limits for individual apps, tap the category name to see all apps in that category, then select the apps to limit

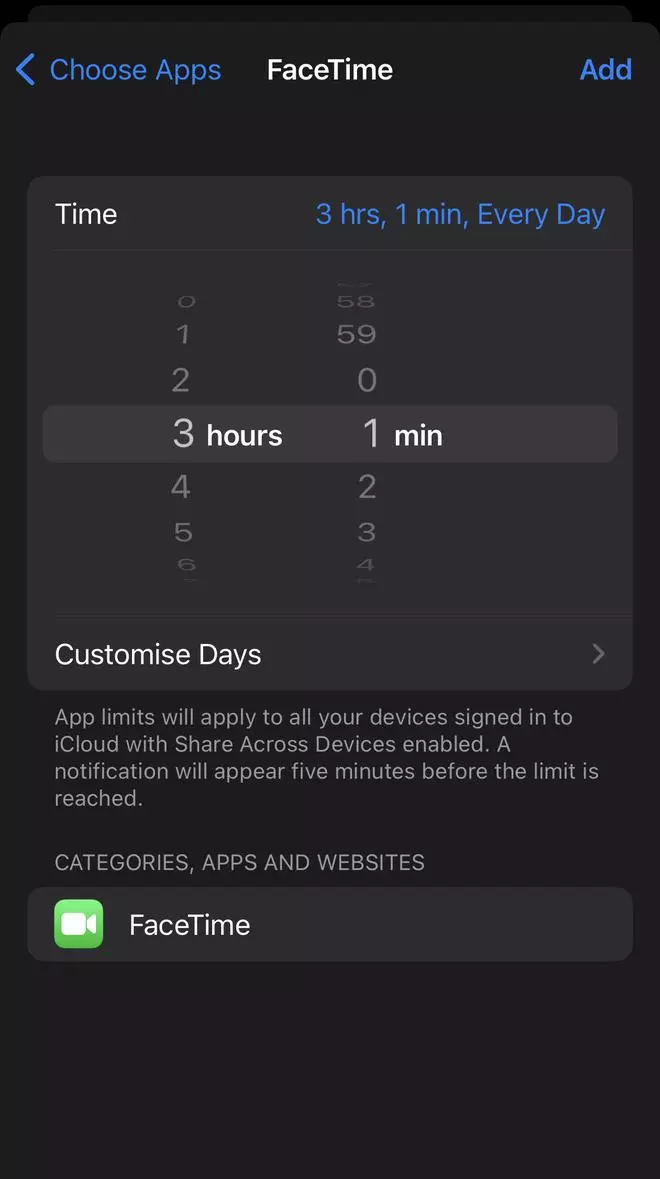
  • Step 5: Select ‘Next’, then choose the time limit. To set an amount of time for each day, tap ‘Customise Days’.
  • Step 6: Finally, select ‘Add’

Also read: Apple Reality Pro: All you need to know about mixed-reality headset

Published on May 2, 2023