Nextcloud is one of the most popular self-hosted platforms out there, and for good reason. It gives you file sync, calendars, contacts, office document editing, video calls, and a whole ecosystem of apps, all running on your hardware. Think of it as your own private Google Workspace or iCloud replacement.
We're going to set up Nextcloud using the official All-in-One (AIO) Docker image on Ubuntu Server, get storage sorted out (whether you're using a simple Docker volume or mounting network storage like NFS or SMB), install a NetBird client on the machine, and expose it securely through NetBird's built-in reverse proxy with automatic TLS. No port forwarding, no Nginx configs, no Cloudflare tunnels.
Before we dive in, here's what you'll need:
This is the part where you want to stop and think before you start deploying containers. Nextcloud stores user files, and those files can get large fast. Where you put that data matters.
The easiest option. Nextcloud AIO manages its own Docker volumes by default. Your data lives in on the host. This works great if your Ubuntu server has enough local disk space and you just want to get up and running.
The downside is that Docker volumes can be harder to browse and back up compared to a regular directory. If you're running this on a machine with a single disk and don't plan on storing terabytes of files, this is totally fine though.
If you have a NAS or dedicated storage server, you probably want Nextcloud's data living there instead of on the local disk. The way to do this is to mount your network share on the Ubuntu host and then tell Nextcloud AIO to use a folder on that mount as its data directory.
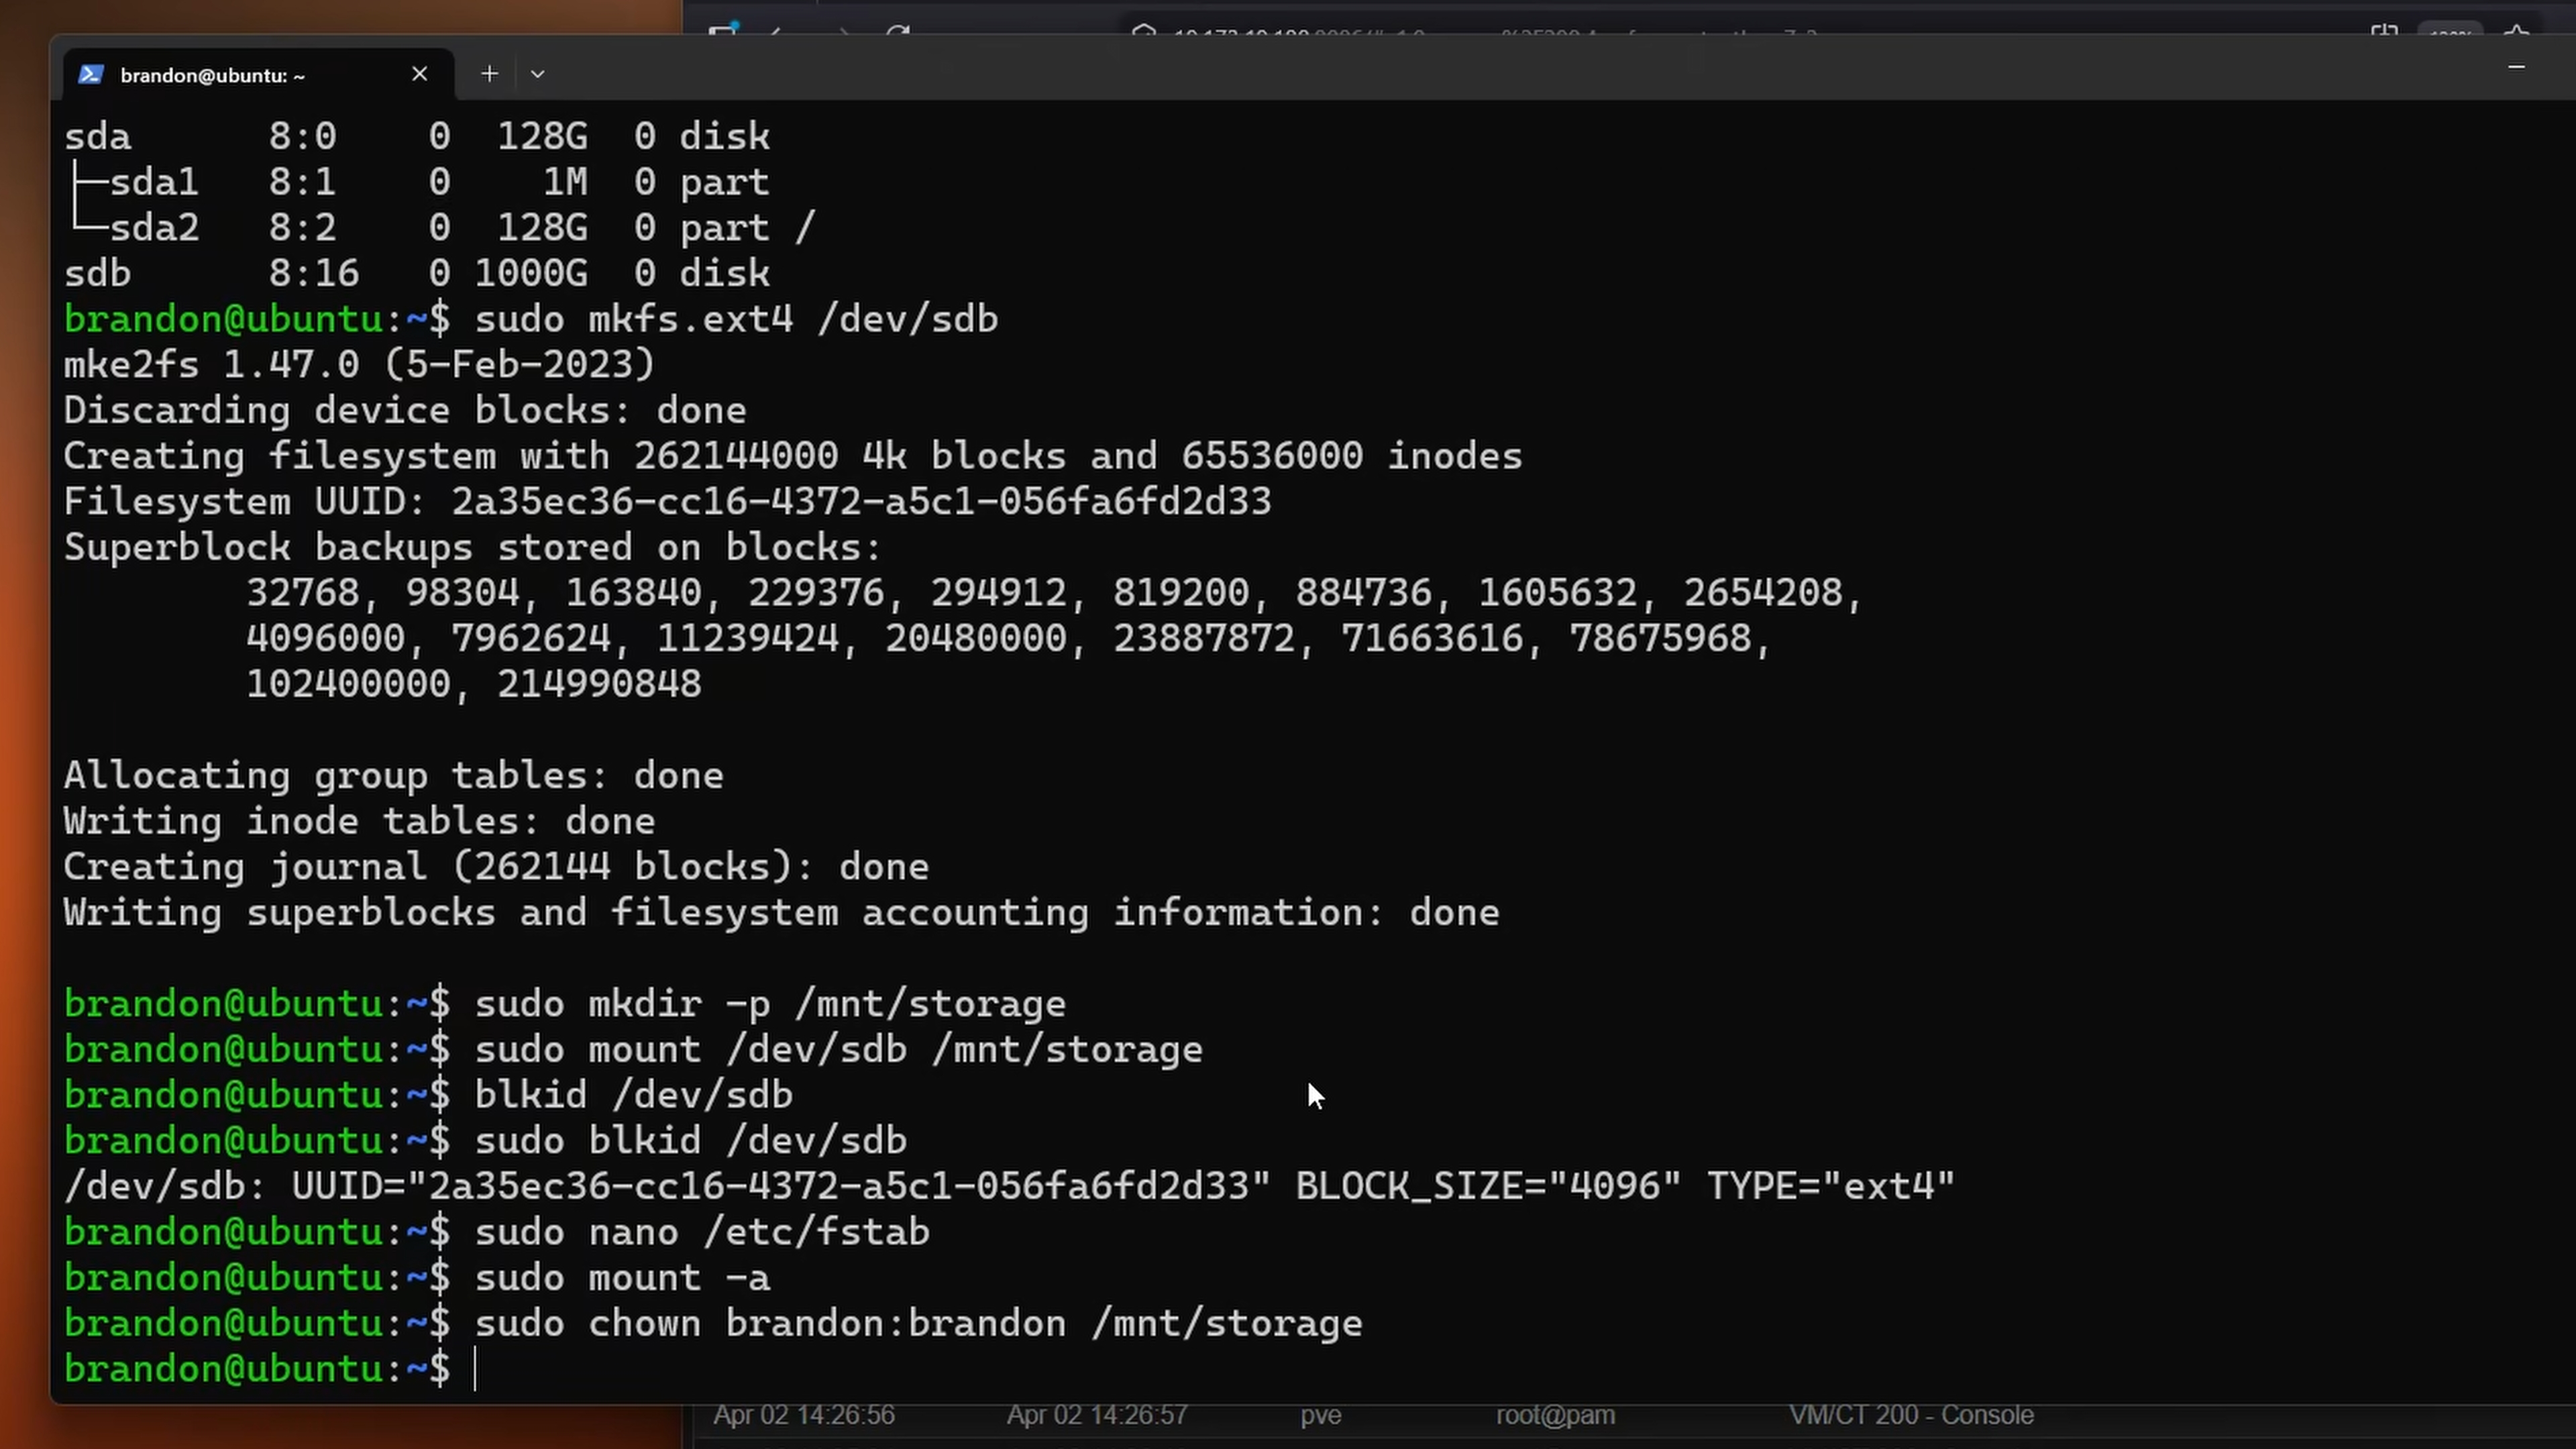
First, install the packages you need for your mount type:
For NFS:
For SMB/CIFS:
Create a mount point on your system:
Then add the mount to so it persists across reboots.
NFS fstab entry:
SMB fstab entry:
For SMB, create that credentials file so your password isn't sitting in fstab:
Then lock it down:
Mount everything:
Verify it's mounted:
Now create the folder that Nextcloud will use:
This path is what we'll pass to the AIO container later. Do note that the folder needs to exist before you start the container, otherwise AIO will throw an error.
We need a NetBird client running on the Ubuntu machine so it's reachable through your NetBird network. The reverse proxy will use this peer to route traffic to Nextcloud.
In your NetBird dashboard, go to Setup Keys > Add Setup Key. Give it a name like "Nextcloud Server" and copy the key.
Install the NetBird client on your Ubuntu server:
Now connect it to your self-hosted instance using the setup key:
Replace with the key you just created and update the management URL to match your NetBird domain.
Check that it's connected:
You should see the peer connected and an IP assigned. Head over to your NetBird dashboard and confirm the peer shows up under Peers. Note the peer's NetBird IP address, you'll need it for the reverse proxy configuration.
Now let's set up the domain in NetBird's reverse proxy so Nextcloud will be accessible at something like .
In the NetBird dashboard, go to Reverse Proxy > Services > Add Service
Enter a subdomain like and select your domain
Click Add Target and configure:
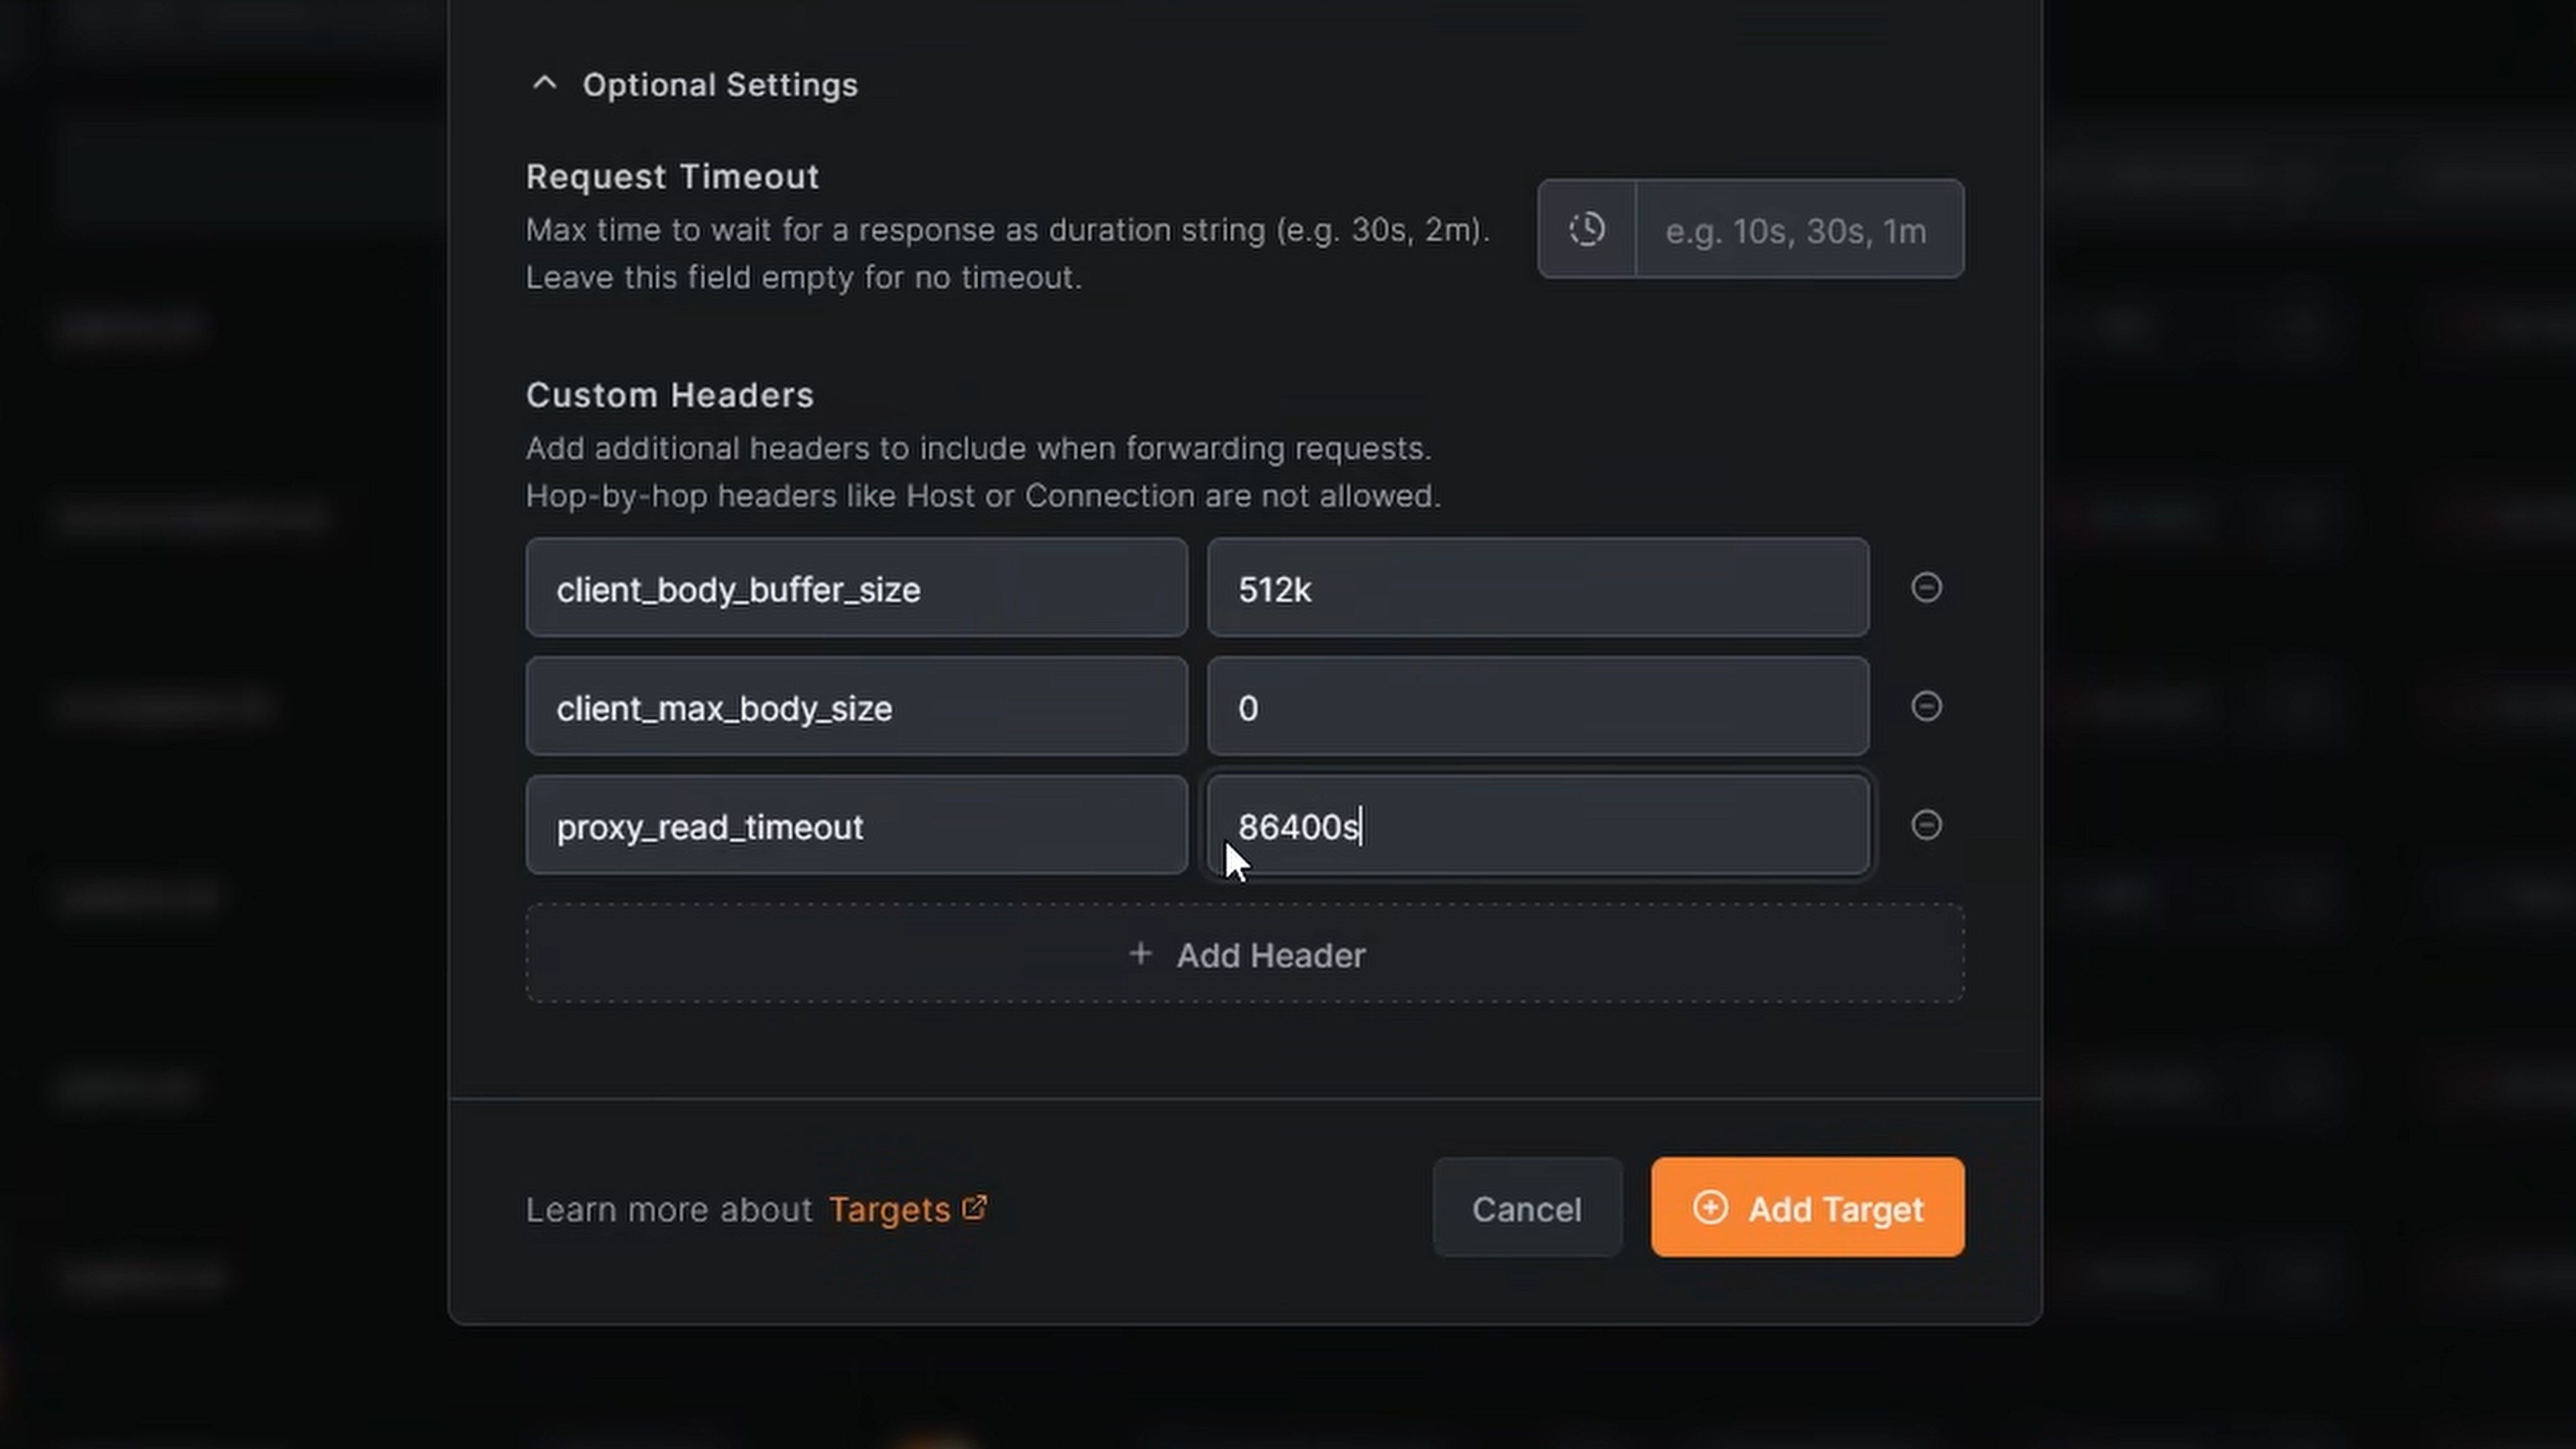
Still in the target settings, open Optional Settings and add these custom headers:
These matter for Nextcloud specifically. The buffer size handles chunked uploads more efficiently, setting max body size to removes the upload size limit entirely (otherwise large file uploads will fail), and the read timeout gives long-running uploads a full 24 hours before timing out.
The port is important here. Nextcloud AIO runs its Apache container on this port by default when configured for use behind a reverse proxy. This is the port that serves the actual Nextcloud interface, not the AIO admin panel.
NetBird will provision a TLS certificate for the domain automatically. Once the service shows as active, the domain is ready. But we haven't started Nextcloud yet, so let's do that.
Create a directory for Nextcloud on your server:
Create the Docker Compose file:
You can find the official reference compose file from Nextcloud at github.com/nextcloud/all-in-one . The compose above is tailored for a NetBird reverse proxy setup, but check the official one for the latest options and defaults.
A few things to note about what's going on here:
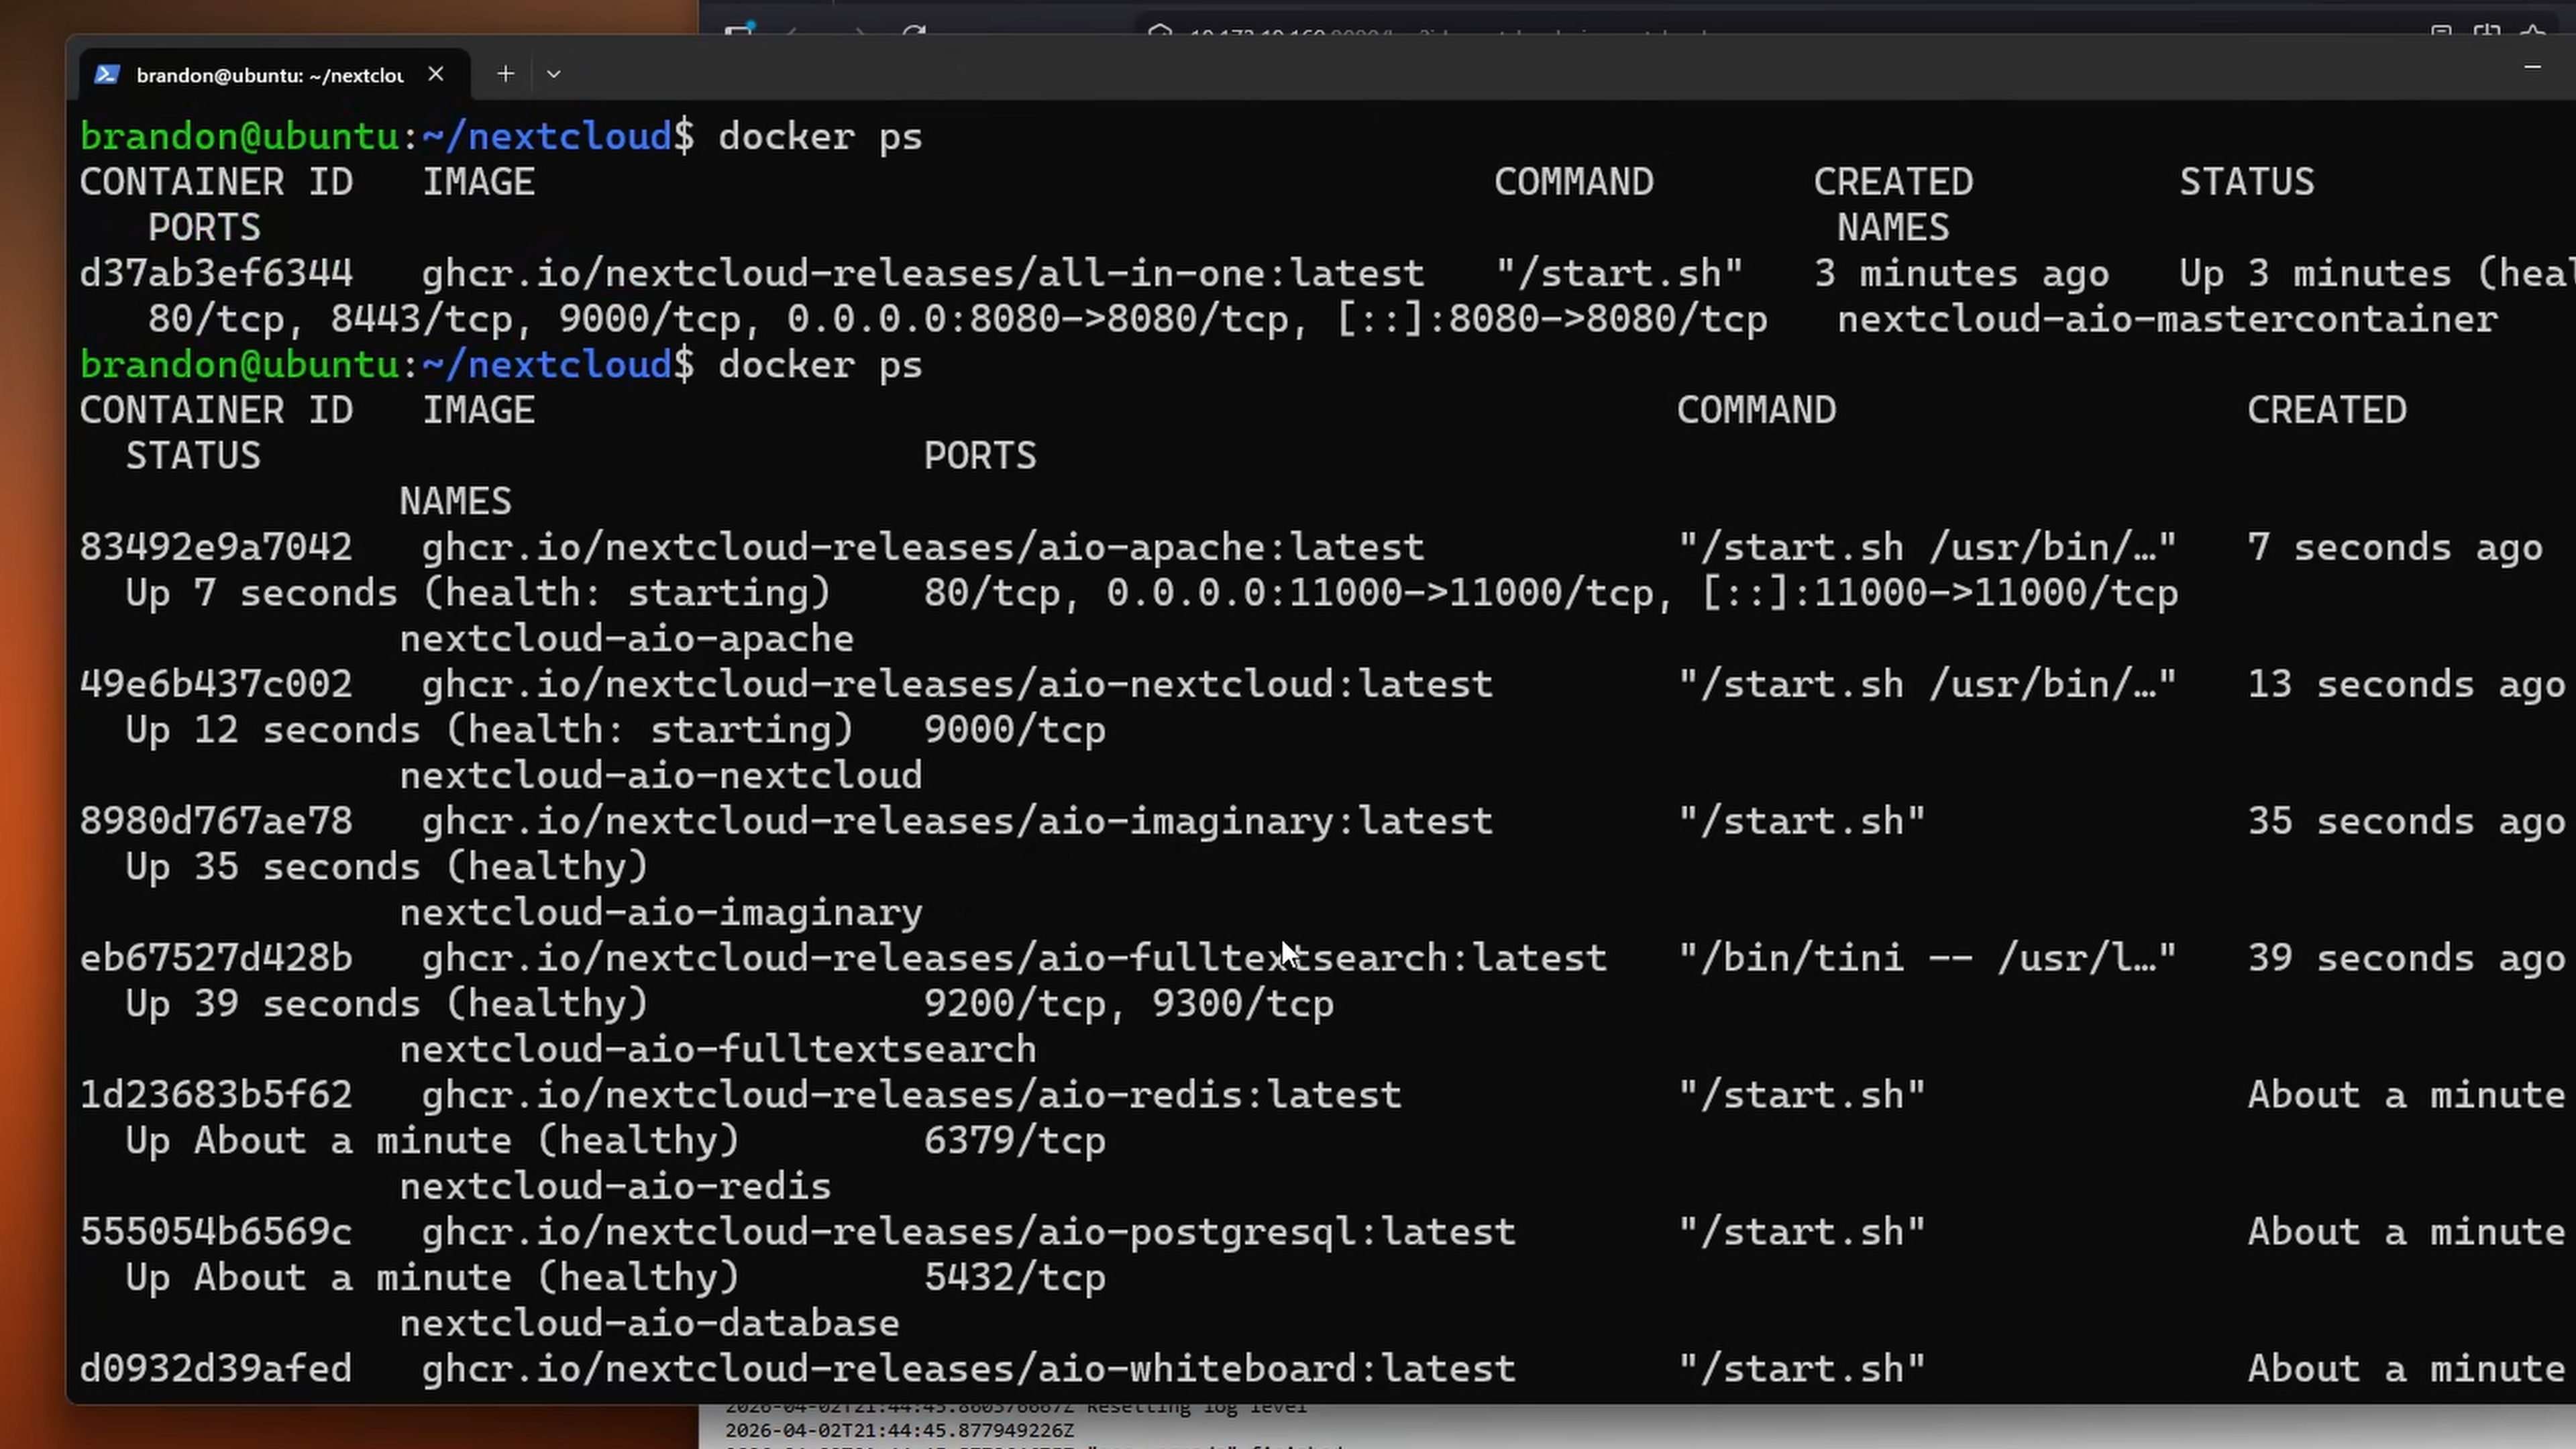
Now start it up:
Give it a minute to pull the images. You can watch the logs with:
Once the master container is running, access the AIO admin interface at . You'll get a self-signed certificate warning since this is the local admin panel, go ahead and accept it.
Note: The AIO interface on port 8080 is only for initial setup and administration. The actual Nextcloud instance that your users access goes through the NetBird reverse proxy on your configured domain.
On first load, AIO gives you a passphrase. Save this somewhere safe. You'll need it to access the AIO admin panel in the future.
Log in with the passphrase and you'll see the AIO dashboard.
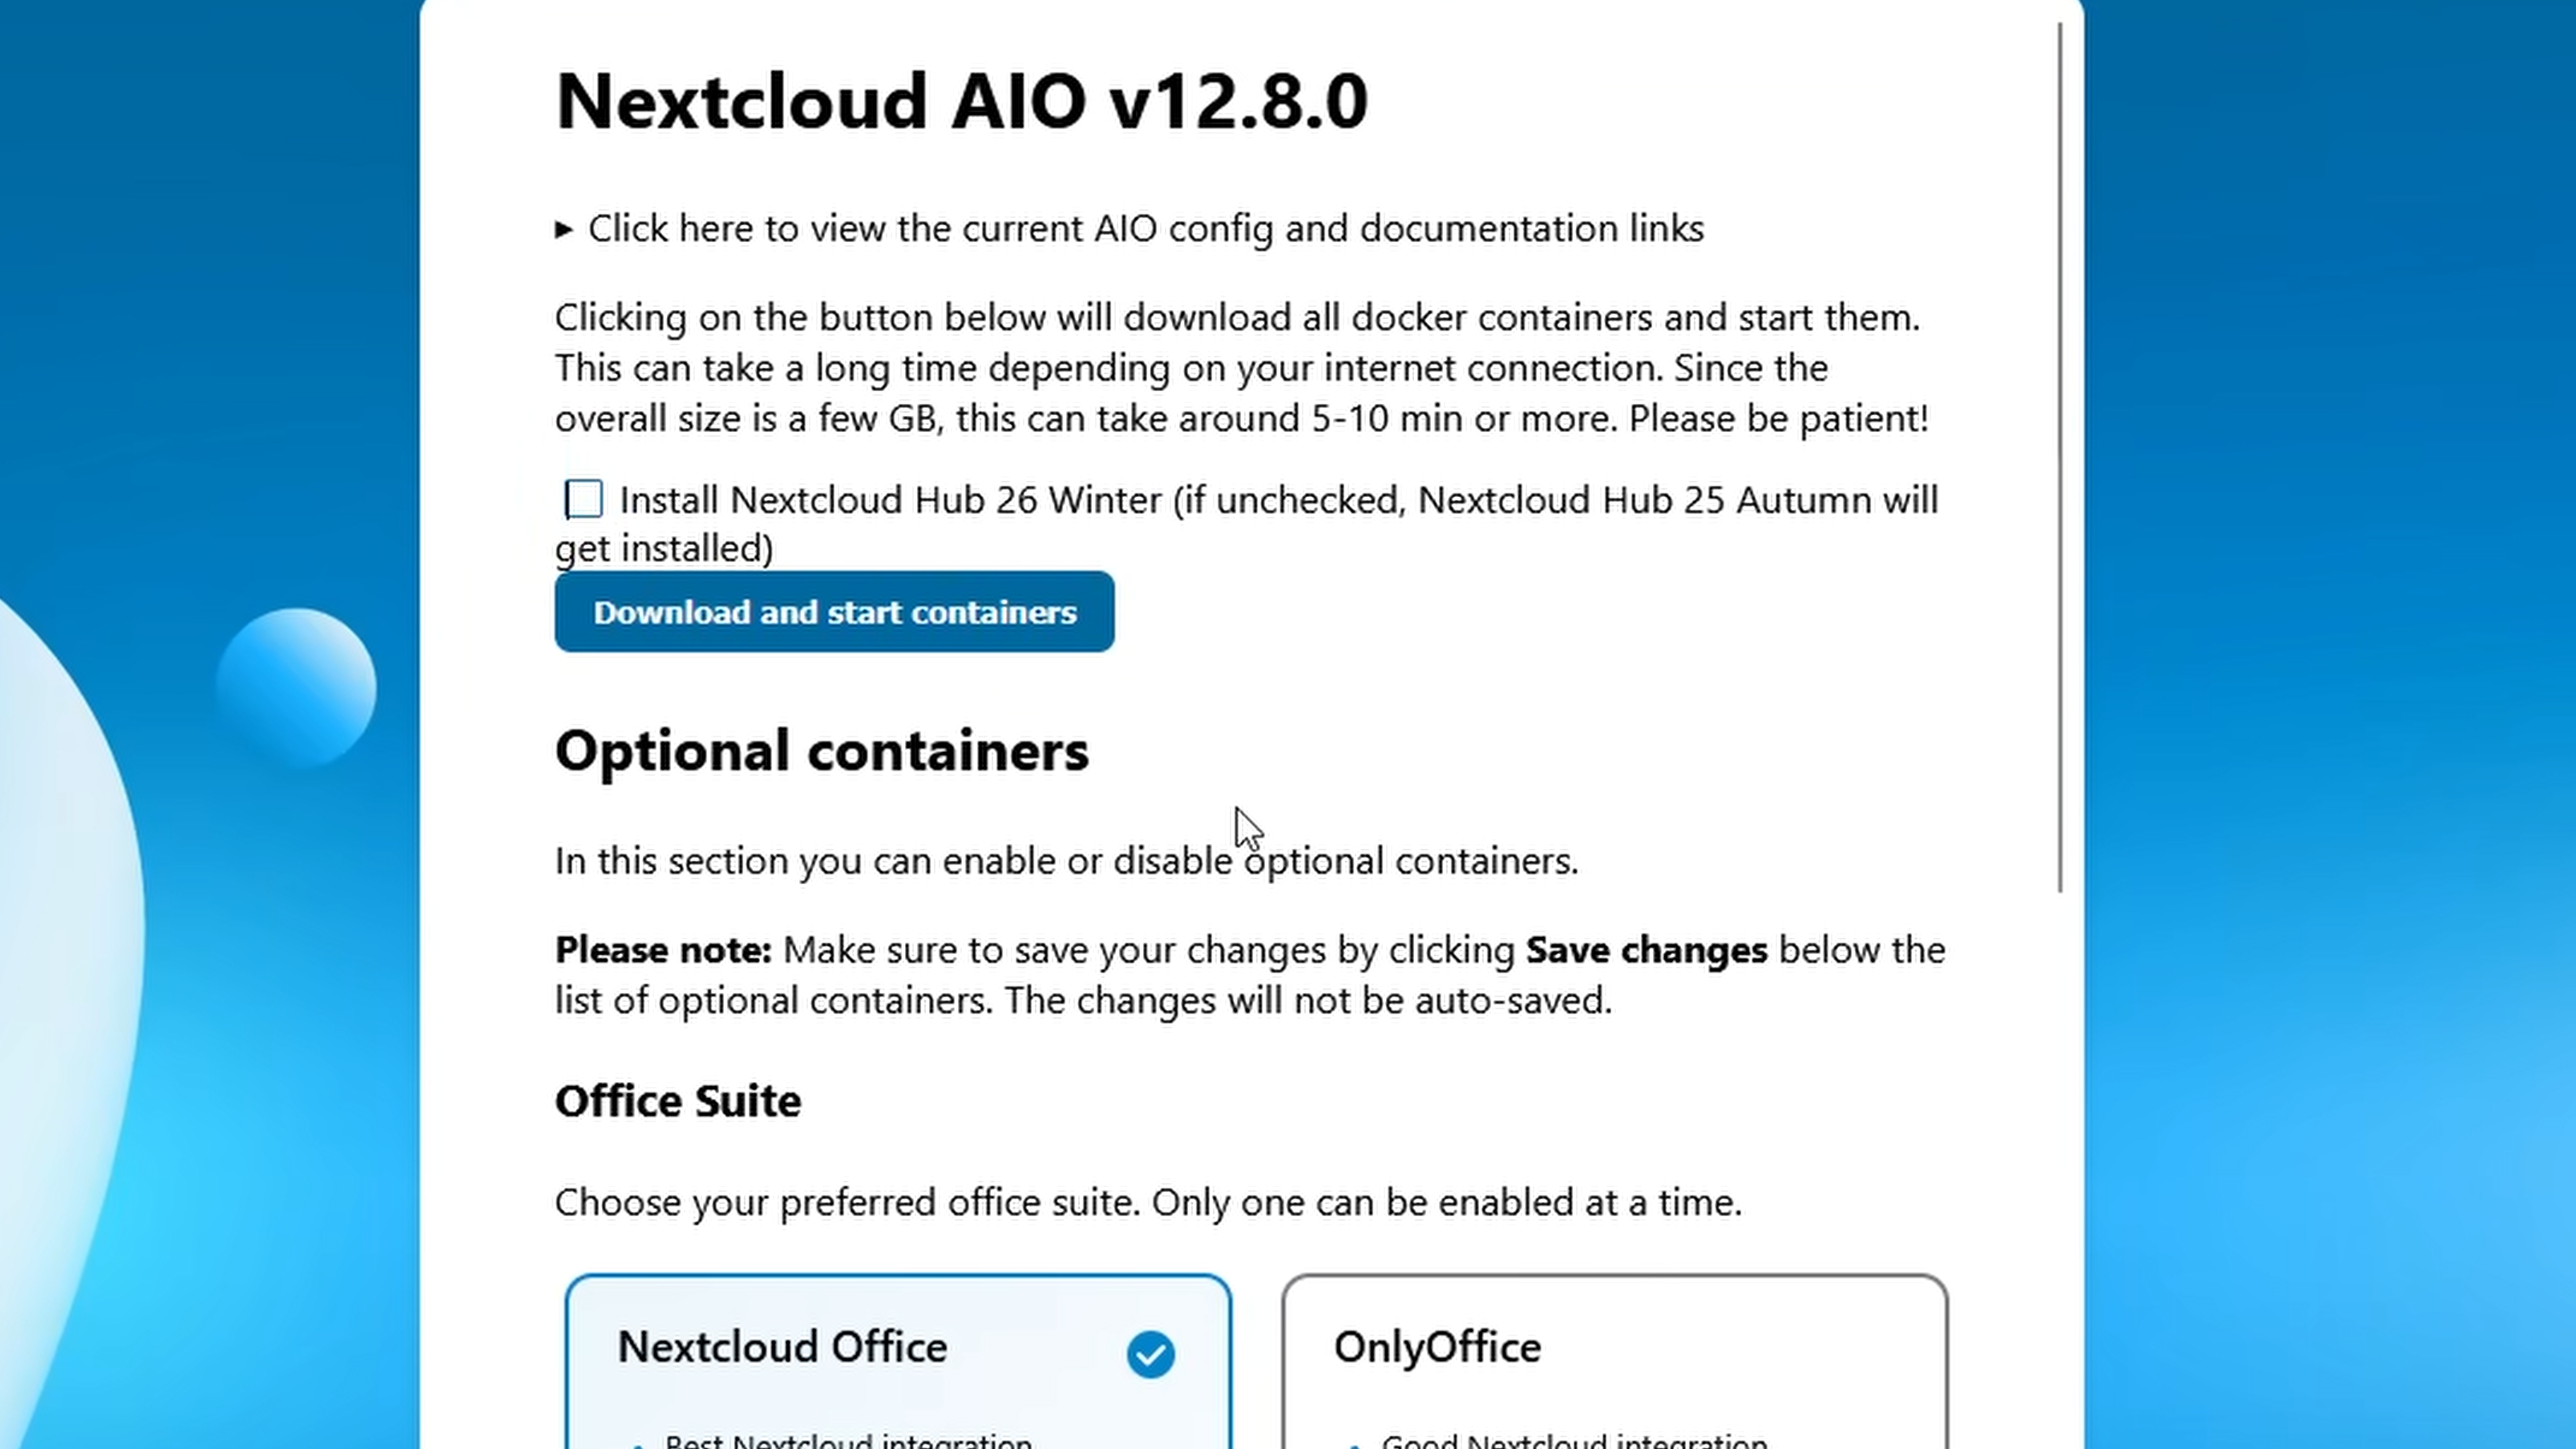
From here you can:
AIO will pull and start all the selected containers. This can take a few minutes depending on your internet connection and how many optional containers you enabled. Once everything is green, Nextcloud is running.
Now go to in your browser. You should see the Nextcloud login page, served over HTTPS through your NetBird network. The initial admin credentials are shown in the AIO admin interface, so grab those and log in.
The first thing you should do after logging in is change the auto-generated admin password. Go to your profile in the top right, click Administration Settings, then navigate to Security. Enter the current password and set a new one that's strong and something you'll actually remember. Don't skip this — the default password is long, random, and easy to lose track of.

And there we go. Nextcloud is running, storage is sorted, and it's accessible through a secure WireGuard tunnel with automatic TLS. No ports exposed to the public internet, no complex reverse proxy configs.
Once you've confirmed everything is working, you can optionally firewall port 8080 on the Ubuntu server so the AIO admin panel isn't accessible from the local network. You'll still be able to reach it if you need to by temporarily opening the port or SSHing in with a tunnel:
Then access it at from your local machine.
From here, there's a lot you can do with Nextcloud:
The combination of Nextcloud AIO handling the application stack and NetBird handling the networking means you get a production-ready setup without the usual headaches of certificate management, port forwarding, and reverse proxy configuration. I do hope this guide was helpful. Have a great one.
此内容由惯性聚合(RSS阅读器)自动聚合整理,仅供阅读参考。 原文来自 — 版权归原作者所有。