




January 24, 2021
My internet connection is now and then unreliable. Because I wanted to exclude the TP-Link TL-WDR4300 router I flashed over a year ago with OpenWrt 18.06.4, it had dropped a few times from a height of about 2 meters, I bought another one last Wednesday.
When I connected the router and checked the default username admin with the default password admin it wouldn't allow me to login. So first I had to reset the router to its default settings.
Resetting the router
In order to reset the router I held the WPS/Reset button on the back for over 10 seconds until the Wi-Fi LED flashed. As soon as that happened I released the button. Next, I connected the LAN1 port of the router directly to my Mac mini and browsed to http://192.168.0.1/. Since my old router uses 192.168.1.1 there was no conflict (yet). I verified that I now could login using admin/admin; no problem. I disconnected the cable but kept it ready for the next step.
Flashing the router
I dowloaded the factory image via the TP-Link TL-WDR4300 OpenWrt page. The version of the new router is 1.7 and hence is supported.
The SHA256 digest for the firmware file I downloaded is given below:
$ shasum -a256 -b openwrt-19.07.6-ath79-generic-tplink_tl-wdr4300-v1-squashfs-fa
ctory.bin
acd0f01ce55766ec5644f839068f6d610883594c3e78635169f3664357f3677a *openwrt-19.07.
6-ath79-generic-tplink_tl-wdr4300-v1-squashfs-factory.bin
which matches the one given in this long list.
Next, the downloaded file must be renamed in order for the router to be able to find and flash it. I did this on the command line as follows:
mv openwrt-19.07.6-ath79-generic-tplink_tl-wdr4300-v1-squashfs-factory.bin \
   wdr4300v1_en_3_14_3_up_boot\(150518\).bin
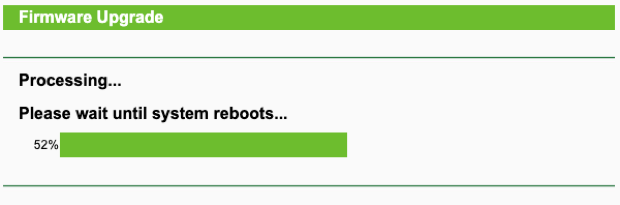
Next, to prevent a clash with the other router I disabled Wi-Fi on the Mac mini and connected the Mac mini directly to LAN port 1 on the new one. I browsed to http://192.168.0.1 and logged in as user admin, password admin. I selected System Tools in the left hand menu and selected Firmware Upgrade in the sub menu. I choose the renamed file and clicked the Upgrade button to start the flashing process.
Note: I was not able to choose the firmware file on Safari; the choose button didn't function, so I used Google Chrome.
Configuring OpenWrt
Connect to the router. You can either connect via the web browser:
http://192.168.1.1/ or use ssh root@192.168.1.1; I prefer the latter.
BusyBox v1.30.1 () built-in shell (ash)

  _______                     ________        __
 |       |.-----.-----.-----.|  |  |  |.----.|  |_
 |   -   ||  _  |  -__|     ||  |  |  ||   _||   _|
 |_______||   __|_____|__|__||________||__|  |____|
          |__| W I R E L E S S   F R E E D O M
 -----------------------------------------------------
 OpenWrt 19.07.6, r11278-8055e38794
 -----------------------------------------------------
=== WARNING! =====================================
There is no root password defined on this device!
Use the "passwd" command to set up a new password
in order to prevent unauthorized SSH logins.
--------------------------------------------------
root@OpenWrt:~#
I used passwd to set a strong password. This password is also the
one required by Luci; the web interface. However, since I prefer the
command line I stopped and disabled Luci using:
/etc/init.d/uhttpd stop
/etc/init.d/uhttpd disable
Public key authentication
In order to use public key authentication with ssh I first generated
a key pair. The SSH server used, dropbear, doesn't come with support
for Ed25519 yet unless you rebuild it, so I used RSA 4096 instead:
ssh-keygen -t rsa -b 4096 -C cadwal -f ~/.ssh/cadwal
cadwal is the name of the router. I used a strong passphrase. Next, I copied the public key to the router as follows:
scp ~/.ssh/cadwal.pub root@192.168.1.1:/tmp
On the router, I added the public key to the authorized keys of dropbear as follows:
cd /etc/dropbear
cat /tmp/*.pub >> authorized_keys
chmod 0600 authorized_keys
rm /tmp/*.pub
These steps add multiple keys in one go, and can also be used to add keys in the future.
Next, I modified the dropbear configuration using vi /etc/config/dropbear:
config dropbear
	option PasswordAuth 'off'
	option RootPasswordAuth 'off'
	option RootLogin 'on'
	option Port '4793'
	option GatewayPorts 'off'
	option Interface 'lan'
On the client computer I added the following lines to ~/.ssh/config:
Host cadwal
     HostName 192.168.1.1
     User root
     Port 4793
     IdentityFile ~/.ssh/cadwal
Note: I used a non-standard port for SSH.
This makes it possible to connect with the router cadwal by just entering ssh cadwal at the command line.
Finally, I restarted dropbear:
/etc/init.d/dropbear restart
And verified I could login using public key authentication.
Wireless
I enabled wireless by setting the option disabled to 0 for each
radio in the wireless configuration file. I also added my country
(NL), set the encryption to psk2 and specified a key. The complete
configuration file, located in /etc/config/wireless looked as
follows after my edits:
config wifi-device 'radio0'
	option type 'mac80211'
	option channel '11'
	option hwmode '11g'
	option path 'platform/ahb/18100000.wmac'
	option htmode 'HT20'
	option country 'NL'
	option disabled '0'

config wifi-iface 'default_radio0'
	option device 'radio0'
	option network 'lan'
	option mode 'ap'
	option ssid 'cadwal'
	option encryption 'psk2'
	option key 'hunter2'

config wifi-device 'radio1'
	option type 'mac80211'
	option channel '36'
	option hwmode '11a'
	option path 'pci0000:00/0000:00:00.0'
	option htmode 'HT20'
	option country 'NL'
	option disabled '0'

config wifi-iface 'default_radio1'
	option device 'radio1'
	option network 'lan'
	option mode 'ap'
	option ssid 'cadwal'
	option encryption 'psk2'
	option key 'hunter2'
Note that the password, hunter2, is not the actual password I used.
After these changes I restarted the network as follows:
/etc/init.d/network restart
Hostnames
One thing I love about OpenWrt is that it uses DnsMasq which allows me to assign an IP address to a specific MAC address (i.e. a specific computer or other (virtual) device). And of course there is support for a hosts file. The latter allows to access computers in the local network by name but also to block certain domains.
At the time of writing my hosts file looks as follows:
127.0.0.1 localhost

::1     localhost ip6-localhost ip6-loopback
ff02::1 ip6-allnodes
ff02::2 ip6-allrouters

192.168.1.100 rhea
192.168.1.120 balmath
192.168.1.200 ecce
192.168.1.200 lc.johnbokma.com
192.168.1.200 lc.castleamber.com
ecce is a virtual machine that hosts local versions of two of my sites.
The hosts file is located inside the /etc/ directory on the router.
The file that links an IP address to a specific MAC addresses is
called ethers and is also located inside the /etc/ directory on
the router. Instead of an IP address a hostname can be used, which I
did.
At the time of writing my ethers file looks as follows:
#
#  Lookup man 5 ethers for syntax documentation
#
#  Examples :
#	02:00:11:22:33:44	OpenWrt.lan
#	02:00:11:22:33:44	192.168.1.1

# Actual devices

## Mac mini
xx:xx:xx:xx:xx:xx rhea

## Brother HL-L2350DW Laser Printer
xx:xx:xx:xx:xx:xx balmath

# Virtual devices

xx:xx:xx:xx:xx:xx ecce
After those edits I restarted DnsMasq as follows:
/etc/init.d/dnsmasq restart
Finally I replaced my old router with the "new" one. Everything worked flawless. Let's hope it stays that way.