











Have you ever wanted to create your own serverless AUTOMATIC1111 endpoint with a custom model that can scale up and down? Now you can do so without much hassle by following this guide!
Pre-requisites
A computer (local or cloud) with the following:
Note that you cannot currently build docker images on Runpod!
We will be using the example here as a base: https://github.com/runpod-workers/worker-a1111. You can absolutely write your own custom worker and do whatever you like with it, but we'll try to keep it as dead simple as possible in this tutorial.
Start by navigating to the directory you would like to work in, and then run a git clone on that repository:
This will create a directory called "worker-a111" in your current folder; you can then enter the directory with:
You should at least see the following files and folders:
Now, if we want to replace the default model with a custom model, we need to do a few things. First, we need to delete the old model from the container image, then we need to add our custom model, and finally, we need to point the start script at the new model. All in all, it should require just a few lines of code changes!
If you have your model file locally:
I'll be using the civitai safetensors model from https://civitai.com/models/4823/deliberate in this example. If you've downloaded it locally, place it in the same directory and rename it model.safetensors. Then make the following change to your Docekrfile:
The line ADD model.safetensors / will add your model file to the container image.
If you want to download it during the build process from a public link:
Alternatively, if you would rather have docker download the model from the internet, you can use a RUN wget command instead of an ADD command like follows:
Now set the model using the start flags in automatic:
The only other thing to do is to edit the start script to point to the correct model file. In this case, we have stored our model as /model.safetensors, so so no change is required, if your model is named something different or in a different folder you will update /model.safetensors to match:
At this point, you are ready to build your docker image. You can do so by running a command like this:
After you have built your image, you can push it to your favorite container registry. For docker hub you can do the following:
Imagine you made your own Docker image and would like to share it with the world you can sign up for an account on https://hub.docker.com/. After verifying your email you are ready to go and upload your first docker image.
just with your own user name and email that you used for the account. Enter your password when prompted. If everything worked you will get a message similar to
and what you will see will be similar to
and tag your image
The number must match the image ID and :1.0.0is the tag. In general, a good tag choice will help you understand what this container should be used in conjunction with or what it represents. In this case, it's the first version, so we tag it 1.0.0
Your image is now available for everyone to use, and you can add it to your template like so by creating a new template and filling it out with the container image name you just pushed:
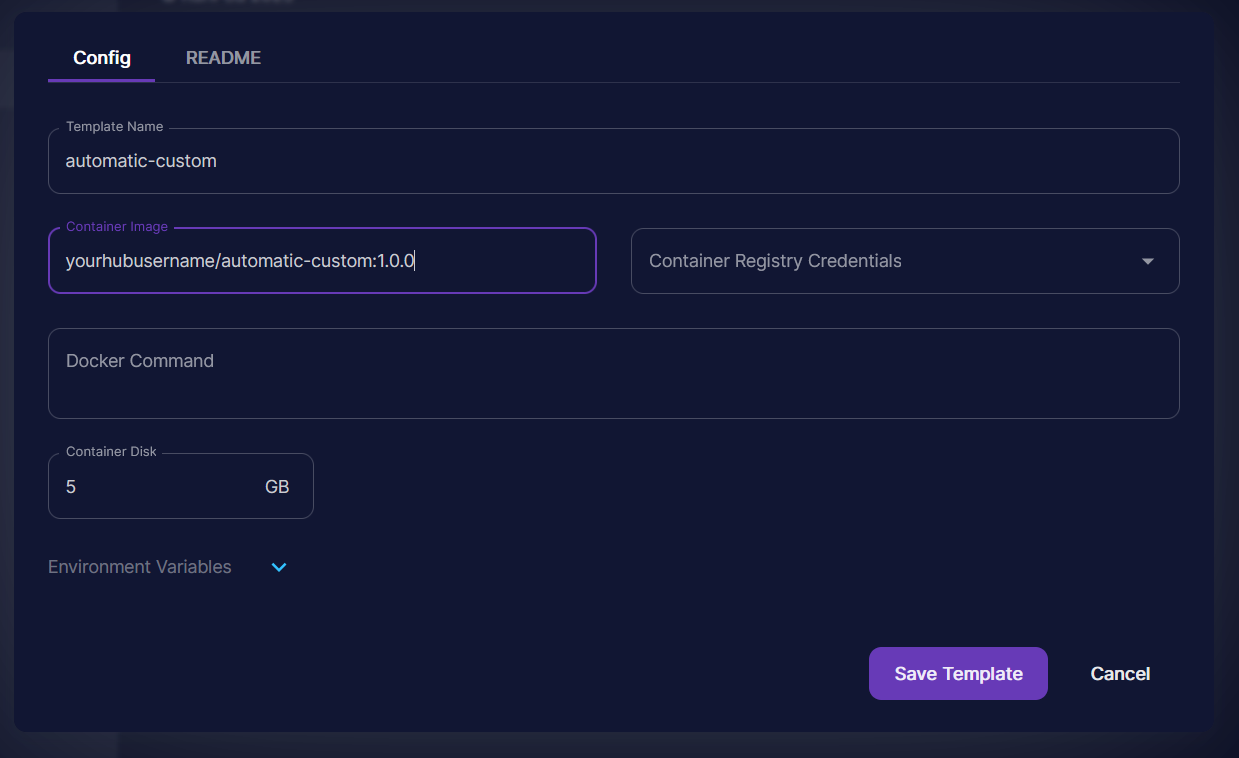
You can then use your template in your API by selecting it from the dropdown menu.
At this point, you can follow the documentation for how to deploy your API and use it:
https://docs.runpod.io/serverless/endpoints/endpoint-configurations
https://docs.runpod.io/serverless-ai/custom-apis/using-your-api
Final Thoughts
While using the AUTOMATIC1111 API is convenient because it has a lot of built-in functionality, there are a few things to consider.
Firstly, the cold start time for this API is about 15 seconds, vs 10 seconds for a raw diffusers-based worker. Automatic1111 does take a bit of time to go through its internal checks as well as starting the uvicorn API that they use internally.
Secondly, because the API has so much functionality, it's challenging to make sure that every piece of it works, so be aware!
Other than that, it's a really great way to get started without having to define a bunch of your own standards or rolling your own code base. Happy hunting!
Author profile: Zhen Lu
此内容由惯性聚合(RSS阅读器)自动聚合整理,仅供阅读参考。 原文来自 — 版权归原作者所有。