





I've been working with Next.js and Firebase and using the Firebase emulators for local development. Firebase has a generous free tier, so unless you're doing something wrong or your project is growing, you probably won't hit those limits any time soon. Regardless, setting up the emulators and running against them instead of a deployed Firebase project simplifies development and testing. It also allows you to iterate faster (i.e., you don't have to re-deploy the functions N times a day), you can quickly run tests to make sure you don't break any basic functionality (or even security rules), and you can quickly seed the database with different documents.
My project is in a single repo that contains the functions (backend folder) and the Next.js frontend (web folder). Here's a simplified version of the repo structure:
.
├── backend
│   └── functions
└── web
    ├── node_modules
    ├── public
    └── src
The backend folder contains the functions, and it's where you initialize the Firebase project (i.e., run the firebase init com). The web folder contains the Next.js frontend.
Before you launch the emulators, you'll have to configure (and download) them first. The easiest way to do that is to run firebase init, go through the prompts and select the emulators you want to use.
You should end up with something similar in the firebase.json file:
...
  "emulators": {
    "auth": {
      "port": 9099
    },
    "functions": {
      "port": 5001
    },
    "firestore": {
      "port": 8080
    },
    "database": {
      "port": 9000
    },
    "hosting": {
      "port": 5000
    },
    "pubsub": {
      "port": 8085
    },
    "storage": {
      "port": 9199
    },
    "ui": {
      "enabled": true
    }
  }
Launching the emulators is pretty straightforward - I typically launch them in a separate terminal window with firebase emualtors:start command.
$ firebase emulators:start
i  emulators: Starting emulators: auth, functions, firestore, database, hosting, pubsub
, storage
...
┌─────────────────────────────────────────────────────────────┐
│ ✔  All emulators ready! It is now safe to connect your app. │
│ i  View Emulator UI at http://localhost:4000                │
└─────────────────────────────────────────────────────────────┘

┌────────────────┬──────────────────────────────────┬─────────────────────────────────┐
│ Emulator       │ Host:Port                        │ View in Emulator UI             │
├────────────────┼──────────────────────────────────┼─────────────────────────────────┤
│ Authentication │ localhost:9099                   │ http://localhost:4000/auth      │
├────────────────┼──────────────────────────────────┼─────────────────────────────────┤
│ Functions      │ localhost:5001                   │ http://localhost:4000/functions │
├────────────────┼──────────────────────────────────┼─────────────────────────────────┤
│ Firestore      │ localhost:8080                   │ http://localhost:4000/firestore │
├────────────────┼──────────────────────────────────┼─────────────────────────────────┤
│ Database       │ localhost:9000                   │ http://localhost:4000/database  │
├────────────────┼──────────────────────────────────┼─────────────────────────────────┤
│ Hosting        │ Failed to initialize (see above) │                                 │
├────────────────┼──────────────────────────────────┼─────────────────────────────────┤
│ Pub/Sub        │ localhost:8085                   │ n/a                             │
├────────────────┼──────────────────────────────────┼─────────────────────────────────┤
│ Storage        │ localhost:9199                   │ http://localhost:4000/storage   │
└────────────────┴──────────────────────────────────┴─────────────────────────────────┘
  Emulator Hub running at localhost:4400
  Other reserved ports: 4500
If all goes well, the emulators will be running, and you can open the emulator UI on localhost:4000 - it should look similar to the figure below.
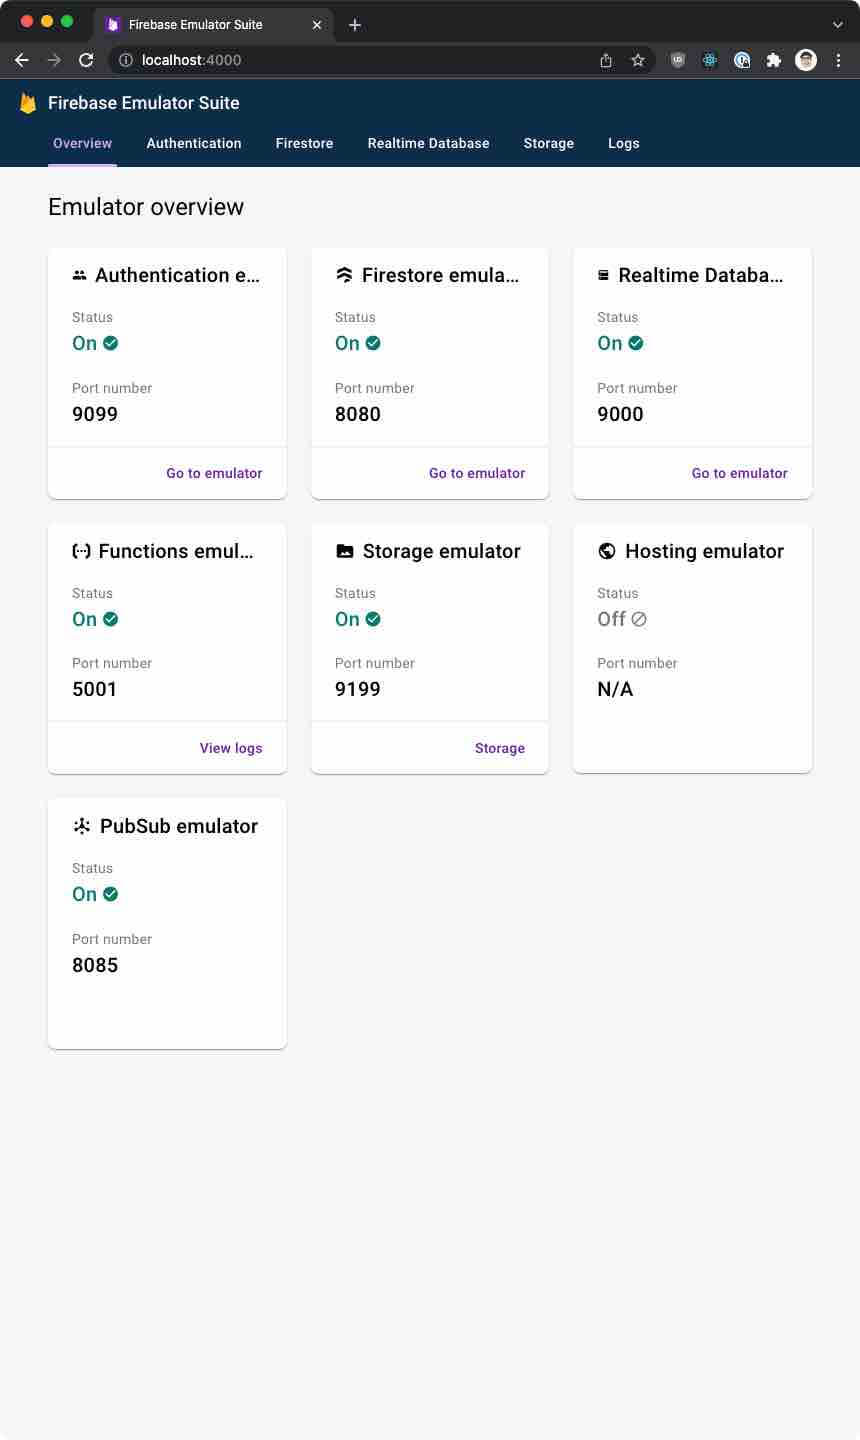
Firebase Emulator Suite
You can click the "Go to emulator" links to get to the specific emulator UI. The UI looks similar to the actual Firebase UI. For example, in the Firestore emulator, you can create and delete collections and documents, in the Authentication emulator, you can add users, and so on.
We can now connect to them from the front-end application with the emulators running.
Whether you're using Next.js or not, the way you connect to the local emulators is the same. The only difference is whether you're connecting from the frontend (using the firebase library) or the backend (using the firebase-admin library).
Since each service in the Firebase suite has its emulator, you have to connect to them individually. This flexibility is great because theoretically, you could use the "production" auth service and connect to the Firestore or Storage emulator or any other combination of emulator and non-emulator service. However, in most cases, if you're developing locally, you'd connect to all service emulators and not mix them up.
With the modular Firebase library, each one of the modules exposes a connectXYZEmulator function. I am also using the reactfire library that implements providers for each service - that's where I decide whether to connect to the emulator or not.
For example, in my FirebaseAuthProvider function, I do something like this:
import {
  useFirebaseApp,
} from 'reactfire';

import {
  connectAuthEmulator,
  getAuth
} from 'firebase/auth';

function shouldConnectAuthEmulator(): boolean {
  // You could do any logic here to decide whether to connect to the emulator or not
  return process.env.NODE_ENV === 'development');
}

function getAuthEmulatorHost(): string {
  // You'd read this from config/environment variable/etc.
  return 'localhost:9099';
}

export const FirebaseAuthProvider = ({ children }) => {
  const app = useFirebaseApp();
  const auth = getAuth(app);

  if (shouldConnectAuthEmulator()) {
    connectAuthEmulator(auth, getAuthEmulatorHost());
  }
  ...
}
The connect function takes the Firebase service, host, and any specific options to the emulator. And that's all! That one call to connectAuthEmulator will connect to the local Authentication emulator. Similarly, you can connect to other emulators.
firebase-adminThe firebase-admin library is meant to be used for accessing Firebase from server environments (as opposed to frontend and client browsers).
In the front-end scenario, exposing the API key, app ID, auth domain, and other configuration values is not an issue. In a typical scenario, you'd register/login the user first and then use their token to allow/deny different types of access to the Firebase.
However, using the firebase-admin library in the backend scenario, you have to provide a private key to connect to the Firebase. It would be best never to share the private key as it gives administrative access to the Firebase. Hence, you'd only use the Firebase admin library from trusted environments and never from the client (frontend).
Note
Read more on how to set up Firebase on a server here
When using the admin version of the Firebase library, you won't find the connectXYZEmulator functions. Instead, you'll have to set environment variables that point to the emulators.
If we continue with the auth example above, you connect to the emulator by setting the FIREBASE_AUTH_EMULATOR_HOST environment variable to localhost:9099. Similarly, you'd set FIREBASE_STORAGE_EMULATOR_HOST for Storage and FIREBASE_FUNCTIONS_EMULATOR_HOST for Functions so on. You can check more details in the documentation here.
此内容由惯性聚合(RSS阅读器)自动聚合整理,仅供阅读参考。 原文来自 — 版权归原作者所有。