


In the previous article, I wrote about the strangler pattern. The strangler pattern is useful for scenarios where you can intercept the calls at the edge of your monolithic application. In this article, I'll describe a pattern you can use when calls can't be intercepted at the edge.
Let's consider a scenario where the functionality you're trying to extract is not called directly from the outside, rather it is being called from multiple other places inside the monolith.
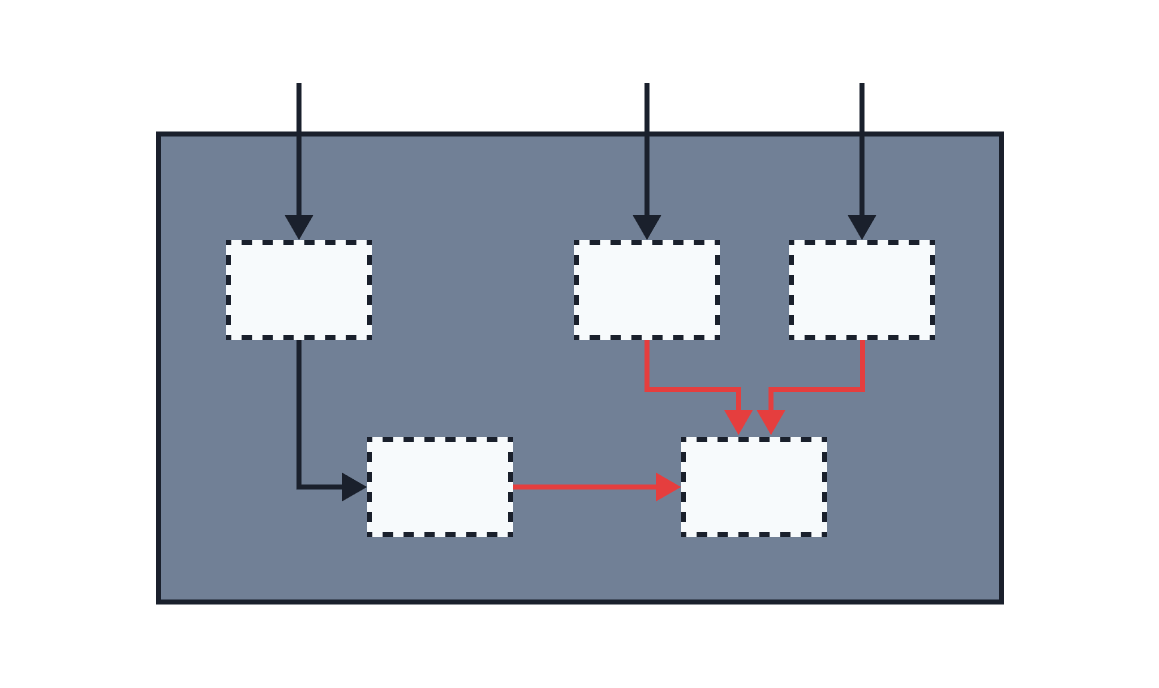
In this case, you have to modify the existing monolith, assuming can do that and have access to the code. To minimize the disruptions to existing developers and make changes incrementally you can use the branch by abstraction pattern.
Note
You can get the sample code that goes with this article from Github
There are five steps to implementing the branch by abstraction pattern:
Let's look at each step in more detail.
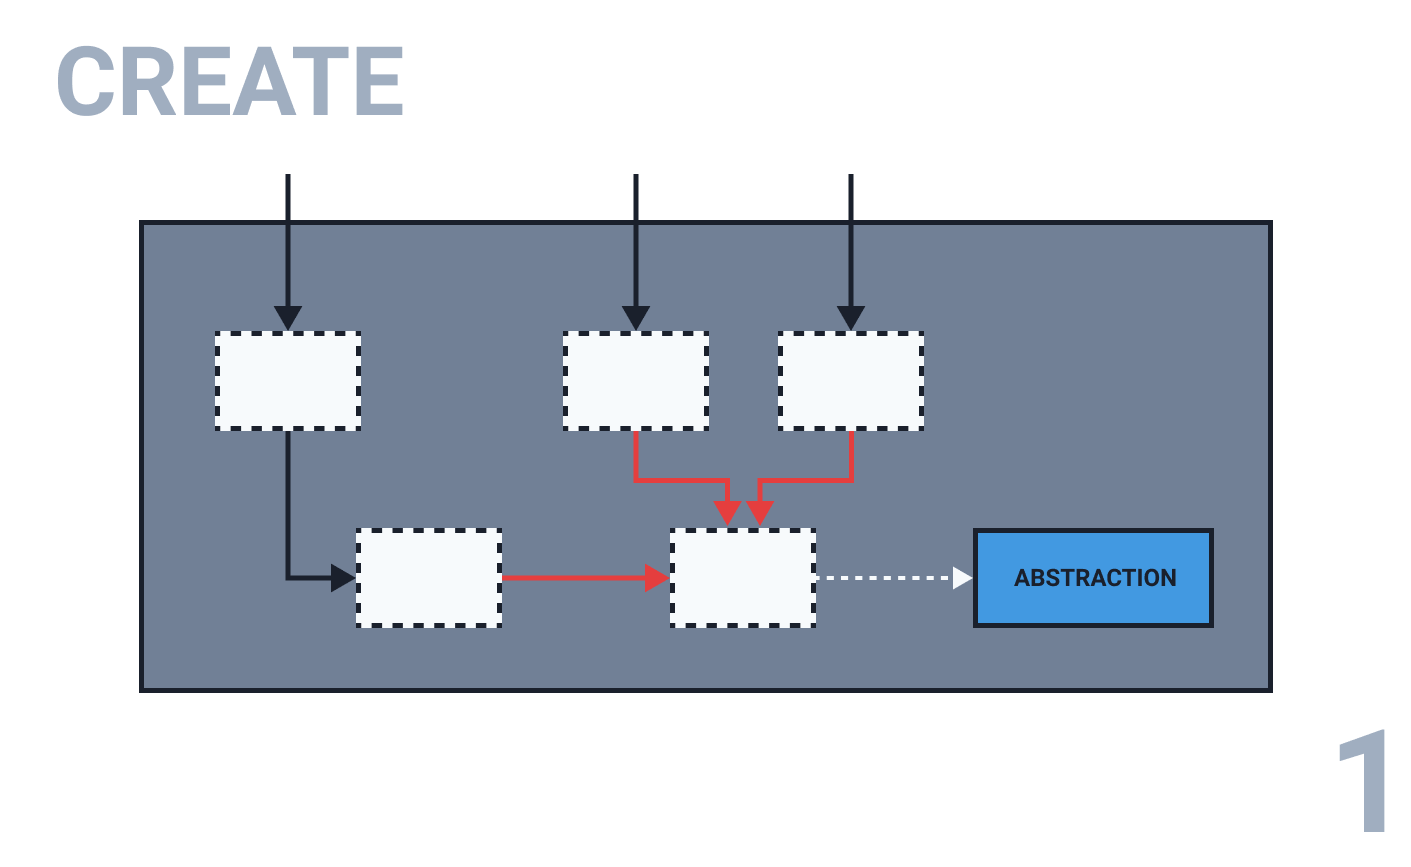
The first step is to create an abstraction for the functionality you are extracting. In some cases, you might already have an interface in front of the functionality, and that is enough. If you don't however, you will have to search the code base and find all places where the functionality you're trying to extract is being called from.
As an example, let's consider we are trying to extract the functionality that sends a notification, that looks like this:
function sendNotification(email: string): Promise<string> {
  // code to send the notification
}
As part of the first step, you will create an interface that describes the functionality, something like this:
export interface Notifications {
  sendNotification(email: string): Promise<string>;
}
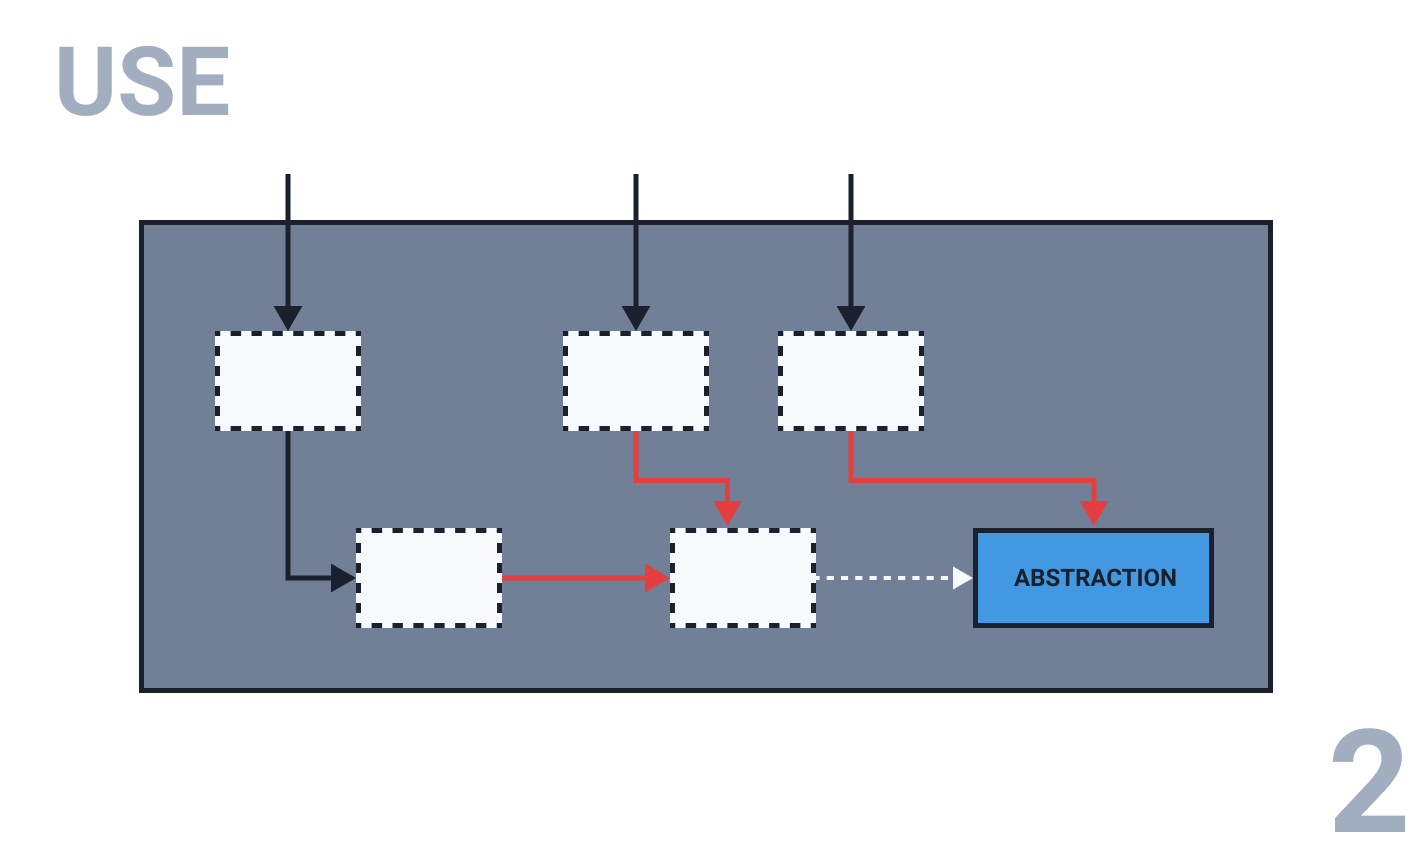
Once you put the abstraction in place you can refactor existing clients/callers to use the new abstraction point, instead of directly calling the implementation. The nice thing here is that all these changes can be done incrementally. At this point, you haven't made any functional changes per-se, you only re-routed the calls through the abstraction.
Practically speaking at this point you will have to create an implementation for the Notifications interface you created in the previous step. Here's an example of how you'd do that:
class NotificationSystem implements Notifications {
  sendNotification(email: string): Promise<string> {
    // Existing implementation
  }
}
In addition to implementing the interface, you should also consider creating a function that returns the Notifications interface with the desired implementation. At first, you will only have a single implementation, the NotificationSystem class above, but later you will use the same function to implement a feature flag that will allow you to switch between different implementations. For now, the newNotificationSystem would look like this:
export function newNotificationSystem(): Notifications {
  return new NotificationSystem();
}
With this in place, you can search the code base for any calls to sendNotification function and replace it with newNotificationSystem().sendNotification(...).
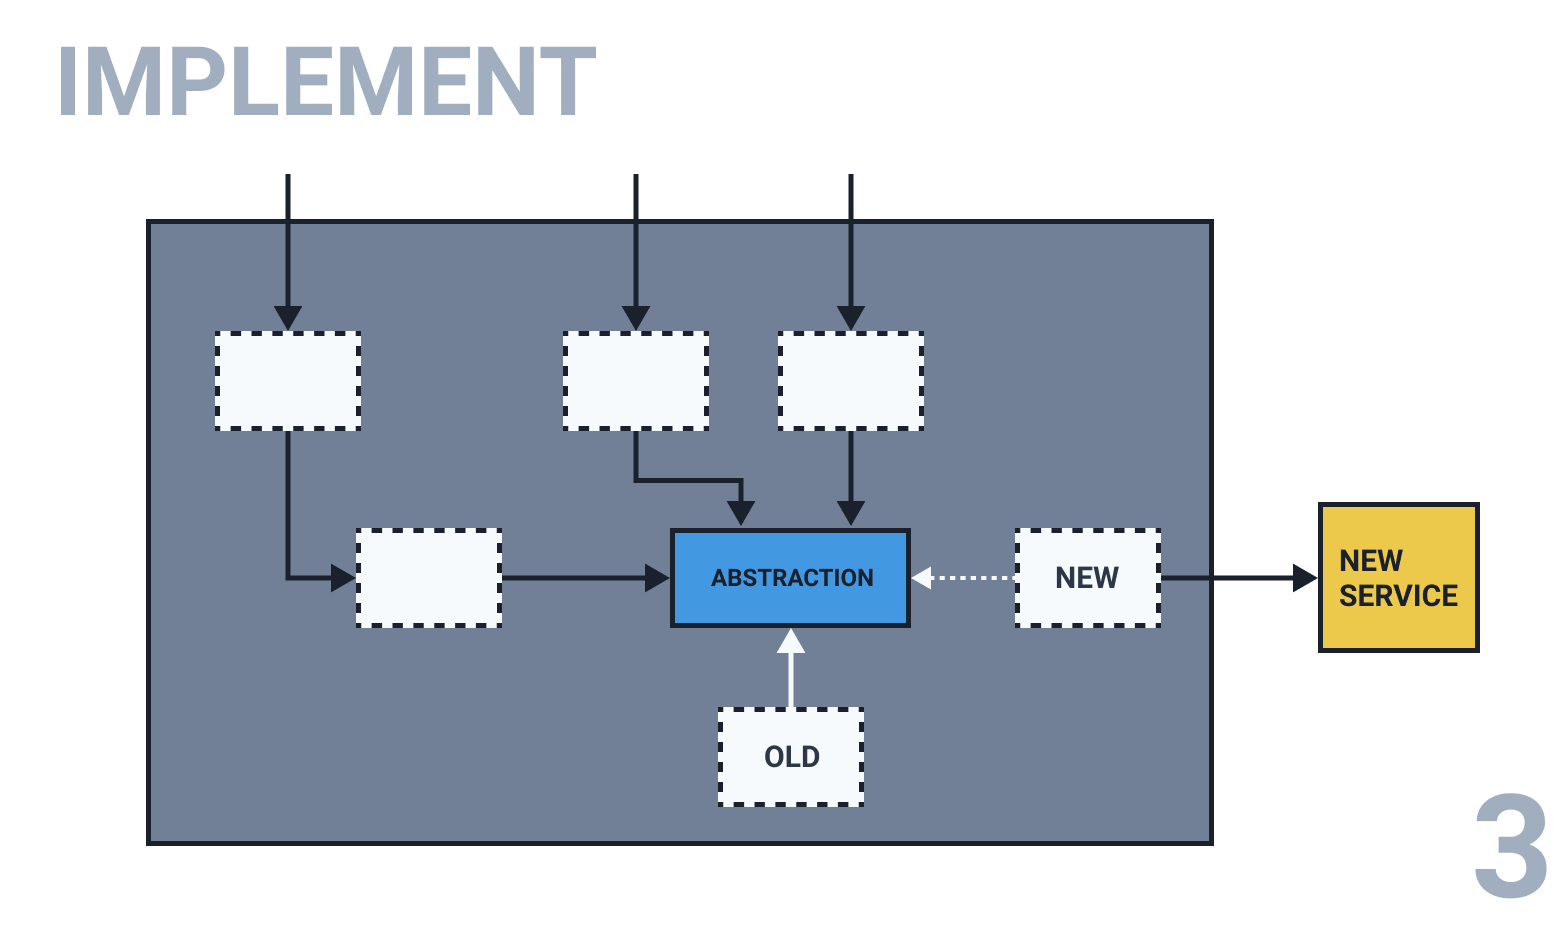
The existing functionality is now being called behind the abstraction and you can independently work on implementing the new service that will have the same functionality. Similarly, as you would do it with the strangler pattern, you can deploy the new service to production, but don't release it yet (no traffic is being sent to it). This allows you to test the new service and ensure it works as expected.
You can also spend time in this step to create the new implementation of the Notifications abstraction, that will call this new service. For example, something like this:
class ServiceNotificationSystem implements Notifications {
  async sendNotification(email: string): Promise<string> {
    const serviceUrl = process.env.NOTIFICATION_SERVICE_URL;
    if (serviceUrl === undefined) {
      throw new Error(
        `NOTIFICATION_SERVICE_URL environment variable is not set`
      );
    }
    const response = await fetch(serviceUrl, {
      method: 'POST',
      headers: {
        Accept: 'application/json',
        'Content-Type': 'application/json',
      },
      body: JSON.stringify({ email }),
    });
    return response.json();
  }
}
Similarly, you can start updating the newNotificationSystem function and put the new implementation under a feature flag.
Note
Feature flags, also known as toggles or switches, allow you to switch certain functionality on or off through the use of configuration settings/environment variables, without redeploying the code.
Here's how the simple feature flag implementation might look like for our case:
export function newNotificationSystem(): Notifications {
  const useNotificationSystem = process.env.USE_NOTIFICATION_SYSTEM_SERVICE;

  // If variable is  set -> use the new implementation
  if (useNotificationSystem !== undefined) {
    console.log('Using service (new) implementation');
    return new ServiceNotificationSystem();
  }

  console.log('Using existing (old) implementation');
  return new NotificationSystem();
}
We are checking if the USE_NOTIFICATION_SYSTEM_SERVICE environment variable is set, and if it is we return the new implementation (ServiceNotificationSystem). If the environment variable is not set we return the existing (old) implementation (NotificationSystem).
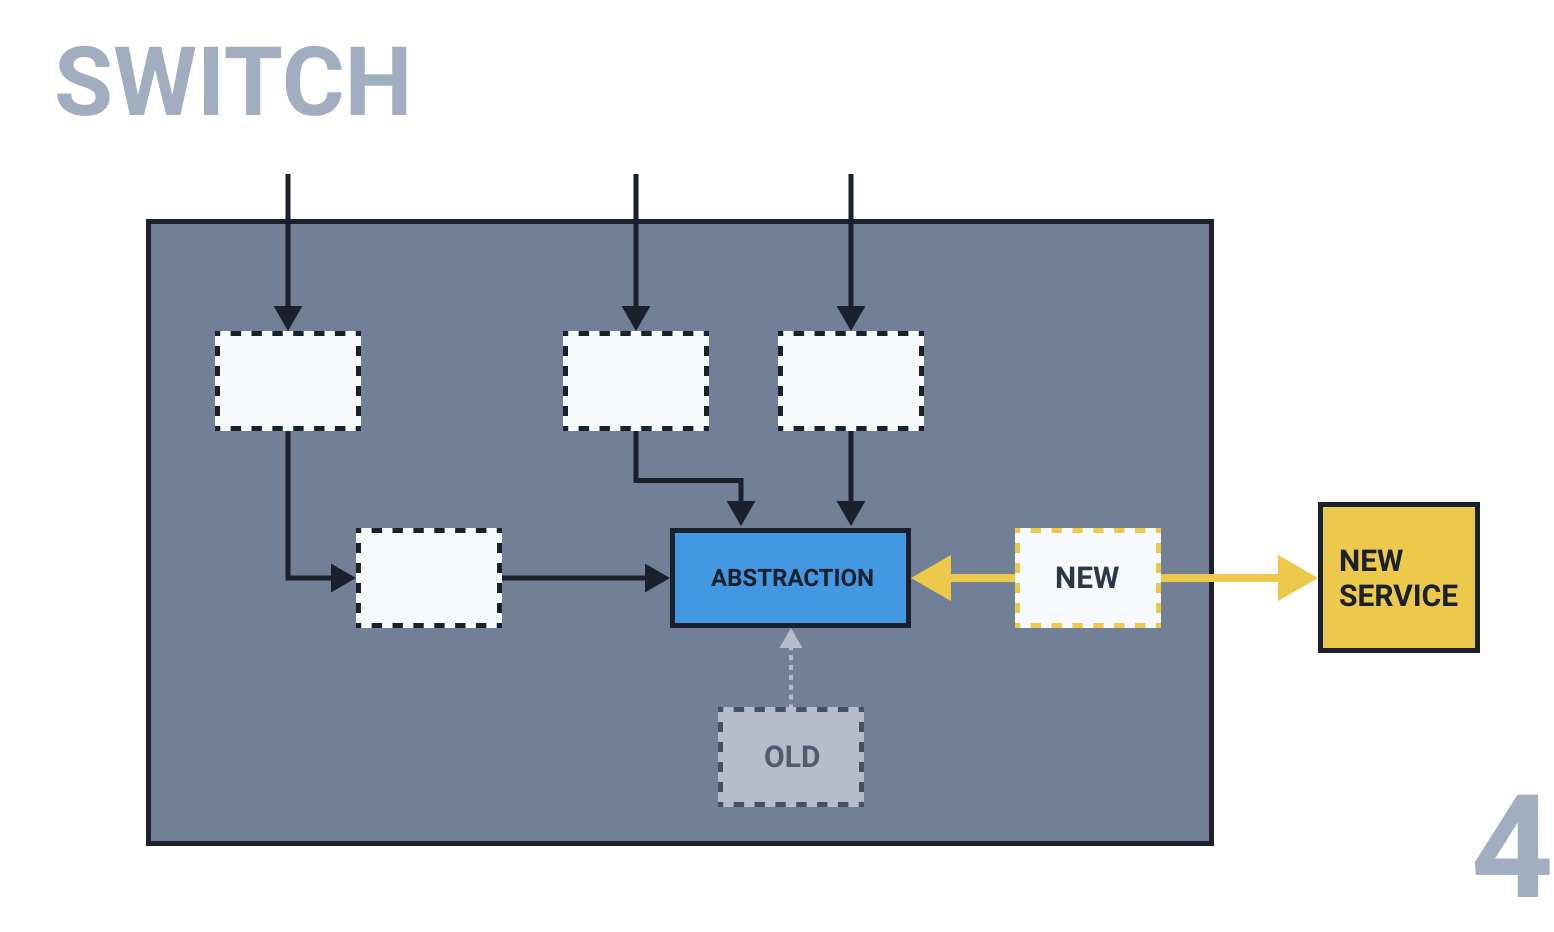
You have deployed the new service and you have a feature flag in place that allows you to switch between implementation. You can now flip the switch (or set the environment variable in our case) to start using the new service implementation, instead of the old implementation.
You would continue to monitor the new service to make sure everything is working as expected. If you discover any issues you can revert to the previous implementation by simply removing that environment variable. The nice thing about this pattern is that you aren't locking yourself out of anything and at each step there's an 'escape hatch' you can take in case something goes wrong.
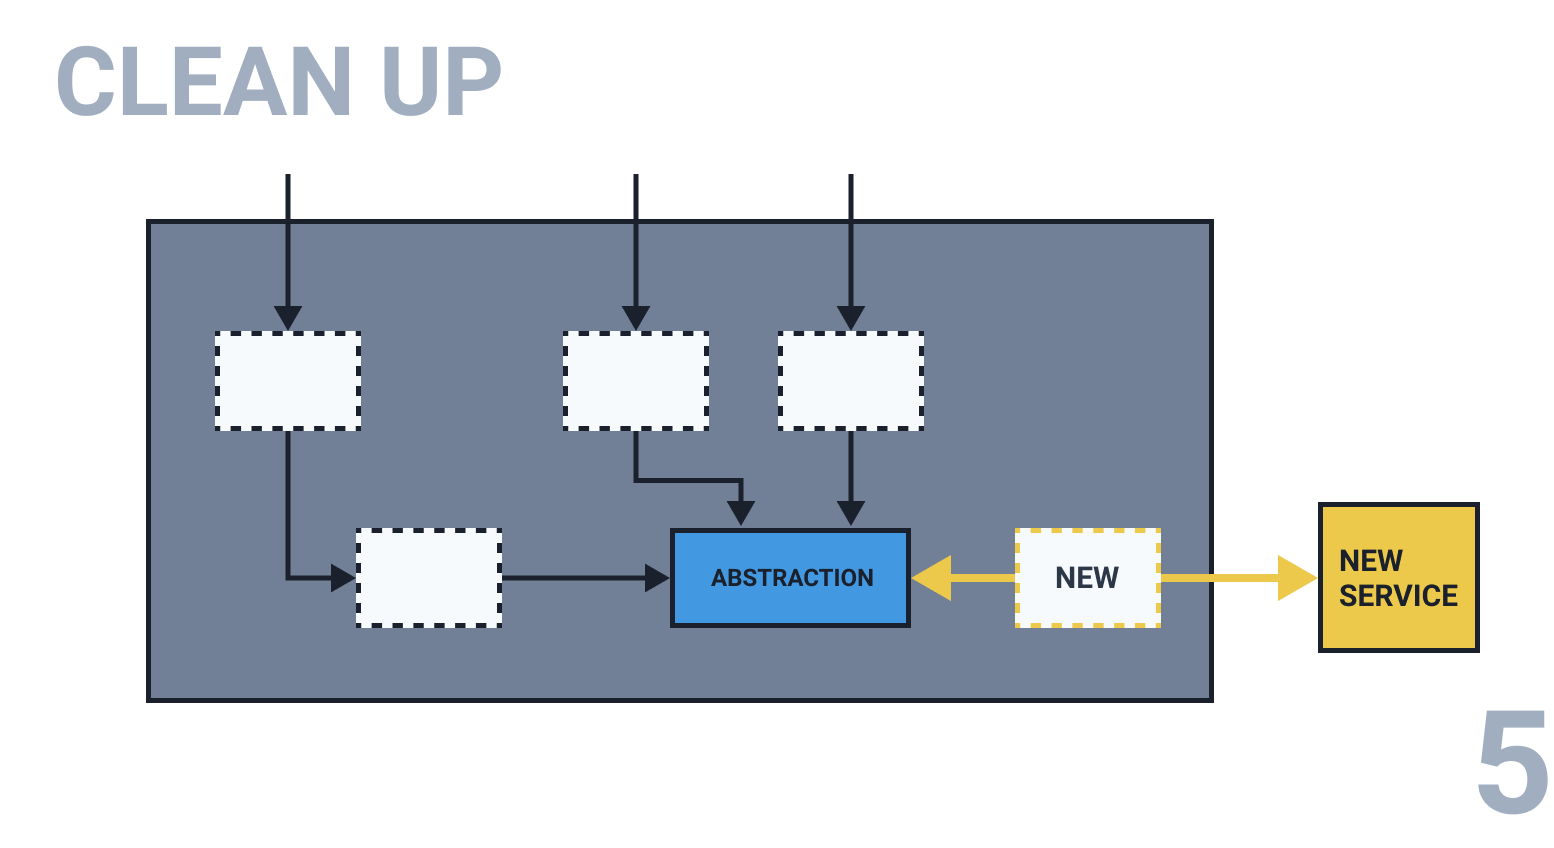
The final step is to clean up. Since the old implementation is not being used anymore, you can completely remove it from the monolith. Don't forget to remove any feature flags as well. You could also remove the abstraction, but I think leaving it in place doesn't hurt anything.
The branch by abstraction pattern can be extremely valuable when you're trying to extract functionality that's deep inside the monolith and you can't intercept the calls to it at the edge of the monolith. The pattern allows for incremental changes that are reversible in case anything goes wrong.
此内容由惯性聚合(RSS阅读器)自动聚合整理,仅供阅读参考。 原文来自 — 版权归原作者所有。