







SSL certificates are a must these days. They help protect the data being sent between the server and the client by encrypting it, which gives your website more credibility. In this blog post, I will explore a couple of different ways you can obtain SSL certificates and configure the Istio Gateway to use them.
In this first part, I will show you how to create a self-signed certificate manually, then obtain an actual SSL certificate and set that up. As you will see, setting all this up is not too complicated. In one of the future posts, I also explain how to retrieve and refresh the certificates before they expire automatically.
You will need an actual, cloud-hosted Kubernetes cluster to follow along because you will need an external IP address you can hook up your domain to. I've tested the steps using the demo profile installation of Istio 1.13.3.
Prerequisites:
istioctl install) with default namespace labelled for Istio sidecar injectionTo ensure stuff works, we'll start by deploying a simple Hello World web application. If you have your own application/service you want to use, feel free to use that.
Let's define the Kubernetes service account, service, and deployment:
apiVersion: v1
kind: ServiceAccount
metadata:
  name: helloworld
---
apiVersion: v1
kind: Service
metadata:
  name: helloworld
  labels:
    app: helloworld
    service: helloworld
spec:
  ports:
    - name: http
      port: 80
      targetPort: 3000
  selector:
    app: helloworld
---
apiVersion: apps/v1
kind: Deployment
metadata:
  name: helloworld
spec:
  replicas: 1
  selector:
    matchLabels:
      app: helloworld
      version: v1
  template:
    metadata:
      labels:
        app: helloworld
        version: v1
    spec:
      serviceAccountName: helloworld
      containers:
        - image: learncloudnative/helloworld:0.1.0
          imagePullPolicy: IfNotPresent
          name: helloworld
          ports:
            - containerPort: 3000
Save the above file to helloworld.yaml and deploy it using kubectl apply -f helloworld.yaml.
Since we'll be exposing the helloworld application on a public domain, we'll need to create a Gateway resource:
apiVersion: networking.istio.io/v1alpha3
kind: Gateway
metadata:
  name: public-gateway
spec:
  selector:
    istio: ingressgateway
  servers:
    - port:
        number: 80
        name: http
        protocol: HTTP
      hosts:
        - '*'
Save above to gateway.yaml and deploy it using kubectl apply -f gateway.yaml.
Note
Check out the Tweet below that explains what
*in thehostsfield means and how the Gateway resource relates to the VirtualService.
We also need a VirtualService that attaches to the Gateway resource and routes the traffic to the helloworld Kubernetes service:
apiVersion: networking.istio.io/v1alpha3
kind: VirtualService
metadata:
  name: helloworld
spec:
  hosts:
    - '*'
  gateways:
    - public-gateway
  http:
    - route:
        - destination:
            host: helloworld.default.svc.cluster.local
            port:
              number: 80
Save the above YAML to virtualservice.yaml and deploy it using kubectl apply -f virtualservice.yaml.
We can list the VirtualService to see which Gateway it is attached to and which hosts it listens for:
NAME         GATEWAYS             HOSTS   AGE
helloworld   ["public-gateway"]   ["*"]   106s
With all these resources deployed, we can now get the external IP of the Istio's ingress gateway and store it in the GATEWAY_URL environment variable:
GATEWAY_IP=$(kubectl get svc -n istio-system istio-ingressgateway -ojsonpath='{.status.loadBalancer.ingress[0].ip}')
If you open the GATEWAY_IP in the browser, you will see something similar to the figure below.
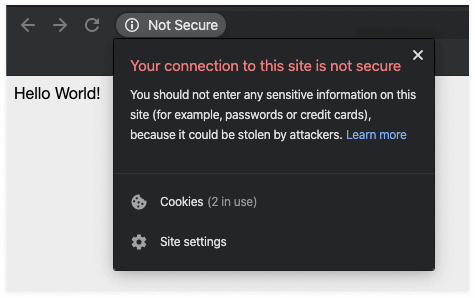
You did get a response back from the application, but you also got the Not Secure message from the browser, which tells the user that the connection is not secure and doesn't instill confidence in your website.
Let's start with the simplest scenario where we manually obtain the certificates. First thing - pick a domain you want to use - note that to test this, you don't have to own the domain name:
export DOMAIN_NAME=mysuperdomain.com
As a first step, you are going to create the root certificate ($DOMAIN_NAME.crt) and the private key used for signing the certificate ($DOMAIN_NAME.key):
openssl req -x509 -sha256 -nodes -days 365 -newkey rsa:2048 -subj '/O=$DOMAIN_NAME Inc./CN=$DOMAIN_NAME' -keyout $DOMAIN_NAME.key -out $DOMAIN_NAME.crt
Next, you need to create the private key:
openssl req -out helloworld.$DOMAIN_NAME.csr -newkey rsa:2048 -nodes -keyout helloworld.$DOMAIN_NAME.key -subj "/CN=helloworld.$DOMAIN_NAME/O=hello world from $DOMAIN_NAME"
Generating a 2048 bit RSA private key
....................................+++
..............................................+++
writing new private key to 'helloworld.mysuperdomain.com.key'
And the certificate:
openssl x509 -req -days 365 -CA $DOMAIN_NAME.crt -CAkey $DOMAIN_NAME.key -set_serial 0 -in helloworld.$DOMAIN_NAME.csr -out helloworld.$DOMAIN_NAME.crt
Signature ok
subject=/CN=helloworld.mysuperdomain.com/O=hello world from mysuperdomain.com
Getting CA Private Key
Once you run the commands above, you'll end up with the following files:
.
  |-mysuperdomain.com.key
  |-helloworld.mysuperdomain.com.csr
  |-helloworld.mysuperdomain.com.crt
  |-mysuperdomain.com.crt
  |-helloworld.mysuperdomain.com.key
We can create the Kubernetes secret to store the certificate and the key. We can call the secret whatever we want, as long as we put it in the same namespace as the ingress gateway is running it. By default, this is the istio-system namespace.
kubectl create secret tls mysuperdomain-certs -n istio-system --key helloworld.$DOMAIN_NAME.key --cert helloworld.$DOMAIN_NAME.crt
secret/mysuperdomain-certs created
With the secret in place, we need to update the Gateway resource to tell it to use this certificate:
apiVersion: networking.istio.io/v1alpha3
kind: Gateway
metadata:
  name: public-gateway
spec:
  selector:
    istio: ingressgateway
  servers:
    - port:
        number: 443
        name: https
        protocol: HTTPS
      tls:
        mode: SIMPLE
        credentialName: mysuperdomain-certs
      hosts:
        - helloworld.mysuperdomain.com
Save the above YAML to gateway.yaml and deploy it using kubectl apply -f gateway.yaml. We'll overwrite the previous Gateway resource we created using the apply command.
Similarly, we need to update the hosts field in the VirtualService:
apiVersion: networking.istio.io/v1alpha3
kind: VirtualService
metadata:
  name: helloworld
spec:
  hosts:
    - helloworld.mysuperdomain.com
  gateways:
    - public-gateway
  http:
    - route:
        - destination:
            host: helloworld.default.svc.cluster.local
            port:
              number: 80
Save the above YAML to virtualservice.yaml and overwrite the existing VirtualService using kubectl apply -f virtualservice.yaml.
The simplest way to test this works is to use curl with the --resolve flag. The resolve flag has a format of [DOMAIN]:[PORT]:[IP] and it routes all requests that match the [DOMAIN]:[PORT] portion to the specified IP address. This way, you don't need to go to your DNS/domain registrar and make changes there to be able to test this.
Here's the curl command you can use to test that the SSL certs get verified and used:
curl -v --resolve helloworld.$DOMAIN_NAME:443:$GATEWAY_IP --cacert $DOMAIN_NAME.crt https://helloworld.$DOMAIN_NAME
With the above command, we are telling curl to resolve any requests to helloworld.mysuperdomain.com:443 to the external IP address of the ingress gateway. Additionally, we provide the name of the CA certificate we created earlier.
From the output, you will be able to see the details of the server certificate and a line that says the certificate was verified as well as the actual response from the helloworld pod:
...
* Server certificate:
*  subject: CN=helloworld.mysuperdomain.com; O=hello world from mysuperdomain.com
*  start date: Nov 30 22:27:11 2019 GMT
*  expire date: Nov 29 22:27:11 2020 GMT
*  common name: helloworld.mysuperdomain.com (matched)
*  issuer: O=mysuperdomain.com Inc.; CN=mysuperdomain.com
*  SSL certificate verify ok.
...

<link rel="stylesheet" type="text/css" href="css/style.css" />

<div class="container">
    Hello World!
* Connection #0 to host helloworld.mysuperdomain.com left intact
</div>* Closing connection 0
The self-signed cert route from the previous section is practical only to kick the tires and test things out. However, you'll need certificates signed by an actual certificate authority that your clients can trust.
There are a couple of ways to get the SSL certificates, the most popular one being Let's Encrypt. I'll use ZeroSSL, which uses Let's Encrypt to issue the certificates. If you want to spend money, you can also purchase SSL certificates from your domain registrar or at DigiCert.
In this section, I'll use a real domain name and actual SSL certificates - this means that if you want to follow along, make sure you have your name domain ready to go. I am using Name.com, but you can use any other domain registrar.
Now that you have your domain, register, and login to ZeroSSL to get your SSL certificates:
startcloudnative.com for my domain nameBefore you can download the certificate and the key, you'll have to verify that you own the domain name you requested the certificate for. There are multiple options to verify the domain name ownership. If you have an email set up on the domain, you can pick the Email Verification; otherwise use the DNS (CNAME) verification.
The DNS verification will require you to log in to the website where you registered your domain and add a custom DNS record. Once you've done that, click the Next Step button and the Verify Domain button.
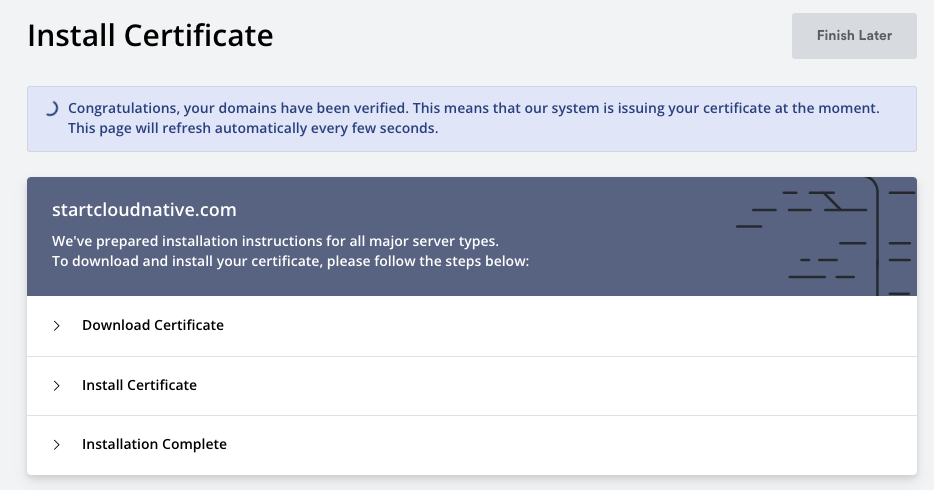
While you are logged in to the domain registrar's website, make sure you add an A record. The A record (IP address) will point your domain to the external IP address of the Istio ingress gateway (the GATEWAY_IP).
I've requested a certificate for startcloudnative.com and www.startcloudnative.com. My A record will point from startcloudnative.com to the IP address (the GATEWAY_IP). I won't use the helloworld subdomain as we did previously.
Once the certificates are issued, you can download the .zip file with all generated files for your domain. You have an option of picking multiple server types, but leaving it on Default Format is what we want.
There will be three files in the .zip package:
ca_bundle.crtcertificate.crtprivate.keyLet's delete the last secret we created and create a new one with the actual certificates:
kubectl delete mysuperdomain-certs -n istio-system
You can re-create it with the actual SSL certificate and key you got from the downloaded package. You can name the secret using your domain name:
kubectl create secret tls startcloudnative-certs -n istio-system --key private.key --cert certificate.crt
secret/startcloudnative-certs created
We also have to update the Gateway and the VirtualService to modify the hostnames and point to the new secret we created.
Let's update the Gateway first (make sure you replace the startcloudnative.com with your actual domain name):
apiVersion: networking.istio.io/v1alpha3
kind: Gateway
metadata:
  name: public-gateway
spec:
  selector:
    istio: ingressgateway
  servers:
    - port:
        number: 443
        name: https
        protocol: HTTPS
      tls:
        mode: SIMPLE
        credentialName: startcloudnative-certs
      hosts:
        - startcloudnative.com
Similarly, let's make a change to the hosts field in the VirtualService:
apiVersion: networking.istio.io/v1alpha3
kind: VirtualService
metadata:
  name: helloworld
spec:
  hosts:
    - startcloudnative.com
  gateways:
    - public-gateway
  http:
    - route:
        - destination:
            host: helloworld.default.svc.cluster.local
            port:
              number: 80
With both of these resources updated, you can open your browser of choice and navigate to your domain. You should see the Hello World! response and the padlock before the domain name, which signifies that the website is secure. If you click on the padlock and check the certificate, you will see your domain name in the certificate, the root authority (Let's Encrypt), and the expiration date.
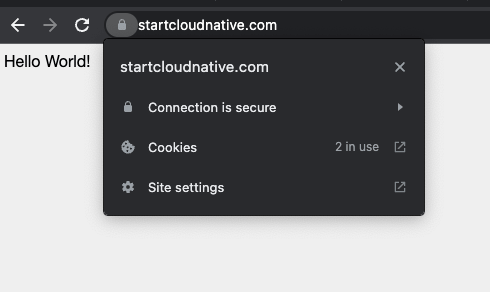
This article explained how to configure the Istio ingress gateway to serve HTTPS traffic. We also covered creating self-signed TLS certificates and using the ZeroSSL to create an actual SSL certificate.
此内容由惯性聚合(RSS阅读器)自动聚合整理,仅供阅读参考。 原文来自 — 版权归原作者所有。