








Most projects don't really have a configuration system. They have a pile.
There's a .env file holding your variables. A Makefile or a justfile holding your tasks. A hand-written CI workflow that tries to reproduce both in YAML. And your secrets live in a fourth place — a password manager, a cloud secret store, or, in the worst case, accidentally committed to the repo. Nothing validates any of it, and the pieces drift apart the moment someone changes one without touching the others.
cuenv replaces that pile with a single typed file. You describe your project once in CUE, a typed configuration language. Then cuenv validates it, resolves secrets at runtime, runs your tasks, and generates your CI from the same definitions.
In this post I'll give you a quick overview of cuenv and explain the problem it solves, the core model, and three short demos. If you prefer a video, check the YouTube link below.
Here's what the typical project setup looks like, and why each layer hurts:
.env — flat strings. NODE_ENV=prodction is valid text. Nothing catches the typo until something breaks downstream.Makefile / justfile — shell recipes. Task dependencies are implicit, parallelism is manual, and a mistyped target only fails at runtime.None of these layers know about each other. The .env doesn't know CI needs DATABASE_URL. The CI doesn't know the Makefile renamed build to compile. There's no single place that says "this is what a valid version of this project looks like" — so there's no single place to validate.
Rendering diagram…
cuenv is a single static binary. The whole idea is that one env.cue becomes the source of truth for four concerns that are usually maintained separately:
cuenv sync ci writes your GitHub Actions workflow from the same task graph, and cuenv ci runs that exact graph locally.Because all four come from the same file, they can't fall out of sync.
Rendering diagram…
cuenv projects are standard CUE modules, so you start by initialising one and pulling in the cuenv schema:
mkdir cuenv-demo && cd cuenv-demo
cue mod init github.com/[your_gh_username]/cuenv-demo
cue mod get github.com/cuenv/cuenv@latest
Then the whole project is one env.cue:
package cuenv

import "github.com/cuenv/cuenv/schema"

schema.#Project & {
    name: "cuenv-demo"

    env: {
        // An enum with a default: only these values are valid.
        NODE_ENV: "development" | "staging" | "production" | *"development"
        PORT:     "3000"
        URL:      "http://127.0.0.1:\(PORT)"
    }

    tasks: {
        hello: schema.#Task & {
            command: "echo"
            args: ["Hello from cuenv"]
        }
        greet: schema.#Task & {
            command: "echo"
            args: ["Hello, \(env.NODE_ENV)!"]
        }
    }
}
With cuenv env print you can resolve all variables and print them out:
NODE_ENV=development
PORT=3000
URL=http://127.0.0.1:3000
Notice URL is built by interpolation from the other two values. Let's see how the validation looks like. Overwrite the NODE_ENV with a value that's not defined in the enum:
    env: {
        // An enum with a default: only these values are valid.
        NODE_ENV: "development" | "staging" | "production" | *"development"
        NODE_ENV: "prod"
        PORT:     "3000"
        URL:      "http://127.0.0.1:\(PORT)"
    }
IF you re-run the print command again, you'll notice an error, which is expected:
$ cuenv env print
# evaluation error: NODE_ENV: 3 errors in empty disjunction ...
Since we clearly require NODE_ENV to be one of the specified values, the invalid configuration (e.g. prod) never reaches a single command. As the docs put it, the cheapest bug is the one that never executes. Validation happens at evaluation time, before anything runs.
And you can run things inside that validated environment:
cuenv task            # list tasks
cuenv task hello      # run one
cuenv exec -- printenv PORT   # run any command in the resolved env
This is where cuenv replaces your Makefile. Here's a task group that runs in parallel, and a build task that depends on it:
tasks: {
    // Object keys in a group run in PARALLEL.
    check: schema.#TaskGroup & {
        type: "group"
        lint:  schema.#Task & {command: "npm", args: ["run", "lint"]}
        types: schema.#Task & {command: "npm", args: ["run", "typecheck"]}
        test:  schema.#Task & {command: "npm", args: ["test"]}
    }

    // Waits for `check`; only re-runs when its inputs change.
    build: schema.#Task & {
        command:   "npm"
        args:      ["run", "build"]
        dependsOn: [check]
        inputs:    ["src/**", "package.json"]
        outputs:   ["dist/**"]
        cache: mode: "read-write"
    }
}
One detail worth dwelling on: dependsOn: [check] is a CUE reference, not a string. It points at the actual check value. Misspell it and CUE refuses to evaluate — a typo is a compile error, not a silent no-op at runtime.
cuenv derives the graph, runs independent work in parallel, and you can watch it live with the TUI:
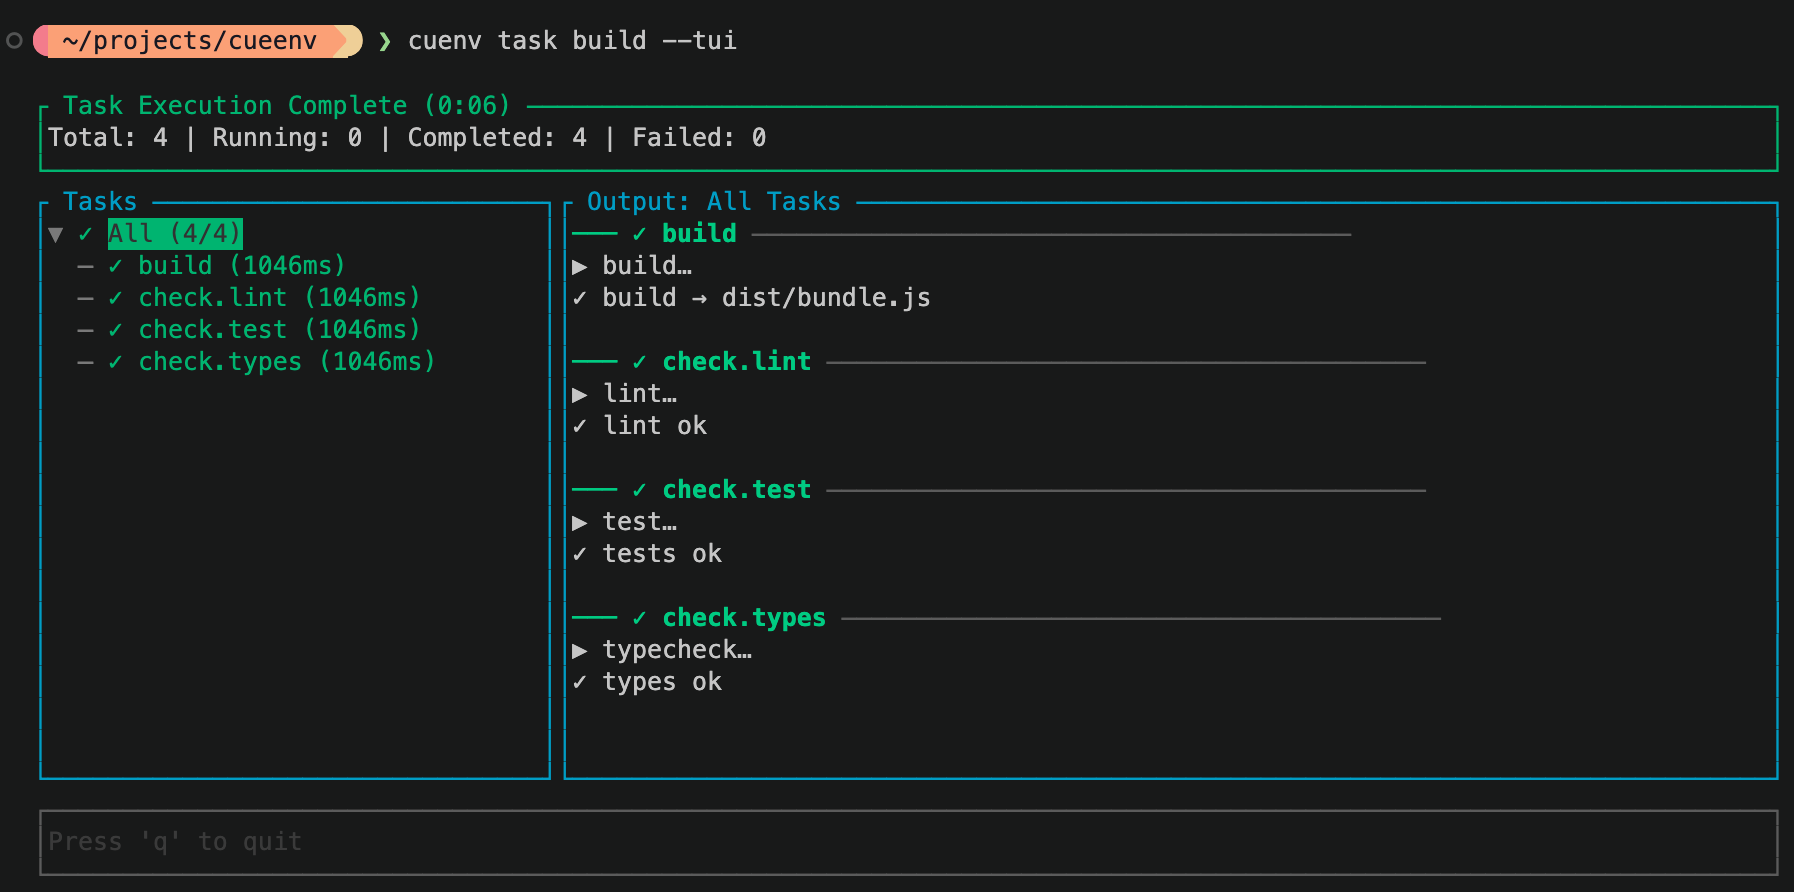
Since we opted into caching, if you re-run the build commmand twice (without changing any source files), you'll see caching in action. The values will be re-used and the task execution will be significantly faster.
Two things teams almost always maintain by hand, and separately: secrets and CI. Both come out of this same file.
There's multiple options to declare secrets inside the .cue file. You can execute a CLI command, read the secrets from GCP, AWS or even 1Password. For example:
env: {
    // ...existing vars...

    // Resolved at runtime from 1Password. Never written to disk or your shell.
    DATABASE_PASSWORD: schema.#OnePasswordRef & {
        ref: "op://Engineering/checkout-db/password"
    }
}
Then if you run cuenv env print, you'll notice the password shows up redacted. This means it will never be stored in the generated output or in your shell.
Finally, let's check out the CI. Let's add small pipeline that points at the tasks you already defined:
ci: {
    providers: ["github"]
    pipelines: {
        default: {
            tasks: [tasks.check, tasks.build]
        }
    }
}
Run cuenv sync ci and cuenv writes the GitHub Actions workflow for you. You can pretty much commit this file to your repo and you have CI sorted out!
The core idea is simple. You have one typed contract for your environment, your secrets, your tasks, and your CI. The whole file gets validated before anything runs, and it's identical on your laptop and in CI. The drift between four files that never agreed with each other just goes away, because there's only one file now.
If this sounds like something that would help your project, make sure you check out the cuenv.dev documentation or head over to GitHub repo to contribute to the project.
此内容由惯性聚合(RSS阅读器)自动聚合整理,仅供阅读参考。 原文来自 — 版权归原作者所有。