I recently had a Mitsubishi mini-split air conditioner installed as part of an attic conversion project. The device was, according to the installer, only controllable via the IR remote. And that just won't do.
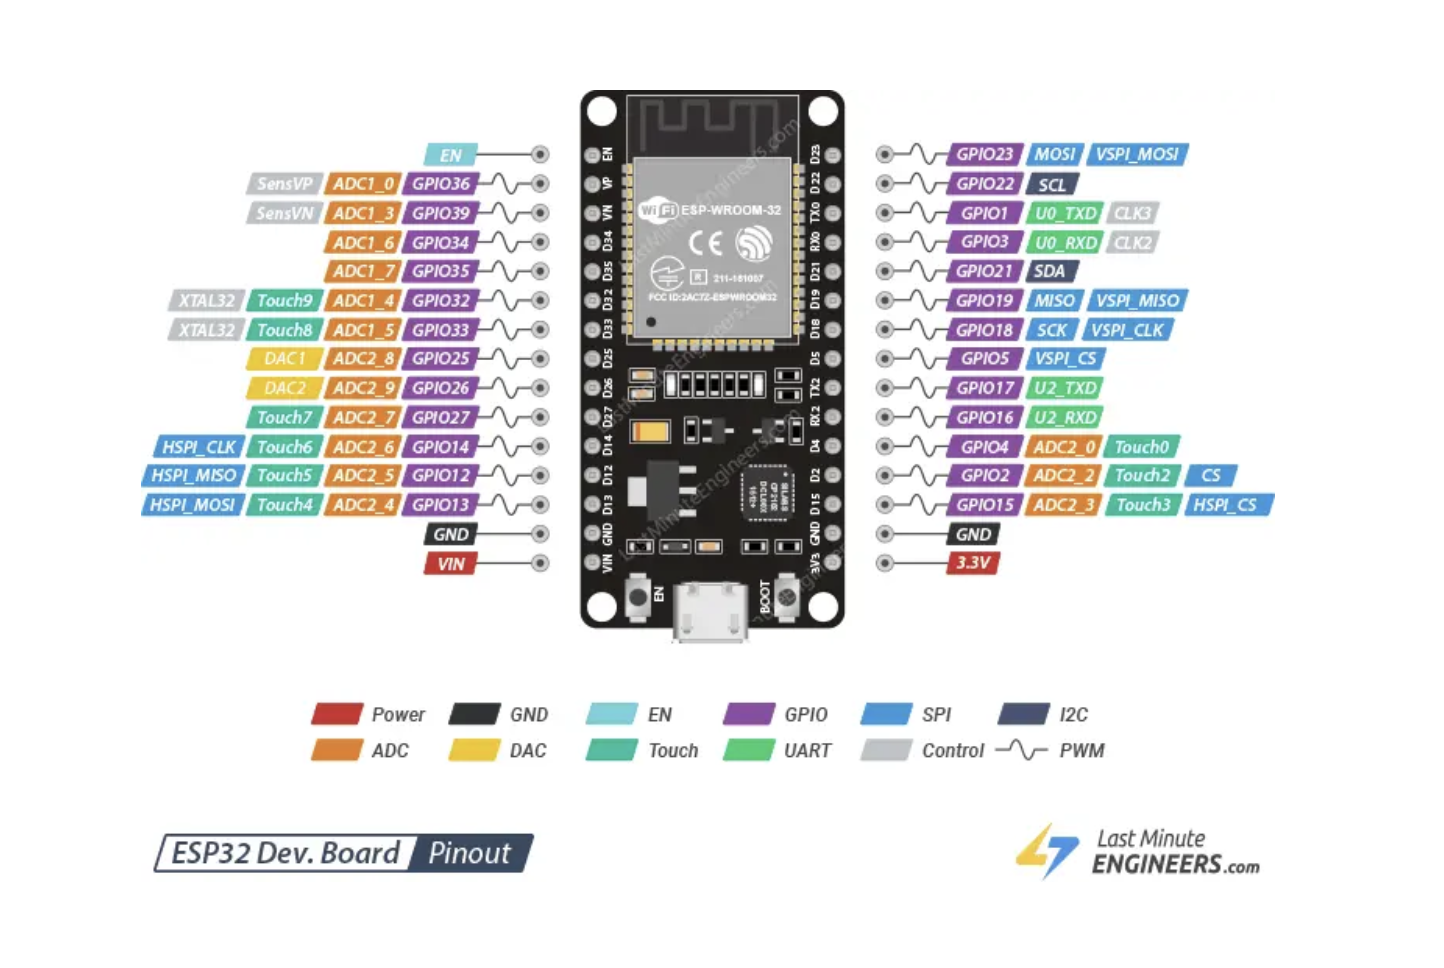
So in today's post I'm going to detail how I used an ESP32 running ESPHome to achieve bi-directional control of the Mitsubishi units using the CN105 control port on the mainboard of the head unit.
What to expect
These units are not cheap. So please only do this if you are comfortable. I am not a lawyer so please apply your own risk disclaimers for damage to property and yourself in case of screw ups. Turn off the power to the units before opening anything up, go slow and take your time. It's not a difficult install and should be an easy afternoon project for most DIY'ers.
The hardware install can be completed in under 10 minutes. The first time will likely take a bit longer as the plastic housings of the units can be a bit fiddly to free from the clips. I cover this is more detail in the video.
The software side might trip a few folks up the first time as there are a few moving parts. I assume for the purposes of this post that you have a functional Home Assistant installation, and a functional ESPHome installation atop it.
Parts
To complete this project you will need:
| Item | Price | Purpose |
|---|---|---|
| ESP32 | $5 | The brains of the operation |
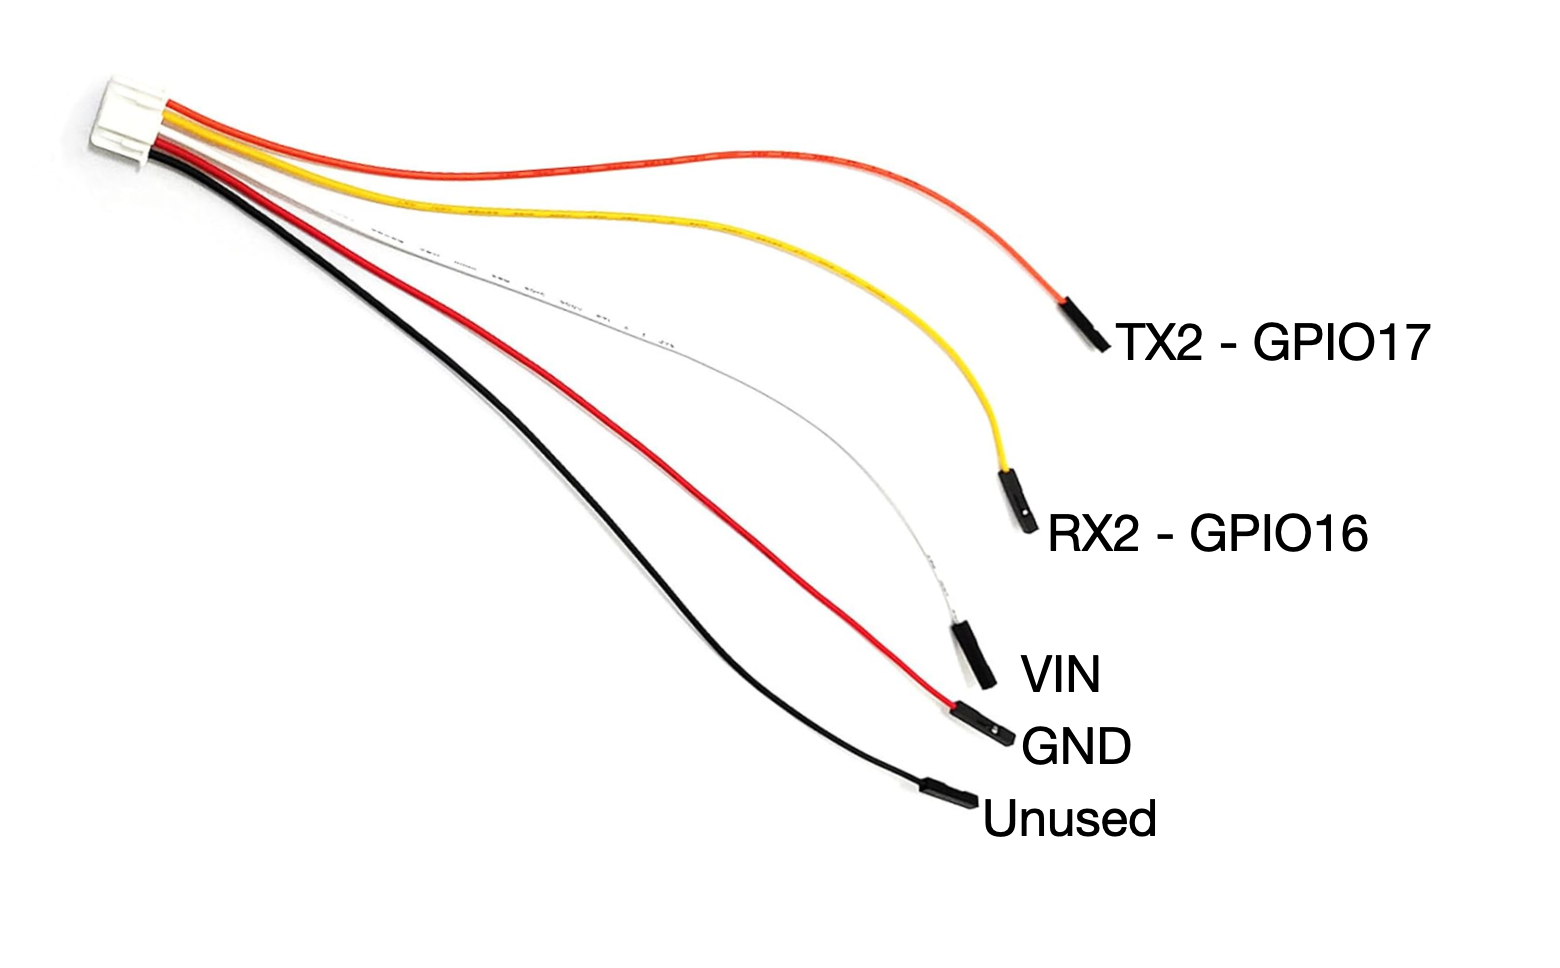
| Connector PAP-05V-S | $7 | Connect ESP32 to CN105 port |
Note that I have linked to multi-packs of ESP32s and of the connectors too, you might be able to find these things cheaper elsewhere but regardless it's still a low cost project.Also note that these links are affiliate links to support my work.
Unit disassembly
The unit I have is the MSZ-GS09NA, though I have found that the process seems broadly the same across the units in NA I have come across, your mileage may vary.
Begin by turning off power at the breaker, and removing the vanes of the unit. There are two plastic tabs that slide and lock the vanes in position.
With the vanes removed, look for two small plastic screw covers and remove them and their associated screws.
The centre of the unit will have a small screwless retaining clip, give it a sharp tug in the middle towards you and free the housing pulling it straight off the front of the unit. It does not pivot (like the filter housings do).
Once the housing is removed look for the grey mainboard cover on the right of the unit and locate the red coloured CN105 port. We'll come back to this later.
ESP configuration
This process is not yet fully written up as I got distracted but the code is below so reach out if you get stuck
esphome-mitsubishi.yaml
GitHub Gist: instantly share code, notes, and snippets.
 262588213843476